Moist Gourmet Vanilla Cupcake Recipe for Weddings
Ingredients
Method
- Pour the cream into a small saucepan; if using a vanilla bean, split it, scrape out the seeds, and add both to the pan, or simply stir in the vanilla paste if using.
- Heat the cream over low heat until it begins to steam, then remove from heat and let steep for 30 minutes before removing any vanilla pods.
- Preheat the oven to 350°F (177°C) and line a 12-count cupcake pan with paper liners.
- Whisk the flour, baking powder, baking soda, and salt together in a large bowl and set aside.
- Beat the melted butter, sugar, egg, yogurt, infused cream, and vanilla extract in a large bowl or stand mixer on medium-high speed until the mixture is completely smooth.
- Reduce the mixer speed to low and gradually add the dry ingredients to the wet until just combined, then fold gently by hand to press out any large flour lumps.
- Fill the cupcake liners 2/3 to 3/4 full and bake for 15-17 minutes until a toothpick comes out clean, then allow them to cool completely.
- Beat the butter in a large bowl or stand mixer on medium speed for approximately 2 minutes until creamy.
- Add the powdered sugar, vanilla, and milk on low speed, then increase to medium and beat for 3 minutes; adjust the consistency with more milk or sugar as needed and add salt to taste.
- Refer to the book, The Home Baker's Guide to Basic Buttercream, for further troubleshooting tips.
- Frost the cupcakes using a piping bag and store them at room temperature for up to 3 days, in the refrigerator for 5 days, or in the freezer for up to 3 months.
Nutrition
Notes
- Full fat dairy: it is imperative to use full fat dairy in this recipe for moisture, since we’re using melted butter, therefore removing some natural moisture.
- Room temperature ingredients: these are always a good idea when using room temperature butter as it makes for easier incorporation into the batter. To bring eggs to room temperature quickly, place eggs in a bowl of warm water for 5-10 minutes.
- Mixer: I’ve had repeated success making these cupcakes in a bowl without a mixer, which is my preferred method for this cupcake batter.
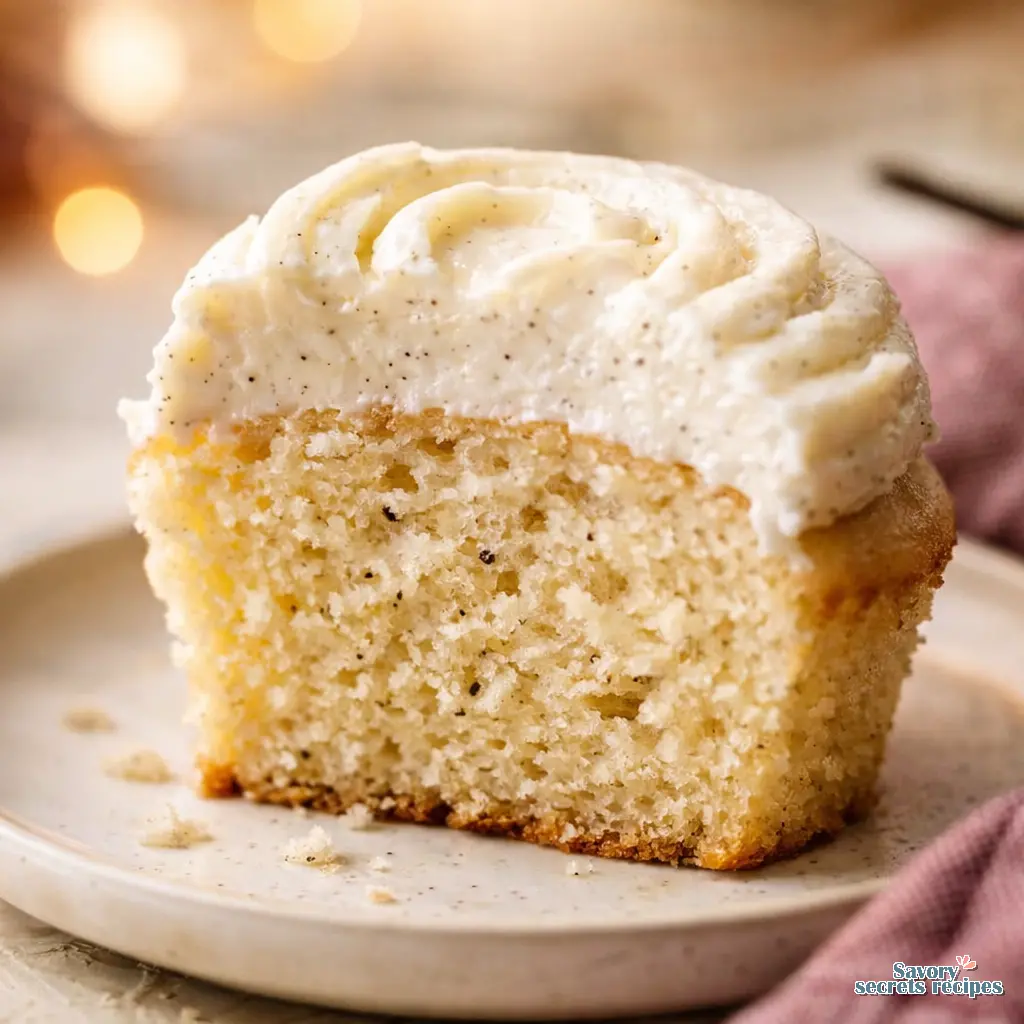
Why These Vanilla Bean Cupcakes Are Anything But Plain
With Mother’s Day right around the corner and spring finally settling into Los Angeles, we are all looking for that perfect, elegant dessert. Treat Mom to the most incredible vanilla bean cupcakes she’s ever tasted. I know vanilla gets a bad reputation as a boring flavor, but I completely disagree. True vanilla is incredibly complex. It has deep floral notes and a rich woody aroma that commands attention.
When we first moved to New York, I was nine and everything tasted wrong to me. My mother would make m’hanncha on Sundays, and I’d help her roll the almond paste logs. The smell of orange blossom water in our small apartment made me feel less lost. I still can’t smell it without feeling that specific combination of homesickness and safety. I feel the exact same way about the smell of real vanilla beans. It’s a scent that promises comfort. This gourmet vanilla cupcake recipe for weddings, bridal showers, or just a Tuesday afternoon delivers that exact feeling.
Let me walk you through this. We aren’t just making a basic cake today. We are building a foundation of flavor using premium ingredients, European butter, and the reverse creaming method. It’s easier than you think, and I promise your family will be completely obsessed.
Vanilla Bean vs Vanilla Extract in Baking
The difference between using a whole vanilla bean pod, vanilla bean paste, and standard extract is massive. You’re looking for that intense flavor that only comes from the real thing. If you want those beautiful little black specks in your cake and speckled frosting, you’ll need beans or paste. Madagascar bourbon vanilla gives you that classic, creamy, woody flavor. Tahitian vanilla brings out more fruity, floral notes. I tend to find Tahitian works beautifully in spring desserts, but test it yourself to see what you prefer.
If you have whole pods, look for plump, flexible vanilla beans. Avoid dry, split, or withered ones. Slicing that pod open and scraping the seeds out is the part I love. It’s so satisfying when it comes together. But if you’re wondering how to use vanilla bean paste in cupcakes, it’s a perfect one-to-one substitute. One teaspoon of vanilla bean paste equals one whole vanilla bean pod. Honestly, vanilla bean paste cupcakes are a lifesaver when you’re prepping for a big event and don’t have time to scrape twenty pods.
And please, reuse scraped vanilla pods by steeping them in heavy cream or storing them in a jar of sugar. Never throw them away. They still have so much aromatic oil left in them.
The Reverse Creaming Method Explained
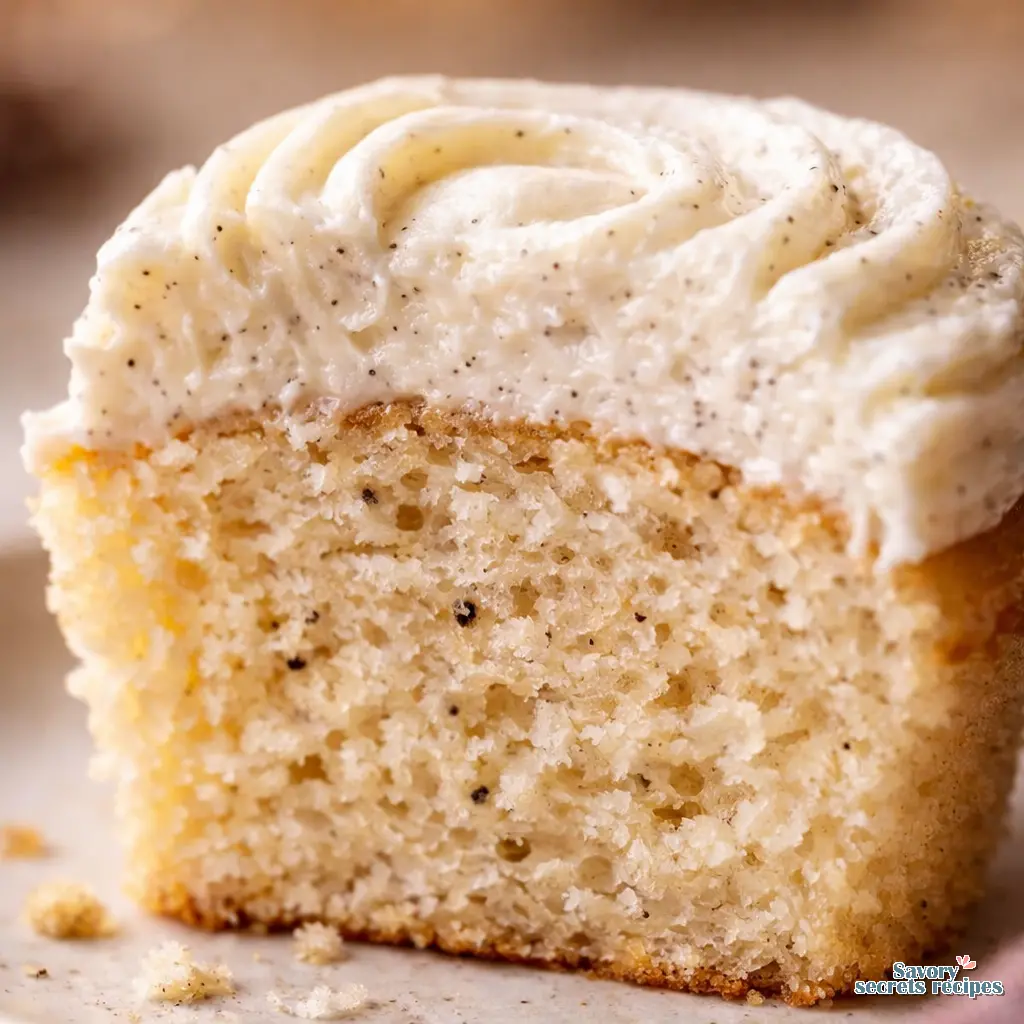
We aren’t just dumping ingredients into a bowl today. We’re using the reverse creaming method. This technique coats the flour in fat before adding liquids, which limits gluten development. The result? The softest, most tender crumb you’ve ever tasted. It’s the secret to achieving the best vanilla bean recipe texture.
First, you’ll mix your dry ingredients. Always weigh ingredients like flour, butter, and sour cream with a scale for consistent results. Then, you mix in room temperature European butter. Temperature is doing the heavy lifting here. The butter needs to be right around 65 to 68 degrees Fahrenheit. The texture should read smooth when you drag a spoon through the sandy mixture. It should look exactly like wet sand.
Next comes the liquid infusion. Use full or high-fat dairy, like whole milk or cream, for the best flavor infusion. The fat carries the vanilla flavor throughout the batter. I prefer whisking the vanilla bean seeds directly into the milk. This needs time to hydrate properly. Give it a minute to settle before streaming it into your dry ingredients. Use a liquid measuring cup with a spout to stream wet ingredients with fewer spills.
Visual Texture Milestones
I know this sounds complicated, but you’ll know it when you feel it. Let’s troubleshoot together. When you first add the butter to the flour, it’ll look dry. That tracks with what I’ve seen in every test batch. Keep mixing on low.
Once you add the milk and egg mixture, the batter will change completely. You’re looking for that ribbon stage. It should fall off the beater in a thick, glossy ribbon that sits on top of the batter for a second before sinking in. That texture is exactly what we’re after. Ensure all dairy and eggs are room temperature for proper emulsion. If you use cold eggs or butter, the batter might curdle. If that happens, the emulsion is broken, and you’ll end up with dense or rubbery cakes. Just let the bowl sit in a warm spot for ten minutes and try mixing again.
The Science of Flat-Top Cupcakes
My grandmother taught me to make sweets in Casablanca, always emphasizing the importance of temperature and timing. That lesson applies perfectly to baking vanilla bean cupcakes. You want flat tops, especially if you’re making these as elegant wedding cupcakes. Domed tops are notoriously hard to frost beautifully.
Here’s the real secret. Don’t fill your liners more than two-thirds full to avoid mushroom tops or sticking. Portion the batter with a cookie scoop to ensure even baking and prevent overflowing. Bake them at 350 degrees Fahrenheit. I’m keeping an eye on it right around the 16-minute mark. That’s the sweet spot. They should bounce back slightly when lightly pressed. The smell of that pure vanilla baking is absolutely intoxicating.
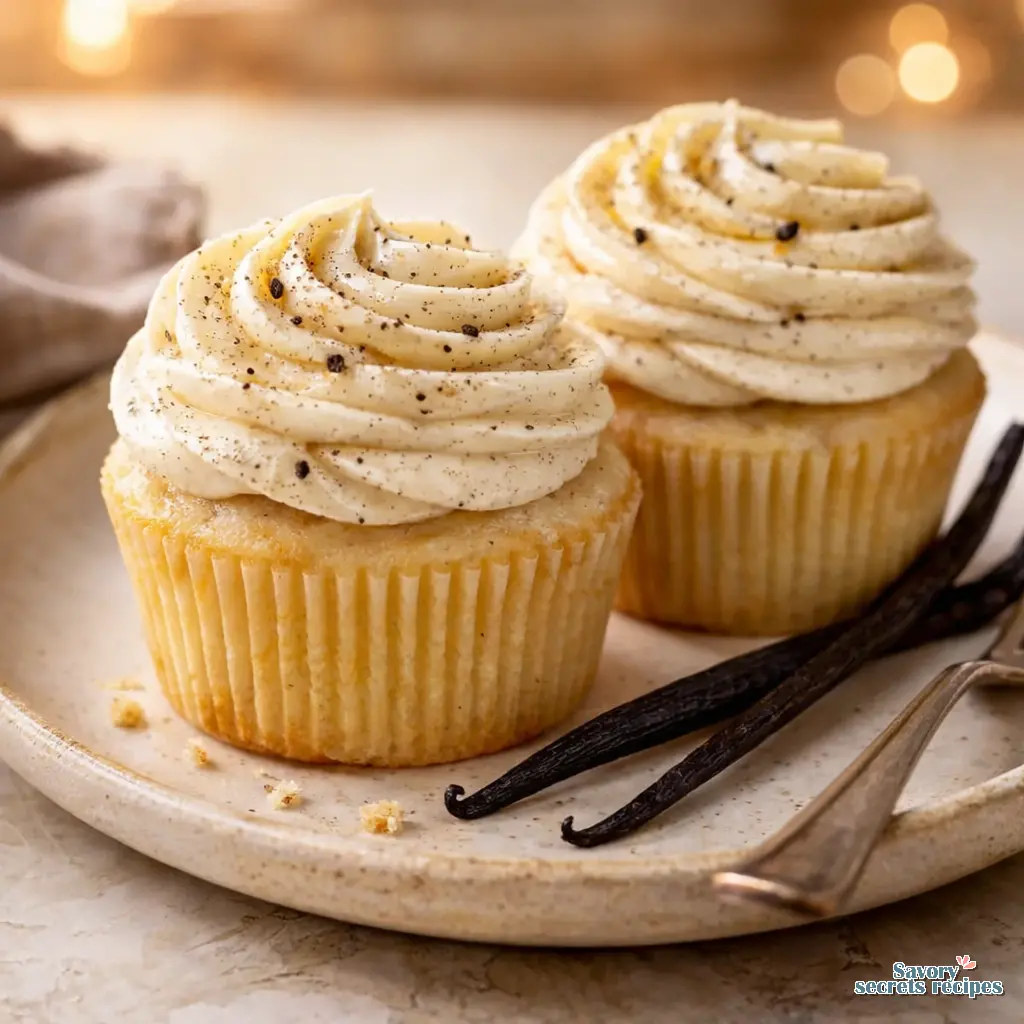
Achieving the Perfect Speckled Frosting
If you only have one premium vanilla bean, prioritize using vanilla beans in the frosting rather than the batter. The flavor shines brightest in the buttercream, and the visual of vanilla cupcakes with vanilla bean frosting is stunning. We’re making a classic American buttercream here, but you could easily swap in an Ermine frosting for a less sweet, custardy finish. Or try a Swiss Meringue buttercream for stability on warm days.
Make sure you cool cupcakes completely before frosting to prevent melting. If your kitchen is running hot, use a cold pack or ice pack on the side of the bowl if the butter or buttercream becomes too soft. Beat the buttercream on low for two to three minutes at the very end to remove large air bubbles. This gives you a silky smooth finish. You can pipe it with 1M or 2D tips, or just swoop it on with an offset spatula. I love to drizzle a tiny bit of extra vanilla bean paste on top of the frosting for an extra gourmet touch.
Common vanilla bean cupcakes Mistakes & Fixes
Mistake: Using cold eggs or butter.
Solution: This prevents proper emulsion. Always bring dairy and eggs to 65-68°F before starting. If your batter curdles, let it sit in a warm spot for ten minutes.
Mistake: Overmixing after adding liquid.
Solution: You likely developed too much gluten, resulting in dense cakes. Trust the process here; mix just until the wet ingredients are incorporated.
Mistake: Cupcakes sinking in the center.
Solution: This usually happens if you open the oven door too early or overfill the liners. Keep the door closed until the final minutes of baking, and stick to the two-thirds full rule.
Comprehensive Freezing & Thawing Guide
I once ruined a batch of delicate desserts because I didn’t respect the thawing process. Your mileage may vary depending on your freezer, but here’s my foolproof method for storing these vanilla bean cupcakes. For short-term storage, keep them in an airtight container at room temperature for up to three days. If your kitchen is very warm, put them in the fridge. But please, always serve at room temperature for the best texture. Cold butter equals hard cupcakes.
To freeze unfrosted cupcakes, wrap each one tightly in plastic wrap. Place them in a freezer-safe bag. They’ll keep beautifully for up to three months. To thaw, unwrap them while still frozen and let them come to room temperature on a wire rack. This prevents condensation from making the tops sticky. If they’re already frosted, freeze them uncovered on a baking sheet for an hour until the frosting is solid. Then wrap them gently. Right in that window of thawing, you’ll see why making them ahead is such a smart move.
Frequently Asked Questions
A Masterpiece Ready to Serve
There’s nothing quite like the moment when you take that first bite of these vanilla bean cupcakes. The texture is exactly what we’re after, and that deep, floral vanilla flavor is just spectacular. Whether you’re making these for Mother’s Day, a bridal shower, or simply to treat yourself, they’re guaranteed to impress. Serve them alongside some fresh spring berries, and you’ve created a true masterpiece. I love when readers send me photos of their bakes, so please share your results. For more inspiration and sweet ideas, check out my Pinterest boards where I save all my favorite variations.
Reference: Original Source
Can I use vanilla extract instead of beans for these vanilla bean cupcakes?
You absolutely can, though you’ll miss out on those beautiful visual specks. Substitute one tablespoon of high-quality pure vanilla extract for one vanilla bean pod. The flavor will still be wonderful, just slightly less complex than using the whole pod or paste.
Why are my vanilla bean cupcakes dense or rubbery?
That tracks with what I’ve seen when batters are overmixed or ingredients are too cold. Once you add the liquid to the flour mixture, mix only until combined. Overmixing develops gluten, which creates that tough, rubbery texture instead of a soft crumb.
Why did my vanilla bean cupcakes sink in the center?
This usually happens if you open the oven door too early, causing a sudden temperature drop. It can also happen if your baking powder is expired, or if you overfilled the liners. Stick to the two-thirds full rule and keep that oven door shut.
How do I store vanilla beans at home?
Store your vanilla beans in an airtight container at room temperature, ideally in a dark cupboard. Never put them in the fridge, as that causes them to dry out and can encourage mold growth. If they dry out, you can rehydrate them in warm milk.
What is the best vanilla extract to buy?
I always recommend looking for pure Madagascar bourbon vanilla extract. Avoid anything labeled “imitation” or “artificial flavor.” You want an extract where the only ingredients are vanilla bean extractives, water, and perhaps a touch of sugar. It makes a huge difference in baking.
Can I make these vanilla bean cupcakes gluten-free?
Yes, you can. I’ve had great success swapping the all-purpose flour for a high-quality 1:1 gluten-free baking blend that contains xanthan gum. Weigh the flour just as you would regular flour. The reverse creaming method actually works beautifully for gluten-free baking.