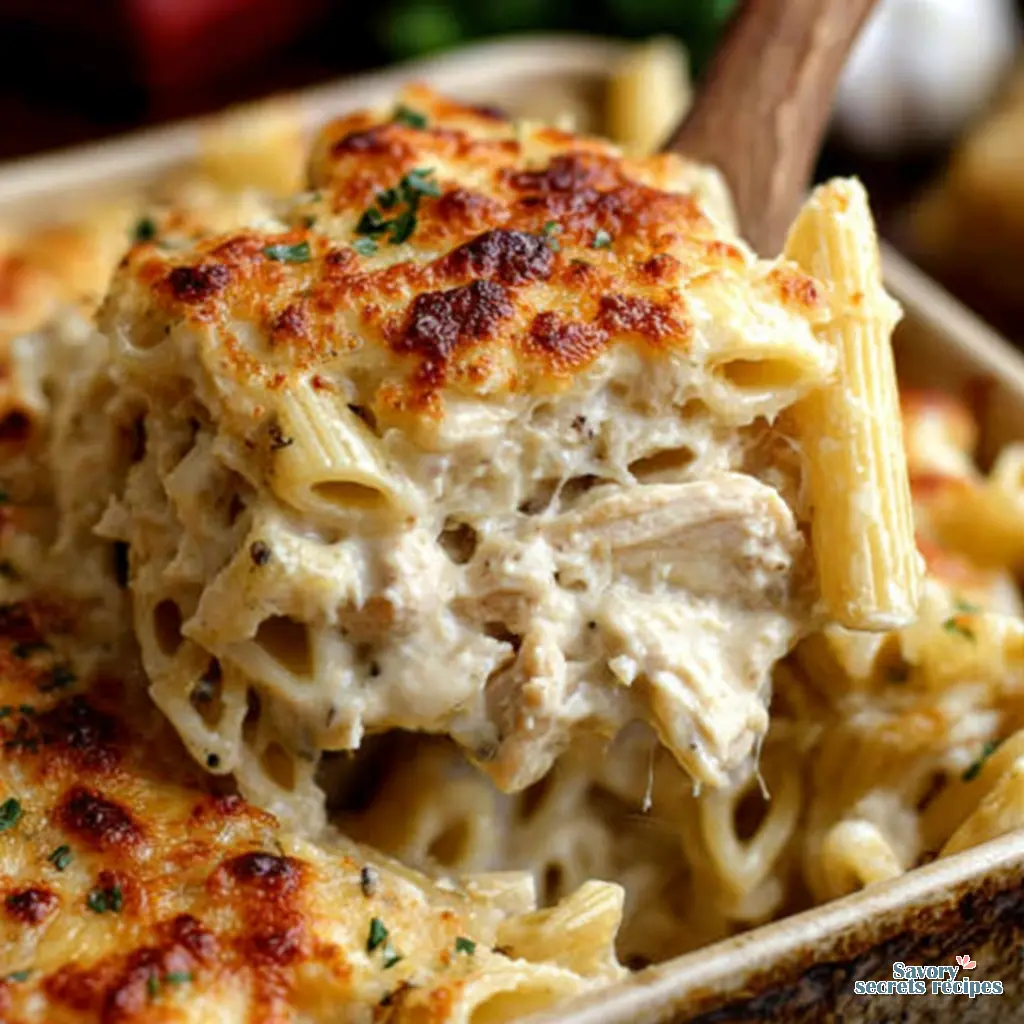
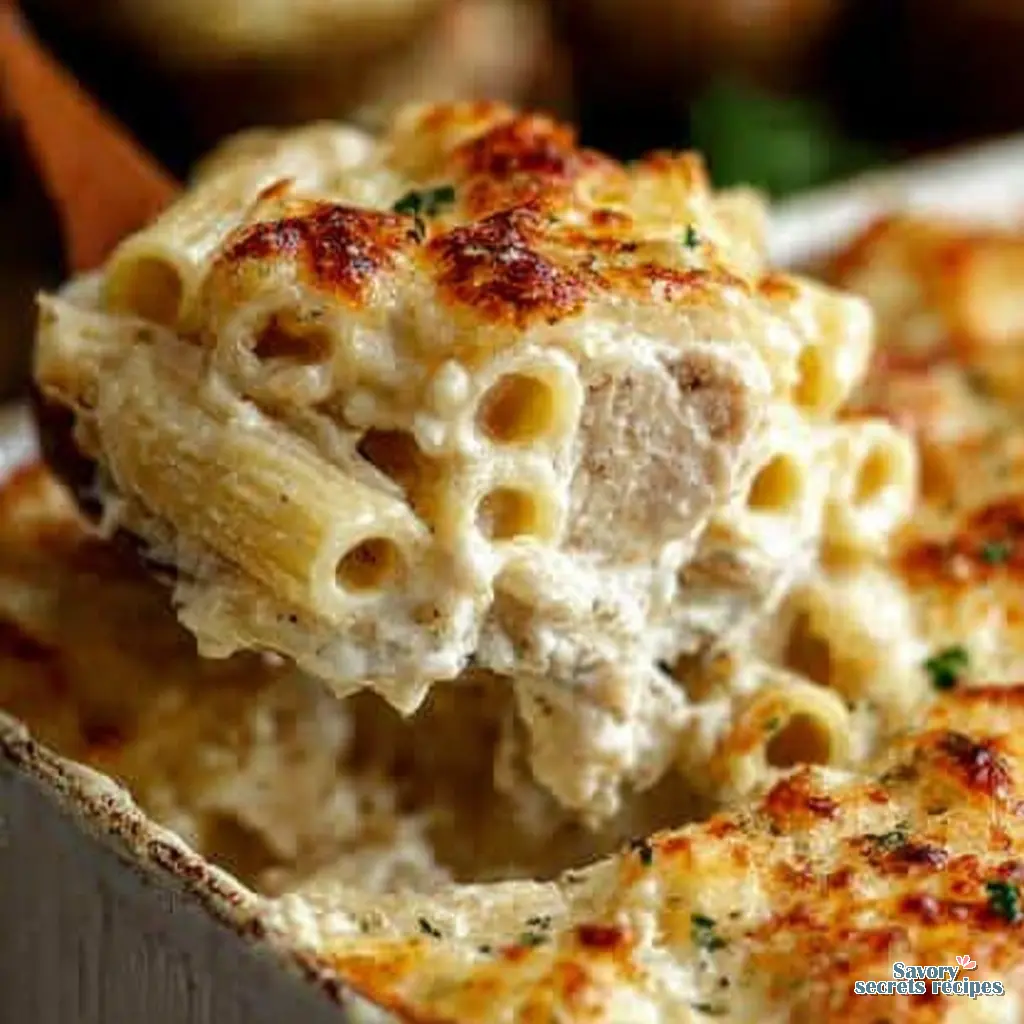
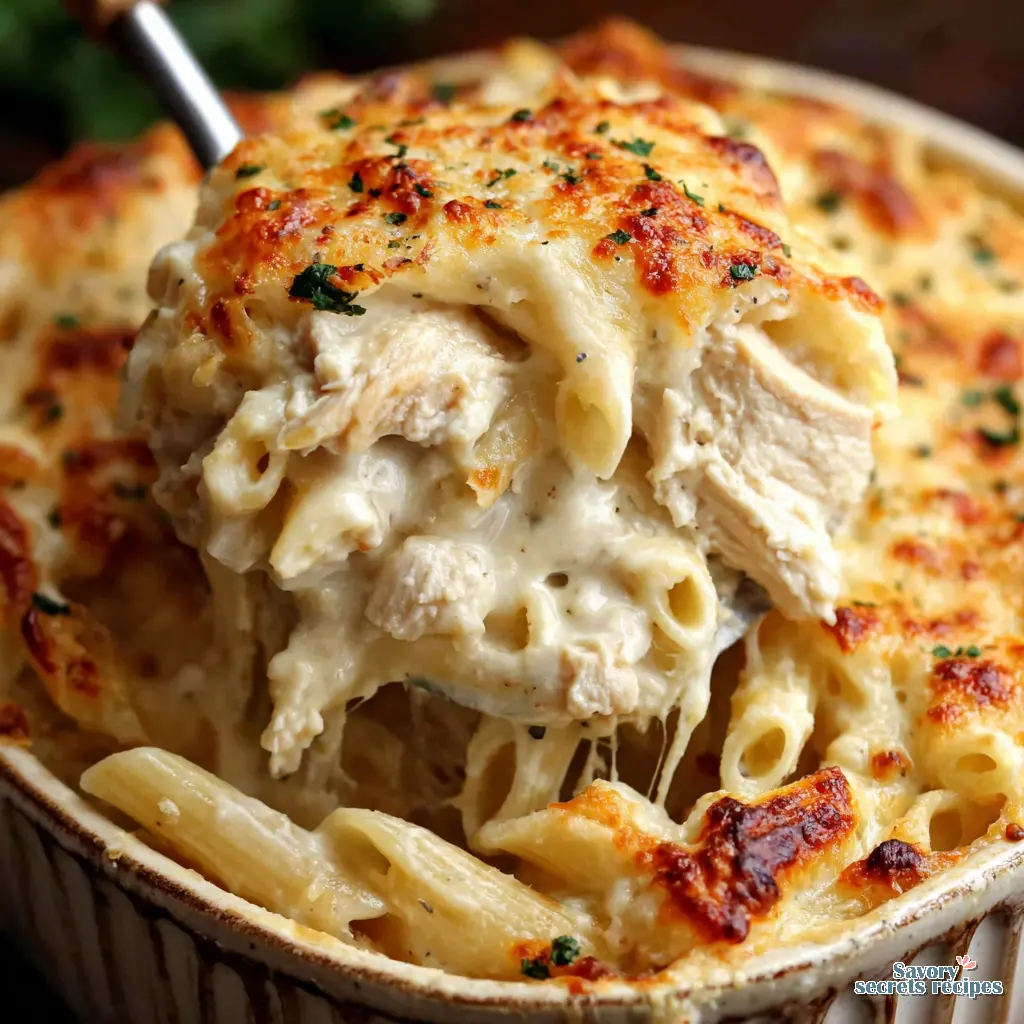
Dump and Bake Chicken Alfredo with Uncooked Pasta
Ingredients
Method
- Preheat the oven to 350°F to prepare the cooking environment for the casserole.
- Poach the chicken breasts in simmering water for approximately 15 minutes until thoroughly cooked and no longer pink.
- Boil the penne pasta in salted water for about 11 minutes until al dente, then drain it completely.
- Slice the cooked chicken into uniform, bite-sized pieces to ensure even distribution.
- Combine the shredded chicken, drained pasta, Alfredo sauce, half of the mozzarella, milk, onion powder, and garlic powder in a large mixing bowl and stir until well blended.
- Transfer the mixture to a casserole dish and spread it into an even layer.
- Sprinkle the remaining mozzarella and all of the Cheddar cheese evenly over the top.
- Bake the casserole for 25 minutes until the cheese is melted and the dish is hot and bubbly.
Nutrition
Notes
Why This Chicken Alfredo Dump and Bake Changes Things
Wednesday evening, 35 minutes before dinner. You are staring at the fridge, calculating if you have the energy to boil water, cook chicken, make a sauce, and then wash three different pots. I completely get it. Let me introduce you to the chicken alfredo dump and bake. You might be thinking right now, wait, I don’t have to boil the water? Yes. That is exactly what I am telling you.
During these cooler LA winter months when we actually use our ovens, this recipe is a lifesaver. It is the perfect comfort food season dinner without heating up your apartment too much. My grandmother Thérèse used to spend hours on her sauces. She kept a specific wooden spoon just for deglazing pans with chicken broth and stock. She would probably raise an eyebrow at this shortcut method. But honestly, as a general rule, we need recipes that fit into real life. This one dish miracle delivers perfectly tender pasta and fully cooked, juicy chicken without the kitchen anxiety.
What Exactly is a Dump and Bake Recipe?
If you are new to this concept, let me explain. A dump and bake recipe is exactly what it sounds like. You quite literally dump your dry, uncooked pasta, your liquids, and your proteins into a single casserole dish. You cover it, bake it, and let the oven do the heavy lifting. There is no separate pot for boiling noodles. There is no colander to wash.
I know this sounds completely wrong if you grew up making traditional pasta. The first time I tried a chicken alfredo dump casserole, I was incredibly skeptical. I kept checking the oven, convinced I was going to end up with a pan of burnt, crunchy noodles. But here is where it gets interesting. When you balance the liquid ratio perfectly, the pasta absorbs the moisture as it bakes. You end up with just one dish to wash. Perfect. Worth it.
Essential Kitchen Tools Needed
You really do not need much gear for a chicken alfredo bake dish, which is part of the appeal. However, the type of dish you choose actually matters more than you might think. I tend to think ceramic or glass baking dishes are your best bet here. They heat evenly and hold their temperature well. If you use a dark metal pan, it conducts heat much faster. You will likely need to shave a few minutes off your cooking time to prevent burning the edges.
Here is a trick I use to minimize cleanup even further. Use kitchen scissors to cut your pre-cooked chicken directly into the baking dish. This saves you from having to wash a raw meat cutting board and a knife. Just snip the chicken into uniform bite-sized pieces right over the dry pasta. Trust the process on this one.
The Science of No-Boil Pasta (And Why It Works)
Let me think on that for a second. Why does dry pasta cook in an oven without a rolling boil? It comes down to starch absorption and steam. When you put dry pasta in a dump and bake alfredo, the noodles act like little sponges. They need a specific volume of liquid to hydrate fully. If you just poured sauce over dry noodles, they would stay hard as rocks.
This is where most people rush it or make a critical error. The secret is trapping the steam. Covering the dish tightly with aluminum foil is absolutely mandatory for no-boil pasta success. The foil creates a sealed environment. The liquid heats up, turns to steam, and that steam surrounds the exposed tops of the noodles while the submerged parts absorb the broth. It is basic kitchen chemistry, and catching that exact moment when the pasta softens is incredibly satisfying.

How to Make Chicken Alfredo Casserole
The golden rule here is the liquid ratio. You must use a large 22-ounce jar of sauce to ensure enough moisture for the noodles. I highly recommend using a high-quality Alfredo sauce like Rao’s or Bertolli. In a recipe with so few ingredients, the flavor of your sauce really shines through. Pour the sauce over your dry pasta, then add your chicken broth.
You will want to press the dry noodles under the liquid with a spoon before baking. Any pasta sticking up above the liquid line will dry out and get crunchy. Dust the top with garlic powder before baking for extra flavor. Then, seal that dish with foil as tightly as you possibly can. Bake it for 35 minutes for al dente pasta. If you prefer softer pasta, leave it in for 45 minutes.
Always use pre-cooked chicken only. Raw chicken will not cook evenly in this specific environment, and we do not want to risk food safety. A rotisserie chicken from Ralphs or Vons works perfectly here. After the initial bake, pull off the foil. Stir in your cheese at this stage for a melty topping, and maybe add a splash of milk or heavy cream for extra creaminess.
Expert Tips for the Best Results
In my experience, the shape of your pasta dictates your success. You must use short, quick-cooking pasta shapes like rotini or penne. These typically have a 7-8 minute box boiling time. Avoid thick pasta shapes like ziti or large shells. They take too long to soften and will leave you frustrated with a crunchy dinner.
If you are adding vegetables, be strategic. Use fresh broccoli instead of frozen. Frozen broccoli releases too much water as it thaws in the oven, which results in a watery, separated sauce. Also, adjust your salt based on your liquids. Chicken stock is generally saltier than chicken broth. Taste your liquid mixture before you add the raw pasta.
Visual Troubleshooting Guide: Correct Liquid Levels
Mistake: The pasta is crunchy and undercooked.
Solution: You likely did not cover the dish tightly enough with foil, or you used a small 15oz jar of sauce instead of the required 22oz jar. The liquid should almost completely submerge the dry pasta before it goes into the oven.
Mistake: The sauce is watery and thin.
Solution: Using frozen vegetables is the usual culprit here. Always use fresh broccoli. If your sauce is still thin, stir in a handful of parmesan cheese and let the dish rest uncovered for 5 minutes before serving. It will thicken as it cools.
Mistake: The chicken is rubbery.
Solution: You might have used raw chicken breast. Always use pre-cooked, shredded, or diced chicken. It simply warms through in the sauce, staying incredibly tender.
Flavorful Recipe Variations
Once you master the basic dump and bake chicken alfredo with uncooked pasta, you can start playing with the flavor profile. For a pesto twist, stir in a spoonful of basil pesto right before serving. The vibrant green color and fresh basil flavor cut through the richness beautifully.
If you want a vegetable boost, add fresh spinach or diced bell peppers during the last ten minutes of baking. For a lighter version, you can certainly use reduced-fat Alfredo and part-skim mozzarella. Just be aware that lower-fat dairy sometimes separates slightly when baked. If you are cooking for someone with dietary restrictions, you can use gluten-free pasta. However, you need to check it about ten minutes early. Gluten-free pasta goes from al dente to mushy very quickly.
What to Serve with Chicken Alfredo
This dish is heavy, rich, and incredibly satisfying. Because of that, I always serve it with something bright and acidic to balance the palate. A crisp green salad with a sharp lemon vinaigrette is perfect. It cuts right through the heavy cream and cheese.
If you are feeding a crowd, pair it with warm garlic bread or soft breadsticks to soak up any extra sauce in the bowl. A fresh fruit platter also makes a wonderful, light dessert after such a comforting, carbohydrate-heavy main course.
Storage and Reheating Masterclass
Let’s talk about leftovers, because Alfredo sauce can be notoriously difficult to reheat. It loves to separate into a greasy, curdled mess if you push the heat too high. I learned this the hard way early in my career. Refrigerate any leftover chicken alfredo dump and bake in an airtight container for up to 4 days.
When you are ready to reheat, do not just blast it in the microwave on high. That is a guaranteed way to break the emulsion. Instead, reheat individual portions on 50% power in the microwave, stirring every 60 seconds. Better yet, reheat it on the stove over low heat. Add a splash of chicken broth or extra milk to the pan. This extra liquid helps restore the creaminess and brings the sauce back together smoothly.
If you want to freeze this, freeze it unbaked. Assemble the dry ingredients, chicken, and sauce in an aluminum pan, cover tightly, and freeze for up to 3 months. Thaw it completely in the fridge overnight before baking as directed.
Frequently Asked Questions
There is a specific moment when you peel back that foil, the steam rises, and you see perfectly cooked pasta that you didn’t even have to boil. Catching that exact moment never gets old. It feels like you cheated the system, and honestly, you kind of did. The next time you are staring down a busy weeknight, grab your favorite jar of sauce and give this chicken alfredo dump and bake a try. Your future self, the one who only has to wash a single dish, will thank you.
For more inspiration and easy weeknight dinner ideas, I share tons of variations on my Pinterest boards. Come say hello and let me know how your bake turned out!
Source: Nutritional Information
Can you really put dry pasta in a dump and bake alfredo and have it cook through?
Yes, absolutely. The secret is the exact ratio of liquid to dry pasta, combined with trapping the steam. As long as you cover the baking dish tightly with aluminum foil, the dry noodles will absorb the sauce and broth, cooking perfectly tender in about 35 to 40 minutes.
What if my pasta is still hard after baking?
If you pull the foil off and find crunchy noodles, do not panic. Just stir the casserole, making sure to push the hard pasta down into the liquid. Recover the dish tightly with foil, and bake for an additional 10 to 15 minutes. Different pasta brands absorb liquid at different rates.
Can I use pre-cooked rotisserie chicken for this chicken alfredo dump casserole?
That is actually my preferred method. Using a store-bought rotisserie chicken saves incredible amounts of time and ensures the meat is fully cooked and tender. Just shred or dice the meat, discarding the skin and bones, before adding it to your baking dish.
How do I prevent the casserole from drying out?
The most common reason for a dry bake is using too small a jar of Alfredo sauce. You must use a large 22-ounce jar, plus the required chicken broth. Also, ensure your foil seal is incredibly tight so no steam escapes during the baking process.
Can I use gluten-free pasta?
You can, but you need to watch it closely. Gluten-free pasta tends to absorb liquid differently and can turn to mush very quickly. I recommend checking the dish 10 minutes before the suggested baking time to test the texture of the noodles.
Does the baking dish make a difference?
It really does. A heavy ceramic or glass 9×13 dish heats evenly and retains heat well, which is perfect for this method. If you use a thin metal pan, the edges will cook much faster and you risk burning the sauce before the center pasta softens.
Can I make this dump and bake chicken alfredo with uncooked pasta ahead of time?
I do not recommend assembling this completely and letting it sit in the fridge for hours before baking. The dry pasta will start absorbing the cold liquid unevenly, resulting in a gummy texture. It is best to assemble the ingredients right before you plan to put it in the oven.