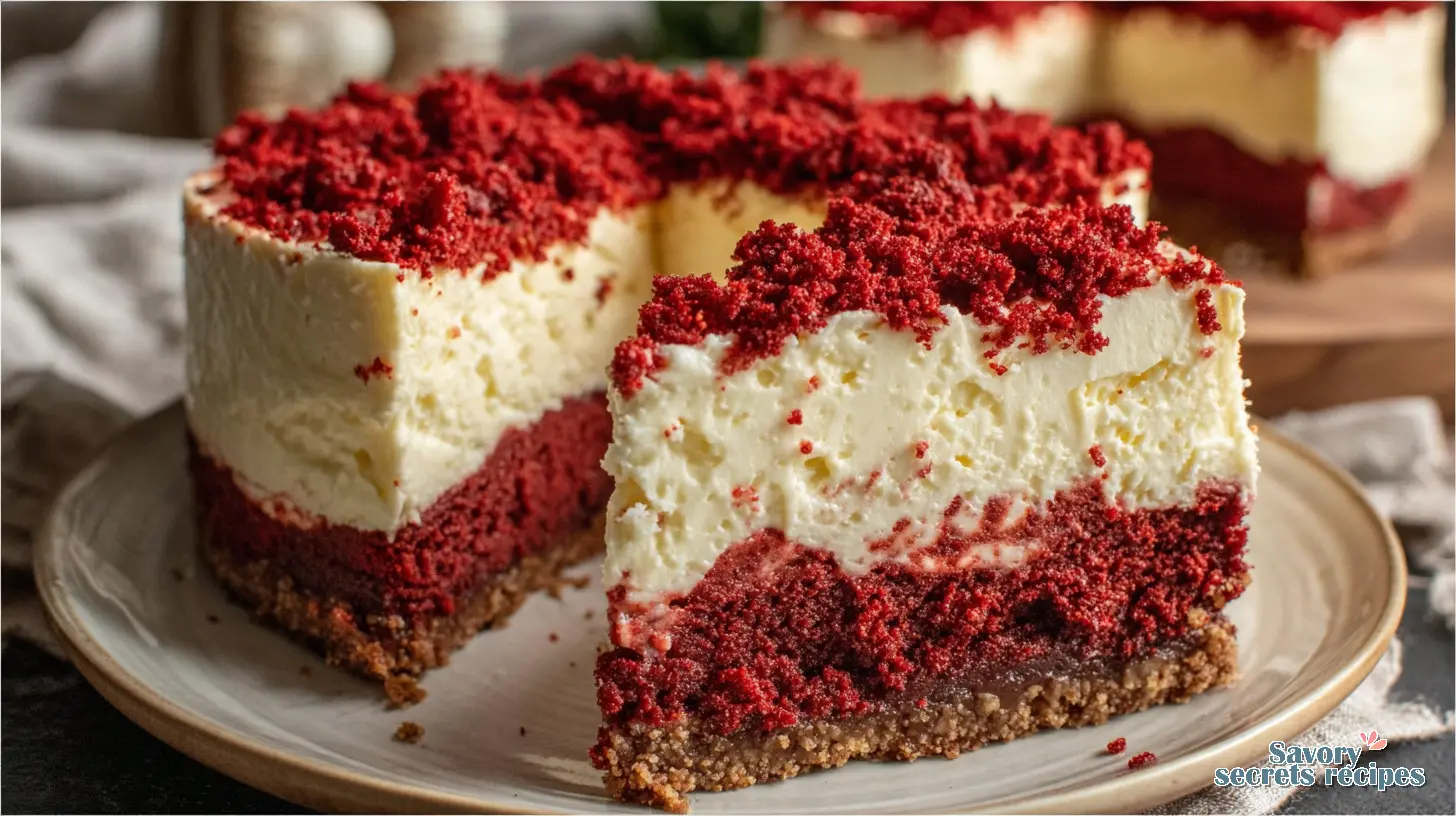
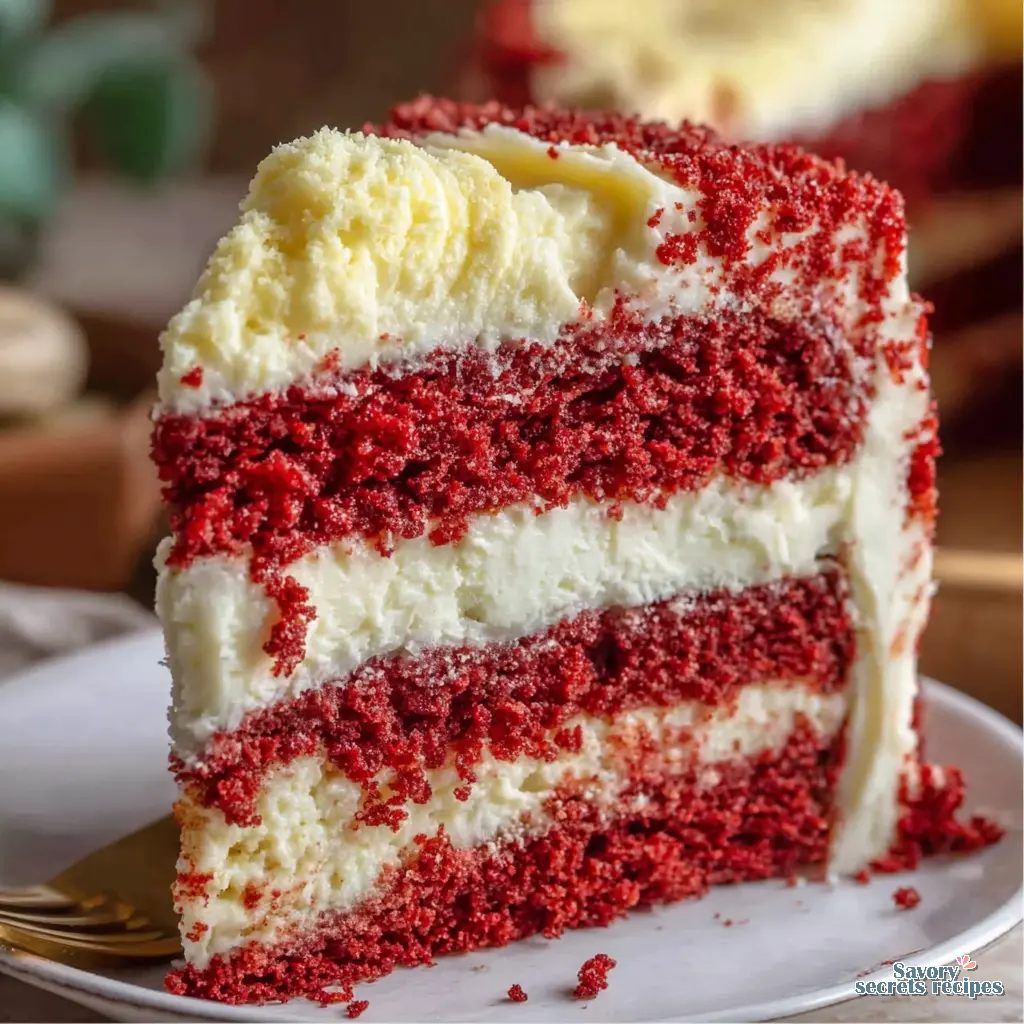
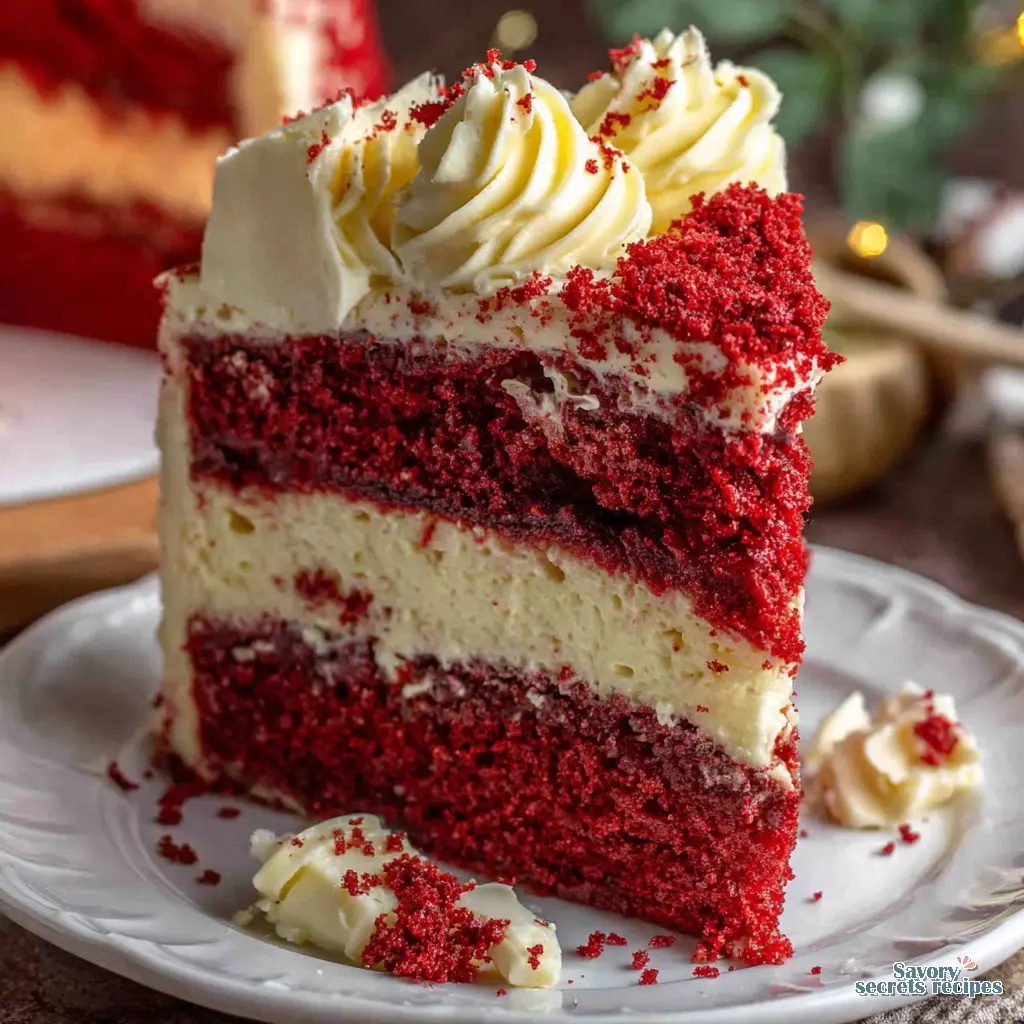
Easy Layered Red Velvet Cheesecake Cake
Ingredients
Method
- Preheat the oven to 325°F (160°C).
- Combine crushed graham crackers and melted butter in a medium bowl. Mix until crumbs are fully coated. Press this mixture into the bottom of a 9-inch springform pan to form the crust. Bake for 10 minutes, then remove and cool.
- In a large mixing bowl, beat softened cream cheese and granulated sugar until smooth and fluffy.
- Add eggs one at a time, mixing on low speed after each addition.
- Stir in sour cream, flour, cocoa powder, vanilla extract, and red food coloring until combined and smooth.
- Pour the red velvet cheesecake batter over the prepared crust, spreading evenly with a spatula.
- Bake in the preheated oven for 55-60 minutes, or until the center is set but still slightly jiggly.
- Turn off the oven and let the cheesecake cool inside for one hour.
- Refrigerate for at least 4 hours or overnight before serving.
- Once chilled, remove from the springform pan. Top with cream cheese frosting, chocolate shavings, or fresh fruit, if desired.
- Slice and serve.
Nutrition
Notes
Why You’ll Love This Red Velvet Cheesecake Cake
You know, there’s always that moment when you scroll past a photo of a truly stunning dessert, and you think, “That’s it. That’s the one I need to make.” But then, the ingredient list or the steps just look… overwhelming. I’ve been there, trust me. We all want to create those showstopper cakes, especially with spring gatherings and brighter days just around the corner here in Los Angeles, but the fear of a baking disaster can be real. That’s not how this works in my kitchen.
This Red Velvet Cheesecake Cake, with its vibrant layers and creamy frosting, is precisely that kind of dessert. It looks like it took days, but honestly, it’s more achievable than you might think. This isn’t being fussy, it’s the difference between a good cake and one that makes everyone gasp a little. You’re going to get that perfect balance of tangy cheesecake and moist red velvet. That’s exactly the texture we want.
I remember my grandmother Zoya, standing over me while I calculated baker’s percentages for her blini batter. She’d say, “Baking isn’t magic, Elena, it’s math you can eat.” And she was right. This Red Velvet Cheesecake Cake is a testament to that precision. It’s a cake that says “I care” without requiring you to take a week off work.
Understanding Red Velvet Cake
Before we dive into the layers of this magnificent Red Velvet Cheesecake Cake, let’s clear up a few things about red velvet itself. People ask me all the time, is it just chocolate cake? Let’s be clear about this: no, it’s not. That’s not how this works.
Is Red Velvet Cake Just Chocolate?
While red velvet cake does contain cocoa powder, it’s significantly less than a traditional chocolate cake. The magic happens with the interaction between the cocoa, buttermilk, and a touch of vinegar. This combination reacts to create a subtle tang and, traditionally, a reddish-brown hue. Modern recipes, like ours, enhance that vibrant color with a bit of red food coloring. It’s a distinct flavor profile, not just a dyed chocolate cake, and I’m not entirely convinced that people who say otherwise have had a proper one.
What Does Red Velvet Taste Like?
A good red velvet cake should be incredibly moist, almost velvety in texture. You’ll taste a gentle hint of cocoa, but it’s balanced by the tang of the buttermilk and a distinct vanilla flavor. It’s a rich flavor, but not heavy. When paired with that tangy cream cheese frosting and a creamy cheesecake layer, it becomes something truly special. It’s a showstopper cake, for sure.
Essential Ingredients & Why They Matter
Every ingredient plays a part in this cheesecake fusion cake. We’re not guessing on this one. Temperature matters here, immensely. Your softened cream cheese should be truly soft, not cold and firm straight from the fridge. Same for the eggs.
For the red velvet cake layers, you’ll need all-purpose flour, cocoa powder, baking soda, vinegar, buttermilk, vanilla extract, and red food coloring. The buttermilk and vinegar are crucial for that signature moist cake texture and the subtle tang. And for that vibrant, rich red color? Only use gel food colorings. One drop goes a long way for a bright red. Liquid food coloring just won’t give you the intensity you want without thinning your batter too much.
The cheesecake layers call for cream cheese, granulated sugar, eggs, and sour cream. The sour cream is key for that ultra-creamy, tangy cream cheese texture without being too dense. And the crust? Simple crushed graham crackers and melted unsalted butter. It’s the perfect sturdy base for this decadent dessert.
Mastering Your Red Velvet Cheesecake Cake
Making a layered cheesecake velvet cake might seem like a project, but we’re going to break it down. You’ve got this. The goal here is a harmonious blend of textures and flavors, and that comes from understanding each component.
Getting Your Cheesecake Layer Just Right
First, the cheesecake. You want a creamy, crack-free cheesecake, right? That’s the correct instinct. After you’ve pressed your graham cracker and melted butter crust into your springform pan, it’s all about the filling. Make sure your cream cheese is properly softened. Your butter’s too warm if it’s oily, but your cream cheese needs to be just right to avoid lumps. Beat it with the granulated sugar until it’s smooth, then add the eggs and sour cream. Don’t overmix once the eggs are in; that just adds air, which can lead to cracks.
Now, for the secret to a good cheesecake: don’t skip the water bath. This is a high-value tip for a reason. It creates a moist, steamy environment in your oven, which helps the cheesecake bake evenly and slowly. This prevents it from falling, browning too much on the edges, or cracking down the middle. I mean, you could skip this, but you’ll probably regret it. You’ll know it’s done when the edges are set but the center still has a slight wobble, like firm jelly. It needs to chill for at least four hours, probably longer, to firm up completely. That’s the correct way.
Baking Those Velvety Cake Layers
For the red velvet cake, precision is key. Measure the flour accurately. I prefer working with baker’s percentages, but for volume, spoon your all-purpose flour into the cup and level it off. Don’t pack it in. That’s not how this works. You’ll end up with a dry cake. The thing is, the vinegar and baking soda react quickly once combined with the buttermilk. So, when preparing the cake batter, ensure the oven is pre-heated to 350°F (about 175°C) and your pans are greased and floured. You need to get that batter into the oven immediately to capture all that leavening power.
You’ll bake these until a wooden skewer inserted into the center comes out clean, usually around 25-30 minutes. The cake should spring back lightly when touched. Let them cool in the pans for a bit, then turn them out onto a wire rack. They need to cool completely before you even think about frosting them. Temperature matters here, always.
Assembling Your Showstopper
Here’s where it all comes together. Patience is your best friend during assembly. Seriously, carve out fifteen minutes to avoid ruining it with hasty assembly. First, ensure all layers, especially the cheesecake, are thoroughly chilled. This is critical for clean layers and a stable structure. You can bake your cake layers and cheesecake the day before; both hold up very well. This makes assembly much less stressful. That’s the correct instinct.
Now, for the cream cheese frosting. You want it silky smooth. Beat softened cream cheese and unsalted butter together until light and fluffy, then gradually add powdered sugar and vanilla extract. If it doesn’t look right, it isn’t right. It should be thick enough to hold its shape but spreadable. Then, you’ll layer: cake, frosting, cheesecake, frosting, cake, and then the final glorious coat of cream cheese frosting. You can decorate with cake crumbs or even pipe shells around the top edge. For a truly elegant touch, try decorating with shaved white chocolate. See how much better that looks?
Troubleshooting Common Red Velvet Cheesecake Cake Issues
Look, we all make mistakes. I once ruined an entire week’s worth of recipe testing because I didn’t account for my home oven running twenty degrees hot. I learned that the hard way. So, let’s talk about what can go wrong with your Red Velvet Cheesecake Cake and how to fix it.
Common Mistakes & Fixes
Mistake: Your red velvet cake is dry.
Solution: This usually means you used too much flour or overbaked it. Measure the flour accurately, preferably by weight, and don’t bake past the point where a skewer comes out clean. I need you to show me your process if this keeps happening.
Mistake: Your cheesecake cracked or is rubbery.
Solution: You likely skipped the water bath or overbaked it. A water bath is non-negotiable for a creamy, crack-free cheesecake. Also, don’t overmix the batter once eggs are added. Temperature matters here.
Mistake: The layers slide around during assembly.
Solution: You didn’t chill your layers enough. Both the cake and cheesecake need to be completely cool, ideally cold, before stacking. Fine, but document what you changed if you rush it.
Mistake: The cream cheese frosting is runny.
Solution: Your butter or cream cheese was too warm, or you didn’t use enough powdered sugar. Ensure both are softened but still cool to the touch. If it’s too thin, add more powdered sugar, a tablespoon at a time, until it firms up.
Mistake: The red color isn’t vibrant.
Solution: You probably used liquid food coloring. Switch to a gel food coloring; it’s much more concentrated and will give you that deep, rich red without impacting the batter consistency. We’re not guessing on this one.
Variations & Smart Substitutions
I like recipes that assume the reader is intelligent and capable of precision, but I also know that sometimes you need to adapt. This Red Velvet Cheesecake Cake is pretty perfect as is, but here are a few ways you can adjust it.
For a gluten-free alternative, you can try using cornstarch as a thickener in the cake layer. Use half as much cornstarch as you would all-purpose flour. I haven’t worked with that flour enough to say it’s identical, but it’s a common substitution. If you don’t have buttermilk on hand, you can easily make your own by adding a tablespoon of vinegar to regular milk and letting it sit for five minutes. Or, you can use powdered buttermilk according to package directions. That might be regional; I’d need to verify.
Regarding the frosting, you can reduce the amount of powdered sugar if you prefer it less sweet, but be aware it won’t be as thick and might not pipe as well. And for a time saver, yes, you *can* use canned frosting. Honestly, I recommend homemade for this showstopper, but fine, but document what you changed if you go that route. And for the vanilla? Always choose pure vanilla extract. The difference is undeniable. I’ll admit I don’t fully understand why some people can’t taste the difference between real vanilla and artificial; it’s so obvious to me.
Storing & Serving Your Red Velvet Cheesecake Cake
This Red Velvet Cheesecake Cake is a special occasion dessert, and you’ll want to keep it perfect. Due to the cream cheese in both the cheesecake layer and the frosting, you cannot leave this out on the counter. That’s not how this works. Store it covered in the refrigerator. It’s best enjoyed within three to four days, maybe five if it’s really well-sealed.
The cake freezes perfectly, which is fantastic for meal planning or if you want to make components ahead. You can flash freeze individual slices, then wrap them tightly in plastic wrap and foil. They’ll keep for a month or two. You can also freeze the cake layers and the cheesecake layer separately before assembly. Just thaw them in the fridge before you’re ready to build. I often grab extra cream cheese and butter from Costco when they’re on sale, knowing I can freeze them for projects like this.
When you’re ready to serve, it’s perfectly okay to leave the cake at room temperature for an hour or so before slicing, especially if you’re serving it at a party. This takes the chill off and really lets those flavors shine. Decorate with a few extra red velvet cake crumbs or some elegant white chocolate shavings for that final touch. It’s perfect for spring brunches or any gathering where you want to impress without the stress.
Frequently Asked Questions
Your Next Showstopper Is Waiting
There’s a real sense of accomplishment that comes from presenting a dessert like this Red Velvet Cheesecake Cake. It’s that feeling of knowing you’ve mastered something beautiful and delicious, even if it seemed a little intimidating at first. When you slice into this incredible layered cheesecake velvet cake, seeing those vibrant red layers and the creamy white cheesecake, you’ll feel that pride. That’s exactly the texture we want.
Don’t let the layers scare you. You’ve got all the tools and knowledge now to create something truly impressive. So grab your ingredients on your next Ralphs run, set aside some time, and get baking. I genuinely love the problem-solving aspect of recipe development, and this one has all the satisfying answers built in. I’m excited for you to try it.
For more inspiration and baking ideas, browse my Pinterest. I share tons of variations there.
Source: Health & Nutrition Research
Is Red Velvet Cake Just Chocolate Cake?
No, let’s be clear about this. Red velvet cake has significantly less cocoa powder than a traditional chocolate cake. Its unique flavor comes from the interaction of buttermilk, vinegar, and cocoa, creating a distinct tangy and mildly chocolatey profile, not just a dyed chocolate flavor. That’s not how this works.
So What Does Red Velvet Cheesecake Cake Taste Like?
This Red Velvet Cheesecake Cake offers a harmonious blend. You’ll get the moist, velvety texture and subtle cocoa tang of the red velvet cake, perfectly complemented by a rich, smooth, and tangy cream cheese cheesecake layer. It’s a decadent dessert with balanced sweetness and a lovely complexity.
How to store Red Velvet Cheesecake Cake?
Due to the cream cheese in both components, always store your Red Velvet Cheesecake Cake covered in the refrigerator. It’ll stay fresh and delicious for 3-5 days. You can also freeze individual slices or layers for longer storage; just wrap them tightly and thaw in the fridge. Temperature matters here.
Can I use canned frosting for Red Velvet Cheesecake Cake?
Fine, but document what you changed. While homemade cream cheese frosting is always recommended for the best flavor and texture, you can use canned frosting as a time saver. Just be sure to pick a good quality cream cheese frosting for your Red Velvet Cheesecake Cake. It won’t be quite the same, but it’ll work.