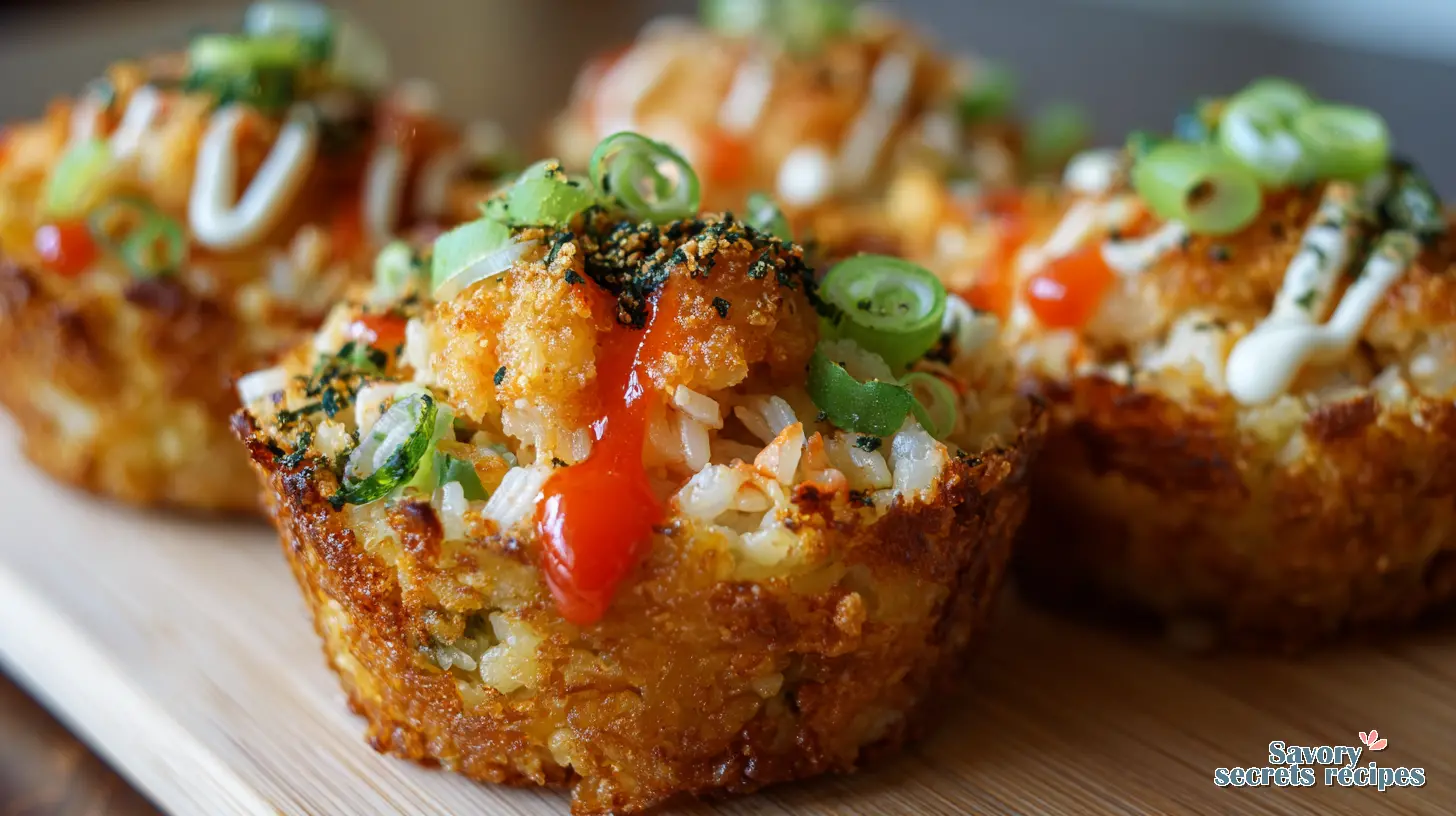
Shrimp & Crab Crispy Rice Sushi Bake Cups
Ingredients
Method
- Wash rice 1 to 2 times with tap water, then drain well. Cook with water using your preferred method (rice cooker or stovetop).
- In a large bowl, combine vinegar, sugar, and salt; stir to combine. Add hot cooked rice and gently incorporate the vinegar mixture with a spatula. Sprinkle with 1/2 furikake, mix again, and set aside.
- Pat shrimp dry with a paper towel, then place in a large bowl.
- Add shredded crab, green onions, Kewpie mayo, cream cheese, and sriracha. Mix until creamy, then season with garlic powder and stir to combine.
- Preheat your oven or air-fryer oven to 400°F (200°C).
- Cut each nori sheet into 4 equal squares.
- Arrange two nori squares in a crisscross pattern in each muffin tin cup, overlapping slightly if needed.
- Gently spoon a heaping tablespoon of sushi rice onto the nori base, then press down to ensure the nori adheres to the bottom of the muffin cup.
- Fill each cup with the shrimp mixture, including roughly 2 pieces of shrimp. Repeat for all muffin cups.
- Bake for 12 to 15 minutes to heat through, or bake for 20 minutes in a convection oven or oven air-fryer for a golden top.
- In a small bowl, combine Kewpie mayonnaise and sweet chili sauce. Stir until smooth and well combined. Taste and adjust mayonnaise or chili sauce to your preference.
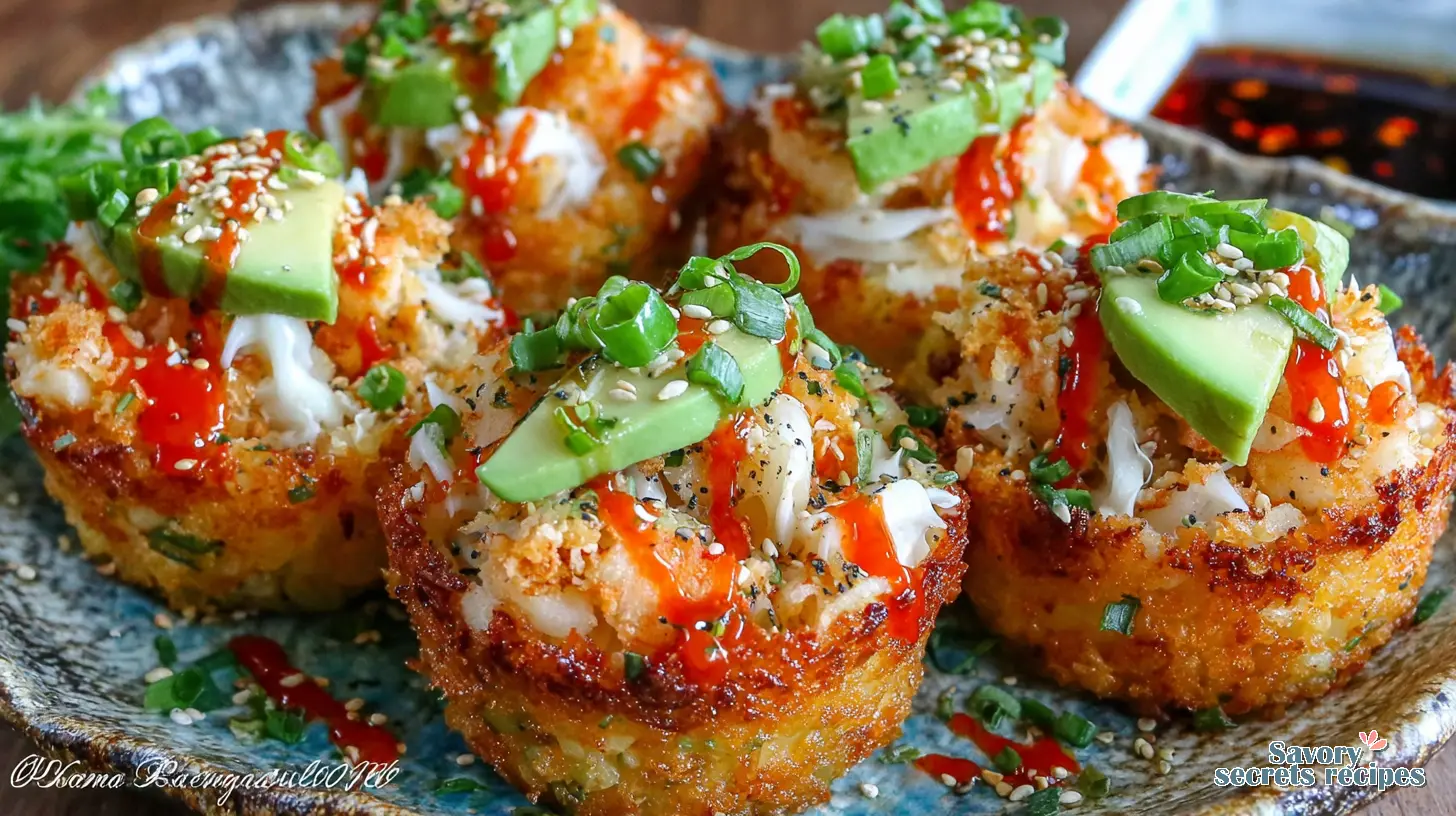
- Drizzle with the sweet-spicy mayo sauce, then sprinkle with green onions and the remaining furikake. Top with avocado or Japanese cucumber slices if preferred.
- Serve warm and enjoy!
Nutrition
Notes
- Rice – measured using baking cups and not the cup that came with the rice cooker.
- Rice Vinegar – you can substitute with Marukan seasoned rice vinegar. Omit salt and or use less sugar.
- Shrimp – cut into bit size pieces if using large shrimp.
- Variation – If you prefer a non-spicy version, substitute sriracha, and sweet chili sauce with sweet teriyaki sauce or store-bought bottled eel sauce.
- Nutrition – approximate calculation per cup excluding avocado and cucumber.
Why You’ll Love These Crispy Rice Sushi Bake Cups
You know that feeling? It’s a mild spring evening here in Los Angeles, maybe 60°F, and you want something impressive, something that feels a little special, but honestly, you’re not trying to spend hours in the kitchen. I get it. We’ve all been there, staring into the fridge, wishing for a dish that looks like it took ages but was actually, well, easy. That tracks, doesn’t it?
That’s exactly where these Crispy Rice Sushi Bake Cups come in. They’re a game changer for entertaining or just making a Tuesday night feel like a treat. Forget the rolling mats and the delicate technique of traditional sushi. We’re baking these beauties, and the result is a perfectly golden-brown, crunchy rice base that’s just begging for a creamy, savory topping. It’s exactly what you want to see.
The first time I tried a baked sushi concept, I was skeptical, I’ll admit. My Opa Klaus, bless his pragmatic German soul, would’ve probably said, “Why bake what you can roll?” But the satisfying crunch of that rice, combined with the fresh flavors, won me over. This isn’t just a trend, it’s a smart way to enjoy those Japanese-style sushi bites without the fuss.
Getting Your Kitchen Ready: Ingredients & Essential Tools
Before we dive into the how-to, let’s talk about what you’ll need. Good cooking starts with good prep, and that means having your ingredients and the right tools at hand. In my testing, I’ve found that having everything organized really makes a difference. Clean as you go or regret it later, that’s what I always say.
For the base, you’ll want good short-grain uncooked rice. Sushi rice preparation is key here, so don’t skip the rinsing step. You’ll need water, rice vinegar, a touch of sugar, and salt for seasoning. Then, for that incredible flavor, furikake is a must-have.
The topping for these Crispy Rice Sushi Bake Cups calls for uncooked shrimp, imitation crab, cream cheese, garlic powder, sriracha, and Kewpie mayonnaise. For garnishes, you’ll want green onion or scallions, more nori sheets (cut into those mini squares), Japanese cucumber, avocado, and sesame seeds. A drizzle of sweet chili sauce and soy sauce will finish them off perfectly.
Essential Equipment for Crispy Rice Sushi Cups
You don’t need a fancy kitchen to pull these off, but a few key items will make your life easier. A good muffin tin, for example, is non-negotiable for these mini sushi bake bites. I prefer heavier gauge steel ones because they distribute heat more evenly, which means better browning. Your mileage may vary with thinner tins, so worth noting.
A sturdy mixing bowl, a rice cooker (if you have one, makes life easy), and a sharp knife are also essential. I like knives with full tangs and triple-riveted handles because I’ve seen what happens to partial-tang knives after five years of regular use. The tool should disappear in your hand, you know? And for those nori sheets, kitchen scissors are your best friend. They’re faster and easier than using a knife, in practice.
The Art of the Crispy Rice Base: Your Guide to Perfect Crunch
The biggest hurdle people face with Crispy Rice Sushi Bake Cups? Getting that rice truly crispy. I’ve heard the frustrations: “My rice just gets soft,” or “It sticks to the pan and falls apart.” Fair enough, it’s a common pain point. But it’s actually simpler than you think if you understand a few principles.
First, it starts with the right rice: short-grain sushi rice. Why? It’s got the right starch content to get sticky enough to hold its shape, but not so much that it turns gummy. Long grain rice will not work here. Once cooked and seasoned with rice vinegar, sugar, and salt, it forms these wonderful little rice crispy cakes that are the foundation of our dish.
The secret to that golden-brown, satisfying crunch? Oil and heat. You want to press the seasoned rice firmly into your muffin tin cups (a little sesame oil flavor in the rice helps too). This creates maximum contact with the hot metal, which helps with browning. Good browning takes patience, but it’s exactly what you want to see for oven-baked sushi.
Air Fryer vs. Oven: Which Way to Crispy Rice?
In my testing, both an air fryer and a conventional oven can deliver great results for crispy rice. It’s mostly a matter of preference and what equipment you’ve got. If you’re using an air fryer, you’ll get a super-crisp exterior with less oil, usually a bit faster, say 15-20 minutes at 375°F (190°C).
For the oven, which is how I typically make these, you’re looking at a slightly longer bake time but you can do more at once. Preheat your oven to 400°F (200°C). Bake the rice cups for about 20-25 minutes, or until they’re golden brown on the edges and feel firm. This might be personal preference, but I find the oven gives a more consistent, all-around crispness, especially if you let it do its work.
Crafting Your Sushi Bake Cups
Once your rice is cooked and seasoned, you’ll want to press it firmly into a greased muffin tin. This is crucial for keeping the rice from falling apart. I use the bottom of a smaller glass or a measuring cup to really pack it down. Then, you’ll sprinkle a good amount of furikake over the rice before it goes into the oven. This adds another layer of flavor and a lovely visual texture.
After the rice is baked and cooled slightly, you’ll gently remove the crispy rice cakes from the muffin tin. This is where a good non-stick tin really shines. If they stick, a thin knife or offset spatula can help coax them out. Then, it’s time for the topping.
Building the Flavor: Toppings & Assembly Beyond the Crunch
Now for the fun part: the creamy, savory topping that makes these Crispy Rice Sushi Bake Cups so irresistible. We’re combining cooked shrimp (chopped small), imitation crab (also chopped), cream cheese, a touch of garlic powder, sriracha for that kick, and plenty of Kewpie mayonnaise. This creates a rich, balanced flavor profile that’s spicy, tangy, and a little sweet.
Mix that all together until it’s well combined. Then, spoon a generous amount over each crispy rice cup. You’re aiming for a nice dome of topping that almost covers the rice. These are mini baked sushi, after all, and we want that good filling-to-rice ratio. It’s easy sushi appetizer perfection.
Once topped, these go back into the oven for just a few minutes, maybe 5-7, to warm through and get that topping slightly bubbly. You’re not trying to cook anything here, just marry the flavors and warm it up. This is a homemade sushi bites experience that’s truly satisfying.
Creative Topping Bar Ideas
The beauty of these Crispy Rice Sushi Bake Cups is how customizable they are. Once they’re out of the oven, that’s when you add your fresh garnishes. I love using thinly sliced Japanese cucumber and creamy avocado. For a little extra pop, a sprinkle of sesame seeds and a drizzle of sweet chili sauce, plus a dash of soy sauce, are just perfect.
Chopped green onion or scallions add a fresh, vibrant finish. Remember, fresh toppings like avocado, cucumber, or jalapeños should go on right before serving so they stay crisp and don’t release extra moisture. That’s a worth noting detail if you’re serving these at a party. You could even set up a little topping bar for your guests, letting them customize their own crispy rice sushi cups.
Troubleshooting Your Crispy Rice Sushi Bake Cups: What Can Go Wrong and How to Fix It
Even with the best instructions, sometimes things don’t go exactly as planned. I’ve had my share of kitchen mishaps, believe me. I once tested a highly-rated Dutch oven by making sauerbraten and the enamel coating chipped on day three. That’s when I learned to run durability tests before food tests, not during. So, let’s talk about a few common issues you might run into with these Crispy Rice Sushi Bake Cups and how to fix them.
Common Mistakes & Fixes for Crispy Rice Sushi Bake Cups
Mistake: The rice isn’t getting crispy.
Solution: You probably didn’t press the rice firmly enough into the muffin tin, or the oven wasn’t hot enough. Make sure to really pack that rice down, and give it enough time in a fully preheated oven (400°F or 200°C) to brown properly. Good browning takes patience, remember?
Mistake: The rice cups are sticking to the muffin tin.
Solution: This usually means you didn’t grease the tin enough, or you tried to remove them too soon. A good spray with cooking oil or a brush of sesame oil is key. Let them cool in the tin for 5-10 minutes before trying to pop them out. Sometimes, a quick run around the edge with a thin knife helps, too.
Mistake: The topping is too runny or bland.
Solution: If it’s runny, you might have added too much sriracha or mayo without adjusting the cream cheese. For blandness, don’t be shy with the garlic powder, sriracha, and a pinch of salt. Taste and adjust. That tracks, right?
Mistake: Fresh toppings (like avocado) get soggy or brown.
Solution: You’re adding them too early. Always add fresh, delicate toppings right before serving. Case in point, if you add avocado and let it sit, it’ll oxidize and turn brown. That’s just how it works.
Understanding the ‘why’ behind these fixes is important. For crispiness, it’s about surface contact and consistent heat. For sticking, it’s about lubrication and allowing the rice to firm up as it cools slightly. All things considered, these are pretty forgiving, but knowing these little tricks will make all the difference for your Crispy Rice Sushi Bake Cups.
Tips for Success: My Best Advice for Crispy Sushi Bake Cups
I’m always looking for ways to make cooking smoother, more efficient. My mom kept every kitchen gadget she ever received as a gift, stuffed into drawers so full you couldn’t close them. I watched her struggle with a garlic press that required two hands and full body weight to operate. Even at twelve, I remember thinking someone designed this badly. So, here are some tips to make your Crispy Rice Sushi Bake Cups a solid performance across the board:
- For those nori sheets, grab your kitchen scissors. Seriously, it’s faster and easier than using a knife to cut them into neat squares. The tool should disappear in your hand, even if it’s just scissors.
- When you’re adding fresh toppings like avocado or Japanese cucumber, make sure they go on right before you serve. This keeps them crisp and prevents them from releasing extra moisture into your beautiful crispy rice cakes.
- If you’re slicing avocado or anything a bit sticky, wet your knife in between slices. It prevents sticking and gives you cleaner cuts. Worth noting for presentation.
- You can also use a cookie cutter to make rounds or squares out of your baked rice, if you want a different shape than the muffin tin provides. Just be gentle when pressing them out.
- To be clear, when you’re making the rice, rinse it until the water runs clear. This removes excess starch, which helps prevent a gummy texture and promotes better crisping.

Variations & Substitutions: Make These Crispy Sushi Bake Cups Your Own
One of the best things about cooking is making a recipe your own. These Crispy Rice Sushi Bake Cups are incredibly versatile, fitting into that Los Angeles ‘farm-to-fork’ culture where fresh and adaptable is key. You can swap out the protein or adjust the flavors to suit your taste or what you have on hand after a Trader Joe’s run.
Instead of shrimp and imitation crab, you could make salmon sushi bake cups. Just use cooked salmon, flaked, and mix it into the creamy base. If you’re looking for other protein options, cooked tuna or even seasoned, shredded chicken could work. For a vegetarian or vegan take, skip the seafood entirely and fill with spicy tofu or seasoned, mashed avocado. Some people even use tomatoes for a vegan option, which sounds interesting.
For the rice, short-grain sushi rice works best, but jasmine rice will also do the trick in a pinch. If you’re gluten-free, swap out the soy sauce for gluten-free tamari or coconut aminos. And if Kewpie mayo is hard to find, traditional mayonnaise will work, though the flavor profile will be a little different. For a spicier kick, use chili crisp or a bit of wasabi instead of sriracha. The options are pretty solid.
Make-Ahead & Storage Strategy: Planning Ahead for Crispy Rice Sushi Bake Cups
Life in LA can be busy, and meal prep Sundays are a real thing. So, planning ahead for these Crispy Rice Sushi Bake Cups is a smart move. You can absolutely get a head start on several components, which means less fuss when you’re ready to serve.
You can cook and season the sushi rice up to a day in advance. Let it cool completely, then store it in an airtight container in the refrigerator. The rice topping mixture, with the shrimp, crab, and creamy base, can also be made a day ahead. Keep it in a separate airtight container in the fridge. This is especially helpful if you’re making them for a holiday party this month.
Once baked, these Crispy Rice Sushi Bake Cups are best eaten right away for the crispest texture. However, leftovers can be stored in an airtight container in the refrigerator for up to 3 days, without the fresh toppings. When you’re ready to enjoy them, reheat gently in the microwave for about a minute, or pop them back in a 350°F (175°C) oven for 5-7 minutes to try and regain some of that crispness. Then, add your fresh avocado, cucumber, and green onion. Your mileage may vary with reheating, but they’re still pretty great.
Frequently Asked Questions
Your Crispy Rice Sushi Bake Cups Await
When you pull these golden beauties out of the oven, smelling that incredible aroma of sesame, garlic, and savory goodness, you’ll feel a real sense of accomplishment. That satisfying crunch, followed by the creamy, spicy filling, it’s just perfect. This recipe does exactly what it promises: delivers impressive, unique Crispy Rice Sushi Bake Cups with minimal fuss. Now, go grab some rice and make it happen!
For more inspiration, check out my Pinterest boards.
Source: Nutritional Information
Can I make Crispy Rice Sushi Bake Cups ahead of time?
Absolutely! You can prepare the seasoned rice and the creamy topping mixture a day in advance. Store them separately in airtight containers in the refrigerator. Then, assemble and bake your crispy rice sushi cups just before serving for the best texture.
How do I store leftover Crispy Rice Sushi Bake Cups?
Store any leftover Crispy Rice Sushi Bake Cups in an airtight container in the refrigerator for up to three days. It’s best to store them without any fresh garnishes like avocado or cucumber, as these can get soggy or brown.
What fillings work best in these mini sushi bake bites?
For these mini sushi bake bites, creamy, savory fillings that hold their shape work best. Our recipe uses shrimp and imitation crab with cream cheese and spicy mayo. Cooked salmon, tuna, or even seasoned tofu are also solid choices, offering a nice contrast to the crispy rice.
How do you keep the rice from falling apart for these baked sushi cup recipe?
The key to preventing your baked sushi cup recipe from falling apart is using short-grain sushi rice and pressing it very firmly into the muffin tin. The starch in the rice helps it stick together, and firm packing ensures it maintains its shape when baked and removed.
Can I use spicy tuna instead for Crispy Rice Sushi Bake Cups?
Yes, absolutely! Spicy tuna is a fantastic alternative for Crispy Rice Sushi Bake Cups. Just use sushi-grade ahi tuna, finely chop it, and mix it with sriracha and Kewpie mayonnaise, just as you would for the shrimp and crab topping. Delicious!