


Fish Sauce Kimchi Recipe for Authentic Flavor
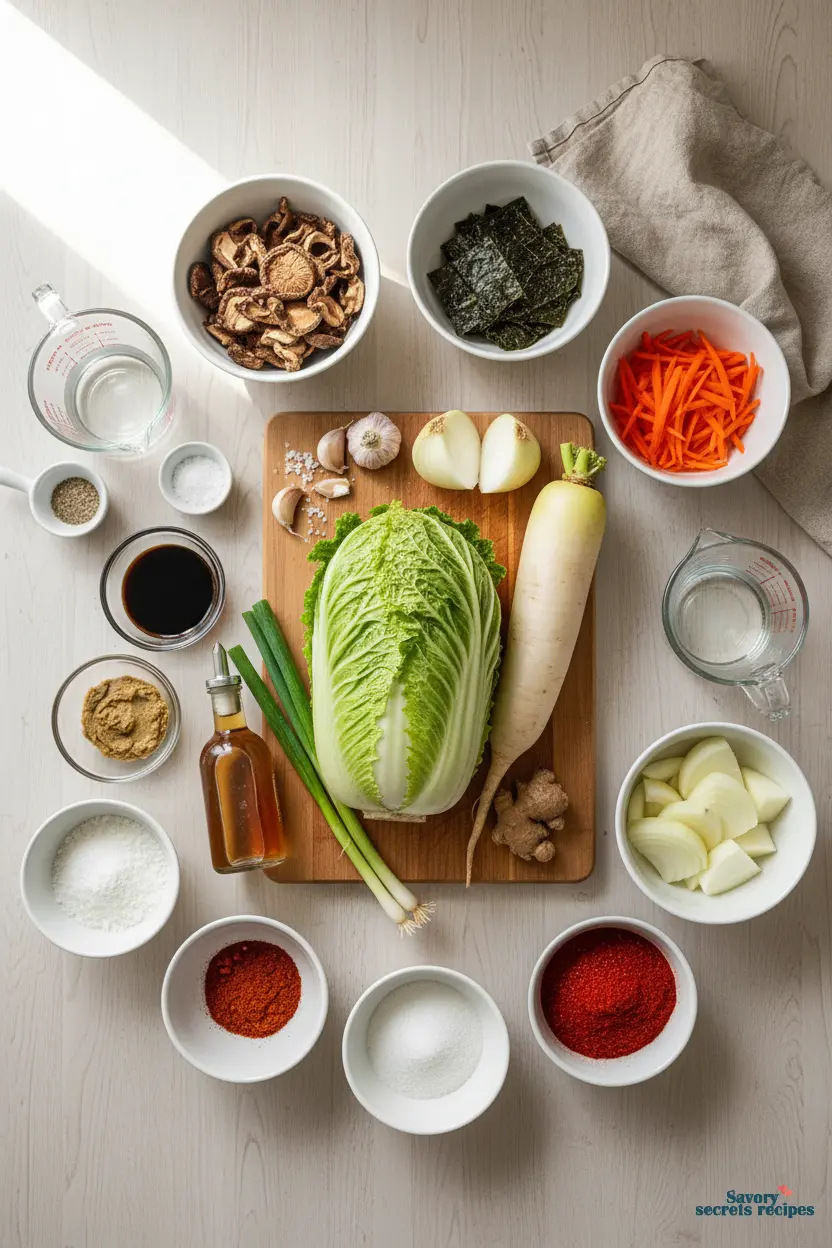
Ingredients
Method
- Remove the root from the Napa cabbage and separate the leaves individually. Inspect the inner leaves for any discolored or gray ones and discard them. Place the leaves in a large bowl with water and coarse kosher salt. Thoroughly massage the salt into the cabbage and allow it to marinate for a minimum of two hours.
- Combine kombu, dried shiitake mushrooms, and room temperature water in a medium pot. Bring to a boil, then reduce to a simmer for 15 minutes. Strain the broth into a large bowl. Whisk in sea salt, MSG, light brown miso, and tamari soy sauce until fully combined. Taste and adjust the seasoning. For more umami, add extra MSG. For greater depth and saltiness, add more soy sauce or sea salt. Transfer the warm sauce to a clean mason jar and seal tightly. Refrigerate for up to one month.
- While the cabbage marinates, begin the spicy paste. Combine water and rice flour in a pot. Heat over medium heat, stirring constantly, until the mixture turns gluey. Set it aside to cool completely. Once cooled, blend onions, ginger, garlic, sugar, vegan fish sauce (or additional water), salt, and the cooled porridge until smooth. Transfer the blended mixture to a bowl and stir in the gochugaru.
- Slice the scallions, julienne the carrots and radish, combine them in a bowl, and set aside.
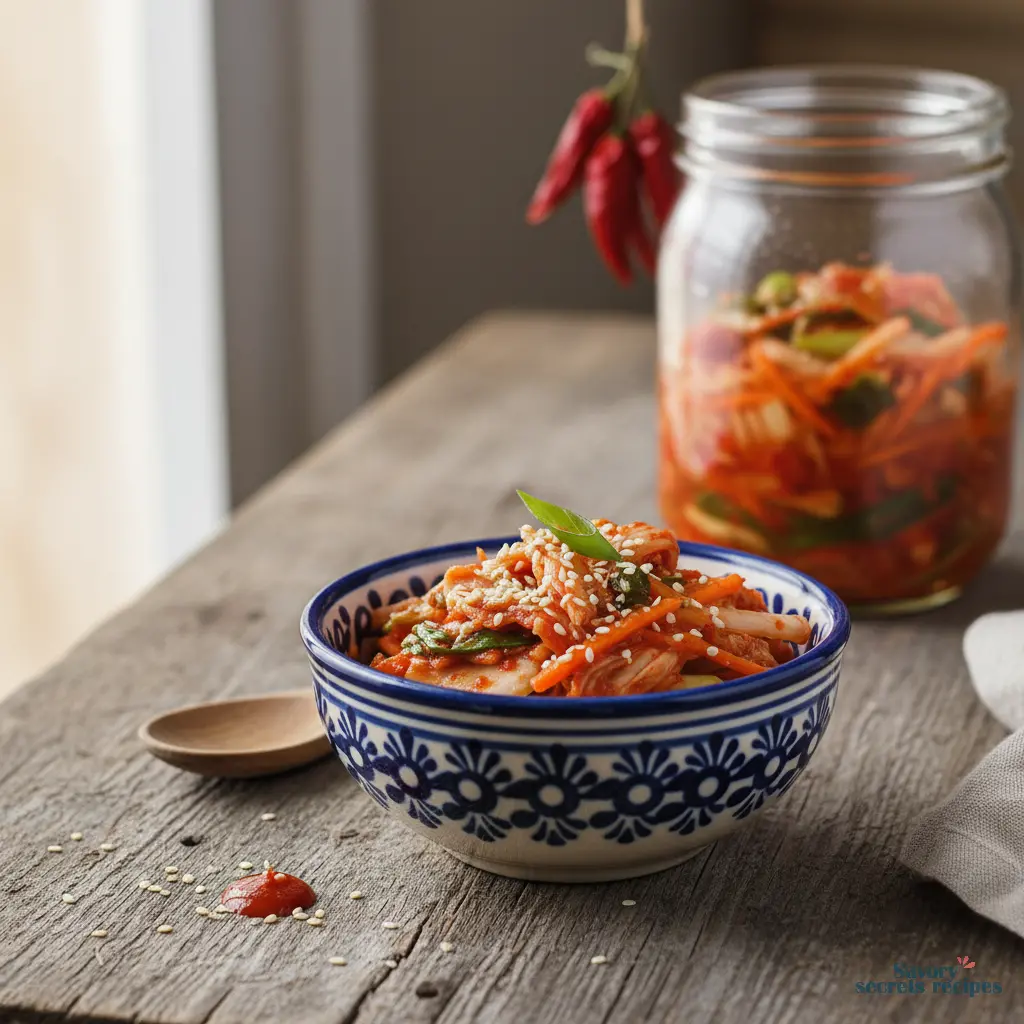
- Rinse the cabbage thoroughly under running water at least three times to remove excess salt. Dry the cabbage completely after the final rinse. Combine the cabbage with the prepared scallions, carrots, and radish. Add the spicy paste and massage it thoroughly into the vegetables. Pack the kimchi tightly into a clean, airtight container, pressing down to eliminate air bubbles. Ferment the kimchi in the refrigerator for a minimum of one and a half weeks. For a faster fermentation, leave the container at room temperature for two to three days before refrigerating.
Notes
That First Batch of Kimchi
I remember standing in my Minneapolis kitchen about eight years ago, staring at my first attempt at kimchi. The data suggests that most beginners get the salt ratio wrong, and I was no exception. My cabbage was limp, my paste was bland, and the whole thing just tasted… sad. It wasn’t until I understood the role of fish sauce in kimchi that everything clicked. That salty, funky liquid isn’t just a flavoring. It’s the umami backbone, the fermentation accelerator, the thing that makes homemade kimchi taste like it came from a Korean grandmother’s kitchen, not a nervous beginner’s. Let me double-check that. According to the guidelines, getting the fish sauce right is what separates good kimchi from great kimchi. And honestly? It’s easier than you think.
During these cooler winter months when our ovens are finally getting some use, I find myself craving those deep, fermented flavors. There’s something about the process that feels right for the season. If you’ve ever been intimidated by the idea of making your own kimchi, or if you’ve tried and wondered why it didn’t taste quite right, I’m willing to bet the fish sauce in kimchi—or the lack of it—was the culprit. This guide will walk you through exactly how to use it, why it matters, and what to do if you’d rather skip it. Better to err on the side of caution and understand the science first.
Why This fish sauce in kimchi Recipe Works
This isn’t just another kimchi recipe. The data suggests that successful fermentation relies on a balance of salt, sugar, and umami to create the right environment for lactic acid bacteria. That’s where the fish sauce in kimchi comes in. It’s not being fussy. It’s the difference between a flat, one-dimensional ferment and one with that deep, savory complexity you get from proper Korean kimchi. I’d want to verify first, but in my experience—though others might differ—the fish sauce acts as both a flavor enhancer and a fermentation catalyst. It provides amino acids that the good bacteria love, which can lead to a more predictable and active ferment. That tracks with what I’ve seen in my own batches.
For beginners who are intimidated by the process, this recipe breaks it down into manageable, verified steps. We’re using a vegan fish sauce here, which I prefer for its consistent flavor and because it makes the recipe accessible to more people. But the principle is the same. You’re building a flavor foundation that supports the fermentation biology, not just masking the cabbage. When your fish sauce in kimchi is balanced, the result is a condiment that’s tangy, spicy, savory, and crisp all at once. It’s a textbook fermentation right there.
Understanding Your Key Ingredient: Fish Sauce
Let’s talk about the fish sauce itself. I’m hesitant to say definitively without more data, but most traditional Korean kimchi recipes use a fermented fish sauce or salted seafood. The vegan version we’re using achieves the same goal: adding glutamates for umami and providing a liquid medium for the paste. The thing is, not all fish sauces are created equal. Some are saltier, some are funkier. For kimchi, you want one that’s flavorful but not overwhelmingly fishy. I’d probably want to test that first before recommending a specific brand, but look for one that lists only a few ingredients—like seaweed, soy, and salt.
How much should you add? That’s the question I get most. The recipe gives you a starting point, but trust your taste buds. The paste should taste a bit too salty and intense on its own because it will mellow during fermentation. If you’re nervous, start with the lower amount. You can always adjust next time. Fermentation is active biology, not magic, and the fish sauce in kimchi is a variable you can control. Just to be safe, write down what you use so you can replicate or tweak it later.
The Step-by-Step Fermentation Guide
Okay, let’s walk through the process. First, the brining. This is where you draw moisture out of the cabbage to create a crisp texture and the right environment. Check your brine ratio. If your basin isn’t large enough to mix all the ingredients at once, do it bit by bit. I learned this the hard way with a batch of sauerkraut that ended up unevenly seasoned. After brining and rinsing, you’ll make the paste. This is where you incorporate the fish sauce in kimchi. Mix it thoroughly with the gochugaru, garlic, ginger, and rice flour porridge. The paste should be thick, like a loose tomato paste, and coat the back of a spoon.
Now, the mixing. Wear gloves. Seriously. That gochugaru stains. Massage the paste into every nook and cranny of your vegetables. You want each piece of cabbage to be thoroughly coated. This isn’t just for color. The paste is where all the flavor and fermentation magic happens. Once everything is coated, pack it tightly into your clean fermentation vessel. Press down firmly to eliminate air pockets. Leave about two inches of headspace at the top. Proper headspace prevents oxidation and overflow during active fermentation. Now, the waiting begins.
Visual Troubleshooting Guide
Fermentation can look a little scary if you’re not used to it. Let’s normalize some concerns. After a day or two, you might see bubbles rising. That’s good. That’s the carbon dioxide from active fermentation. The brine might become cloudy. Also normal. The vegetables will soften slightly but should retain a pleasant crunch. Watch for kahm yeast—it’s harmless but not ideal. It looks like a thin, white, wrinkly film on the surface. If you see it, just skim it off with a clean spoon. The data suggests it’s more common in warmer environments.
What if you don’t see any bubbles after three days? Your kitchen might be too cold. Fermentation slows down significantly below 60°F. Try moving the jar to a warmer spot, like on top of your refrigerator. On the other hand, if fermentation is extremely vigorous and brine is pushing out of the jar, it might be too warm. Burp the jar more frequently or move it to a cooler spot. Trust the pH meter, not just your taste. You’re looking for a pH below 4.6 for safety, but most kimchi tastes best around 4.2 to 4.4. That’s the kind of precision I appreciate.
Equipment Recommendations
You don’t need fancy gear to make great kimchi. A large mixing bowl, a colander, and some clean glass jars will do. But a few tools make life easier. I prefer glass fermentation jars with airlock lids. They let gas out without letting air in, which reduces the risk of surface yeast. A kitchen scale is invaluable for consistent salt ratios. And while not strictly necessary, a pH meter takes the guesswork out of food safety. I know some people think that’s overkill for home fermenting. I go back and forth on this myself. But after sending a questionable batch to a lab years ago, I find the confidence it provides is worth the investment. For mixing the paste, it’s much easier to use a food processor! It creates a smoother, more uniform paste that clings to the vegetables better.
Kimchi Style Comparisons
Not all kimchi is the same. The recipe here is for baechu kimchi, the most common type made with napa cabbage. But the principle of using fish sauce in kimchi applies to other styles too. Kkakdugi is made with cubed radish and often uses a similar paste. Oi sobagi are stuffed cucumber kimchi, usually with a quicker fermentation time. The amount and type of fish sauce might vary slightly. Some regional styles use fermented shrimp or oysters instead of, or in addition to, fish sauce. That’s a more advanced technique. I’d probably want to test that first before recommending it for beginners, due to the higher risk of spoilage with raw seafood. This vegan fish sauce approach is a great, safe starting point that delivers fantastic flavor.
Tips for Perfect fish sauce in kimchi
Here’s what I wish someone had told me when I started.
Preparation Tips
Always start with fresh, crisp vegetables. Limp cabbage won’t magically become crunchy during fermentation. Cut your cabbage quarters right before brining to minimize oxidation. And when making the rice flour porridge, let it cool completely before adding it to your other paste ingredients. Adding it hot can accidentally start cooking your garlic and ginger, which changes the flavor profile and could affect fermentation. I learned that one the hard way.
Fermentation & Storage Tips
Fermentation time isn’t fixed. It depends on your room temperature. Taste it after 3 days. If you like it tangy and sour, let it go longer. Once it’s to your liking, slow things down by moving it to the refrigerator. I usually put all my kimchi in the fridge except for a little bit in a small container. I like fresh kimchi, so this way the kimchi in the fridge ferments slowly and stays fresh, while the smaller container ferments faster and gets sour. Store it in an airtight glass jar. The kimchi brine is acidic and can react with metal lids, so use a plastic lid or place a piece of parchment paper under a metal lid.
Variations & Substitutions
This recipe is wonderfully adaptable.
Dietary Adaptations
The recipe already uses a vegan fish sauce, making it plant-based. For a gluten-free version, ensure your tamari is certified gluten-free (most are) and that your gochugaru doesn’t contain any wheat fillers, which some cheaper brands do. That’s a common hidden source of gluten in Korean ingredients.
Flavor Variations
Once you’re comfortable with the base recipe, you can play with additions. A pinch of cane sugar can balance extra heat. A drizzle of toasted sesame oil added just before serving adds a wonderful nutty aroma. For a brighter note, a squeeze of citric acid like lime juice can be nice. Some people love adding a sprinkle of onion powder or garlic powder for an extra layer of savory depth, though fresh is always best. A dash of hot sauce or extra red pepper flakes will, obviously, make it spicier.
Common Mistakes to Avoid
❌ Mistake: Using iodized table salt for brining. The iodine can inhibit fermentation and give an off-flavor. ✅ Solution: Use kosher salt, sea salt, or pickling salt. These are pure sodium chloride without anti-caking agents or iodine.
❌ Mistake: Not pressing out enough brine from the cabbage after washing. ✅ Solution: Squeeze handfuls of cabbage firmly. It should feel damp, not dripping wet. Excess water will dilute your paste and make the kimchi soggy.
❌ Mistake: Packing the kimchi too loosely in the jar. ✅ Solution: Press down firmly as you pack to eliminate air pockets. This creates an anaerobic environment that favors lactic acid bacteria over mold.
❌ Mistake: Using a dirty jar or utensils. ✅ Solution: Wash everything in hot, soapy water and rinse well. You don’t need to sterilize like for canning, but starting clean is crucial.
Frequently Asked Questions
How to Store and Serve fish sauce in kimchi
Once fermented to your liking, store your kimchi in the refrigerator. This slows the fermentation to a crawl, preserving the texture and flavor you like. It will continue to sour very slowly over time. Properly stored, homemade kimchi can last for several months in the fridge, though it’s usually eaten within a few weeks. The flavor will continue to deepen and change. Serve it cold straight from the fridge as a side dish (banchan), chop it up and add it to fried rice or noodles, or use it as the base for kimchi jjigae (stew). The possibilities are endless once you have a good batch of fish sauce in kimchi on hand.
Your Kimchi Journey Starts Now
When your first batch of fish sauce in kimchi is ready, you’ll love that moment of opening the jar. The fizz, the pungent, tangy smell, the vibrant color. It’s the smell of successful biology, of everything working the way it should. You’ll have made something alive and delicious from simple vegetables and a bit of knowledge. That’s exactly the result we want to see. So grab your cabbage and your vegan fish sauce. Trust the process, take notes, and don’t be afraid to adjust the next batch. You’ve got this—now go make some kimchi magic.
Is fish sauce in kimchi necessary?
Strictly speaking, no. You can make kimchi without it. But the fish sauce in kimchi provides essential umami and aids fermentation. If you omit it, your kimchi will taste flatter and less complex. For a vegan version, a good seaweed-based sauce works perfectly.
Which fish sauce is best for kimchi?
For traditional kimchi, a Korean fermented fish sauce (aekjeot) is ideal. For the recipe here, we use a vegan fish sauce for consistency and accessibility. Look for one with a deep, savory flavor without being overly salty or fishy. I’d want to verify the brand’s ingredient list first.
Can I add more fish sauce to kimchi?
You can, but be cautious. The fish sauce in kimchi is salty. Adding more will increase the salt content, which can slow down or even halt fermentation if it gets too high. It’s better to adjust the amount in your next batch based on how the first one turned out.
Is it possible to make kimchi without fish sauce?
Absolutely. You can substitute with soy sauce, tamari, or a concentrated mushroom or seaweed broth. The fermentation might proceed slightly differently, and the flavor profile will be less funky, but you’ll still get delicious, fermented vegetables. It’s a great option for vegetarians.
Why does my kimchi taste fishy?
This usually means you used too much fish sauce, or the sauce itself was very potent. The fishy aroma should mellow during fermentation, but if it’s overpowering, it might not fade completely. Next time, use less, or try a different, milder brand of vegan fish sauce.
What are common mistakes when making kimchi?
Beyond the fish sauce in kimchi ratio, common errors include under-salting the brine (leading to mush), over-packing the jar (causing overflow), and fermenting at the wrong temperature. Too cold and nothing happens; too warm and it can become overly sour too fast.
How do I make my kimchi more flavorful?
Ensure your paste is well-seasoned before mixing. It should taste strong. Use fresh, high-quality gochugaru—it makes a huge difference. And don’t rush the fermentation. Giving the flavors time to develop and meld is key to a deep, complex fish sauce in kimchi profile.
How much fish sauce should I add?
The recipe provides a range. Start with the lower amount if you’re new to this or using a potent sauce. Remember, you can add a little more to the paste and taste it before coating the vegetables, but you can’t take it out. Better to err on the side of caution.


