


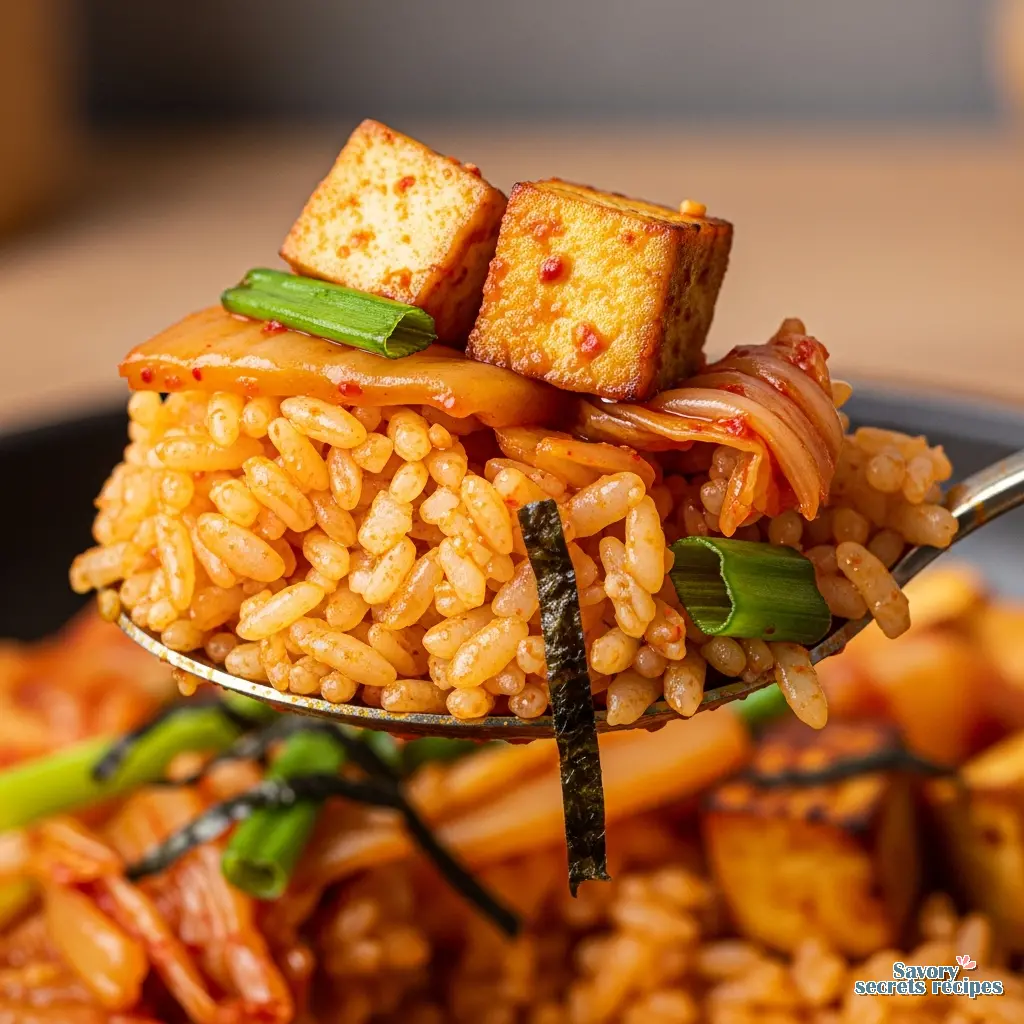
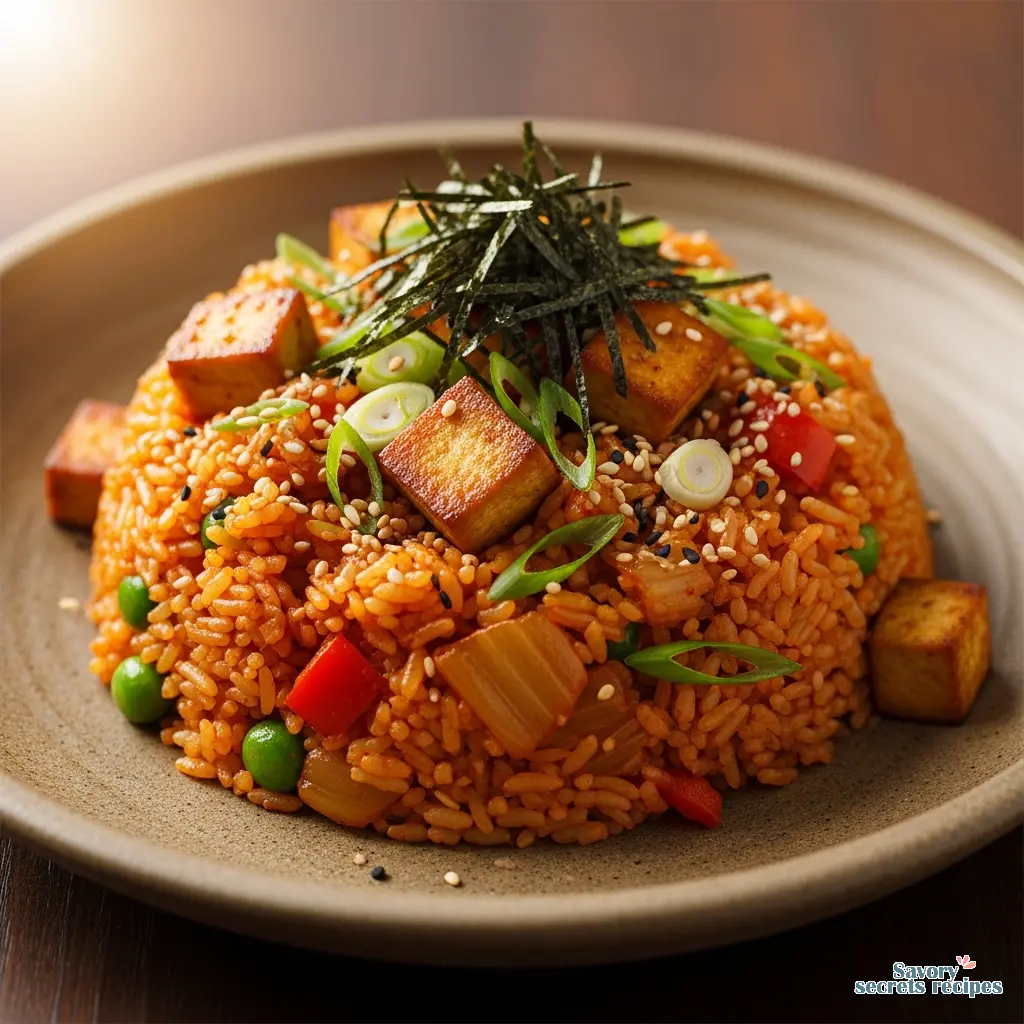
Easy Vegan Kimchi Fried Rice with Vegetables
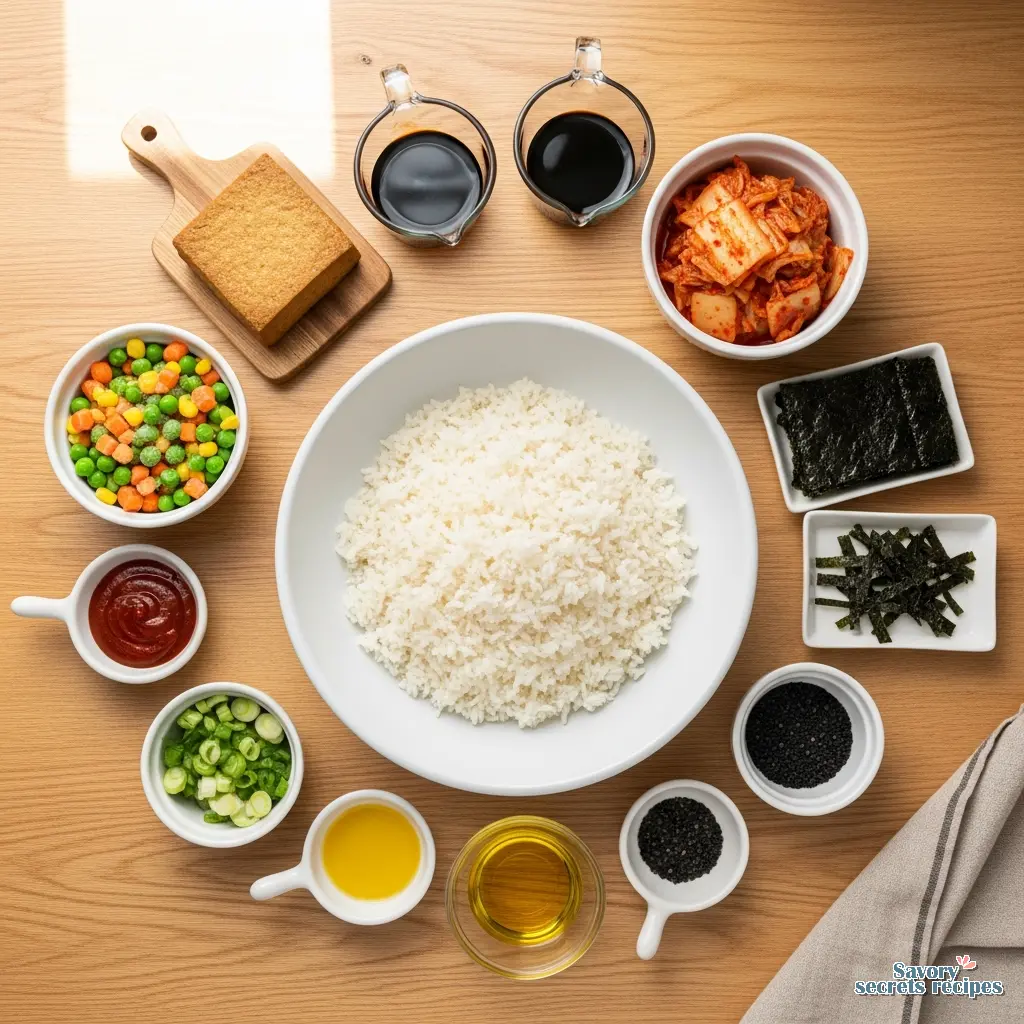
Ingredients
Method
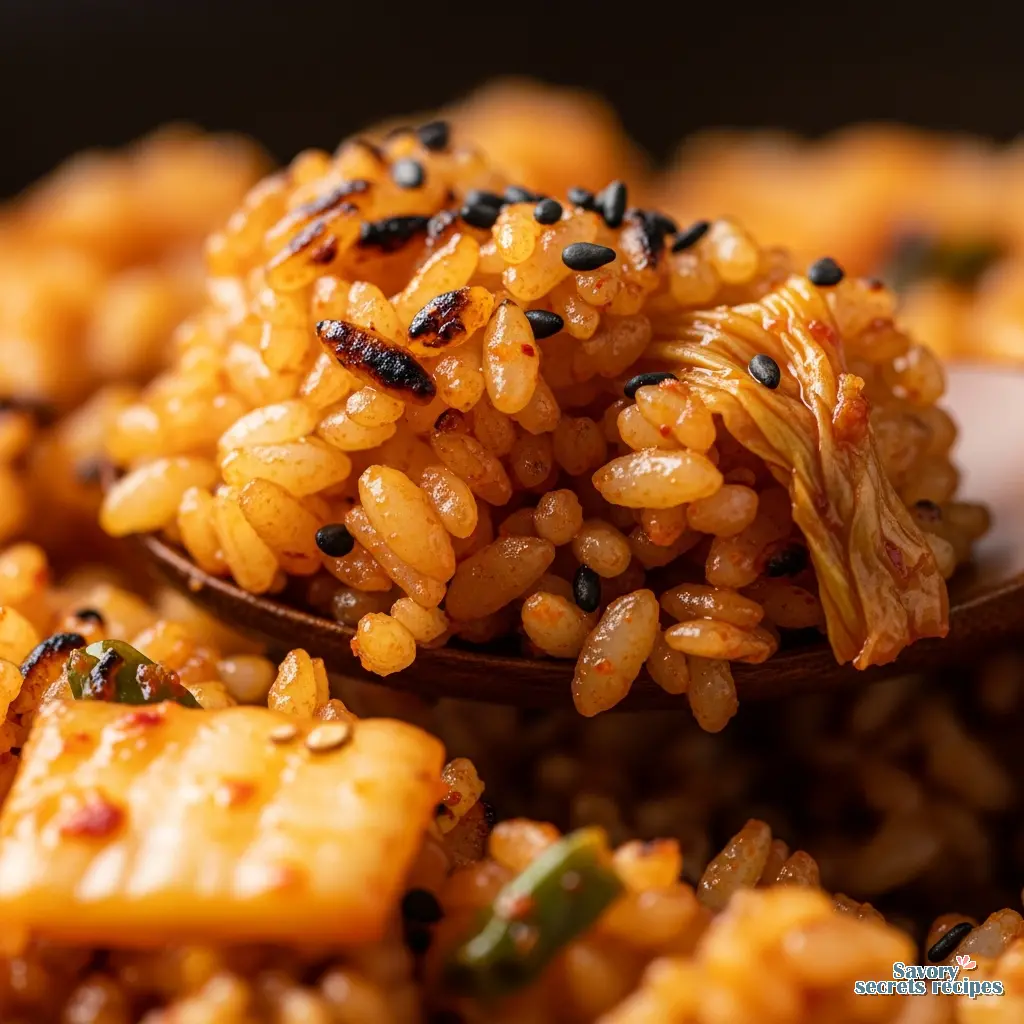
- Heat a drizzle of oil or water in a medium wok or frying pan over medium-high heat. Add the white parts of the scallions and fry for 1 minute. Stir in the kimchi and gochujang and fry for another minute. Reduce the heat to medium and add the cooked rice, smoked tofu, frozen vegetables, and soy sauce. Fry until the rice absorbs all the flavors.
- Add half of the green onion tops, drizzle with sesame oil, and fry for 1 minute.
- Serve immediately and garnish with the remaining green onions, sesame seeds, and nori strips.
Nutrition
Notes
The Weeknight Fermentation Rescue
It’s 6:30 PM on a Tuesday. I’ve just walked in the door, my feet hurt, and the last thing I want to do is start a complicated cooking project. But I also know that if I order takeout again, I’ll feel sluggish tomorrow. This is exactly when I turn to my refrigerator’s “fermentation station” (my husband calls it the shelf of weird jars) for a solution.
Kimchi fried rice with vegetables isn’t just a meal; it’s a rescue strategy. It reminds me of my Babcia Helena, who never wasted a single scrap of food in her Milwaukee kitchen. She would take the end of a sauerkraut jar, some cold potatoes, and whatever vegetables were wilting in the bin, and turn them into something that tasted like a feast. This recipe follows that same no-waste philosophy. It’s fast, it uses up leftovers, and honestly? It tastes better than anything you can get delivered.
The beauty of this dish is the biology behind it. You’re taking simple ingredients like rice and vegetables and hitting them with the complex, developed flavors of fermented kimchi. It does the heavy lifting for you. You don’t need to simmer a sauce for hours because the fermentation bacteria have already spent weeks developing that deep, tangy, umami flavor profile. Just to be safe, I always keep a jar of well-aged kimchi in the back of the fridge specifically for this purpose.
The Science of Starch: Why Cold Rice Matters
Let’s get a little technical for a second. I know it’s tempting to cook a fresh pot of rice when the craving hits, but trust me on this one. Fresh, hot rice is full of moisture and gelatinized starch. If you throw that into a hot pan with sauce, you’re going to end up with a gummy, sticky mash. Not appetizing.
We want retrogradation. That’s the scientific term for what happens when rice cools down. The starch molecules realign and crystallize, making the grain firmer and less sticky. This is crucial for fried rice because it allows the grains to separate and get that lovely, chewy texture instead of turning into porridge. I’d probably want to test that first before recommending it if I hadn’t made this mistake a dozen times myself.
Pro Tip: If you absolutely must use fresh rice, spread it out on a baking sheet in a thin layer and pop it in the fridge (uncovered) for 30 minutes. It mimics the drying process. It’s not perfect, but it works in a pinch.
Choosing Your Kimchi: A Visual Guide to Fermentation Stages
Not all kimchi is created equal, especially when it comes to cooking. In my experience, though others might differ, you want the stuff that makes your face pucker slightly when you eat it raw.
New Kimchi (1-2 weeks): The cabbage is still crisp and white-ish. The flavor is bright and distinct. This is great for salads or side dishes, but it lacks the depth we need for frying.
Ripe Kimchi (1 month+): This is the sweet spot. The cabbage becomes translucent and takes on a deeper orange-red color. The brine is sour and rich. The pH has dropped significantly, meaning the acid is strong enough to cut through the oil and starch of the fried rice. This is exactly the result we want to see.
If your kimchi is too young, don’t worry. You can cheat the biology a little bit by adding a splash of rice vinegar or extra kimchi juice to the pan. It mimics that aged acidity.
The Vegan Verification Checklist
I’m hesitant to say definitively that all kimchi is vegan without checking the label. Traditional kimchi often uses salted shrimp, fish sauce, or anchovy extract to kickstart fermentation. It provides umami, but it’s obviously a no-go for plant-based diets.
When you’re shopping, flip that jar over. Look for “vegan” certification or scan the ingredients list for:
* Fish sauce
* Shrimp paste
* Anchovy extract
* Bonito flakes
If you find a brand that uses kelp (seaweed) or mushroom extract instead, grab it. That tracks with what I’ve seen in the best vegan ferments; they use those ingredients to replace the seafood umami. Better to err on the side of caution and double-check every time. To make this a more substantial meal, consider adding a side of savory braised tofu for extra plant-based protein.
Achieving the Perfect Texture (The Maillard Reaction)
You know that sound when wet food hits a cold pan? That sad, quiet sizzling? We don’t want that. We want a roar. We are looking for the Maillard reaction, which is just a fancy way of saying browning equals flavor.
Heat your pan (a wok is great, but a cast-iron skillet works too) until it’s properly hot. Add your oil, then the kimchi and vegetables. You want to hear an aggressive sizzle. This drives off excess moisture and concentrates the flavor. If the pan is too crowded, everything steams instead of frying. I learned this the hard way when I tried to double a batch in a small skillet it turned into a soggy mess.
The “Crispy Bottom” Trick: Once you’ve mixed the rice and sauce in, press the whole mixture down into the pan with the back of your spatula. Then, stop touching it. Seriously. Let it sit on medium-high heat for about 2-3 minutes. You’re creating a layer of scorched rice (called nurungji in Korean) that adds an incredible crunch. Just keep your nose alert for burning smells.
Balancing Sodium Without Losing Flavor
Let’s address the elephant in the room: sodium. Kimchi is salt-preserved cabbage. Soy sauce is liquid salt. Gochujang is salty paste. If you’re not careful, this dish can taste like the ocean had a grudge against you.
I recommend using low-sodium soy sauce or Tamari. Also, taste your kimchi before you start cooking. If it’s incredibly salty, rinse it quickly under cold water. I know, it sounds like heresy, but you’ll retain the fermented texture and some flavor while washing away excess surface brine. You can always add flavor back with aromatics like garlic and ginger, which add punch without the sodium spike.
Storage & Reheating (Safety First)
I’m a stickler for food safety. Leftover rice can be tricky because of Bacillus cereus bacteria. Just to be safe, get your leftovers into the fridge within two hours of cooking. Don’t let it sit out on the counter all night.
Reheating for Crunch
The Skillet Method (Preferred): Toss the leftovers back into a hot pan with a tiny drop of oil. Stir for 3-4 minutes. This wakes up the texture.
The Air Fryer Method: This is a game-changer. Put the rice in a heat-safe bowl or on foil in the air fryer at 350°F for about 5 minutes. It gets surprisingly crispy again.
The Microwave (Last Resort): If you must, sprinkle a few drops of water over the rice and cover it with a damp paper towel before zapping. This creates steam and prevents the rice from turning into hard little rocks.
Frequently Asked Questions
Ready to Ferment Your Dinner?
When you make this, you’ll love the flavors. It’s complex, comforting, and surprisingly quick. It’s one of those meals that makes you feel like a competent chef without requiring hours of prep. I sometimes wonder if I rely on it too much, but then I take that first bite of crispy, spicy rice, and I stop worrying.
I’d love to see how yours turns out. Did you get that perfect scorched bottom? Did you add any unusual vegetables? For more inspiration, check out my Pinterest boards where I save all my favorite fermentation-forward recipes. Go ahead, spice up your dinner tonight!
Reference: Original Source


