Easy Oven Baked Korean Bulgogi Steak
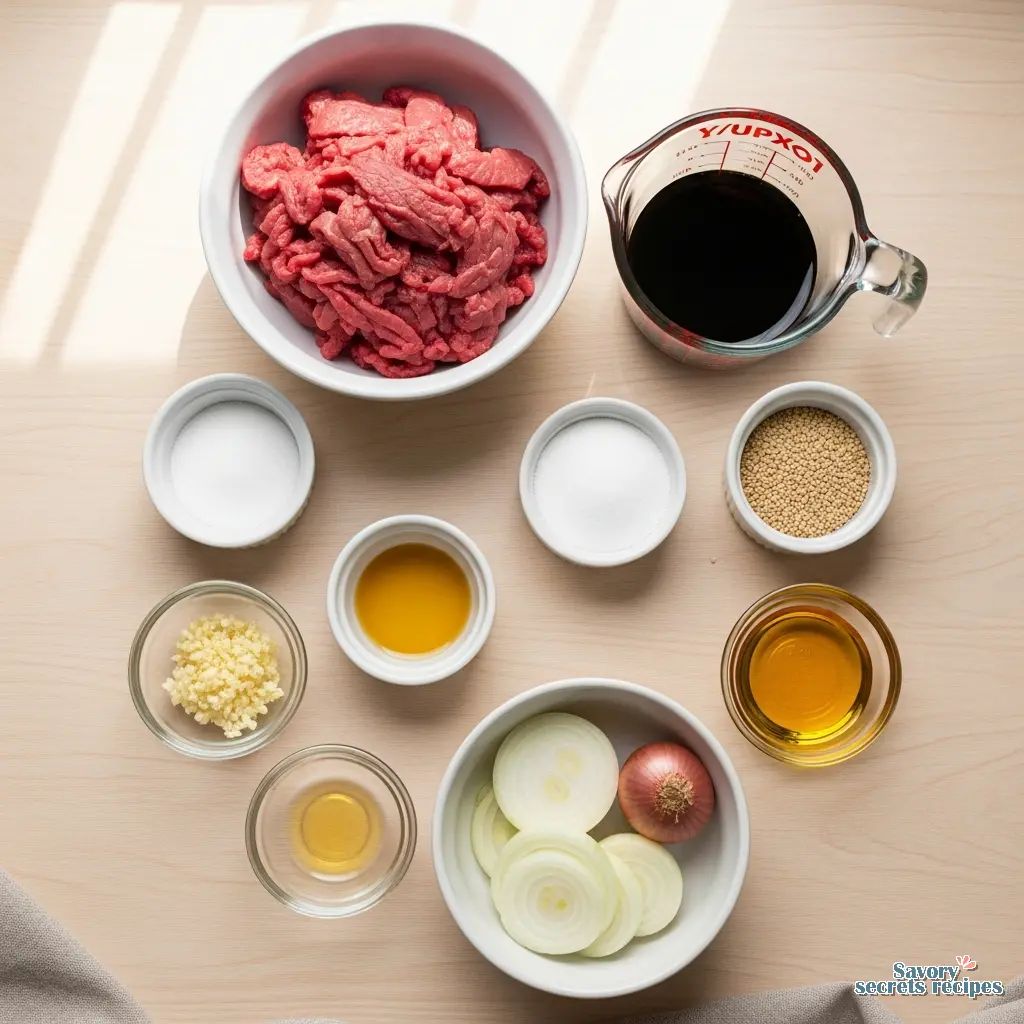
Ingredients
Method
- In a large bowl, stir together the soy sauce, sugar, sesame seeds, sesame oil, shallots, garlic, and mirin. Add the meat, and stir to coat. Cover and refrigerate for 12 to 24 hours.
- Heat a large skillet over medium heat. Fry the meat for 5 to 10 minutes, or until no longer pink. Serve with salad or fried rice.
Nutrition
Notes
Why This Method Works (Even Without a Grill)
I still remember the specific sound of my nani’s kitchen in Chandigarh. It wasn’t just the sputtering of mustard seeds. It was the rhythm of her hands moving, adjusting heat by feel rather than looking at a dial. She taught me that cooking is mostly about managing variables. When I first tried to make bulgogi in oven, I felt a little guilty. Like I was cheating on the traditional grill method. But then I looked at the science of it, and honestly, it made perfect sense.
We often think we need an open flame to get that signature char on Korean beef. But really, we’re just looking for the Maillard reaction. That’s the chemical reaction between amino acids and reducing sugars that gives browned food its distinctive flavor. You can absolutely achieve this in a standard home oven if you manipulate the surface area and heat source correctly. This technique is one of my favorite easy korean recipes for weeknights.
This recipe is my solution for when the craving hits on a Tuesday night in February. It’s for when you want that salty, sweet, umami-packed beef but don’t have the time to fire up a grill or deal with the smoke. By using a sheet pan and the broiler, we mimic the intense direct heat of a BBQ. The result is tender, caramelized beef that tastes like you worked much harder than you did.
The Science of Tenderizing: Pear vs. Soda
Let’s talk about texture. If you’ve ever had tough, chewy bulgogi, it’s heartbreaking. The traditional method uses grated Korean pear in the marinade. Why? Because pears contain an enzyme called calpain (and sometimes ficin depending on the variety) that breaks down the connective tissues in the meat. It’s basically pre-digesting the tough proteins for you.
However, finding a Korean pear in a standard grocery store can be hit or miss. I’ve stood in the produce aisle of my local Ralphs more times than I can count, looking for one and failing. That tracks with what I’ve seen in many American supermarkets.
This is where it gets interesting. You can substitute kiwi, pineapple, or even cola. But be careful. Pineapple contains bromelain, which is incredibly aggressive. Leave it too long, and your beef turns to mush. I learned this the hard way when I tried to marinade a skirt steak overnight with fresh pineapple juice. It had the texture of wet cardboard. Not my finest moment.
For this bulgogi in oven recipe, if you can’t find Asian pear, use a Bosc pear or a Fuji apple. They are gentler. If you’re in a real pinch, a splash of Coke works because the phosphoric acid helps denature the proteins, though the mechanism is different from the enzymatic action of fruit. I prefer the fruit method because it adds a natural sweetness that balances the soy sauce beautifully. Understanding the balance of flavors is key to perfecting an authentic bulgogi sauce recipe at home.
The Freezer Trick for Paper-Thin Slices
If there is one thing that will make or break your bulgogi in oven experience, it is the thickness of the meat. You want it paper-thin. I mean really thin. If it’s too thick, it steams instead of searing, and you end up with a grey, chewy stir-fry rather than crispy, caramelized goodness.
Here is the trick I use, and it works every single time: put your steak in the freezer for about 20 to 30 minutes before you slice it. You don’t want it frozen solid. You just want it firm enough that it doesn’t wiggle away from your knife. It makes slicing incredibly easy and precise.
I usually use ribeye or top sirloin for the best fat content, but skirt steak is a fantastic budget-friendly option. Just make sure you slice against the grain. I explain this to my daughter like this: imagine the meat is a bundle of rubber bands. If you cut across them, they snap apart easily. If you cut with them, you have to chew through the whole rubber band. Nobody wants that.
Sheet Pan vs. Skillet: Why the Oven Wins
Traditionally, you might cook this in a cast iron skillet. And that works. But here is why I prefer the sheet pan method for home cooks, especially on busy weeknights. When you use a skillet, unless you have a massive commercial burner, the pan cools down as soon as you add the meat. The meat releases liquid, the temperature drops, and suddenly your beef is boiling in its own juices.
By spreading the meat out in a single layer on a large baking sheet and blasting it in the oven, you maximize surface area. The hot air circulates around each piece. This evaporation is crucial for concentrating flavor.
Pro Tip: Do not overcrowd the pan. If you have too much meat, use two pans or cook in batches. I know, I know. It’s tempting to just dump it all on one tray to save on dishes. I’ve done it. And I regretted it. The meat steamed, turned grey, and lacked that signature BBQ flavor. Trust me on this one. If you’re looking for more protein variety, learning about the best korean chicken is a great next step.
Broil vs. Bake: Getting the Temperature Right
This is where the “oven” part of bulgogi in oven gets specific. You aren’t just baking this like a casserole. You want intense, direct heat.
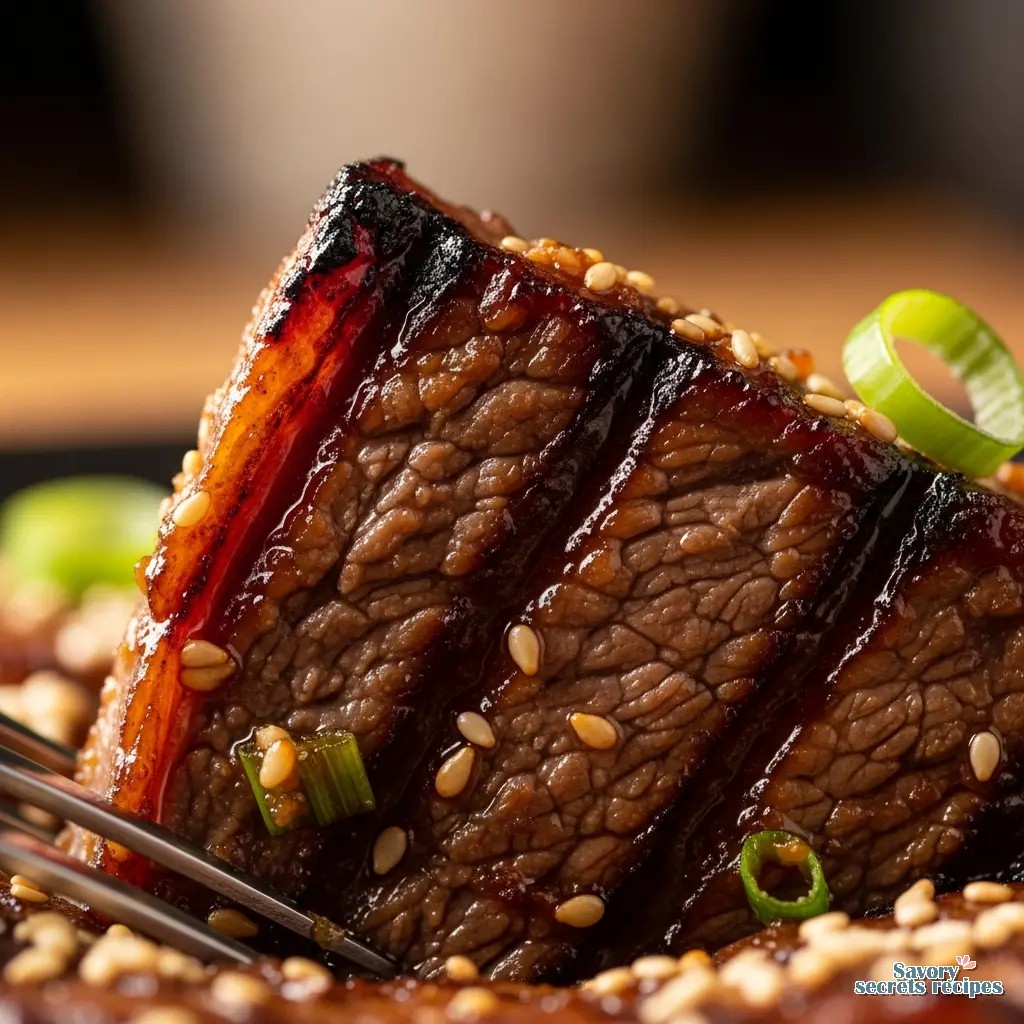
I recommend preheating your oven to 400°F (200°C) to get everything hot, but for the actual cooking, use the broiler (grill setting) for the last few minutes. This mimics the direct fire of a grill. Keep the rack about 6 inches from the heating element. Too close and the sugar in the marinade will burn before the meat cooks. Too far and you won’t get any browning.
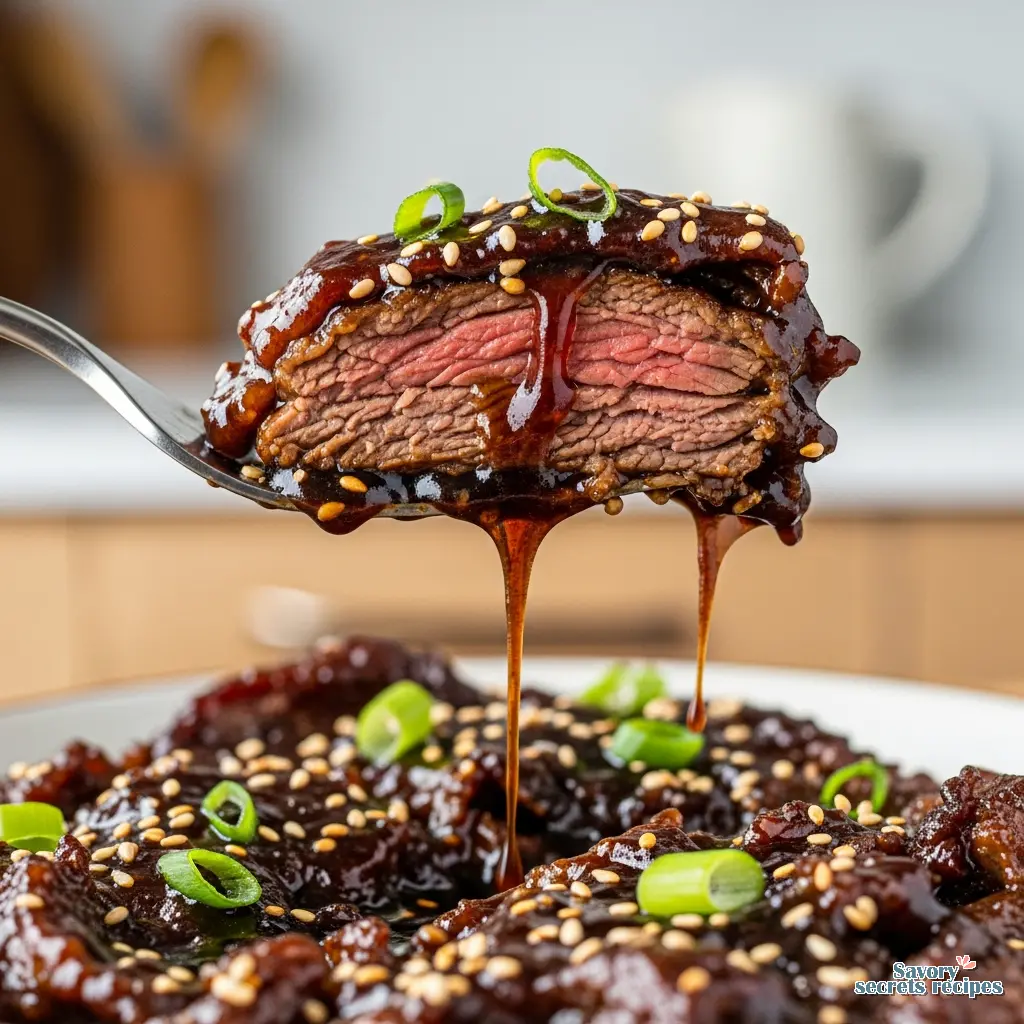
Watch it like a hawk. Sugar burns fast. I once walked away to check an email and came back to charcoal. The difference between “perfectly caramelized” and “ruined” is about 45 seconds. Stay in the kitchen. Smell the air. When it smells like toasted sesame and caramelized soy, it’s done.
Serving Suggestions and Storage
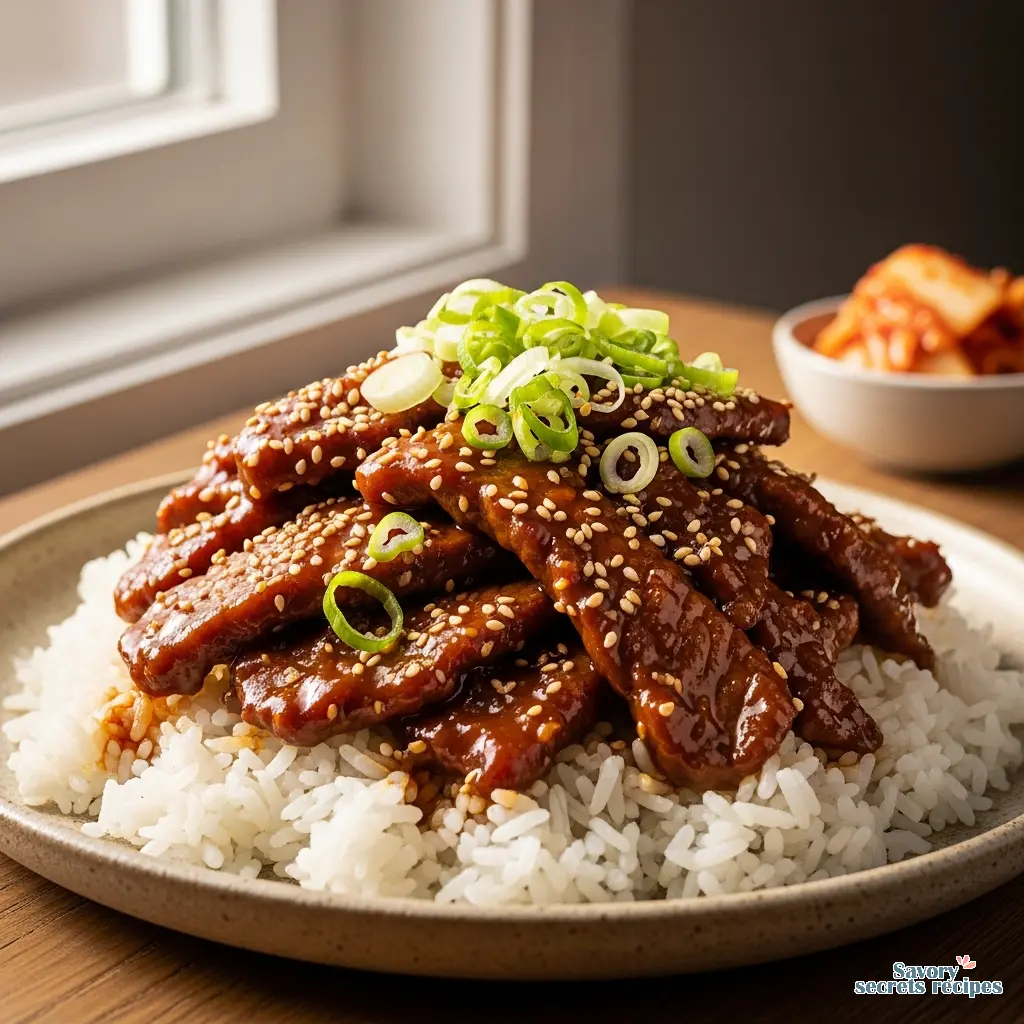
I usually serve this simply over steamed white rice. The rice acts as a neutral canvas for the intense salty-sweet flavor of the beef. If I’m feeling ambitious, or if my daughter is actually willing to eat vegetables that day, I’ll do lettuce wraps (ssambap). Get some red leaf lettuce or perilla leaves, a dab of ssamjang (a spicy soybean paste), and maybe some kimchi. If you enjoy spicy elements, consider pairing this with a recipe with gochujang for a complete meal.
Storage: This keeps surprisingly well. Store it in an airtight container in the fridge for up to 3 days. The flavors actually meld a bit more overnight. To reheat, don’t microwave it if you can help it. It makes the beef rubbery. Instead, toss it back in a hot skillet for a minute just to warm it through.
You can also freeze the marinated raw meat. I do this for meal prep. Put the meat and marinade in a freezer bag, squeeze out the air, and freeze for up to 2 months. When you want to eat, thaw it in the fridge overnight. It marinates while it thaws. Efficient, right? That appeals to the scientist in me.
Frequently Asked Questions
Final Thoughts
Making bulgogi in oven might not be the strictly traditional way, but it is the practical way for most of us living busy lives. It delivers that comforting, savory sweetness that defines Korean BBQ without needing a backyard grill. When you pull that tray out of the oven and the sauce is bubbling and the edges are crisp, you’ll know exactly what I mean. It’s science, yes, but it feels a lot like magic.
I’d love to see how yours turns out. For more inspiration, check out my Pinterest boards where I save all my favorite weeknight experiments. You’ve got this now go warm up your kitchen!
Reference: Original Source
Can I make bulgogi in oven ahead of time?
Yes, absolutely. In fact, marinating is the most important step. You can prep the meat and sauce and let it sit in the fridge for up to 24 hours. The enzymes in the pear need time to work their magic on the proteins anyway. It’s a great meal prep strategy.
What if I don’t have a cast iron grill pan?
No worries at all. A standard rimmed baking sheet is actually better for the oven method because it allows for more surface area. Just line it with foil for easy cleanup (the sugar in the marinade can be a pain to scrub off) and don’t overcrowd the meat.
What can I substitute for the pear in the marinade?
This is a common issue. If you can’t find Asian pear, a Bosc pear or Fuji apple works well. In a pinch, kiwi or pineapple work too, but use much less and marinate for a shorter time (only 30 mins) because their enzymes are very aggressive and can turn meat mushy.
Is bulgogi healthy for you?
It can be! It’s high in protein and iron. The marinade does have sugar and sodium, which is something to be mindful of. You can reduce the sugar or swap it for a lower-glycemic sweetener, and use low-sodium soy sauce without losing too much flavor.
How do I store leftover bulgogi in oven?
Store leftovers in an airtight container in the refrigerator for 3 to 4 days. To reheat, I recommend using a skillet over medium heat rather than the microwave to keep the texture right. You can also freeze cooked bulgogi for up to 2 months.