Crunchy Spicy Pickled Green Tomatoes Recipe
Ingredients
Method
- Combine water, vinegar, and cheesecloth-wrapped pickling spice in a large pot and bring to a boil. Reduce heat, stir in sugar and salt, and simmer for 30 minutes. Allow the mixture to cool to room temperature.
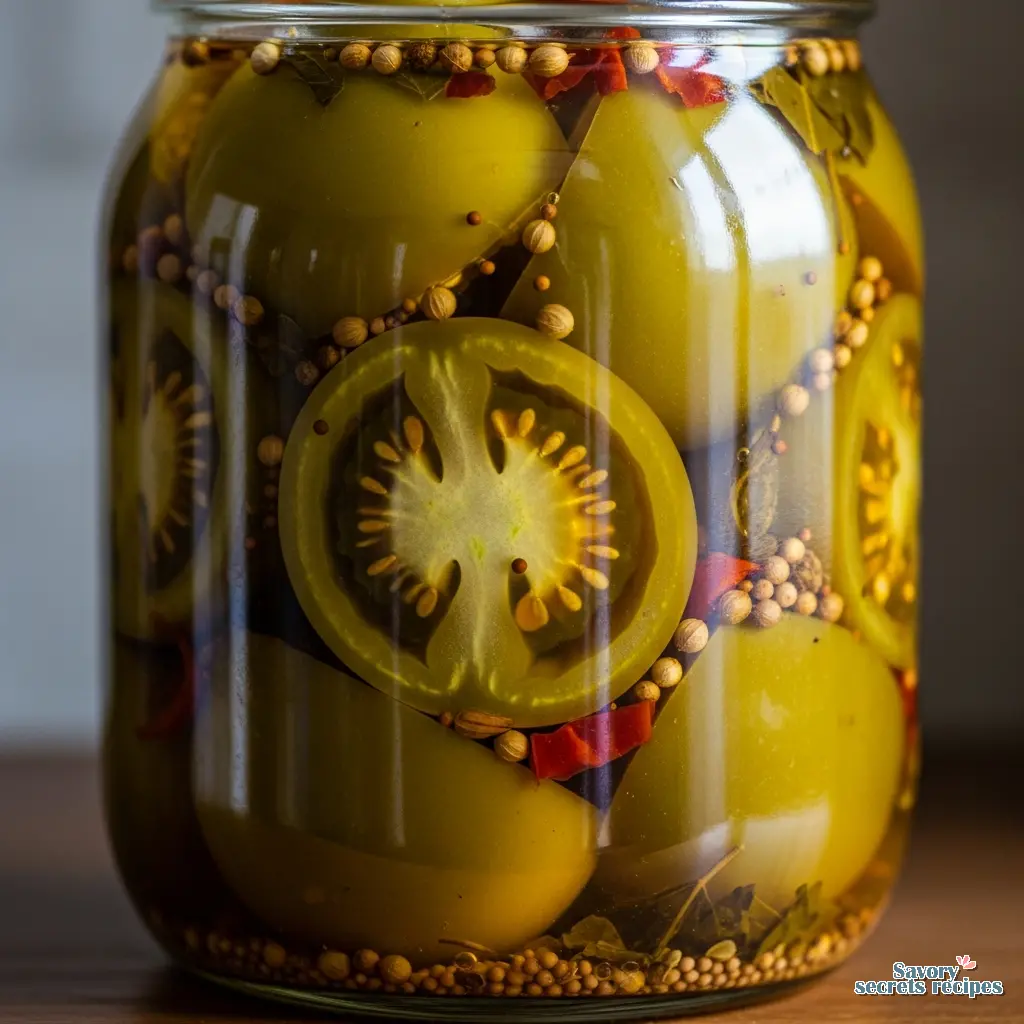
- Place red pepper, dill, dill seed, garlic, and cherry tree leaves into each quart jar. Pack the jars tightly with sliced tomatoes.
- Pour the cooled brine into each jar until full. Secure the lids tightly and invert the jars several times to distribute the seasonings.
- Refrigerate for three days before opening and consume within three months.
Nutrition
Notes
Turning Garden Loss Into Winter Gold
There is a specific kind of heartbreak that happens in late October or early November. You walk out to the garden, coffee in hand, and see the frost warning has turned into reality. The vines are black and withered. But underneath that canopy of dead leaves, you spot them. Dozens of rock-hard green tomatoes that never got the chance to turn red. Most people toss them on the compost pile. That’s a mistake.
I learned this from my Uncle Raymond back in Goldsboro. He hated waste more than he hated bad BBQ. “Green tomatoes aren’t unfinished,” he’d tell me while we sorted through the bushel baskets. “They’re just waiting for a different job.” He was right. That job is becoming hot pickled green tomatoes.
When you pickle a ripe red tomato, it turns into mush. It just falls apart. But a green tomato? It has the structure to stand up to a hot brine solution and hold its crunch. It’s acidic, firm, and acts like a sponge for heat. If you’ve been looking for a way to save your harvest and add some serious punch to your winter pantry, this is it. It’s not just a salvage operation. It’s the best pickle you’ll make all year.
The Science of the Crunch: Tannins and Firmness
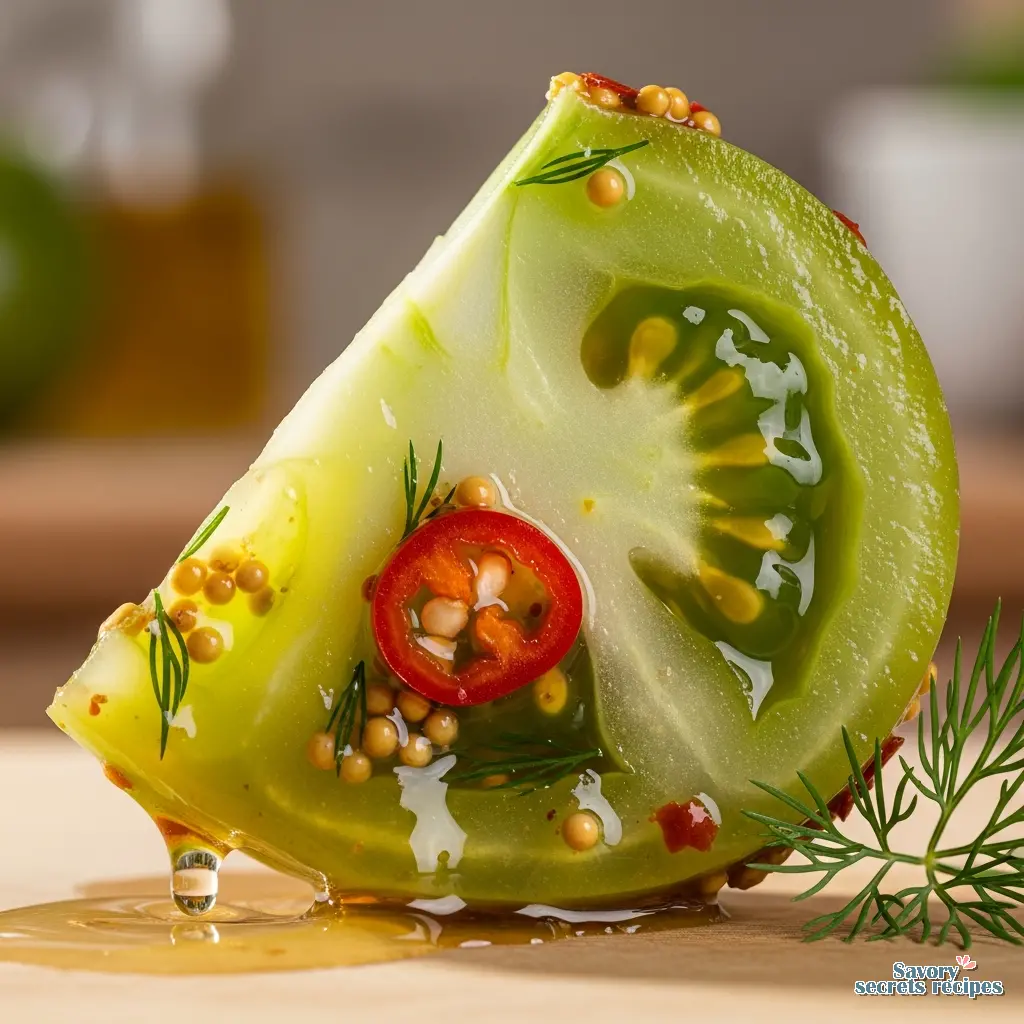
Let’s talk about the biggest fear people have with pickled tomatoes. Mushiness. There is nothing worse than biting into a pickle and having it disintegrate. Texture is truth. If the crunch isn’t there, the pickle failed. The secret to keeping that snap isn’t just in the tomato selection, though picking rock-hard ones is non-negotiable. The secret is tannins.
In this recipe, we use cherry tree leaves. It sounds like old folklore, but it checks out scientifically. The tannins in the leaves prevent the cell walls of the tomato from breaking down in the vinegar. If you can’t find cherry leaves, grape leaves work just as well. I’ve even used oak leaves in a pinch. It creates a stringent environment that locks in firmness.
Some folks use calcium chloride (often sold as Pickle Crisp), and that works too. But I prefer the leaf method. It feels more natural, and honestly, it’s how I was taught. If you skip this, you might get a decent flavor, but you won’t get that satisfying snap that makes these pickles worth eating.
Selecting Your Heat Source
The “hot” in hot pickled green tomatoes is subjective. I tend to like a heat that builds slowly rather than one that blows your palate out on the first bite. You want to taste the vinegar and the dill weed, not just fire.
For this recipe, crushed red pepper flakes provide a consistent background heat. But if you want to dial it up, fresh peppers are the way to go.
- Jalapeños: These give a grassy, fresh heat. Slice them into rings and leave the seeds in if you want more kick.
- Habanero peppers: These bring a fruity, intense heat. Be careful here. One habanero per jar is usually plenty.
- Serranos: A solid middle ground. Sharper than a jalapeño but not as aggressive as a habanero.
Remember that the heat will mellow slightly over time as it infuses into the vinegar, but it also permeates the tomatoes more thoroughly. What tastes mild on day one might surprise you on day fourteen. Let it ride.
Preparation and Hygiene: Respect the Process
I can’t stress this enough. Cleanliness is everything here. We aren’t just cooking dinner; we are preserving food. That means bacteria is the enemy. You need sterilized mason jars. I run mine through the dishwasher on the sanitize cycle right before I need them, so they are hot when I’m ready to fill them.
Wash your tomatoes thoroughly. I mean really scrub them. You don’t want any garden dirt making its way into your brine. Slice them into wedges or thick slices. I find wedges pack better into the jars, but slices look nicer on a sandwich. Your mileage may vary. If you have smaller or bruised fruit that won’t work for pickling, consider making a batch of green tomato sauce instead.
The Brine and The Pour
The brine is simple: distilled white vinegar, water, pickling salt, and sugar. Do not use table salt. Table salt has additives that will make your brine cloudy. You want that crystal clear look. Pickling salt is pure sodium chloride.
When you bring that vinegar mixture to a boil, it’s going to clear your sinuses. It smells sharp, acidic, and alive. That’s the smell of preservation. I love it. It reminds me of my mother’s kitchen in late summer. Add your spices mustard seeds, coriander seeds, peppercorns, and dill seed directly to the jars, not the brine pot. This ensures every jar gets an even distribution of flavor.
Pack the tomatoes tight. Then pack them tighter. They will shrink slightly as they cook in the jar, so you want to start with a very full jar. Leave the appropriate headspace (usually 1/2 inch) at the top. If you overfill, the jar won’t seal. If you underfill, you risk spoilage.
Water Bath vs. Refrigerator: Choose Your Path
You have two roads here. You can make refrigerator pickles, or you can process them in a water bath canning system for shelf stability.
If you are new to this, the refrigerator method is easiest. You pour the hot brine over the tomatoes, let them cool on the counter, and then stick them in the fridge. They are not shelf-stable. You have to keep them cold. But they stay incredibly crunchy this way.
If you want to store them in the pantry for a year, you need to process them. This involves boiling the filled, sealed jars in a water bath for about 10 to 15 minutes. This kills any remaining bacteria and creates a vacuum seal. You’ll hear that satisfying “ping” sound as the lids pop down while they cool. That sound is victory.
The Hardest Part: Waiting
Here is where people mess up. They open a jar the next day. Don’t do it. The flavor hasn’t penetrated the tomato yet. It will just taste like raw tomato and vinegar. You need to wait at least one week. Two weeks is better.
Nothing for it but to wait. Put the jars in the back of the fridge or the pantry and forget about them. When you finally crack that seal, the vinegar will have broken down the raw edge of the tomato, the garlic cloves will have mellowed, and the heat from the peppers will be evenly distributed. It’s worth the patience.
Common Mistakes & Troubleshooting
Troubleshooting Your Pickles
Mistake: The pickles are mushy.
Solution: You likely skipped the tannins (grape/cherry leaves) or used tomatoes that were starting to ripen. Only use rock-hard green tomatoes.
Mistake: The garlic turned blue.
Solution: This is a reaction between the enzymes in the garlic and the acid. It looks scary, but it’s harmless. You can eat it. Generally speaking, younger garlic does this less.
Mistake: The brine is cloudy.
Solution: Did you use table salt with iodine? That’s the culprit. Or, it could be hard water. If it’s hard water or salt, it’s safe. If it’s caused by spoilage, it will smell bad. Trust your nose.
Frequently Asked Questions
Serving Suggestions
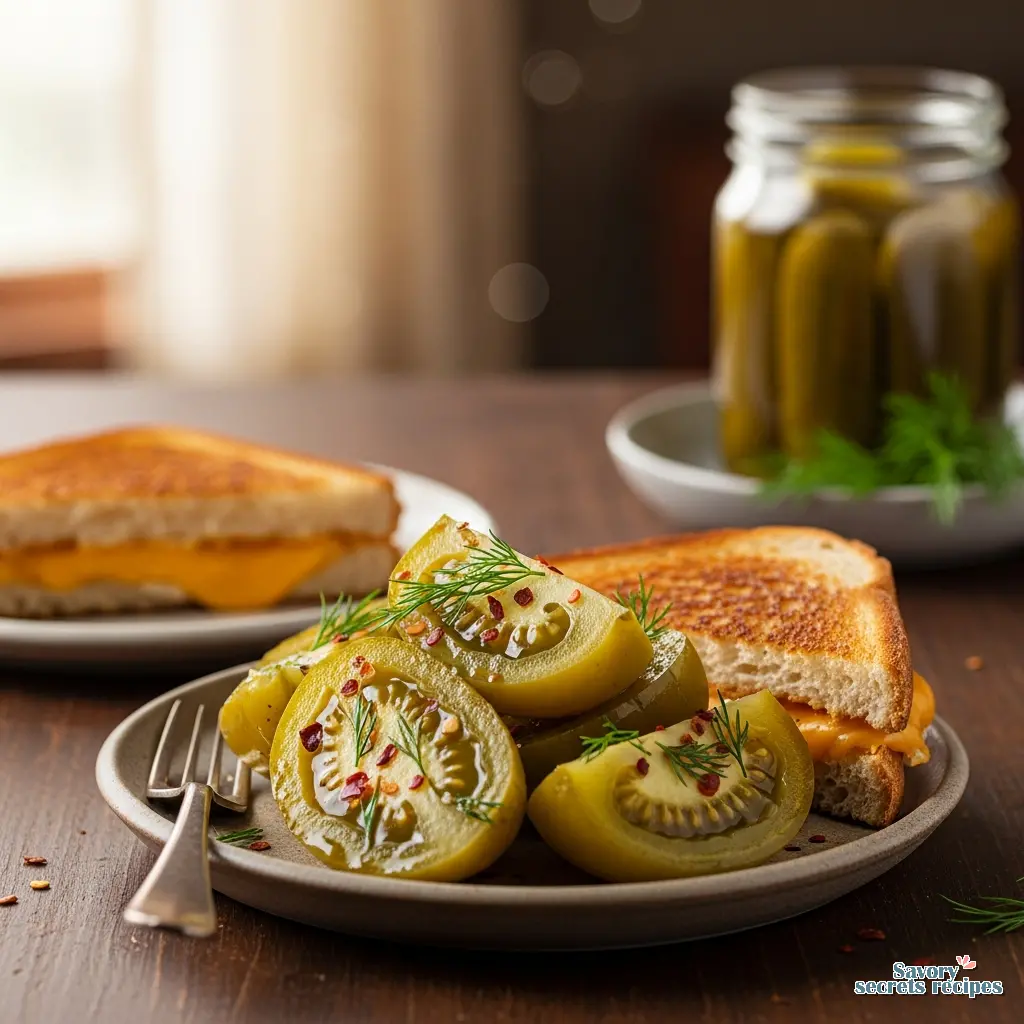
So you’ve waited your two weeks. Now what? These pickles are versatile. My favorite way to eat them is on a pulled pork sandwich. The acid cuts right through the fat of the pork, and the heat wakes everything up. That’s a classic combination in North Carolina. If you are hosting a dinner party, pairing these with a savory green tomato casserole creates a unique and cohesive menu.
They are also incredible on a burger, replacing your standard dill pickle. Or, chop them up and mix them into a potato salad for a spicy crunch. Honestly, I often just eat them straight out of the jar while standing in front of the fridge. That tracks for me.
Storage and Shelf Life
If you went the refrigerator route, these will keep for about two to three months. Always use a clean fork to fish them out. If you use your fingers or a dirty utensil, you introduce new bacteria that will spoil the batch faster.
If you water bath canned them properly and the lid sealed, they will last in a cool, dark pantry for up to a year. Once you open a jar, though, it goes straight to the fridge. I usually label my jars with the date. It helps me keep track of the inventory, not that they usually last that long in my house.
Conclusion
Making hot pickled green tomatoes is one of those weekend projects that makes you feel like you’ve really accomplished something. You took a waste product unripe tomatoes and turned them into a premium condiment. That’s good cooking. When you crack open that first jar in January, and you hear that crunch, you’ll know it was worth the effort.
If you try this recipe, I’d love to see how it turned out. Did you go heavy on the habaneros? Did you stick to the classic dill? For more inspiration on preserving your harvest, check out my Pinterest boards where I collect all sorts of canning ideas.
Reference: Original Source
What are the best types of tomatoes to use for hot pickled green tomatoes?
You want unripe, firm tomatoes. Cherry tomatoes work great if you prick them or slice them in half so the brine penetrates. Standard slicing tomatoes like Beefsteak or Early Girl are perfect when they are fully green and hard. Avoid anything that has started to blush red; they will get too soft.
Can I make this spicy pickled green tomatoes recipe without a water bath canner?
Absolutely. You can make refrigerator pickles. Follow all the instructions for packing and brining, but instead of boiling the jars, let them cool to room temperature and put them directly into the fridge. They aren’t shelf-stable, but they will last a few months in the cold.
How long do spicy pickled tomatoes need to sit before they are ready to eat?
I recommend waiting at least one full week. Seven days allows the vinegar to soak into the center of the tomato and the spices to marry with the brine. If you eat them too early, the flavor will be disjointed and the heat won’t be fully developed. Patience pays off.