


Spicy Guacamole Shrimp Appetizers for Party
Ingredients
Method
- Position an oven rack in the center and preheat to 400°F. In a large bowl, toss the shrimp with olive oil, chili powder, cumin, smoked paprika, and salt. Spread the shrimp in a single layer on a baking sheet and roast for 4 to 6 minutes until opaque and cooked through, taking care not to overcook. Set aside.
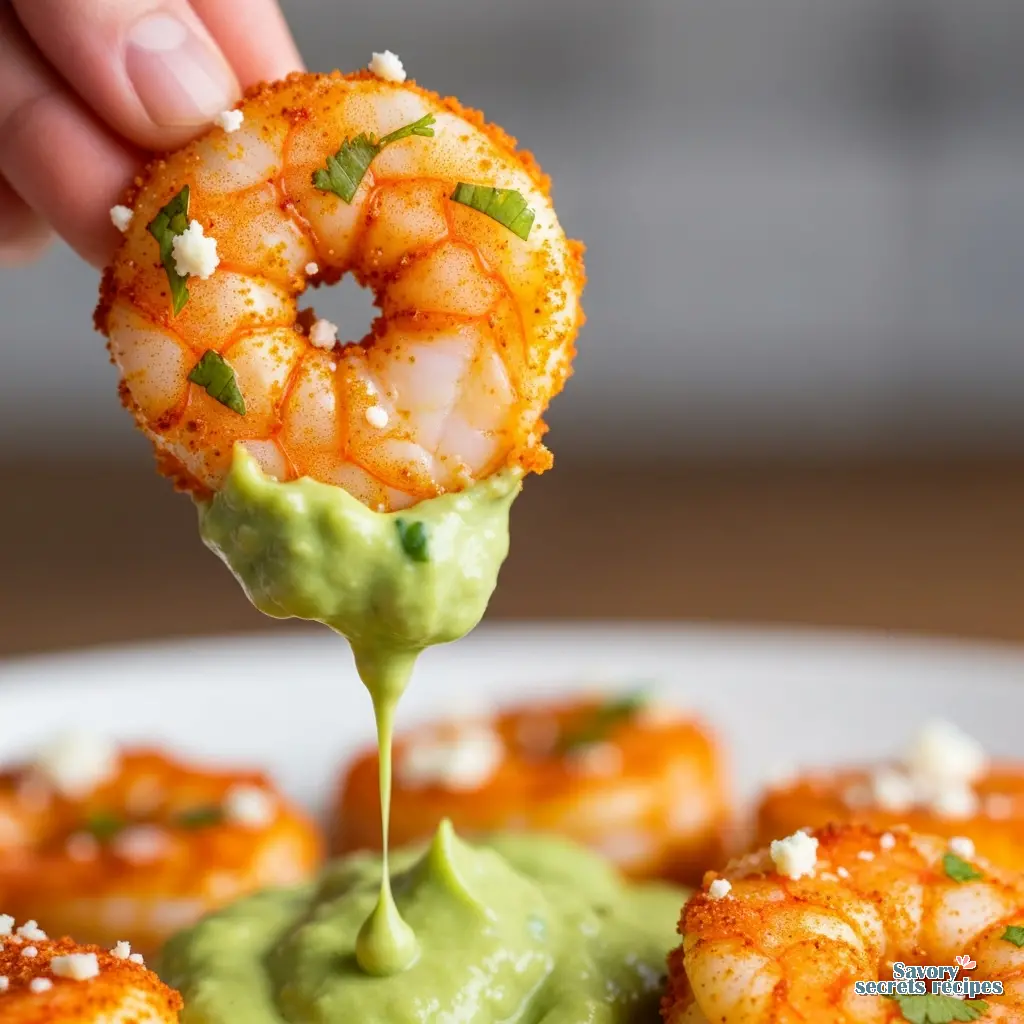
- Combine the guacamole, lime juice, and 1 tablespoon of cilantro in a small bowl.
- Assemble the bites by topping each tortilla chip with a spoonful of guacamole and a roasted shrimp. Garnish with additional cilantro and cheese, then serve at room temperature.
Nutrition
Notes
- Because the guacamole softens the chips as the bites sit, I recommend assembling the bites immediately before serving.
- If you’d like to prep ahead, you can roast the shrimp a few hours in advance. Let come to room temperature before topping the chips. The guacamole can also be stirred with the cilantro and lime juice a few hours in advance. Store it in the refrigerator in an airtight container with plastic wrap pressed on the guac’s surface to deter browning.
Why This Recipe is the Ultimate Hosting Hack
I remember my grandmother Elaine arranging green beans on a white plate, turning it slightly, moving one bean just a fraction of an inch. I was maybe seven years old. I asked her why she was doing that, and she looked at me and said, “So your eye knows where to land.” I think about that every single time I style a shoot. And honestly? I think about it when I’m frantic in my own kitchen, trying to get food on the table before guests walk through the door. Hosting is stressful. I know the feeling of staring at the clock, realizing you have fifteen minutes, and your hair isn’t done and the table looks empty. That is exactly why I rely on the **best shrimp appetizers**. They are the ultimate visual cheat code. Shrimp has this incredible natural color gradient. It goes from translucent to opaque white with these brilliant pops of coral and red. It does the styling work for you. You don’t need to be a professional food stylist to make a platter of chilled or roasted shrimp look like a magazine cover. It just happens. Plus, let’s be real. There is a “wow” factor with seafood. It feels premium. It feels like you put in way more effort than you actually did. When you set this down on the table, watch how fast it disappears. It’s a clean read visually, and the flavor payoff is huge for very little active time.The Buying Guide: Getting a “Clean Read” on Quality
The first step to the **best shrimp appetizers** happens way before you turn on the stove. It happens at the grocery store. I used to be intimidated by the seafood counter. I’d stand there wondering if I should buy the fresh ones on the ice or the bag in the freezer. Here is the truth I learned from a chef friend: unless you live on the coast and see the boats coming in, the “fresh” shrimp in the display case were likely frozen on the boat and thawed at the store. So, I almost always buy frozen. It gives me control over the thawing process. **Understanding the Numbers** You’ll see numbers like 16/20 or 21/25 on the bags. This isn’t a secret code. It just means how many shrimp make up a pound. * **16/20 (Jumbo):** These are your showstoppers. Use these for cocktail styling where the shrimp is the hero. * **21/25 (Large):** Perfect for two-bite appetizers or skewers. * **31/40 (Medium):** Better for dips or chopped salads. For an impressive appetizer spread, I usually go with 16/20 or U15 (under 15 per pound) if I want to feel fancy. They have a better presence on the plate. It prevents the platter from looking “muddy” or cluttered with too many small pieces.Prep and Safety: The “Two-Hour Rule”
I’m not totally sure, but I think people get nervous about seafood because of safety. It’s valid. Nobody wants to be the host who made everyone sick. But if you follow the two-hour rule, you are golden. Basically, don’t leave shrimp out at room temperature for more than two hours. If it’s a hot day in Los Angeles (or wherever you are), cut that down to one hour. **Thawing the Right Way** Please, I beg you, do not microwave frozen shrimp to thaw them. It ruins the texture. It makes them rubbery and tough. 1. **The Patient Method:** Put the frozen bag in a bowl in the fridge overnight. This is the best way to maintain that snap. 2. **The “I Forgot” Method:** We’ve all been there. Place the frozen shrimp in a colander and run cold (never warm) water over them for about 15 minutes. Move them around with your hand so they thaw evenly. **The Most Important Step: Patting Dry** This is the step most home cooks skip. Once your shrimp are thawed and rinsed, you must pat them completely dry with paper towels. If you don’t, they won’t sear or roast; they will steam in their own juices. Steamed shrimp are fine, but they look pale and sad. We want vibrant color. Dry surface equals better color.Visual Doneness: The ‘C’ vs ‘O’ Shape
I learned to style food by watching a stylist named Chen work with tweezers for hours. But you don’t need tweezers to know when shrimp is done. You just need to look at the shape. This is the most reliable visual cue I know. * **The ‘C’ Shape:** When the shrimp curls into a loose ‘C’ shape, it is **Cooked**. It will be tender, juicy, and have that perfect snap when you bite into it. That’s the one. Pull it off the heat immediately. * **The ‘O’ Shape:** If the shrimp curls tight into a closed circle or ‘O’ shape, it is **Overcooked**. It will be rubbery and tough. It happens fast. Usually 2 to 3 minutes per side is all it takes. I usually pull back a bit and take them off the heat the second I see that ‘C’ form, because they will continue to cook slightly from the residual heat.
Flavor Layers and Dipping Sauces
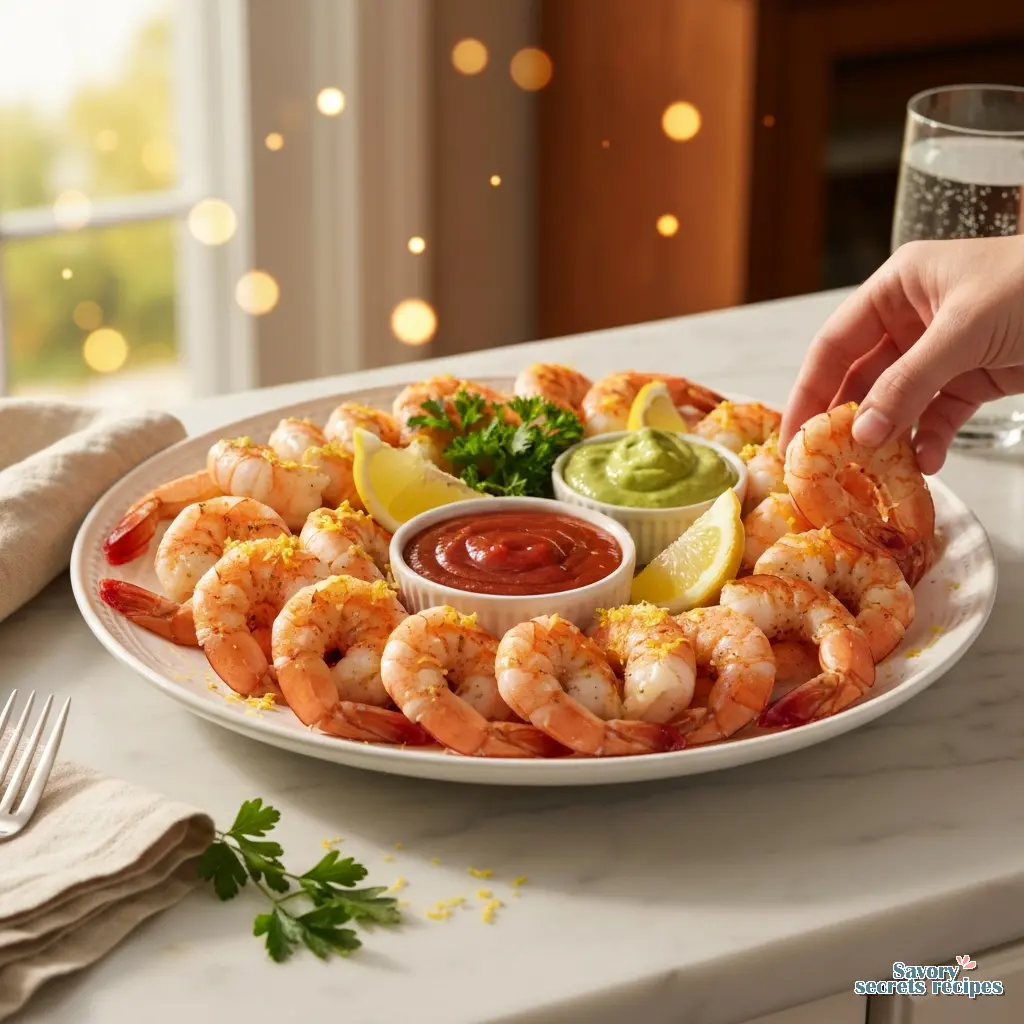
My grandmother used to say, “Build in layers.” She meant flavors, but visually it works too. **Best shrimp appetizers** aren’t just about the protein; they are about the vehicle you dip them in. While a classic cocktail sauce is great, it can look a bit dark and heavy on a plate. I like to offer contrast. * **The Red:** A zesty cocktail sauce with extra horseradish (I add a squeeze of lemon to brighten the color). * **The White:** A garlic aioli or a remoulade. This pops against the pink shrimp. * **The Green:** A chimichurri or an avocado-lime crema. **The Host’s Secret** Here is a trick I use on set that works in real life. Zest a lemon over the entire platter right before you walk out of the kitchen. The oils from the zest hit the warm (or cold) shrimp and release this incredible aroma. It smells fresh, it smells expensive, and those little yellow flecks look beautiful against the pink meat. It adds that “perfect contrast” I’m always looking for.Plating: The Ice Bowl Method
If you are serving cold shrimp, you have to keep them cold. Nothing is worse than lukewarm seafood. But putting shrimp directly on melting ice gets messy. They get waterlogged and lose their flavor. I use the double-bowl method. 1. Fill a large bowl with crushed ice. 2. Nestle a smaller bowl inside the ice. 3. Fill the smaller bowl with your shrimp. This keeps them chilled without them swimming in water. It looks deliberate and styled. If you are doing a platter, ensure the platter itself is chilled in the fridge for an hour before arranging the food.Tail-On vs. Tail-Off
This is a common debate. For appetizers, I almost always leave the tails on. It gives your guests a natural “handle” to hold the shrimp while dipping. It keeps fingers cleaner. Visually, the tail adds length and elegance to the shape. If you cut the tail off, the shrimp can look like a little nugget, which isn’t the vibe we are going for here.Common Mistakes & Fixes
Troubleshooting Your Shrimp
Mistake: The shrimp are rubbery.
Solution: They were cooked too long. Remember the ‘C’ shape. Next time, pull them off the heat 30 seconds sooner.
Mistake: The shrimp taste watery.
Solution: You probably didn’t pat them dry enough, or they sat in melting ice. Pat them dry aggressively before seasoning.
Mistake: The appetizers are soggy.
Solution: If you are serving shrimp on a cracker or chip, assemble them at the very last second. Moisture is the enemy of crunch. For those who prefer a crunchier texture, learning how to make crispy shrimp with cornstarch can provide that desired bite.
Frequently Asked Questions
Storage and Serving
If you somehow have leftovers (which, honestly, rarely happens in my house), storage is simple. Place the leftover **best shrimp appetizers** in an airtight container. They will last 1 to 2 days in the coldest part of your refrigerator. For reheating, go gentle. I usually don’t microwave them. Instead, I’ll toss them in a warm skillet for just a minute to take the chill off, or chop them up cold and toss them into a salad the next day. It’s a great lunch hack. When you’re ready to serve, remember the light. If you can, place your platter near a window or under warm light. It makes the colors pop. And don’t be afraid to rearrange the platter halfway through the party. Consolidate the stragglers so it always looks full and inviting. I hope this helps you navigate the holiday season or just your next Tuesday night dinner. Hosting doesn’t have to be perfect, but with these tips, it’ll certainly look like it is. For more inspiration on how to style your table, check out my Pinterest boards where I collect all my favorite color palettes. You’ve got this.Reference: Original Source
Can I use frozen shrimp for appetizers?
Absolutely. In fact, I prefer it. Frozen shrimp are often flash-frozen immediately after catch, meaning they are fresher than the “fresh” ones sitting in the display case for days. Just make sure you thaw them slowly in the fridge for the best texture.
What are the best sauces for shrimp appetizers?
I love contrast. A classic spicy cocktail sauce is standard, but try a creamy Remoulade or a green avocado-lime crema. The different colors look incredible on the platter, and it gives guests options between spicy, tangy, and rich flavors.
Are there make-ahead shrimp appetizers?
Yes! Chilled shrimp cocktail is the ultimate make-ahead dish. You can poach the shrimp up to 24 hours in advance. Store them in the coldest part of your fridge. Just don’t sauce them until you are ready to serve so they stay firm.
What is Marie Rose Sauce?
It’s basically a fancy British fry sauce, often called “fancy sauce” in my house. It’s usually a mix of mayonnaise, ketchup, a splash of Worcestershire, and sometimes brandy (though I use lemon juice instead). It’s creamy, tangy, and pink perfect for dipping.
How to Choose the Best Cocktail Shrimp?
Go for size. Look for “Jumbo” (16/20 count) or “Colossal” (U15). Smaller shrimp can look messy and are harder to dip. You want something substantial that holds its shape and looks impressive on the rim of a glass or platter.
Do I Need to Serve Shrimp over Ice?
If they are cold appetizers, yes. Safety first! But don’t put them directly on the ice or they get soggy. Use the double-bowl method: ice in the bottom bowl, shrimp in the top bowl. It keeps them crisp and safe for hours.
What Can I do with Leftover Sriracha Mayonnaise?
Don’t toss it! It’s liquid gold. Use it as a spread on turkey sandwiches, drizzle it over roasted broccoli, or use it as a dip for sweet potato fries. It usually keeps for about a week in the fridge.


