


Why Country Fried Shrimp Requires Precision (Not Luck)
I still remember the first time I tried to fry shrimp without a plan. It was a Tuesday, I was twenty-two, and I ended up with a pan full of naked, rubbery seafood and a separate pile of oily, floating batter. It was a design failure. The coating didn’t have the structural integrity to hold on, and honestly, I didn’t understand the physics of what I was asking the flour to do. It was a mess.
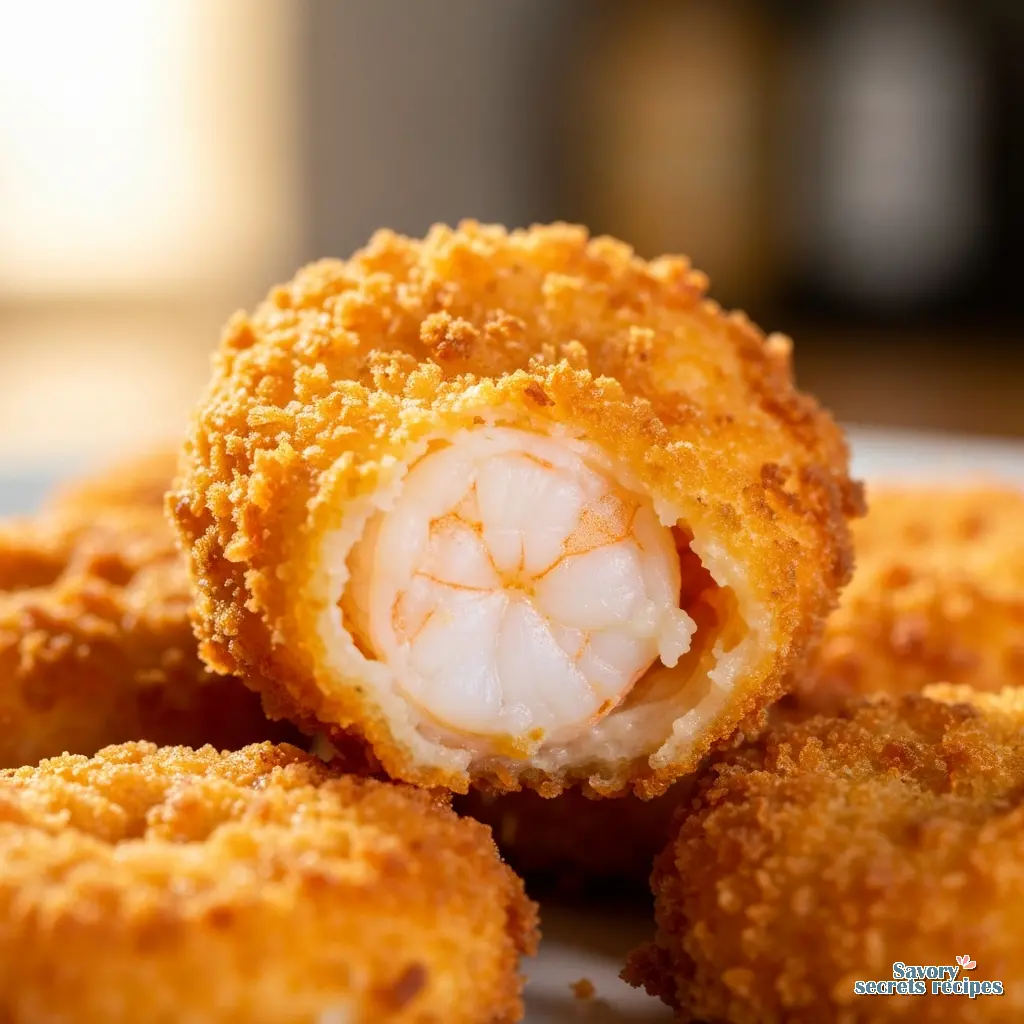
My Opa Klaus used to say that a dull knife is more dangerous than a sharp one because it behaves unpredictably. The same logic applies here. Good country fried shrimp isn’t about luck or some magical Southern touch; it’s about controlling variables. It’s about temperature management, moisture control, and the mechanical bond between the protein and the dredge. When you get the process right, the result is a tool that does exactly what it’s supposed to: deliver a shattering crunch followed by tender, sweet meat. That tracks with everything I know about good engineering.
If you’ve been looking for that specific “seafood shack” texture where the breading actually stays put, this is the method. We aren’t just tossing things in flour. We are building a casing that protects the shrimp while it cooks. It takes about 15 minutes of active work, but the results are consistent. In my testing, this flour-based approach beats cornmeal-heavy batters for that authentic “country” style every time.
Crispy Southern Fried Shrimp Recipe
Ingredients
Method
- Combine the milk, 1/2 tsp salt, 1 tsp oregano, 1 tsp paprika, 1 tsp granulated garlic, and shrimp in a large bowl and let marinate for 10 minutes.
- Season the all-purpose flour with the remaining salt, paprika, oregano, granulated garlic, and black pepper.
- Remove the shrimp from the milk mixture and dredge thoroughly in the seasoned flour until completely coated.
- Fry the shrimp in 375°F oil for 3 to 4 minutes or until crispy.
- Remove the shrimp from the oil and transfer to a paper-towel-lined plate to drain.
- Serve immediately.
Nutrition
Notes
The Physics of Adhesion: Why Batter Falls Off
Let’s address the most common failure point immediately. You bite into a piece of fried shrimp, and the entire coating slides off like a sleeve. In practice, this happens because of moisture. Shrimp are naturally wet, and water is the enemy of hot oil. If you dredge a wet shrimp directly into flour, you create a barrier of steam the second it hits the heat, which pushes the coating away from the meat.
To fix this, we need a dry interface. I always start by patting the deveined shrimp thoroughly dry with paper towels. I mean really dry. Then, we use a three-stage dredging station. The first dip into plain flour creates a primer layer think of it like sanding wood before painting. It gives the wet batter something to grip. If you skip this, your crispy coating won’t last five seconds.
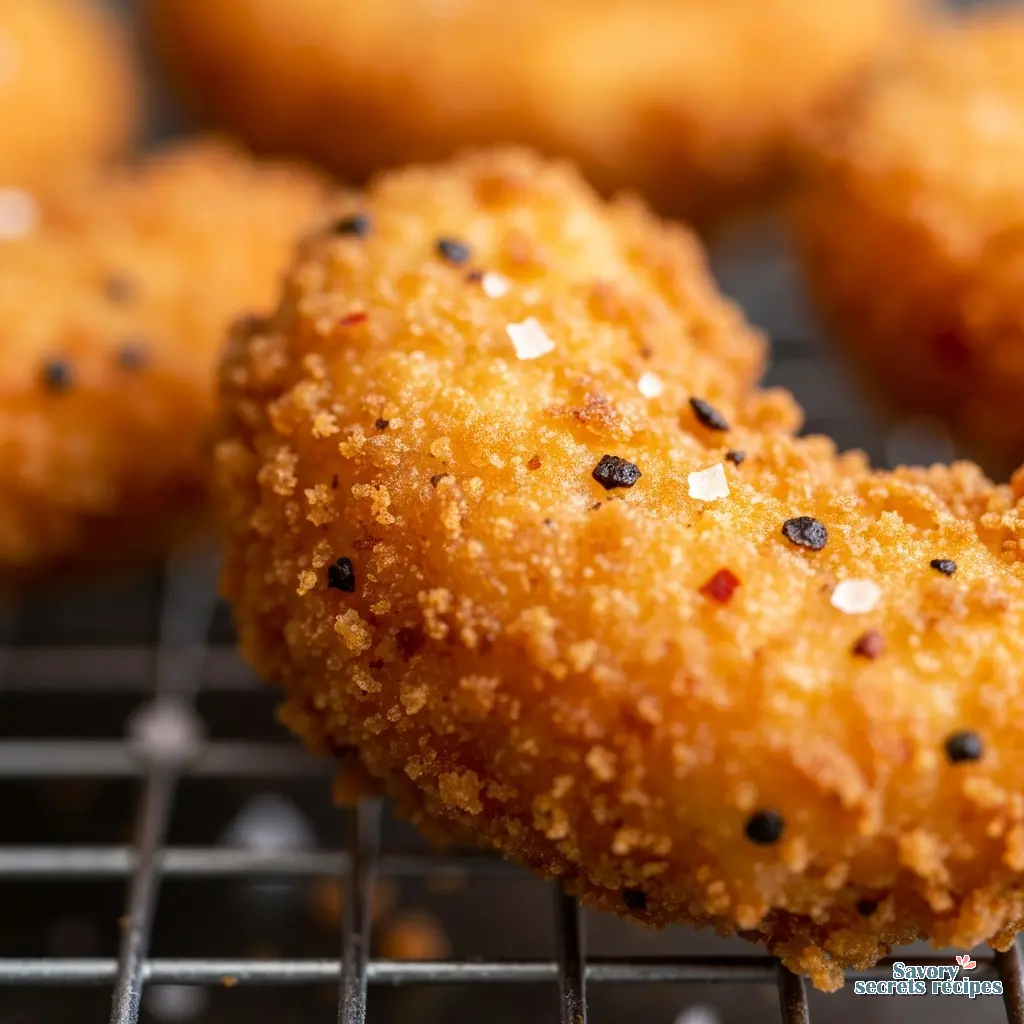
Another variable worth noting is the “tackiness” window. After you’ve breaded the shrimp, let them sit on a wire cooling rack for at least 10 to 15 minutes. This allows the gluten in the flour to hydrate and the coating to set. It essentially glues the breading to the protein. If you rush this step, you’re just asking for separation.
Tool Selection and Oil Management
My grandfather Klaus taught me that you can’t force a tool to do a job it wasn’t designed for. When it comes to deep fry cooking, your vessel matters. A heavy cast iron skillet or a Dutch oven is superior to a thin aluminum pot because cast iron holds heat energy. When you drop cold shrimp into oil, the temperature drops. Cast iron has enough thermal mass to recover quickly, keeping that temperature in the sweet spot.
Speaking of temperature, don’t guess. I’ve tested this enough to know that “shimmering” isn’t a measurement. Use an oil thermometer. You need to maintain a range between 350°F and 375°F. If you drop below 350°F, the breading acts like a sponge and soaks up grease. If you go over 375°F, the outside burns before the inside cooks. It’s simple thermodynamics.
For the oil itself, I prefer peanut oil. It has a high smoke point and a neutral flavor profile that doesn’t fight with the shrimp. If allergies are a concern, canola or vegetable oil works, but peanut oil performs best in my experience. It just behaves better under sustained heat. While deep frying is a treat, I often balance my weekly menu with a lighter shrimp and veggies recipe.
The Dredging Workflow
Efficiency in the kitchen is about setting up your workspace logically. I set up my station left to right (or right to left, depending on your dominant hand) to minimize the mess. You want three distinct zones.
Zone one is your dry flour mix. I season this aggressively. Seasoned flour needs more salt than you think because a lot of it stays in the bowl. I add garlic powder, paprika, and a decent hit of cayenne pepper for that background heat. Zone two is your wet mix. A buttermilk soak is traditional for a reason the acidity tenderizes slightly, and the thickness holds the flour. If you don’t have buttermilk, milk with a squeeze of lemon juice works in a pinch.
Zone three is the final dredge. I like to press the shrimp into the flour here, ensuring every crevice is covered. The goal is a dry, dusty surface before it hits the oil. If it looks wet, dip it again. It’s messy, sure. You’ll get “club hand” if you don’t use one hand for wet and one for dry. But clean as you go or regret it later. This method also works perfectly if you are preparing shrimp hors d oeuvres for a party.
Visual and Auditory Doneness Indicators
Cooking country fried shrimp is a sensory process. You can’t just set a timer and walk away. When the shrimp first hit the oil, the sound should be an aggressive, violent sizzle. That’s the sound of water vapor escaping rapidly. As they cook, that sound will change.
You’re looking for a specific shade of golden brown not pale beige, but a deep, rich amber. The shrimp will curl into a “C” shape. If they curl into a tight “O”, you’ve likely overcooked them. In my testing, standard medium-large shrimp take about 2 to 3 minutes tops. The sizzling will quiet down slightly as the moisture reduces. That’s your cue. Trust the sound.
It’s worth noting that Gulf shrimp or wild-caught varieties often have a better snap than farm-raised, but use what you can find. Just make sure they are thawed completely if you’re using frozen.
Troubleshooting Common Failures
Even with the best tools, things can go sideways. Here is what usually goes wrong and how to correct it.
Mistake Analysis & Correction
Mistake: The coating is soggy and oily.
Solution: Your oil temperature dropped too low. This happens if you crowd the pan. Fry in small batches to let the oil recover.
Mistake: The shrimp is rubbery.
Solution: You overcooked it. Shrimp cook incredibly fast. Pull them the second the crust is golden. Residual heat will finish the job. Note that this frying technique requires raw shrimp; for frozen pre-processed options, you should look for already cooked shrimp recipes instead.
Mistake: The breading lacks flavor.
Solution: You under-seasoned the flour. The flour is the only chance you have to introduce flavor to the crust. Be generous with the salt and spices.
Dipping Sauces and Serving
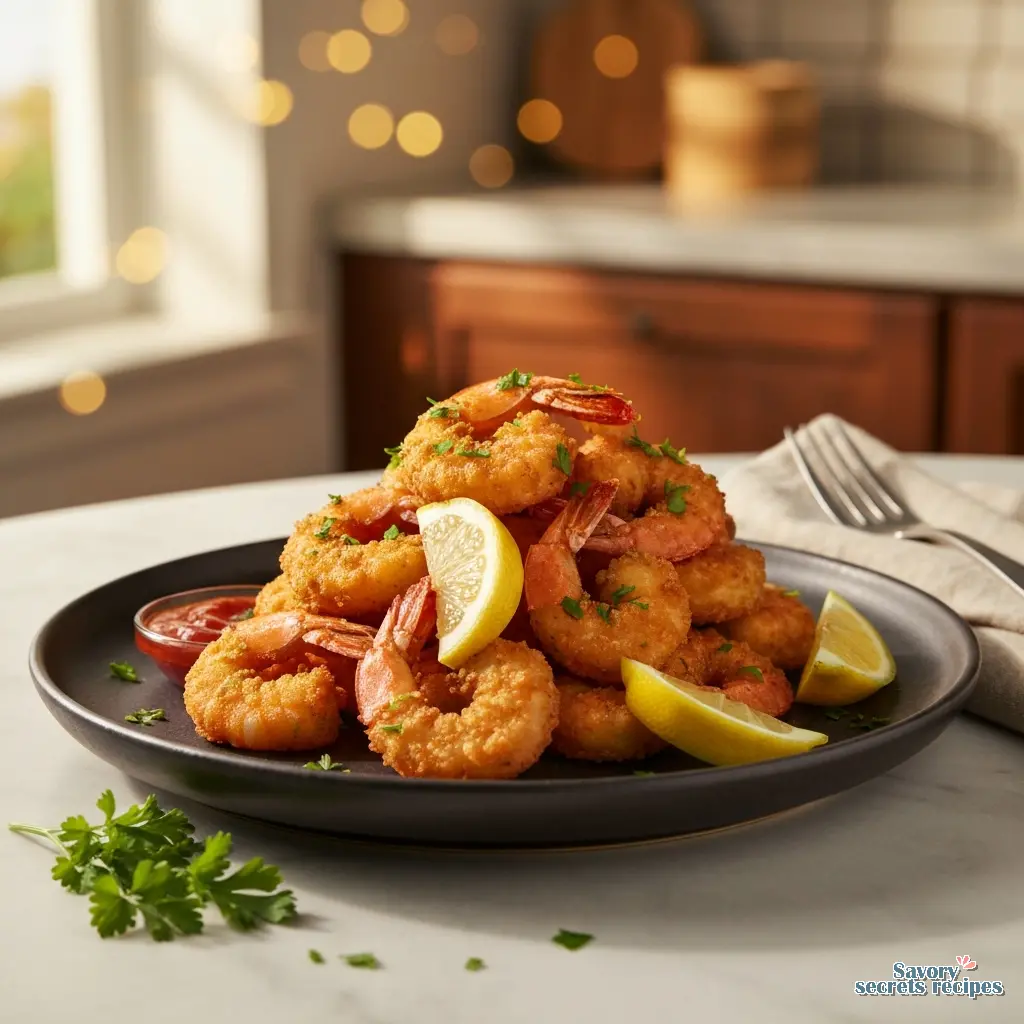
A good tool needs the right accessories. Country fried shrimp needs an acid component to cut through the richness of the fried batter. Cocktail sauce is the standard, and I prefer it with extra horseradish for bite. A remoulade is also an excellent choice if you want to lean into the New Orleans vibe. This recipe is one of my favorite fried shrimp meal ideas for busy weeknights.
Always serve with lemon wedges. A fresh squeeze of citric acid brightens the entire flavor profile. It’s a small detail, but it makes a measurable difference in the eating experience. I usually plate these on a platter for the family, and I’ve noticed they disappear before I even sit down. For a different flavor profile, you can also explore cheesy shrimp pairings.
Storage, Reheating, and Safety
If you have leftovers which is rare in my house storage matters. Don’t just throw them in a plastic bag; they’ll steam and get soggy. Store them in an airtight container with a paper towel at the bottom to absorb excess moisture. They’ll keep for 3 days.
For reheating, do not use the microwave. It destroys the texture we worked so hard to create. An air fryer is the best tool here. Set it to 350°F for about 3 to 4 minutes. It revives the crunch almost perfectly. An oven works too, but it takes longer.
Finally, a note on oil disposal. I see people pouring hot oil down the sink, and it drives me crazy. That’s a plumbing disaster waiting to happen. Let the oil cool completely. I mean completely. Then funnel it back into its original container or a disposable jar and throw it in the trash. It’s the only responsible way to handle it.
Frequently Asked Questions
Final Thoughts
There is a real satisfaction in mastering a technique like this. It’s not just about dinner; it’s about understanding how your ingredients interact. When you bring this platter to the table, and you hear that first crunch, you’ll know the prep work was worth it. It’s a solid, reliable recipe that delivers every time.
For more inspiration on organizing your kitchen or finding the right tools for the job, check out my Pinterest boards. I’ve collected quite a few ideas there.
Reference: Original Source
Can I use frozen shrimp for this recipe?
Absolutely. In fact, most “fresh” shrimp at the counter were previously frozen. Just ensure you thaw them completely under cold water and dry them thoroughly. If they are still frozen in the middle, they will lower the oil temp and cook unevenly.
What is the best oil for country fried shrimp?
I prefer peanut oil for its high smoke point and neutral flavor. It handles the 375°F heat without breaking down. If you have an allergy, canola or vegetable oil are solid alternatives that perform well in deep frying applications.
Why is my breading falling off the shrimp?
This is usually a moisture issue. You likely didn’t dry the shrimp enough before the first flour dredge. Also, make sure you let the breaded shrimp rest for 10 minutes before frying. This “tackiness” phase is critical for adhesion.
How do I keep the shrimp crispy after frying?
Don’t pile them on a plate immediately. Place them on a wire cooling rack set over a baking sheet. This allows air to circulate underneath, preventing steam from turning the bottom of the crust soggy. It makes a huge difference.
Can I make these in an air fryer?
You can, but the texture will be different. For an air fryer, spray the breaded shrimp generously with oil spray and cook at 400°F for about 5 minutes, flipping halfway. It won’t be quite as craggy as deep-fried, but it’s a decent alternative.
Should I soak shrimp in milk before frying?
Yes, or buttermilk. The liquid helps the flour adhere, and the slight acidity in buttermilk can help tenderize the meat. It acts as the glue between your dry flour layers. Don’t skip the wet step.
How long does it take to fry shrimp?
It’s very fast. Usually 2 to 3 minutes at 350°F is all you need for medium-large shrimp. Watch for a golden brown color and a “C” shape. If they curl tight, they are overdone. Trust your eyes and the timer.


4 Responses
The flavor was spot on, but I’m curious about the oil temperature. Should I be aiming for 350 or 375 degrees to make sure they don’t get greasy?
I’d recommend aiming for 375°F to ensure they crisp up quickly without absorbing too much oil. In my kitchen tests, I’ve found that maintaining this slightly higher temperature is the key to avoiding that greasy texture.
I’ve always struggled with the breading falling off, but your tip about the mechanical bond really worked. These were perfectly crunchy and the paprika gave them such a nice color!
Made these for dinner tonight and they were delicious! I added a little cayenne pepper for some extra heat since we like things spicy, and it paired great with the honey mustard.