


Old Fashioned Banana Bread Recipe with Margarine
Ingredients
Method
- Preheat the oven to 350°F and either grease and flour a loaf pan or line it with parchment paper.
- Beat the butter and sugar in a large bowl using a hand-held or stand mixer on medium-high speed for approximately 2 minutes until light and fluffy.
- Add the vanilla and eggs one at a time, beating for 1 minute and scraping the bowl with a rubber spatula, then add the bananas and beat until fully incorporated.
- Heat the milk in a small saucepan or microwave until it boils, stir in the baking soda, then add the mixture to the batter along with the baking powder, salt, and flour, beating until just combined while scraping the bowl.
- Fold in the nuts if using.
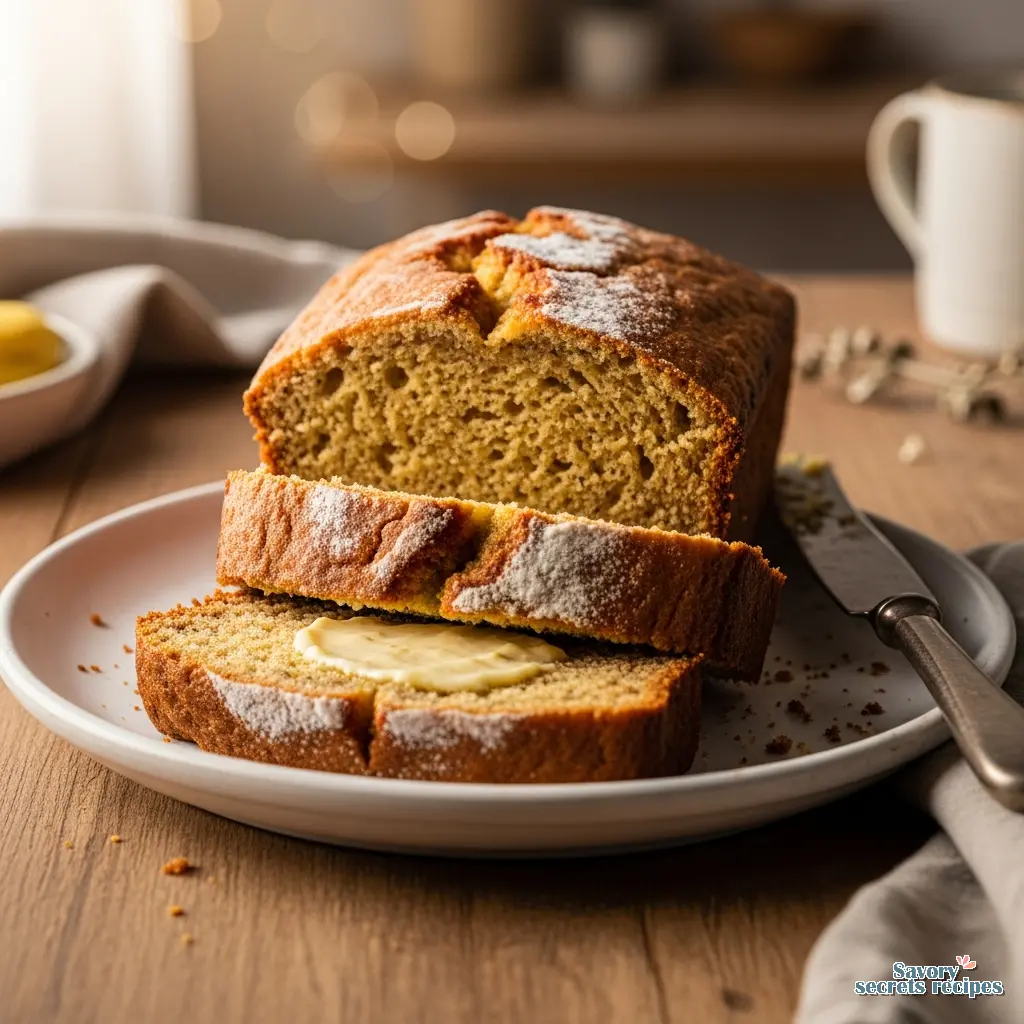
- Pour the batter into the loaf pan and bake for approximately 40 minutes until a toothpick inserted into the center comes out clean, then cool on a wire rack before slicing.
Notes
No Butter? No Problem.
Here’s the thing. We have all been there. It is Wednesday afternoon, and you spot them on the counter. Those three bananas. They have gone past the point of being a healthy snack and are currently looking a little scary. They are mostly black, maybe a little squishy, and definitely judging you for not eating them earlier.
You decide to be responsible and bake. You open the fridge. And then, the realization hits. The butter dish is empty. Or maybe you have a tiny scraping of butter left, but it is definitely not enough for a recipe. Panic sets in. Do you toss the bananas? Do you run to the store?
Nope. You grab that tub or stick of margarine and you make it work. Honestly, though, making banana bread made with margarine isn’t just a backup plan. It is a legitimate strategy. In my experience, anyway, margarine can actually yield a loaf that stays softer for longer than the all-butter version. Plus, with grocery prices being what they are in Los Angeles right now (and everywhere else, let’s be real), using what you already have is just smart cooking.
My Grandma Jean taught me that good food doesn’t need to be fancy or use the most expensive ingredients. It just needs to be made with care and served warm. So, let’s turn those sad-looking bananas into something that smells like heaven and tastes like comfort. If you find yourself without dairy as well, you can easily pivot to a no milk banana bread recipe.
Why This Recipe Works (Better Than You Think)
I’m not gonna lie, there is a bit of a stigma around margarine in the baking world. People act like if you aren’t using European cultured butter, you are doing it wrong. That tracks for croissants, maybe. But for a quick bread? Nobody’s grading this.
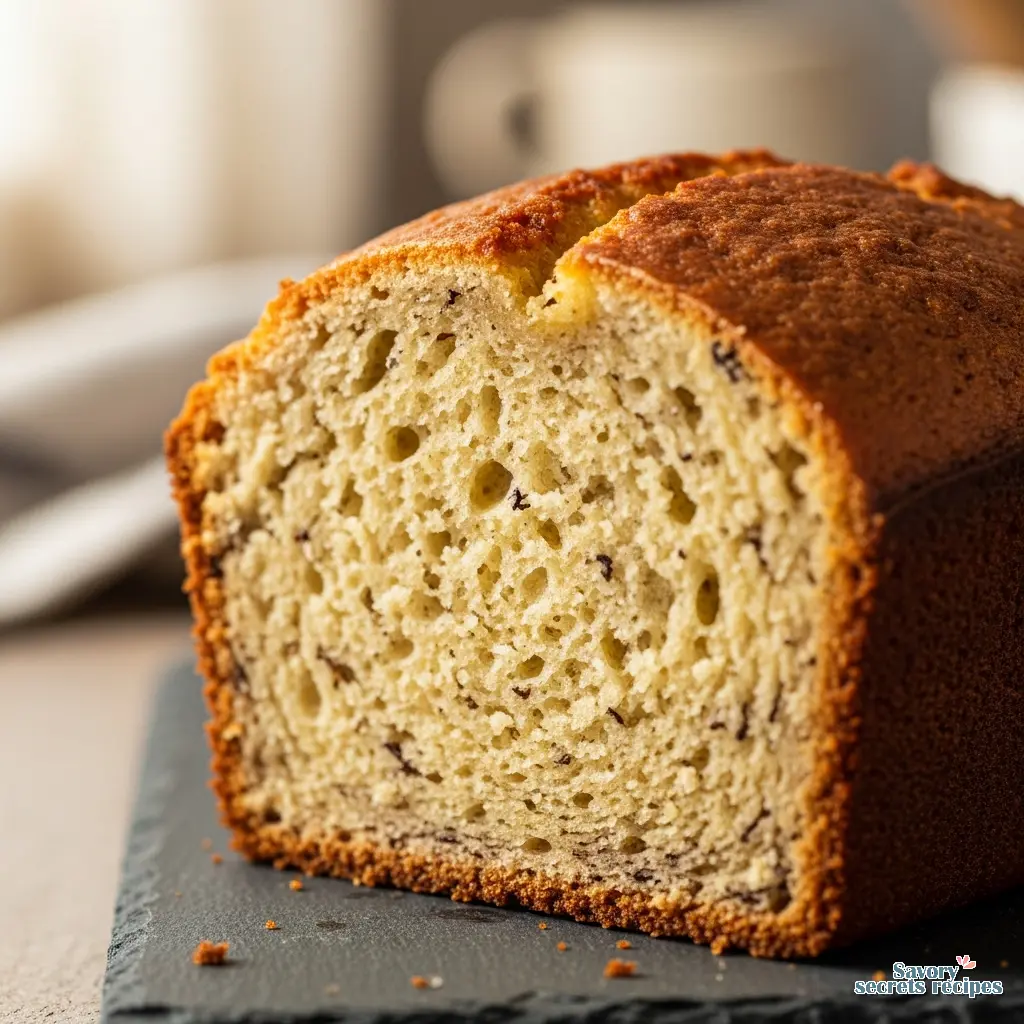
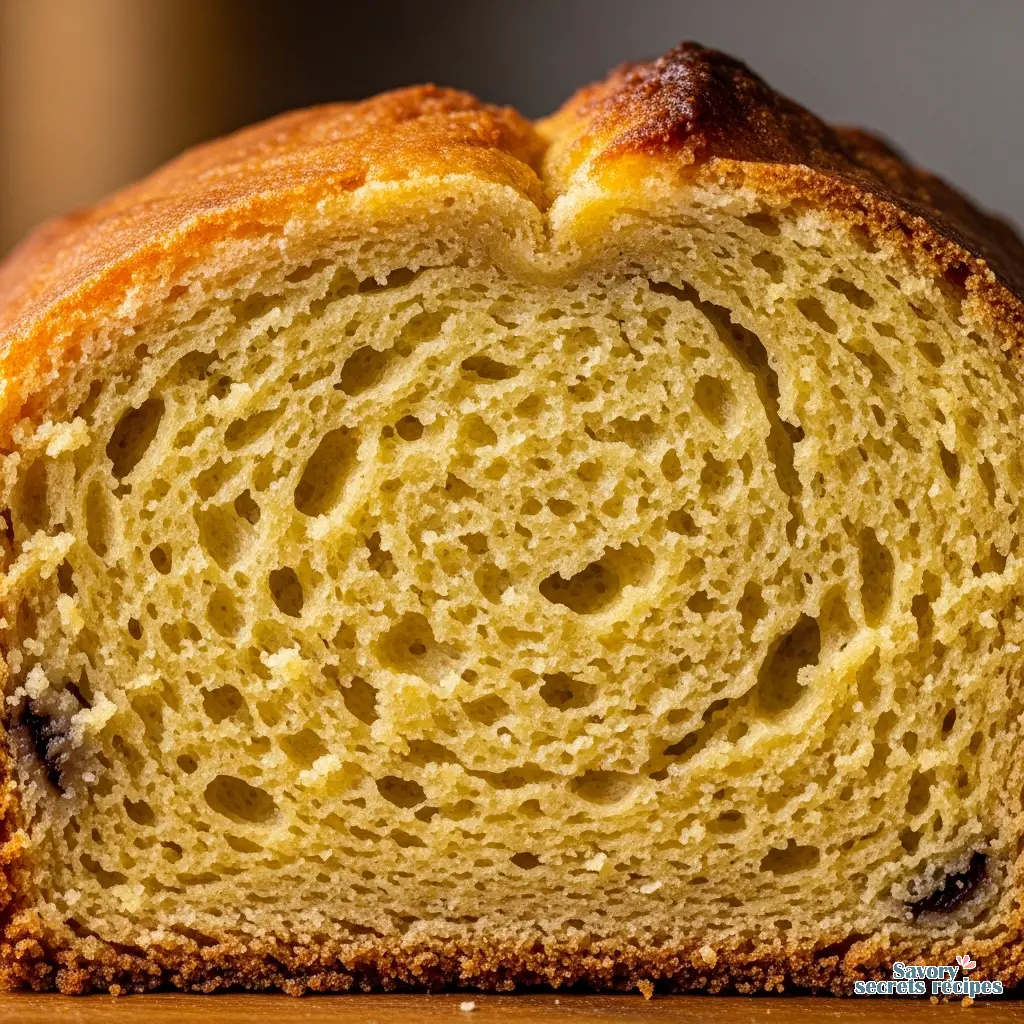
Using margarine in this recipe actually offers a few distinct advantages. First off, margarine is oil-based. Oil is liquid at room temperature, whereas butter is solid. This means that banana bread made with margarine often has a more tender, moist crumb that stays soft even after a day or two on the counter. Butter-based breads can sometimes dry out faster or get hard in the fridge.
Second, it is easier to cream. If you have ever tried to cream cold butter with sugar, you know the struggle. It takes forever. Margarine softens much faster, meaning you can go from “I should bake” to “bread in the oven” in about 15 minutes. This is a lifesaver when you are trying to squeeze in some baking while the kids are actually occupying themselves for once.
The Great Debate: Stick vs. Tub Margarine
Real talk: not all margarine is created equal. This is the one technical detail you really need to pay attention to. If you look in your fridge, you might have a tub of spreadable margarine or you might have foil-wrapped sticks.
For the best banana bread made with margarine, you really want to use the sticks if you have them. Here is why. Tub margarines are formulated to be spreadable right out of the fridge, which means they often have a higher water content and more air whipped into them. If you use a tub spread, your batter might end up a little too wet, or your bread might not rise quite as high.
If all you have is the tub stuff, don’t panic. Use what you’ve got. Just be aware that your bread might be a little denser. You can try adding an extra tablespoon of flour to balance it out. If it works, it works.
Also, keep in mind that margarine is almost always salted. Most baking recipes call for unsalted butter so you can control the salt level. Since we are using margarine, we need to dial back the added salt in the recipe just a tiny bit so the final loaf doesn’t taste savory. I usually cut the salt by half if I’m using a particularly salty brand.
The Banana Situation: Ugly is Better
I cannot stress this enough. If your bananas are yellow with just a few cute brown spots, put the mixing bowl away. They are not ready. You want bananas that look like they belong in the compost bin. I’m talking brown, streaky, maybe even fully black skins.
Why? As bananas ripen, their starch converts to sugar. A green or yellow banana is starchy and bland. A black banana is essentially a sugar bomb of flavor and moisture. This is the secret to that deep, sweet, caramelized flavor we all want. If you use under-ripe bananas, your bread will be dry and lack that signature aroma.
Pro Tip: If your bananas are ready but you aren’t, throw them in the freezer. Peel them first (trust me, peeling a frozen banana is a nightmare), toss them in a bag, and freeze. When you want to make banana bread made with margarine, just thaw them in a bowl. They will look like brown sludge. That is perfect. Dump the bananas and the liquid straight into the batter.
Mastering the Method (Without the Stress)
We are using the creaming method here. It sounds technical, but it is just mixing fat and sugar until they are fluffy. Since margarine is already soft, this happens fast.
1. The Creaming Step
Beat your margarine and sugar together until the mixture looks pale and slightly fluffy. This traps air into the batter, which helps the baking soda do its job later. If you skip this and just dump everything in, your bread will be heavy and dense. It takes about two minutes with a mixer, or maybe four minutes by hand if you want an arm workout.
2. The Wet Ingredients
Add your eggs one at a time. Then comes the vanilla and your mashed bananas. At this point, the mixture might look a little curdled or split. Don’t worry. It is fine. Once you add the flour, it will all come back together. I usually mash my bananas with a fork on a plate before adding them because I like leaving a few chunks for texture. If you prefer a smooth bread, mash them thoroughly.
3. The “Don’t Overmix” Rule
This is where most people mess up quick breads. Once you add the dry ingredients (flour, baking soda, salt) to the wet ingredients, switch to a spatula or a wooden spoon. Stir just until you can’t see white streaks of flour anymore. Then stop. Seriously, stop.
If you keep mixing, you develop the gluten in the flour. Gluten is great for pizza crust. It is terrible for banana bread. Overmixed bread comes out rubbery and tough. We want tender and pillowy. So, gentle hands here.
Troubleshooting Common Mistakes
I have failed at this enough times to know exactly what can go wrong. Here is how to fix it before it happens. Often, issues start with using the wrong banana bread pan, which can affect heat distribution.
Mistakes & Fixes
Mistake: The bread is raw in the middle but burnt on top.
Solution: Your oven might be running hot, or the sugar is caramelizing too fast. Tent a piece of aluminum foil loosely over the top of the loaf for the last 15 minutes of baking. This shields the crust while the center finishes cooking.
Mistake: The loaf sank in the middle.
Solution: You probably opened the oven door too early to check on it. I know it smells amazing, but keep that door closed until at least 45 minutes have passed. A rush of cold air can cause the rising structure to collapse.
Mistake: The texture is gummy.
Solution: This usually means you overmixed the batter or you measured the flour wrong. Don’t scoop the flour with the measuring cup (that packs it down). Spoon the flour into the cup and level it off with a knife.
Storage Secrets: The Paper Towel Hack
If you have any leftovers (which is a big “if” in my house), you want to keep that moisture locked in. But you don’t want the top of the bread to get sticky and wet, which sometimes happens with banana bread made with margarine.
Here is the trick I swear by. Let the bread cool completely. I mean completely. If you wrap it while it is warm, the steam turns into water and makes the crust soggy. Once it is cool, place a paper towel in the bottom of your airtight container. Put the loaf on top, then place another paper towel on top of the loaf before snapping the lid shut.
The paper towel absorbs the excess moisture that tries to settle on the crust, but the container keeps the bread soft. It stays fresh on the counter for about 3 to 4 days. If you want to freeze it, wrap the loaf (or individual slices) tightly in plastic wrap, then a layer of foil. It lasts for 3 months in the freezer. Perfect for emergency school snacks.
Variations to Try
Once you have mastered the basic recipe, you can start playing around. This batter is pretty forgiving.
- Chocolate Chip: Add 1/2 cup of semi-sweet chocolate chips. My kids argue this turns it into cake. I don’t correct them.
- Nutty: Fold in 1/2 cup of chopped walnuts or pecans. It adds a nice crunch to contrast the soft crumb.
- Muffins: Pour the batter into a muffin tin. Bake for 18-22 minutes instead of the full hour. These are great for lunchboxes.
Frequently Asked Questions
Time to Bake
There is a specific moment when this bread is in the oven, usually around the 40-minute mark, where the smell hits you. It smells like caramelized sugar, warm bananas, and pure comfort. It is basically the best air freshener you can buy. For extra indulgence, consider adding a sweet banana bread topping like a brown sugar crumble.
So, go preheat that oven. Your kitchen is about to be the best-smelling room in the house. And hey, if you make this, I’d love to see it. Snap a picture before you devour it (or after, no judgment). For more inspiration, check out my Pinterest boards where I save all my favorite family-friendly recipes.
Enjoy the slice. You earned it.
Reference: Original Source
Can I use tub margarine for banana bread made with margarine?
Yes, you can, but stick margarine is better. Tub margarine has more water and air, which might make the bread slightly denser or flatter. If using tub margarine, try avoiding the “light” or “low fat” versions, as the water content is too high for baking.
Why is my banana bread dry?
Dry bread usually happens for two reasons: over-baking or too much flour. Check your loaf 5-10 minutes early. Also, make sure you aren’t packing your flour into the cup. Using margarine actually helps combat dryness, so if it’s still dry, check your oven temp.
Can I freeze banana bread made with margarine?
Absolutely. In fact, it freezes beautifully. Wrap the cooled loaf tightly in plastic wrap, then a layer of foil. It stays fresh for up to 3 months. I like to slice it before freezing so I can just grab one piece for a quick breakfast.
How do I know when the bread is done?
Use the toothpick test. Insert a toothpick into the center of the highest part of the loaf. It should come out clean or with just a few moist crumbs attached. If it has wet batter on it, give it another 5 minutes and check again.
Can I substitute oil for the margarine?
You can. Use the same amount of vegetable or canola oil (1/2 cup). The texture will be very similar moist and tender but you will lose that slight buttery flavor that margarine provides. If you use oil, you don’t need to cream it with the sugar; just whisk them together.


