


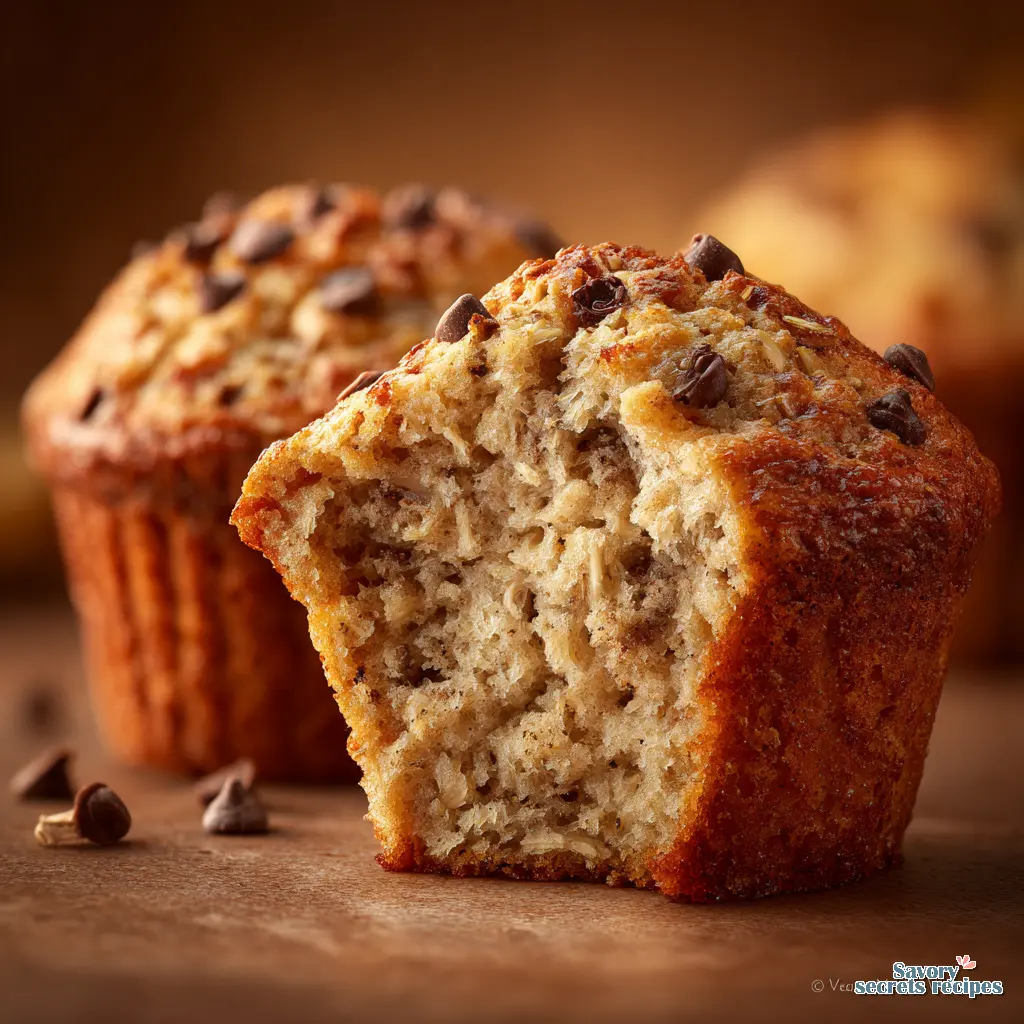
Healthy Blender Banana Oat Muffins
Ingredients
Method
- Position an oven rack in the center and preheat the oven to 350°F. Grease a standard 12-cup muffin tin with olive oil or cooking spray.
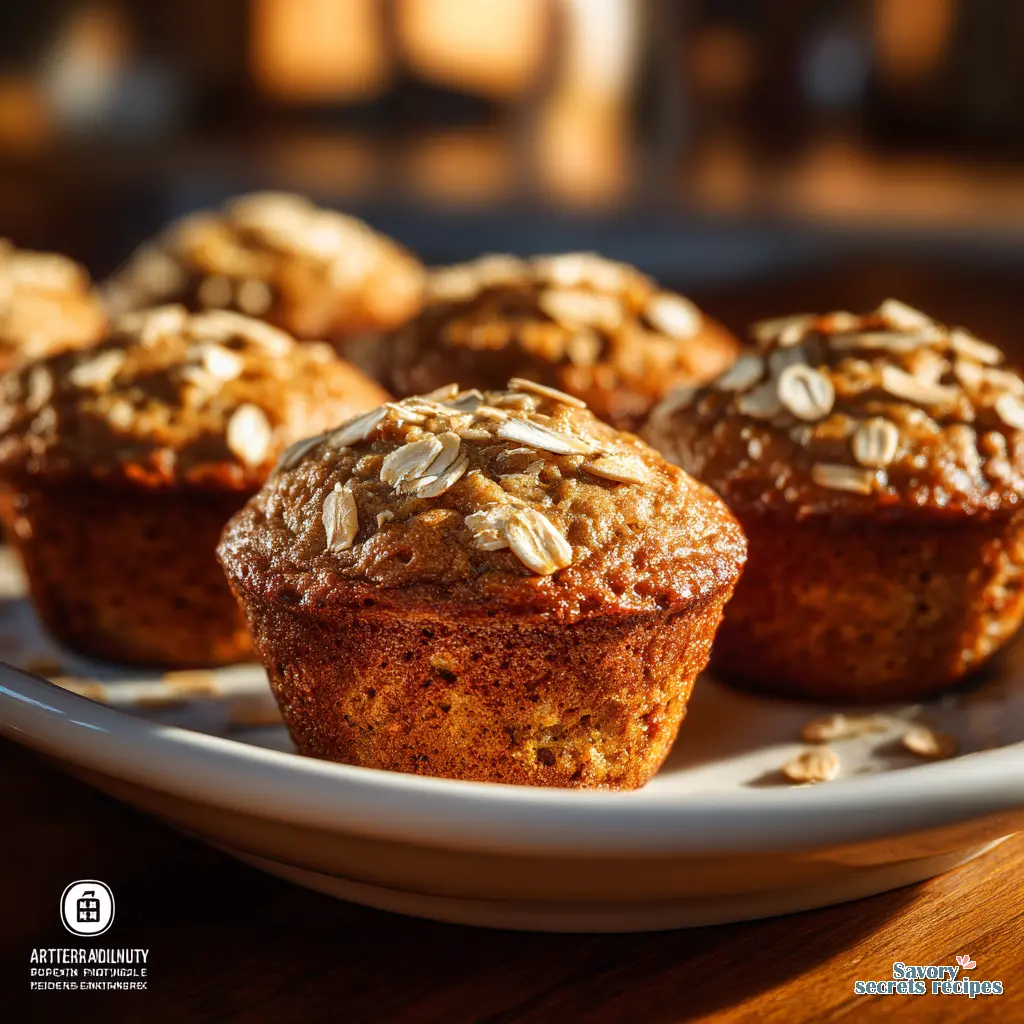
- Combine 2 cups oats, 2 peeled bananas, 2 eggs, 1/4 cup olive oil, 1/4 cup syrup, 1 teaspoon baking powder, 1 teaspoon baking soda, 1 teaspoon cinnamon, and 1/4 teaspoon salt in a blender. Blend for approximately 1 1/2 minutes until smooth, scraping down the sides as necessary. Fill the muffin wells halfway with batter and sprinkle with additional oats.
- Bake for 25 to 30 minutes until lightly browned and a tester inserted into the center comes out clean. Allow the muffins to cool in the pan for 10 minutes before removing.
- Customize the recipe by blending in 1 handful of spinach, 3/4 cup pumpkin purée, or 1 diced carrot with 1/2 cup raisins for different variations. Store in an airtight container at room temperature for up to 5 days or freeze for up to 3 months, thawing at room temperature before serving.
Nutrition
Notes
The Morning Savior You Didn’t Know You Needed
Let me walk you through a scenario that might feel familiar. It is Wednesday morning. We are running ten minutes late. There are three bananas on the counter that have moved past “ripe” and are currently sitting in that scary, nearly black stage where fruit flies start to gather. My daughter, Priya, is asking for something “special” for breakfast, but the idea of dirtying three mixing bowls makes me want to go back to bed.
This is exactly why these blender banana oat muffins exist. They are my absolute favorite solution for the morning chaos.
I stumbled upon this method a few years ago when I was trying to sneak more fiber into Priya’s snacks without her noticing. She is five now, and she has become a very honest critic. If something tastes “too healthy,” she will tell me immediately. But these? These passed the test.
The magic here is that you toss everything into a blender, press a button, and pour. No flour to sift. No butter to melt. Just wholesome ingredients that somehow turn into a golden-domed, cinnamon-scented win. Whether you are meal prepping for the week or just trying to save those sad-looking bananas, this recipe is about to become your best friend.
Why Oats Are the Secret Weapon Here
As a dietitian, I spend a lot of time talking about blood sugar. Most bakery muffins are basically cake without frosting. They give you a sugar spike at 8 AM and leave you crashing by 10 AM. That is not what we want.
In my testing, I found that using old-fashioned oats as the base changes everything. When you blend oats, you are essentially making your own fresh oat flour. This provides complex carbohydrates and soluble fiber (specifically beta-glucan) which helps keep you full longer.
Plus, they are naturally gluten-free if you buy the certified bags. I prefer using rolled oats over quick oats here because they offer a better structure. Quick oats can sometimes make the batter a bit too gummy in the blender. If you prefer skipping the blender entirely, these 3 ingredient banana oatmeal muffins offer a similar nutritional profile with even less cleanup.
The “Wet-to-Dry” Blender Rule
If there is one thing that matters in this recipe, it is the order you put things in the blender. Trust me on this. I have jammed my poor Vitamix more times than I care to admit by putting the oats in first.
Here is what I have found works best to keep the blades moving:
- Liquids go first: Start with your eggs, yogurt, oil (or melted butter), and vanilla. This creates a vortex that pulls everything else down.
- Soft solids next: Break those ripe bananas into chunks and toss them in.
- Dry ingredients last: Pour the oats, baking powder, baking soda, and spices on top.
This layering ensures that the blades catch the liquid immediately. If you put the oats at the bottom, they can get compacted under the weight of the bananas and create an air pocket. Then you are stuck stopping and scraping down the sides while the oven preheats, which defeats the whole “easy” purpose.
Troubleshooting the “Gummy” Texture
One common complaint I hear about blender banana oat muffins is that they can turn out dense or gummy. I have been there. It is disappointing when you expect a fluffy muffin and get a rubbery puck.
The culprit is usually over-processing. Oats contain starches that can gelatinize if you work them too hard. It is similar to mashed potatoes; if you beat them too much, they turn into glue.
My advice? Use the pulse setting. Blitz the batter until the oats are broken down and the ingredients are combined, but stop there. It is okay if the batter looks a little textured. You do not need it to be perfectly smooth like a smoothie. A little texture actually helps the crumb feel more like a traditional muffin.
Dietary Substitutions That Actually Work
I know every kitchen is different. Maybe you are out of eggs, or perhaps you are cooking for a cousin with a gluten allergy. In my role as a Special Diets Editor, I test these variations so you do not have to guess.
Make it Vegan:
You can swap the eggs for “flax eggs” (1 tablespoon ground flaxseed meal + 3 tablespoons water per egg). Let the mixture sit for five minutes to thicken before adding it to the blender. I have found this works well, though the muffins will be slightly denser and won’t rise quite as high. It is a trade-off, but a delicious one.
Make it Gluten-Free:
While oats are naturally gluten-free, they are often processed in facilities that handle wheat. To be safe, especially for anyone with Celiac disease, you must use oats labeled “Certified Gluten-Free.” The texture remains exactly the same.
Dairy-Free Options:
This recipe is naturally dairy-free if you use oil. If you prefer a butter flavor but cannot do dairy, melted coconut oil or a high-quality vegan butter stick works beautifully. I often use almond milk or oat milk for the liquid component.
The Liner Situation (Don’t Skip This)
Here is a specific pain point: blender muffins stick to paper liners like crazy. It is frustrating to peel a muffin and lose half of it to the paper.
Why does this happen? Since there is no fat-heavy flour and butter matrix like in traditional baking, the oat batter bonds to the paper. I have found two solutions that solve this.
First, spray your liners with non-stick spray. It sounds redundant, but it helps. Second, and this is the real secret: let them cool completely. If you try to peel the liner while the muffin is hot, it will stick. If you wait, the steam re-absorbs into the muffin, and the liner peels off cleanly. I know waiting is hard when they smell like cinnamon and warmth, but it is worth it.
Better yet? Use silicone muffin cups. They pop right out, zero sticking, every single time. Best investment for a busy parent.
Variations to Keep It Interesting
Once you master the base recipe, you can play around. I prefer recipes that give you decision points rather than rigid instructions.
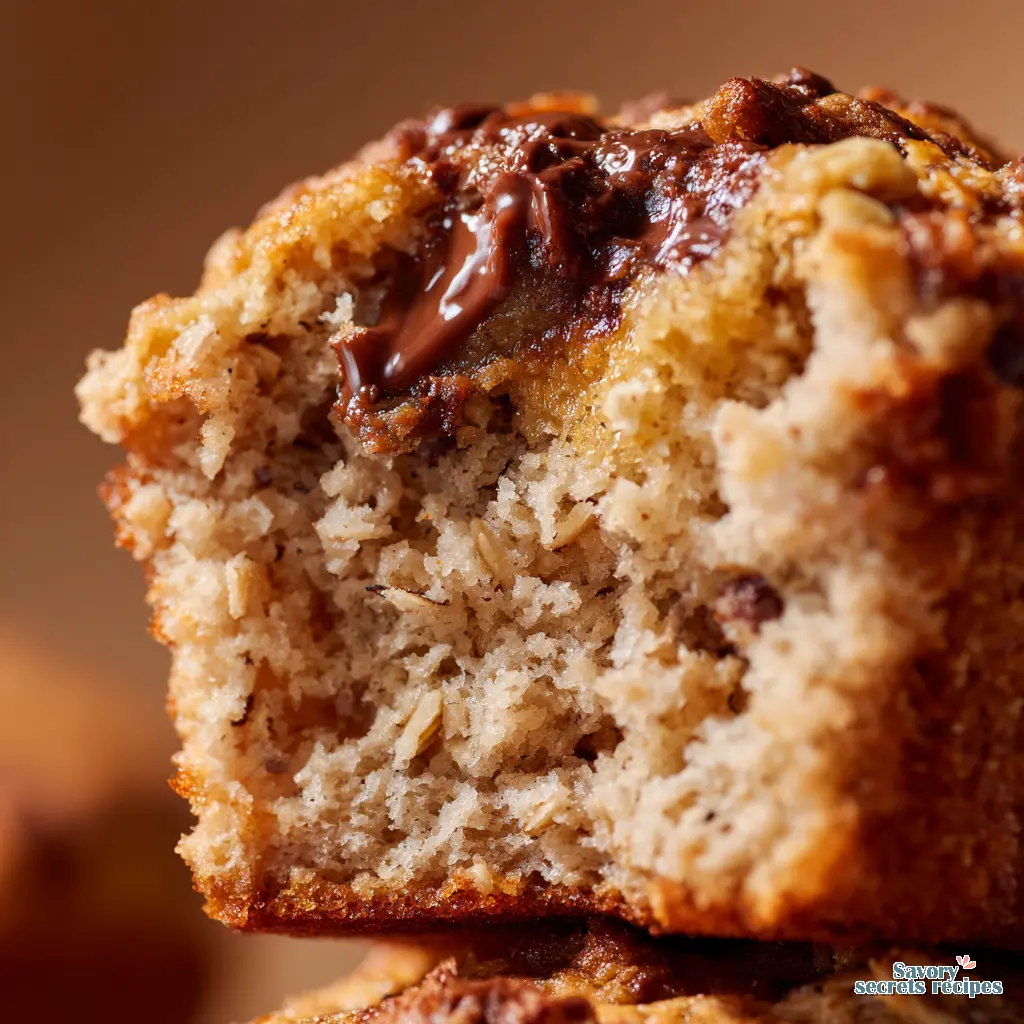
- Chocolate Chip: Stir in a handful of semi-sweet chips after blending. Do not blend them unless you want chocolate batter.
- Blueberry Lemon: Add lemon zest to the blender, then fold in fresh or frozen blueberries by hand.
- Nutty Crunch: Walnuts or pecans add a nice texture contrast to the soft oats.
- Green Monster: Toss a handful of spinach into the blender. I promise you cannot taste it. My daughter calls them “Hulk Muffins” and eats them happily.
Storage and Freezing for Meal Prep
These muffins are champions of meal prep. I usually make a double batch on Sunday. Here is how to keep them fresh.
Room Temperature: They will stay good on the counter in an airtight container for about 3 days. Because they are moist (thanks to the bananas), they can spoil faster than dry bakery muffins, especially if your kitchen is warm.
Fridge: This is my preferred method. They last up to a week in the fridge. I like to pop them in the microwave for 15 seconds before eating to bring back that “fresh out of the oven” softness.
Freezer: Let them cool completely, then place them in a freezer-safe bag. They will keep for up to 3 months. To thaw, just leave one on the counter for an hour or microwave it for 30-45 seconds. It is a lifesaver on those mornings when the alarm didn’t go off.
Frequently Asked Questions
Final Thoughts
There is something deeply satisfying about taking brown, spotty bananas and turning them into breakfast for the week. It feels like a small victory against food waste and a win for your future self. When you grab one of these blender banana oat muffins on your way out the door tomorrow morning, you will thank yourself for taking the thirty minutes to make them today.
For more inspiration and meal prep ideas, check out my Pinterest boards where I save all my favorite quick breakfasts.
Go preheat your oven. You’ve got this.
Reference: Original Source
Can I make blender banana oat muffins without a high-speed blender?
Absolutely. While a high-speed blender (like a Vitamix) makes the batter smoother, a standard blender works fine. You might just have a slightly more textured muffin with visible oat flecks, which I actually think adds a nice rustic quality. Just blend a little longer.
My batter seems very runny, is that normal?
Yes, this batter is much thinner than traditional muffin batter. It pours almost like pancake batter. Do not panic! The oats will absorb the liquid as they bake. If it looks too watery, let it sit in the blender for 5 minutes to thicken slightly before pouring.
Can I use steel-cut oats instead of rolled oats?
I would not recommend it. Steel-cut oats are too hard and dense. Even a high-speed blender struggles to break them down into a flour-like consistency for this recipe, and you will end up with crunchy, gritty muffins. Stick to rolled or quick oats.
Why did my muffins sink in the middle?
This usually happens if the muffins were underbaked. Because they are dense and moist, they need that full baking time to set the structure. Test with a toothpick; it should come out mostly clean, not wet. Also, avoid opening the oven door too early.
Can I substitute the banana?
You can use pumpkin puree or applesauce, but note that bananas provide a lot of the sweetness here. If you swap them out, you might need to increase the maple syrup or honey slightly to balance the flavor. The texture will be similar.
Are these suitable for toddlers?
Yes, they are perfect for little ones! They are soft, easy to chew, and naturally sweetened. For babies under one, just skip the honey (use maple syrup instead) and omit any large mix-ins like whole nuts or large chocolate chips.


