


Make Your One Pan Easy Quinoa Recipe Fried Rice
Ingredients
Method
- Melt 1/2 tablespoon of butter in a large skillet over medium-high heat. Add the whisked eggs and cook, stirring occasionally, until scrambled. Transfer the cooked eggs to a separate plate and set aside.
- Add another 1 tablespoon of butter to the same skillet and melt. Stir in the diced carrots, onion, frozen peas, and minced garlic. Season with salt and pepper, then sauté for approximately 5 minutes until the carrots and onions soften.
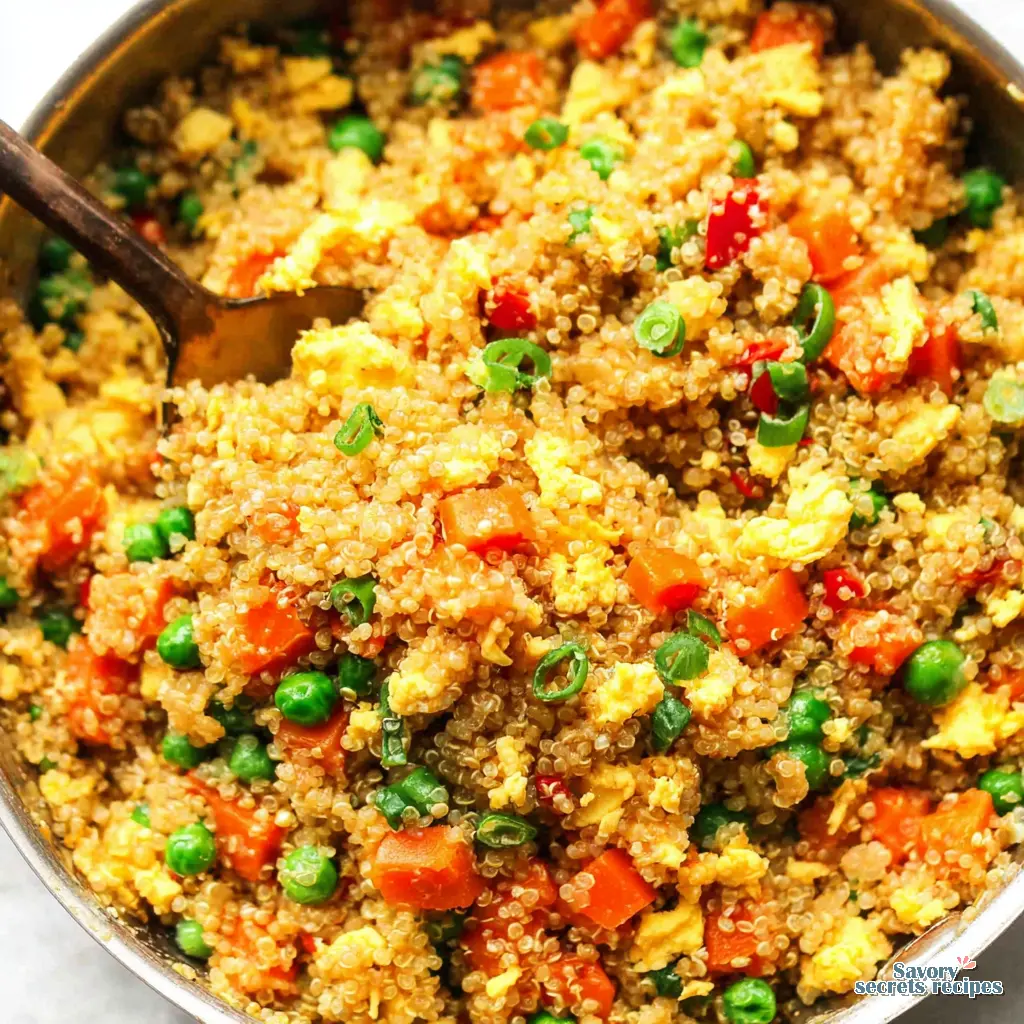
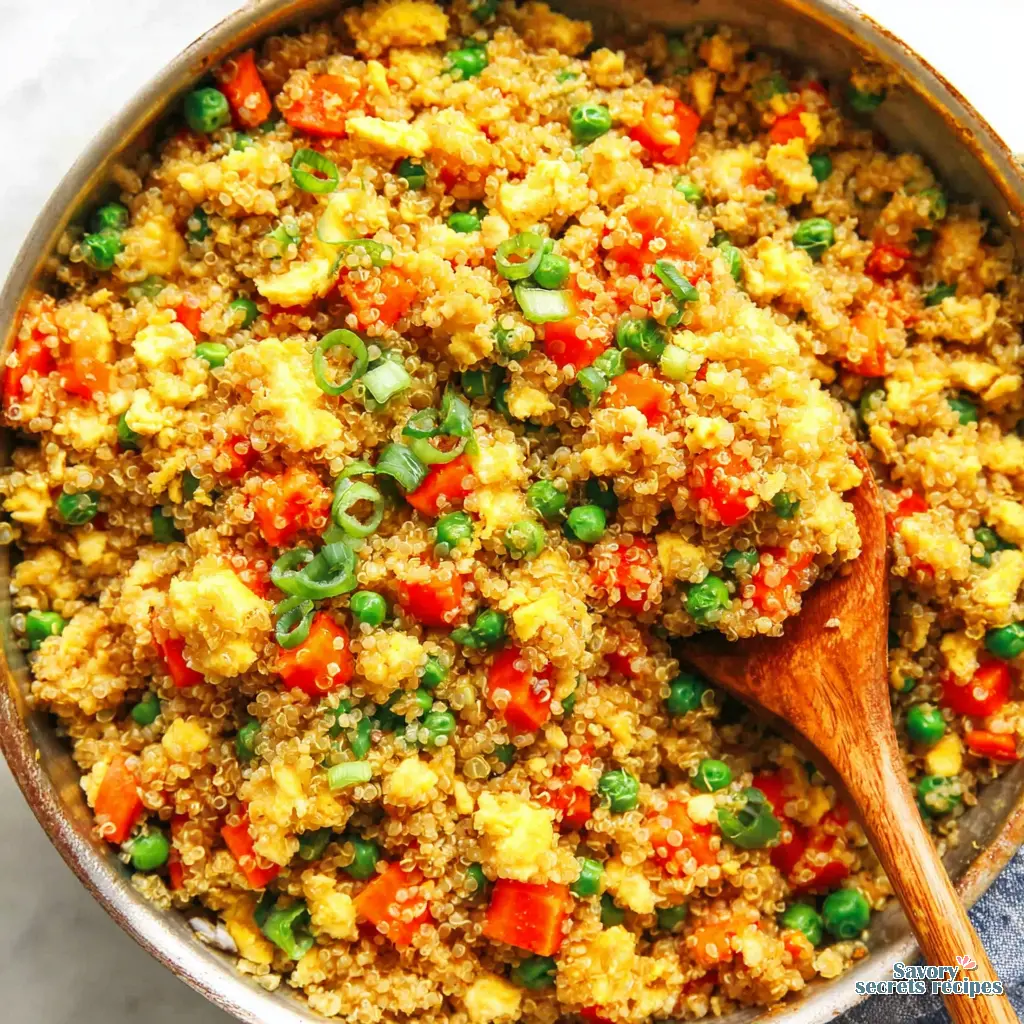
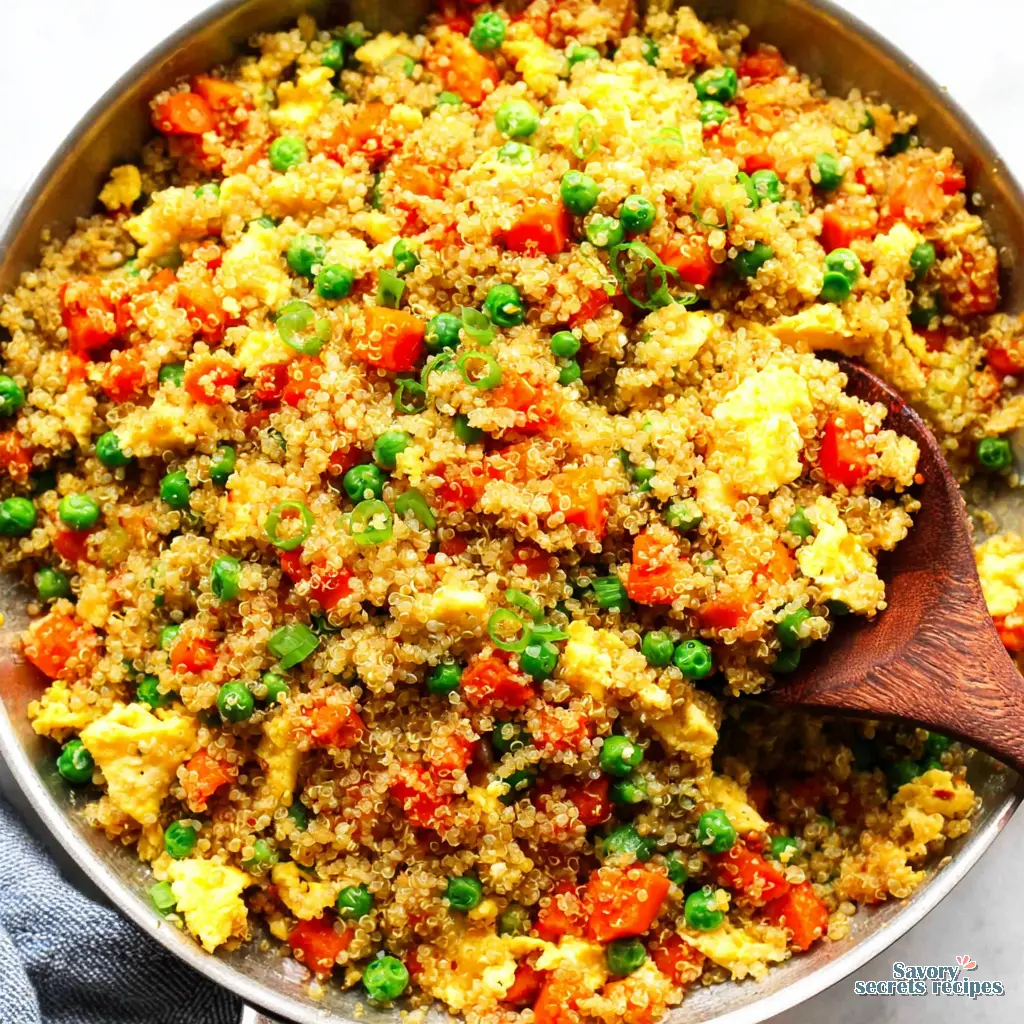
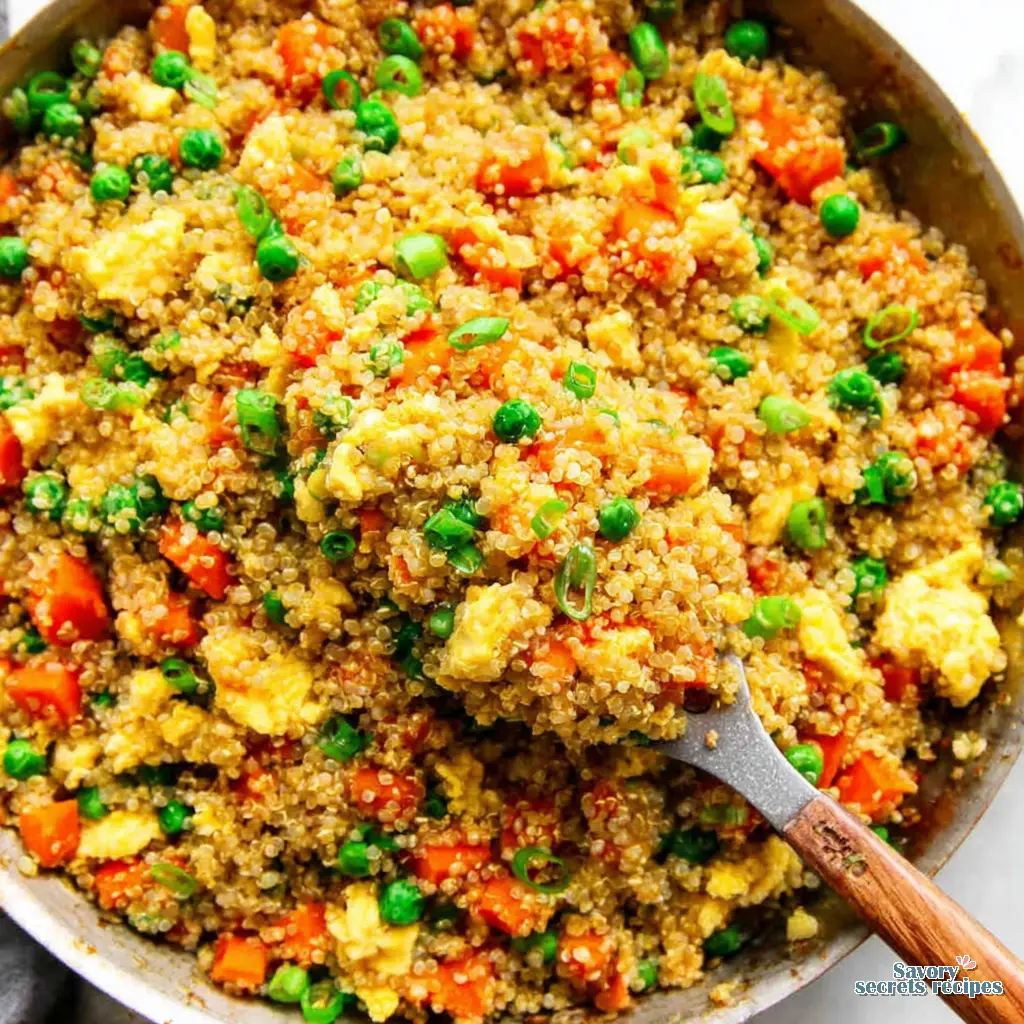
- Increase the heat to high, add the remaining 1 1/2 tablespoons of butter, and stir until melted. Immediately add the chilled cooked quinoa, sliced green onions, soy sauce, and optional oyster sauce. Stir continuously for about 3 minutes to fry the quinoa evenly and combine the flavors.
- Return the scrambled eggs to the skillet and stir to combine. Drizzle with toasted sesame oil, mix thoroughly, and remove the skillet from the heat.
- Serve the quinoa fried rice warm as a main dish or side.
Notes
The Reality of a Truly Easy Quinoa Recipe
Wednesday morning, 7:30 AM. My six-year-old daughter Layla is turning the living room upside down looking for her left shoe. I am standing in front of the open fridge, staring at random containers, trying to figure out a fresh quinoa lunch that will not taste like cardboard by noon. We have all been there. You want to eat well. You just do not have the time or energy to fuss over a complicated meal prep.
I hear you. Let me walk you through it. I used to think making a quick healthy meal meant sacrificing flavor, but this easy quinoa recipe completely changed my weekday routine. It takes about fifteen minutes. Perfect. You can absolutely use pre-cooked quinoa pouches if you are in a rush. I give you full permission to take that shortcut. This is your calm in the storm.
I remember standing on a step stool in my teta’s kitchen in Dearborn, watching her cook. She never measured anything. She just felt the texture of the grains with her fingers. Years later, I spent weeks reverse-engineering her instinctive methods into something I could actually write down. This recipe is the result of those tests. It is simple, it is fast, and it works every single time.
The Saponin Situation (Why Rinsing is Mandatory)
Here is what I wish someone had told me years ago. Quinoa has a natural coating called saponin. It acts as a natural deterrent for birds and insects out in the field. That is great for nature, but terrible for your lunch because it tastes incredibly bitter. Rinsing your quinoa in a fine mesh strainer to remove those bitter saponins is absolutely non-negotiable. Unless the package specifically says pre-rinsed, do not skip this step.
I learned this the hard way. I once made a massive batch for a family picnic without rinsing it first. It tasted like soap. I felt terrible watching everyone politely try to swallow it. Now, I always run it under cold water until the water runs completely clear. Watch for the visual cue. The water will look cloudy at first, then it will clear up. That is exactly what you want to see.
The Toasting Step and The Perfect Ratio
If you want to build incredible flavor without adding extra ingredients, toast the quinoa briefly in a dry pan or with a tiny bit of extra virgin olive oil before adding your liquid. You are looking for the color of wet sand and a slightly nutty aroma. This step makes all the difference. It takes maybe two minutes, but it transforms the entire dish.
Now, let’s talk about the water ratio. This is the most common point of failure I see in home kitchens. Most packages tell you to use two cups of water for every cup of quinoa. In my tests, this usually works, though your mileage may vary depending on your stove. However, I have found that using 1 3/4 cups of water per 1 cup of quinoa gives you that perfect, fluffy texture. If you want a firmer, toothy texture for a desk salad, use 1 2/3 cups of liquid instead. Trust the process here.
And here is a quick flavor upgrade. Swap the water for vegetable or chicken broth. It is the easiest way to improve the flavor profile without any extra chopping. I also like to add a pinch of garlic powder instead of fresh garlic to ensure even distribution throughout the grains.
Stovetop, Rice Cooker, or Instant Pot?
You have options here. It depends on your setup, but here is what I would try. For the stovetop method, bring your liquid to a boil, reduce it to a low simmer, and cover it. Do not peek. Stirring too much while cooking will break the seeds and give you a gummy mess.
If you have a rice cooker, you can absolutely use it. Just use the same 1:1.75 ratio. Some newer models even have a specific quinoa setting. It is a fantastic hands-off method when you are busy helping kids with homework.
For my Instant Pot fans, use a 1:1 ratio of quinoa to liquid. Cook on high pressure for one minute, then let it naturally release for ten minutes. This is my go-to method when I completely forget to prep lunch until the very last minute. It is practically foolproof.
Fluffing, Resting, and Fixing Mushy Quinoa
Once the liquid is absorbed, turn off the heat. Do not touch it yet. Let the quinoa rest, covered, for 5 to 10 minutes. This allows the moisture to redistribute evenly. Then, fluff with a fork immediately after the resting period to prevent clumping. You will see those beautiful little spirals pop open.
Let’s troubleshoot this together. What if you open the lid and it is a mushy, waterlogged disaster? Do not panic. I have done this more times than I care to admit. First, drain any excess water through your fine mesh strainer. Then, spread the quinoa out on a parchment-lined baking sheet in a thin layer. Bake it at 300°F for about 10 minutes to dry it out. It rescues the batch perfectly.
Common Mistakes & Fixes
Mistake: Skipping the rinsing step.
Solution: Always rinse unless the box says pre-rinsed. Unrinsed quinoa has a bitter, soapy taste that ruins the dish.
Mistake: Using too much water.
Solution: Stick to the 1:1.75 ratio. If it gets mushy, spread it on a baking sheet and gently toast it in the oven to dry it out.
Mistake: Stirring while cooking.
Solution: Leave the lid on and let it simmer. Stirring breaks the grains and releases starches, making it gummy.
Variations for a Fresh Quinoa Lunch
I love recipes that do double duty. You can take this basic easy quinoa recipe and turn it into five different meals depending on what pantry staples you have lying around. It is the ultimate no-cook lunch base once the grains are prepped.
For an Asian-inspired fried rice vibe, sauté some white onion, frozen peas, and carrots in butter. Toss in your cooked quinoa, a splash of soy sauce, oyster sauce, and toasted sesame oil. Fold in some scrambled eggs and top with green onions. My daughter absolutely devours this version. For those who need a more filling option, this base can easily be converted into a hearty protein quinoa bowl.
If you want a Mediterranean desk salad, toss the cold quinoa with canned chickpeas, fresh parsley, lemon zest, sea salt, and black pepper. A simple vinaigrette of olive oil and lemon juice is all you need. I always keep my herbs fresh by wrapping them in a slightly damp paper towel in the fridge. It keeps them crisp for days.
You can even boost the nutrition by mixing in arugula, spinach, or crunchy sunflower seeds. It is clean eating that actually fills you up, making it the perfect easy quinoa salad for work lunch no microwave required.
Storage, Freezing, and Detailed Reheating
Make-ahead components are a lifesaver for busy weeks. This easy quinoa recipe is perfect for meal prep. Refrigerate your cooked grains in an airtight container for 3 to 5 days. I like to portion them out into individual glass containers on Sunday afternoon.
Yes, you can freeze it. Transfer the fully cooled quinoa to a freezer-safe bag or container. It will keep for up to three months. When you are ready to use it, let it thaw in the fridge overnight. Bring it to room temperature before fluffing, and use a fork to break up any frozen clumps.
For reheating, the microwave is your best friend. Add a tiny splash of water or broth, cover it loosely with a damp paper towel, and heat for about 60 to 90 seconds. The steam from the towel brings the fluffy texture right back. If you are reheating it on the stove, use a non-stick skillet over medium-low heat with a tiny bit of butter or oil until warmed through.
Frequently Asked Questions
Enjoy Your Fifteen Minutes of Peace
Look, feeding yourself well during a chaotic week shouldn’t feel like a chore. Once you nail the basic technique of this easy quinoa recipe, you will have a reliable foundation for dozens of different meals. Whether you are tossing it with fresh lemon and arugula for a bright desk salad or turning it into a savory fried rice for dinner, you deserve a good meal that doesn’t stress you out.
Try the toasting method next time you make it. I promise you’ll notice the difference immediately. Enjoy that first warm, savory bite, and take a deep breath. You’ve got this. For more inspiration and variations on this base, check out my Pinterest boards where I save all my favorite quick meal ideas.
Reference: Original Source
Why do I need to rinse quinoa?
You have to rinse it to remove saponins, a natural bitter coating that protects the seeds from insects. If you skip this, your easy quinoa recipe will taste soapy and bitter. Just run it under cold water in a fine mesh strainer until the water is completely clear.
Can I use a rice cooker to cook quinoa?
Absolutely. I do this all the time when I am multitasking. Use the standard 1:1.75 ratio of quinoa to liquid. Just press the normal white rice setting, or the specific quinoa setting if your machine has one. It is completely hands-off and turns out perfectly fluffy.
What is the correct water to quinoa ratio?
Through all my testing, I’ve found that 1 3/4 cups of water per 1 cup of dry quinoa is the sweet spot for fluffiness. If you prefer a firmer bite for a fresh quinoa lunch or salad, drop the liquid down to 1 2/3 cups.
Is quinoa better than rice?
They both have their place in my kitchen. Quinoa offers a bit more protein and fiber, making it a fantastic base for a quick healthy meal. It also cooks faster than brown rice, which is why this easy quinoa recipe is my go-to for busy weeknights.
Can I freeze cooked quinoa?
Yes, it freezes beautifully. Let it cool completely, then store it in an airtight, freezer-safe container for up to three months. Thaw it overnight in the fridge and use a fork to break up the clumps. It is a massive time saver for meal prep.
Can I use chicken broth instead of water?
I highly recommend it. Swapping water for chicken or vegetable broth is the absolute easiest way to build deep flavor without adding extra prep time. Just keep the liquid ratio exactly the same. It makes the final dish taste incredibly savory and rich.
How do I add quinoa to baking?
You can fold cooked, cooled quinoa directly into muffin batters or cookie doughs for extra texture and moisture. Just make sure it is completely dry and not waterlogged. You can also buy quinoa flour or flakes specifically designed for gluten-free baking projects.
Can I use a donabe (clay pot)?
You certainly can. A donabe provides gentle, even heat distribution that works wonderfully for grains. You’ll want to watch the heat closely so the bottom doesn’t scorch, but it yields a beautiful, fluffy texture with a slightly toasted bottom layer that is incredibly delicious.


