


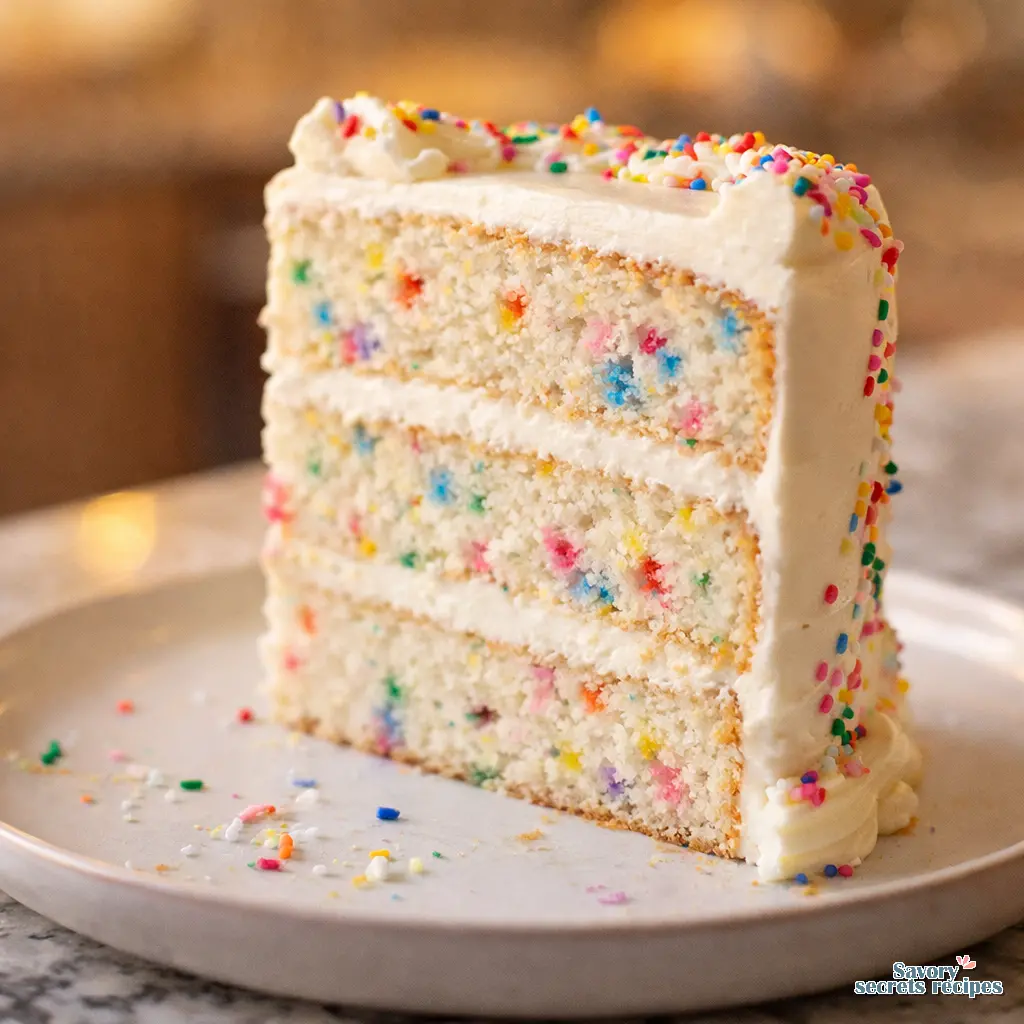
Homemade Funfetti Cake From Scratch Tastes Like Box Mix
Ingredients
Method
- Preheat the oven to 350°F (175°C) and grease and flour two 9-inch round cake pans.
- Whisk together the flour, baking powder, and salt, then set the mixture aside.
- Beat the butter and granulated sugar until the mixture is light and fluffy.
- Incorporate the eggs one at a time, mixing well after each addition, then stir in the vanilla extract.
- Gradually add the dry ingredients and whole milk in alternating batches, starting and ending with the dry ingredients.
- Gently fold the rainbow sprinkles into the batter.
- Divide the batter between the prepared pans and bake for 25 to 30 minutes, or until a toothpick comes out clean.
- Cool the cakes in the pans for 10 minutes, then transfer them to a wire rack to cool completely.
- Beat the softened butter for the frosting, gradually adding the powdered sugar and milk until the mixture is smooth.
- Spread the frosting between the cake layers and over the entire cake, then decorate with additional sprinkles.
Nutrition
Notes
The Nostalgia vs. Reality of Box Mix Funfetti Cake
We all grew up with that iconic blue box. You know the one. It promised magic in a cardboard rectangle. With holiday party season in full swing here in LA, you need a reliable dessert that brings out the kid in everyone. But let’s be honest. As adults, that boxed stuff often tastes like artificial flavoring and disappointment.
I’ll admit something embarrassing. My first attempt at a homemade sprinkle cake looked like wet cement. I just dumped whatever sprinkles I had in the pantry into a standard yellow cake batter. The colors bled instantly. The batter turned a depressing shade of gray. I baked it anyway, and it tasted fine, but it looked incredibly sad. Not a huge deal, but worth noting if you’re trying to impress someone.
That’s exactly why I spent weeks testing this funfetti cake recipe. I wanted that specific birthday cake smell that fills the house. You know, that intense aroma of vanilla and sugar that bypasses your critical palate entirely. But I also wanted the superior taste and moist crumb of a professional bakery cake. During these cooler LA winter months when we actually use our ovens, this is the perfect baking project.
Let me show you what I mean. We’re going to build a perfectly white cake base that makes those vibrant colors pop. We’ll use the creaming method for a fluffy texture. And most importantly, we’ll talk about why your choice of sprinkles will make or break this entire operation.
The Great Sprinkle Test: Why Your Batter Turns Gray
Here’s the thing about that gray batter problem. It all comes down to the type of sprinkles you use. This is where most people run into trouble. You cannot just grab any random jar of colorful sugar from the baking aisle at Ralphs and expect a bakery style result.
I ran a “no-bleed” sprinkle test in the test kitchen. We baked four different types of sprinkles into identical batches of batter. The results were aggressively clear.
First, never use nonpareils. Those are the tiny, hard, round balls. They bleed color the second they touch moisture. They will ruin your white aesthetic and turn your beautiful batter muddy. I’d probably lean toward throwing them out entirely for this recipe.
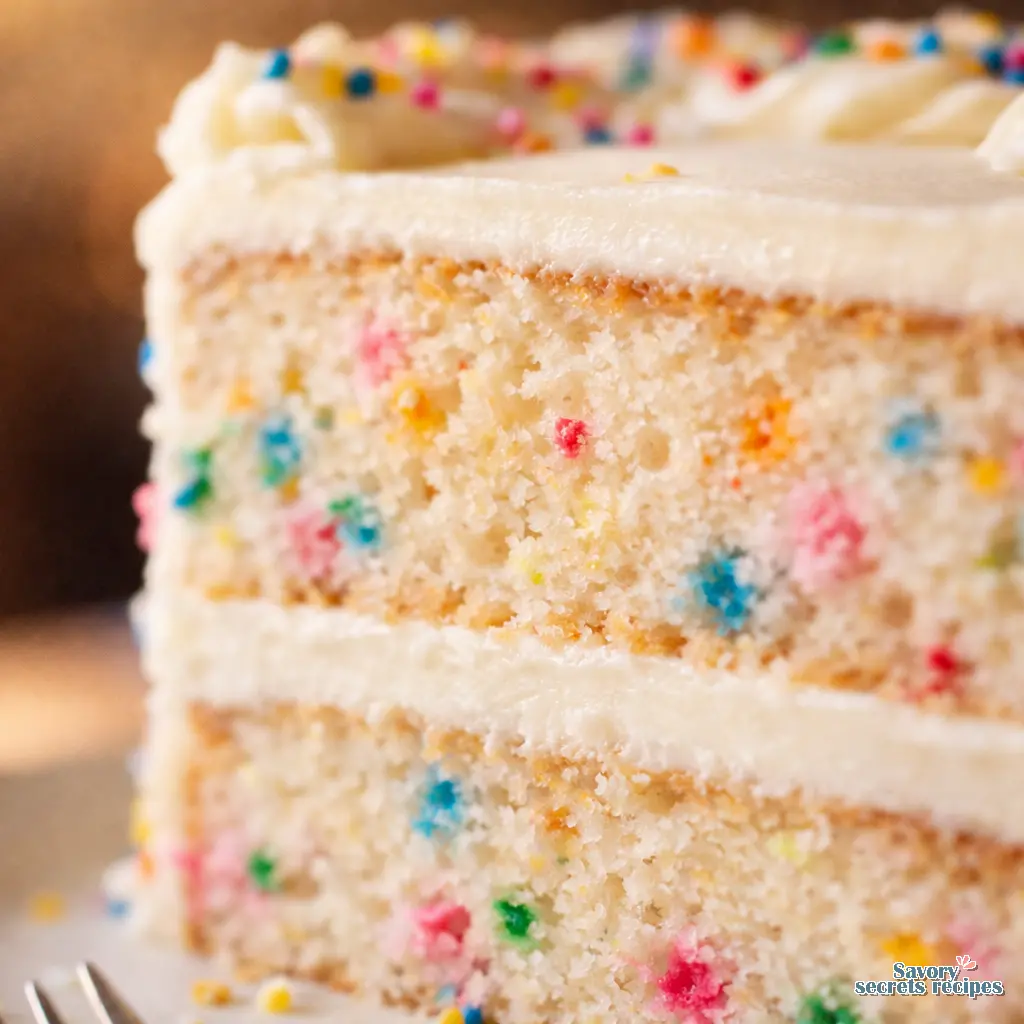
You strictly need “jimmies”. These are the longer, cylindrical strands. But even then, you need the right kind. American-style jimmies are preferred because they hold their color better during the baking process than international “sugar strands” or quins. They melt just enough to leave vibrant pockets of color without streaking.
If you’re doing a Trader Joe’s or Whole Foods run, you might be looking for natural dye options. Natural sprinkles are great, but they tend to have softer colors (think pastels) and can melt a bit faster. In my experience, though your mileage may vary, the standard rainbow jimmies give you that true nostalgic look. Oh, and always taste your sprinkles before using them. If they’ve been sitting in your cupboard since 2019, they might be rancid or bitter. Trust the process on this one. This technique is also essential when creating a rainbow sprinkle cake to maintain those clean, distinct colors.
Building a Better Bakery-Style Base: Butter, Oil, and Egg Whites
To get that true funfetti cake look, the crumb needs to be as white as possible. That means we’re ditching the egg yolks. Using just large eggs (specifically the whites) gives us a snowy backdrop for the rainbow jimmies. Whole eggs will give your cake a yellow tint. It’ll still taste good, but it won’t look like the classic version.
Now we’re talking about the fat. I combine unsalted butter and oil for the best flavor-to-moisture ratio. I prefer European-style butter for anything where you’ll actually taste it. The higher fat content makes a real difference. The butter provides that rich, bakery flavor. The oil ensures a moist crumb that stays soft even if you store it in the fridge.
I remember my uncle Marc letting me stand on a milk crate at his bistro’s prep station in Philly. He taught me to weigh my ingredients. He’d check my prep work constantly. Seemed harsh at the time, but now I get it. Consistency matters. Weigh your cake flour and granulated sugar with a kitchen scale. Cake flour is crucial here. It has less protein than all-purpose flour, which gives you that pillowy, tender texture.
And the real secret ingredient that makes this taste like the boxed version? Clear vanilla extract. Standard pure vanilla extract will tint your batter brown. Clear vanilla extract has that slightly artificial, nostalgic “birthday cake” flavor profile we’re chasing. Makes sense to me to keep it authentic to our childhood memories.
Egg Yolk Rescue: What to Do With the Leftovers
Since we’re using only egg whites for that pristine color, you’ll find yourself with a bowl of leftover yolks. Don’t throw them away. Groceries are too expensive right now to waste good ingredients.
Here are five solid ways to use them up:
- Hollandaise Sauce: Perfect for Sunday brunch. I once scheduled a video shoot for hollandaise on the hottest day in July. The sauce broke four times. Keep your kitchen cool.
- Lemon Curd: A great tart contrast to sweet desserts.
- Pastry Cream: Use it to fill eclairs or fruit tarts.
- Vegetarian Carbonara: Toss hot pasta with yolks, hard cheese, and lots of black pepper.
- Rich Ice Cream Base: Yolks make the creamiest homemade ice cream.
I’m not totally sure, but I think having leftover yolks is actually a great excuse to make a fancy weekend breakfast. That tracks with my cooking philosophy.
Mixing and Baking: The Troubleshooting Guide
Let’s talk technique. You need room temperature ingredients. Butter, egg whites, and buttermilk must all be at room temperature for easy blending. If you use cold ingredients, the emulsion will break, and your cake will be dense. I learned this the hard way.
We use the creaming method here. Beat the butter and sugar until it’s incredibly pale and fluffy. It should look almost like frosting before you even add the eggs. Ensure your bowls and beaters are grease-free when you’re whipping those egg whites. Any speck of grease will prevent them from reaching stiff peaks. Fold the egg whites in gently by hand at the very end to avoid deflating the batter.
Common Mistakes & Fixes
Mistake: The sprinkles sink to the bottom.
Solution: Toss your sprinkles in a tablespoon of flour before folding them into the batter. This gives them grip.
Mistake: The cake layers dome in the middle.
Solution: Use fabric “cake strips” soaked in water wrapped around your pans. This ensures flat, even layers.
Mistake: The cake is dense and heavy.
Solution: You likely over-mixed the batter after adding the flour. Mix just until the white streaks disappear. Trust me.
Always line your pans with parchment paper for easy removal. There is nothing worse than baking a perfect cake and having half of it stick to the bottom of the pan. Test for doneness with a toothpick. A few moist crumbs are okay, but wet batter is not. Let it do its thing in the oven, and don’t open the door too early. I once collapsed a soufflé on camera doing exactly that.
High Altitude Adjustments
If you’re baking above 3,000 feet, you’ll need to make a few tweaks. Decrease the baking powder by 1/4 teaspoon. Increase the buttermilk by 2 tablespoons. Add an extra tablespoon of flour. Water boils at a lower temperature up high, which messes with the structure. Not a huge deal, but essential if you live in the mountains.
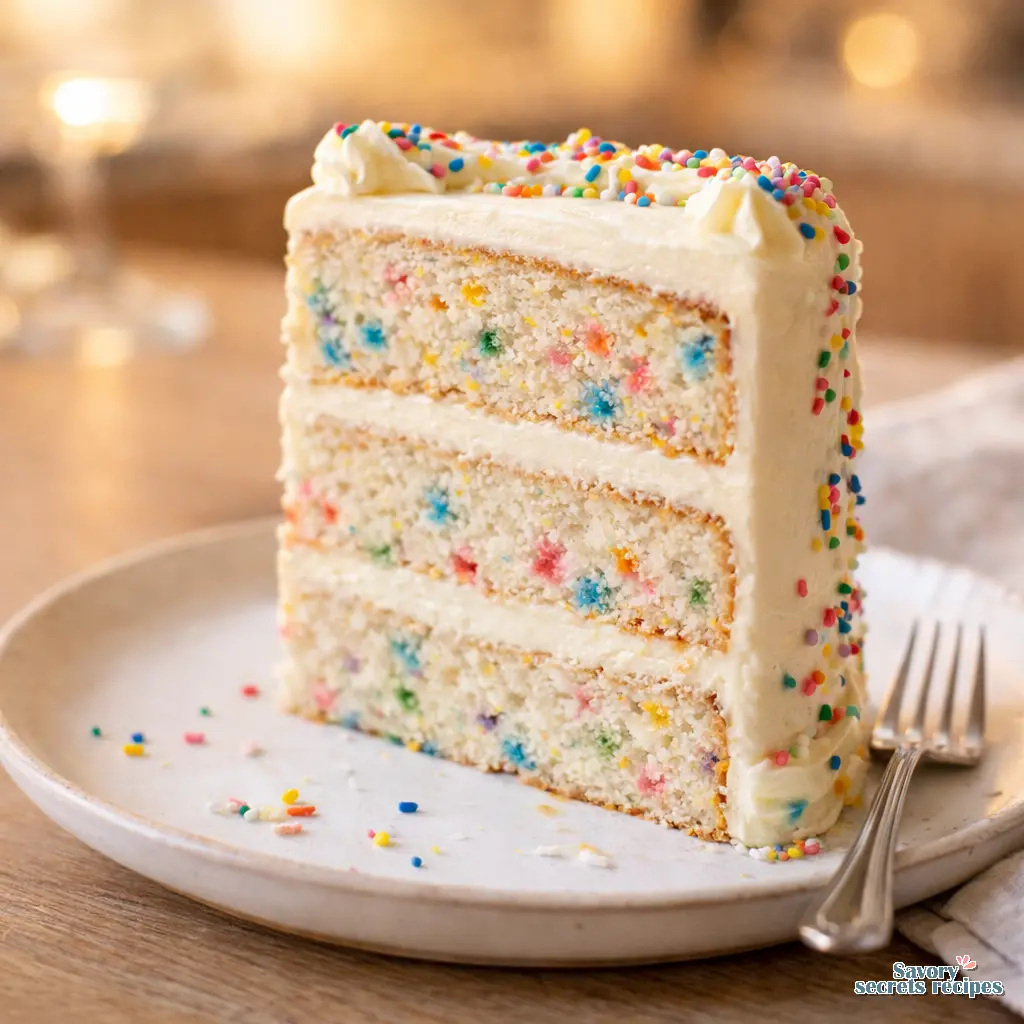
The Crumb Coat: Frosting Like a Professional
You must cool your cake layers completely on a cooling rack before frosting. I know it’s tempting to rush. The smell of vanilla is intoxicating. But frosting warm cake layers will cause your buttercream frosting to melt and your layers to slide right off each other.
To get that bakery style finish, you need to do a crumb coat. Apply a very thin layer of frosting all over the stacked cake. This traps all the loose crumbs. Chill the whole thing in the fridge for 30 minutes. Once it’s set, apply your final, thick layer of confectioners sugar buttercream. Use an offset spatula and a bench scraper to get those edges perfectly smooth.
My daughter insists on helping me decorate. She usually ends up eating more sprinkles than she puts on the cake. I just work around it. Cooking with kids is chaotic, but it’s where the memories happen.
Storage, Freezing, and Serving Your Funfetti Cake
If you somehow have leftovers, proper storage is key. You want to protect that moist crumb. Store the cake at room temperature in an airtight container for up to 3 days. If your kitchen is particularly warm, put it in the refrigerator for up to 5 days. Just make sure you bring it back to room temperature before serving. Cold buttercream has the texture of wax.
You can absolutely freeze this. Wrap individual slices or unfrosted layers tightly in plastic wrap, then a layer of aluminum foil. They’ll keep in the freezer for 2-3 months. Thaw them on the counter for a few hours before you plan to eat them. Add extra sprinkles to the frosting just before serving for maximum cheer. That’s a solid approach to making leftovers feel fresh.
Frequently Asked Questions
Take a photo of that first slice before it’s completely devoured. There’s something genuinely satisfying about pulling out a perfectly baked, colorful piece of cake. It justifies the entire enterprise of baking from scratch. Whether you’re making this for a kid’s birthday, a holiday party, or just because it’s a Tuesday and you need some joy, this funfetti cake delivers.
I share tons of variations and behind-the-scenes baking tests on my Pinterest boards, so come hang out there if you want more ideas. Grab your offset spatula, check your sprinkle stash, and get baking. You’ve got this.
Reference: Original Source
Can I use cake flour for this funfetti cake?
Yes, absolutely. In fact, I highly recommend it. Cake flour gives the funfetti cake that incredibly tender, fine crumb you’d expect from a high-end bakery. You can swap it 1:1 by weight, or use 4.5 cups of cake flour for every 4 cups of all-purpose flour.
What are the best sprinkles for funfetti cake that don’t bleed?
You need to use “jimmies” (the long, cylindrical sprinkles). American-style jimmies hold their color best during baking. Never use nonpareils (the tiny round balls) because they melt instantly and will turn your beautiful white batter into a muddy, gray mess.
Can I bake this homemade sprinkle cake in 9-inch pans?
You certainly can. The layers will just be a little thinner than if you used 8-inch pans. Because they are thinner, they will bake faster. Start checking them with a toothpick about 5 to 10 minutes earlier than the recipe states.
Can I tint the buttercream frosting?
For sure. While a stark white buttercream frosting makes the rainbow sprinkles pop, you can easily tint it. Use gel food coloring rather than liquid drops. Gel won’t thin out your frosting or alter the delicate consistency you worked so hard to achieve.
How much batter does this recipe make?
This recipe yields about 6 to 7 cups of batter. That’s the perfect amount to fill three 8-inch round cake pans, or two 9-inch pans with a bit more thickness. If you’re doing a 9×13 sheet cake, it fits perfectly.
Can I use carton egg whites instead of fresh?
I wouldn’t recommend it if you plan to whip them into stiff peaks. The pasteurization process in carton egg whites often prevents them from whipping properly. Stick to fresh large eggs, separate them yourself, and save the yolks for a batch of lemon curd.
Can I color the funfetti cake batter itself?
You can, but I’d advise against it. The whole charm of a classic funfetti cake is the stark white background contrasting with the bright sprinkles. If you dye the batter pink or blue, the sprinkles will get lost visually. Keep the base white.


