Crunchy Baked Mac and Cheese Recipe
Ingredients
Method
- Preheat the oven to 350°F. Lightly grease a 3- or 4-quart baking dish and set it aside. Combine the shredded cheeses in a large bowl and set aside.
- Cook the pasta for one minute less than the package instructions for al dente. Remove from the heat, drain, and transfer to a large bowl.
- Drizzle the pasta with olive oil and stir to coat. Set aside to cool while preparing the cheese sauce.
- Melt the butter in a deep saucepan, Dutch oven, or stockpot.
- Whisk in the flour over medium heat and continue whisking for approximately 1 minute until the mixture is bubbly and golden.
- Gradually whisk in the milk and heavy cream until smooth. Continue whisking until bubbles appear on the surface, then cook and whisk for an additional 2 minutes. Whisk in the salt and pepper.
- Add two cups of shredded cheese and whisk until smooth. Add another two cups of shredded cheese and continue whisking until the sauce is creamy, smooth, and thick.
- Stir in the cooled pasta until it is thoroughly combined and fully coated with the cheese sauce.
- Pour half of the macaroni and cheese into the prepared baking dish. Top with the remaining 2 cups of shredded cheese, then add the rest of the macaroni and cheese.
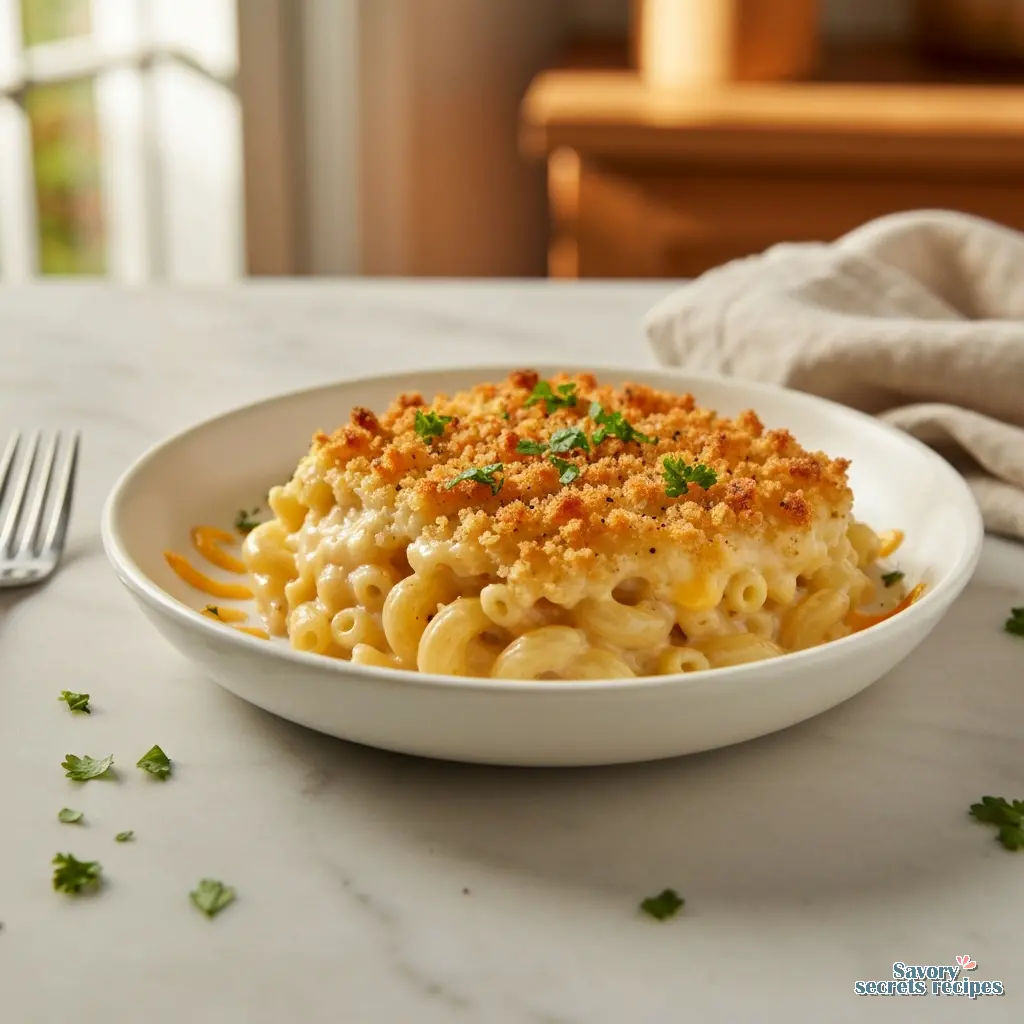
- In a small bowl, combine the panko crumbs, Parmesan cheese, melted butter, and paprika. Sprinkle the mixture over the top and bake for about 30 minutes until bubbly and golden brown. Serve immediately.
Nutrition
Notes
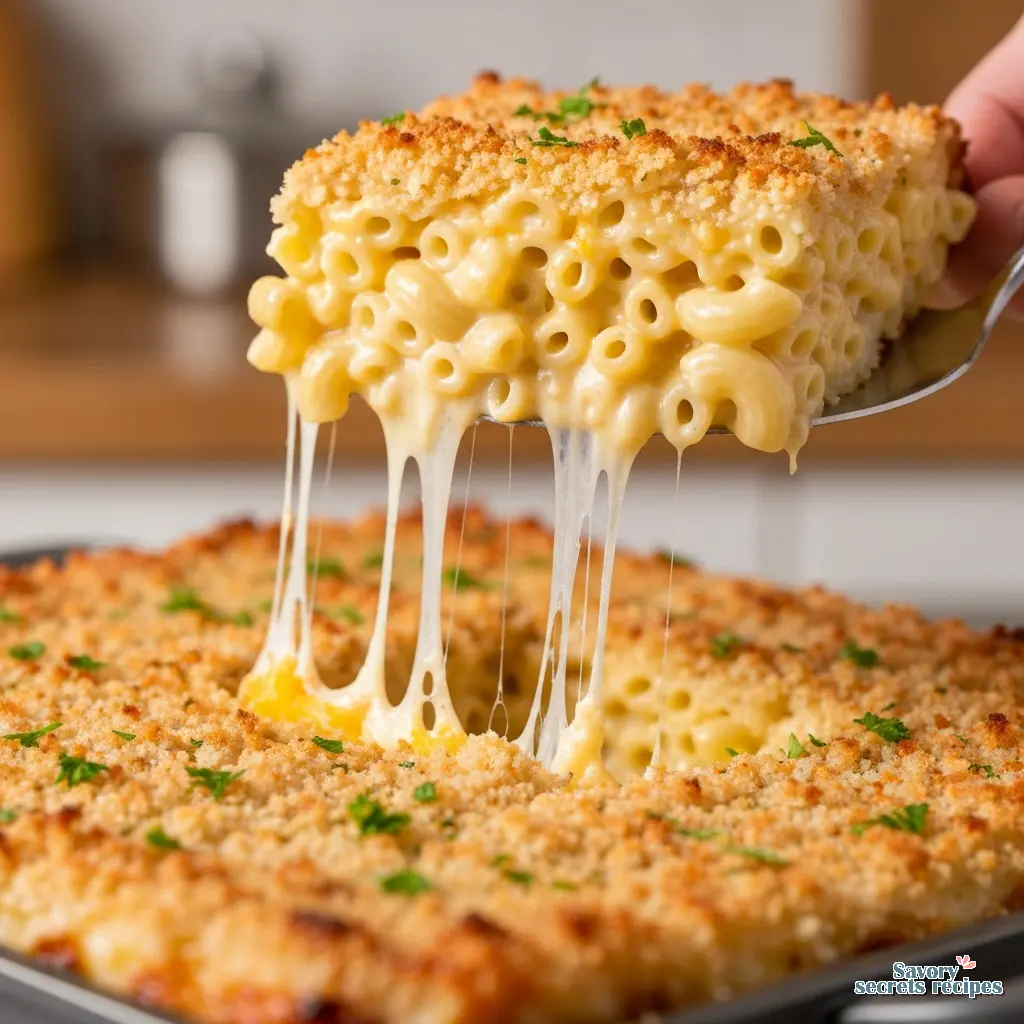
Let’s Be Clear: Texture is Not Optional
Let’s be clear about this right from the start. A dry baked pasta is a tragedy. I remember the first time I tried to make a “fancy” baked breadcrumb mac and cheese for a dinner party in my early twenties. I pulled it out of the oven, looking golden and promising, but when I dug the spoon in? It was a solid brick of noodles. No creaminess. No pull. Just disappointment.
That is not how this works. We are not doing that.
If you are looking for that specific textural contrast. You know the one. Where the top shatters with a buttery crunch, but the layer immediately underneath is velvety, almost liquid gold. Then you are in the right place. This isn’t just about dumping cheese on noodles. It is about physics. It is about understanding how starch and fat interact when you blast them with heat.
I know it’s getting colder out there. Even if you’re in Los Angeles and “cold” just means it dropped below 60 degrees, the instinct is the same. You want something that feels like a warm hug. But a hug shouldn’t be dry. It should be rich, comforting, and executed with precision. My grandmother Zoya used to say, “The oven tells the truth.” If your technique is sloppy, the oven will reveal it. But don’t worry. I’m going to walk you through the exact science of keeping this creamy.
The Cheese Strategy: Why Pre-Shredded is Forbidden
I need you to show me your process here. If you are holding a bag of pre-shredded cheese, put it down. Right now.
Here is the thing about those bags. They are coated in cellulose and anti-caking agents to keep the strands from clumping together in the package. That is great for shelf life, but it is terrible for melting. Those agents prevent the proteins from bonding smoothly, which gives you a grainy, broken sauce. We want an emulsion, not a science experiment. This focus on quality is also why we recommend specific blends in our 3 mac and cheese recipe for the best results.
For the best baked breadcrumb mac and cheese, we need a specific blend:
- Sharp Cheddar (The Backbone): You want aged cheddar for flavor, but not so aged that it separates into oil instantly. Look for a 9-12 month age.
- Gruyère (The Melter): This is non-negotiable for me. Gruyère has this incredible nuttiness and melts like a dream without becoming stringy. It bridges the gap between flavor and texture.
I grate my cheese by hand. Yes, it takes five minutes. Yes, it’s a bit of a workout. But the difference in the final texture? It is night and day. Trust me on this.
The Roux: It’s Just Math You Can Eat
I know the word “roux” intimidates people. It sounds like French culinary school trauma. But honestly? It is just equal parts fat and flour. That’s it.
My grandmother taught me to watch the bubbles, not the clock. When you melt your butter and whisk in the flour, you are cooking out the raw flour taste. At first, it will smell like wet dough. That is not ready. You need to keep whisking until it smells nutty. Like toasted almonds. It should look like wet sand and bubble aggressively.
Temperature matters here. When you add your milk, it needs to be cold or room temperature, and you need to add it slowly while whisking like your life depends on it. If you dump hot milk into a hot roux? Lumps. Every time. We want a béchamel so smooth you could paint with it. A rich, creamy sauce like this pairs beautifully with the earthy flavors of a canned collards recipe.
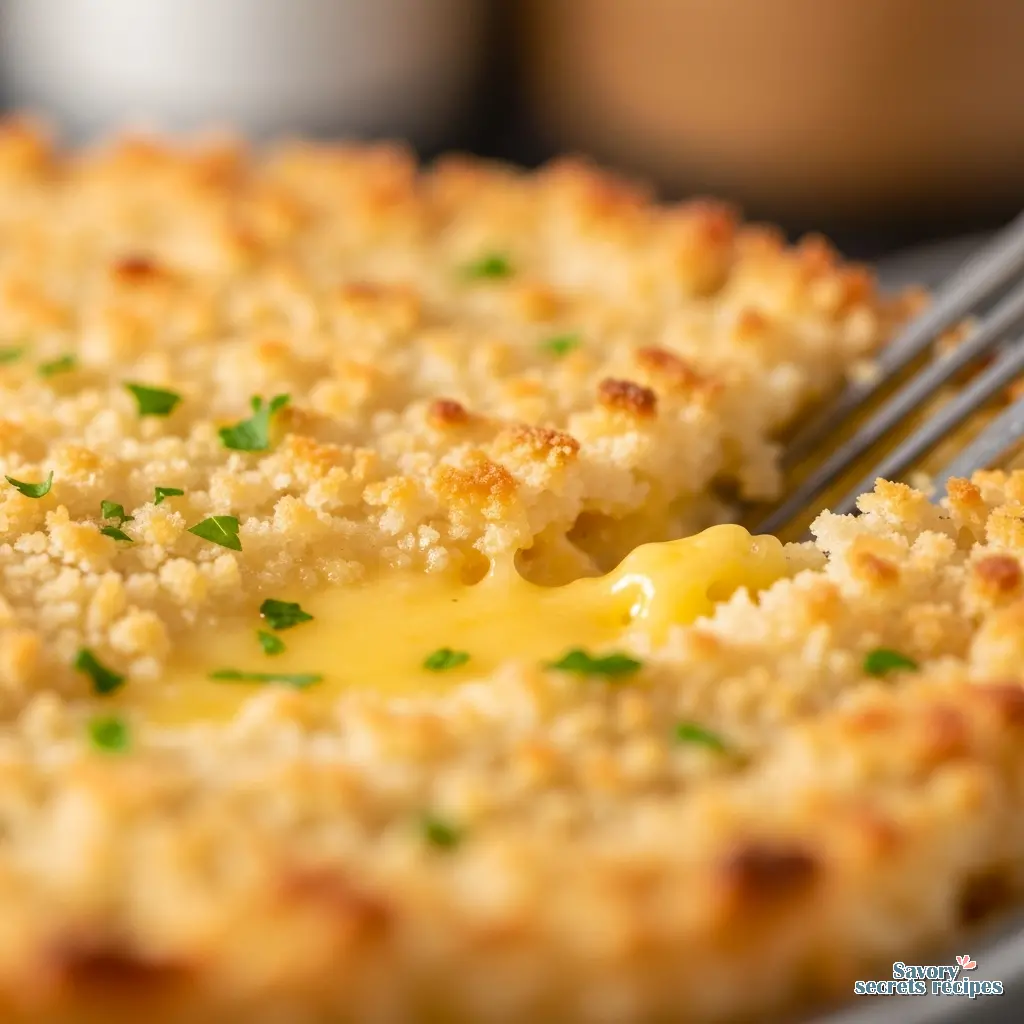
The Breadcrumb Secret (Panko vs. Traditional)
This is where most recipes fail. They just sprinkle dry crumbs on top and hope for the best. That is not correct.
For a truly crispy baked breadcrumb mac and cheese, we use Panko. Japanese-style breadcrumbs are flaky and larger than traditional fine crumbs, which means they don’t soak up the oil and get soggy. They stay shattered and crisp.
But you can’t just put them on raw. You must toss them in melted butter first. I use a ratio of 1 cup Panko to 3 tablespoons of butter. You want every single crumb coated. It should look like wet sand before it even hits the pasta. This ensures that the topping browns evenly in the oven rather than burning in spots and staying pale in others.
Why Your Sauce Separates (and How to Fix It)
I have seen this happen so many times. You make a beautiful sauce, you bake it, and it comes out looking greasy with a grainy texture. That is a broken sauce. It means the fat has separated from the protein.
This usually happens for one of two reasons:
- Too much heat: If you boil the sauce after adding the cheese, the proteins tighten up and squeeze out the fat. Once you add the cheese to your béchamel, remove the pot from the heat. The residual heat is enough to melt it. We are coaxing the cheese, not forcing it.
- Acid imbalance: Sometimes people add too much lemon or vinegar (if they are getting creative). Stick to the mustard powder and maybe a dash of hot sauce.
If your sauce breaks while you’re making it on the stove, don’t panic. Take it off the heat and whisk in a splash of cold heavy cream. It usually brings it back together. It’s a little trick I learned in a production kitchen when a line cook overheated a five-gallon batch. While you wait for the sauce to cool, you can start prepping a classic fried chicken legs recipe to serve alongside.
The Texture Comparison: Choosing Your Topping
I am partial to Panko, as I mentioned. But I know some of you have strong feelings about toppings. Or maybe you just have different things in your pantry. Let’s look at the data.
| Topping Type | Crunch Level | Best For |
|---|---|---|
| Panko (Butter Tossed) | High (Shattering) | The ultimate baked breadcrumb mac and cheese experience. Maximum contrast. |
| Traditional Breadcrumbs | Medium (Sandy) | A smoother, more uniform crust. Good if you dislike large textures. |
| Crushed Crackers | Medium-High (Buttery) | Nostalgia. It adds a salty kick but can get soggy faster. |
Common Mistakes & Troubleshooting
Even with the best recipe, variables change. Your oven might run hot. Your flour might be humid. Here is how we fix the common issues with baked breadcrumb mac and cheese.
Troubleshooting Guide
Mistake: The pasta is mushy.
Solution: You overcooked it during the boil. Remember, the pasta cooks again in the oven. You must drain it 1-2 minutes before it reaches al dente. It should have a firm bite in the center when you taste it.
Mistake: The top is burning before the center is hot.
Solution: Your oven rack is too high. Move it to the center or lower third. If it’s still browning too fast, cover it loosely with foil for the first 15 minutes, then uncover to crisp up.
Mistake: It’s dry.
Solution: You likely added too much pasta for the amount of sauce. Pasta is a sponge. It drinks sauce. Always make about 20% more sauce than you think you need. It looks soupy going in, but it comes out perfect.
Storage and Reheating: The Day 2 Protocol
I’ll be honest. Baked mac and cheese is never quite as good on day two as it is fresh out of the oven. The pasta continues to absorb moisture in the fridge, making it denser.
However, we can get close. Do not microwave it. I repeat, do not microwave it unless you want oily rubber.
To reheat properly, place the portion in an oven-safe dish. Splash a tablespoon of milk or cream over it. Cover it tightly with foil. Bake at 350°F for about 15-20 minutes. The steam from the added milk will revitalize the sauce and loosen the pasta. Remove the foil for the last 2 minutes to re-crisp that breadcrumb topping.
Frequently Asked Questions
Final Thoughts
When you pull this out of the oven, I want you to listen. You should hear it sizzling. The edges should be bubbling aggressively, and the top should be that deep, bronzed color that promises crunch. That is the sound of success.
Don’t rush to serve it immediately. I know, it smells incredible, and you’re hungry. But let it rest for five minutes. Just like a steak, the sauce needs a moment to settle and thicken slightly. If you cut into it too soon, the sauce will run everywhere. Give it a moment.
This recipe is more than just dinner. It’s a reliable friend on a cold night. It’s the dish you bring to the potluck that comes back empty. And once you master that roux, you have unlocked a whole world of cooking. I’d love to hear how it turned out for you. Did you stick to the Gruyère, or did you experiment? Let me know.
For more inspiration and visual guides on mastering comfort food, check out my Pinterest boards where I collect all my favorite textures and techniques.
Reference: Original Source