


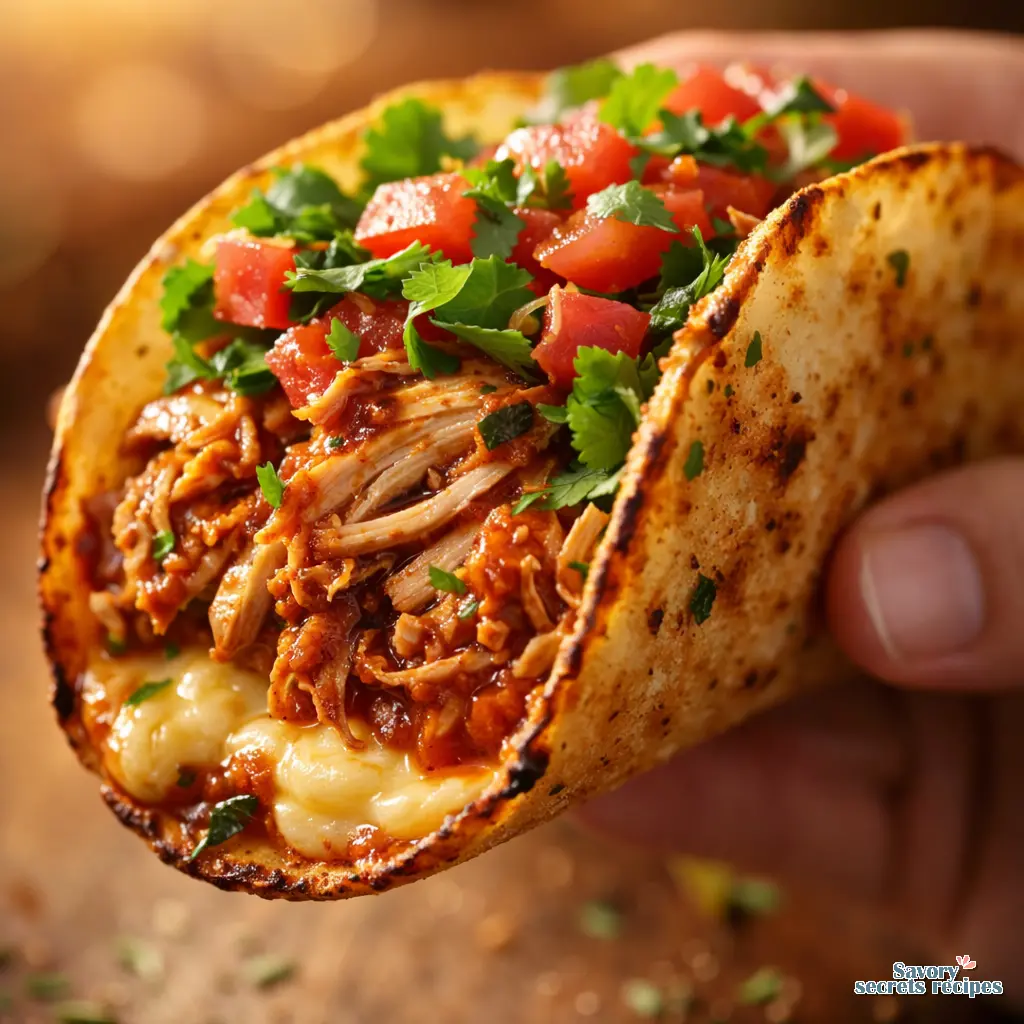
Baked Crispy Chicken Tacos for Mess Free Crunch
Ingredients
Method
- Preheat oven to 425°F (220°C). Lightly grease a 9x13-inch baking dish with cooking spray or oil and set aside.
- Combine shredded chicken, taco seasoning, salsa, and 3/4 cup of shredded cheese in a large mixing bowl. Stir until the filling is well combined and evenly coated.
- Warm corn tortillas until pliable by microwaving them in a damp paper towel for 30–45 seconds or heating them briefly over a gas flame using tongs.
- Spoon 2–3 tablespoons of filling onto one half of each warm tortilla. Fold the tortilla over the filling and place upright in the baking dish. Repeat with remaining tortillas, packing them tightly to maintain their shape.
- Brush or spray the outside of each taco shell with olive oil. Sprinkle the remaining 3/4 cup of shredded cheese evenly over the tacos.
- Bake for 15–20 minutes until the shells are golden and crispy and the cheese is melted and bubbly. Check at 15 minutes to prevent over-browning.
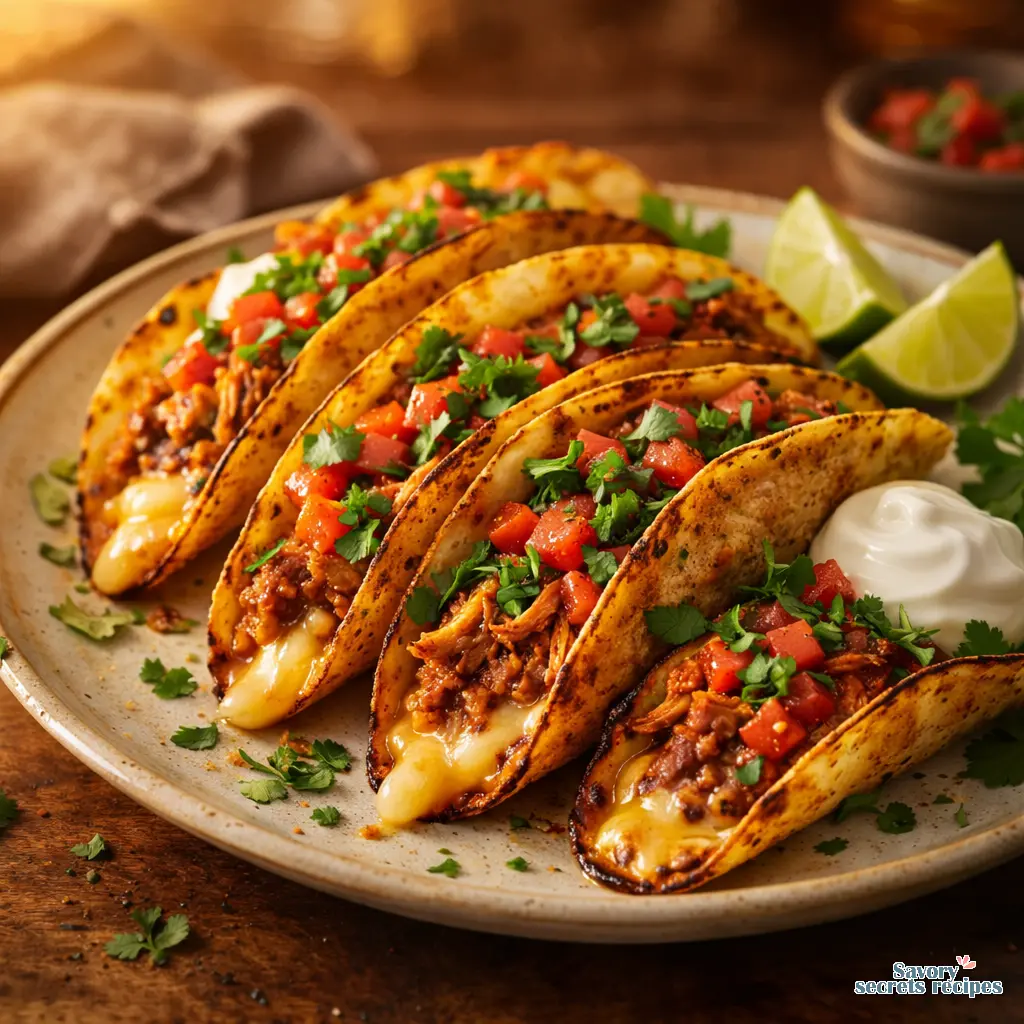
- Remove from the oven and top immediately with shredded lettuce, sour cream, pico de gallo, avocado, and fresh lime juice. Serve immediately while shells are crunchy.
Nutrition
Notes
The End of Soggy Taco Tuesdays
I’ve been making tacos wrong my entire adult life. There, I said it. For years, I’d stand at the stove on a Tuesday night, frying individual corn tortillas in an inch of oil. My kitchen smelled like a diner, my stovetop was coated in grease splatters, and by the time I finished cooking the last hard shell, the first one was already cold. It’s frustrating. You want the crunch of a fried shell without the absolute mess of deep frying.
Then I figured out how to make baked crispy chicken tacos in the oven. The realization that cleanup is just one pan? That changes everything. You build them all at once, bake them on a sheet pan, and they come out uniformly golden brown and bubbly. My grandmother Fatima taught me to cook in Casablanca during childhood summers, and she always emphasized that texture is just as important as flavor. A soggy bottom ruins a good meal. We are going to fix that today.
I know what you’re thinking. You’re wondering if oven baked shells can actually get that signature shatter-crunch. They absolutely can. Let me think about that for a second, actually they get even crispier than the boxed shells because you control the oil and the heat. Plus, you’re doing batch cooking family style, which means you actually get to sit down and eat with everyone else while the food is hot.
The Rotisserie Chicken Shortcut
Look, I love roasting a whole chicken. Every Eid, my father would roast a whole lamb in our backyard, and I learned early on that good meat takes time. But on a Wednesday night when you’re rushing home from work in Los Angeles traffic? We need a shortcut. Grabbing a rotisserie chicken from Ralphs or Trader Joe’s is exactly what you want here. It’s already tender, perfectly seasoned, and ready to pull apart.
Here’s what I’d do. Shred the chicken while it’s still warm. Warm meat absorbs seasonings much better than cold meat from the fridge. Toss that shredded chicken into a skillet with your taco seasoning and a splash of water or broth. Now, this next part is crucial. You have to cook the liquid out of the chicken mixture. If you leave it soupy, that moisture goes straight into your tortillas and creates a soggy bottom. Give it another minute in the pan. You’ll smell when it’s ready, the spices will bloom and the pan will sound like a dry sizzle instead of a wet simmer.
Choosing Tortillas and Preventing Cracks
Not all corn tortillas are created equal. I learned this the hard way after pulling a tray of completely shattered tacos out of the oven. If you use stiff, stale tortillas, they will crack the second you try to fold them. You want to look for brands labeled “super soft.” Mission Super Soft corn tortillas work incredibly well for this hard shell chicken tacos recipe because they have a bit more flexibility.
Even with the softest brand, warming or toasting tortillas before filling is essential for pliability. I usually wrap a stack of six in a damp paper towel and microwave them for about 30 seconds. They should feel like soft fabric in your hands. If they resist when you fold them, they need more heat. Don’t skip this step. Trust me.
The Science of the Crunch: Why Oil Matters
This is the good stuff. The secret to that perfect crispy texture isn’t just the oven temperature (though we’re baking at a solid 425°F). The real magic happens with the oil. A lot of recipes tell you to just hit the pan with cooking spray. I disagree. You need to brush the outside of the tortillas generously with olive oil or avocado oil.
Why? Because oil conducts heat better than air. When that oiled tortilla hits the hot baking sheet, it essentially shallow-fries itself in the oven. The oil creates a barrier that crisps the corn rather than just drying it out. You also need to flip tacos halfway through baking for even browning. It takes maybe sixty seconds to pull the pan out and use tongs to flip them over, but the resulting crunch is incredible. For extra crispiness, I sometimes use a broiler for the last 2 minutes. Just watch them closely so they don’t burn.
Building the Perfect Taco: The Assembly Line
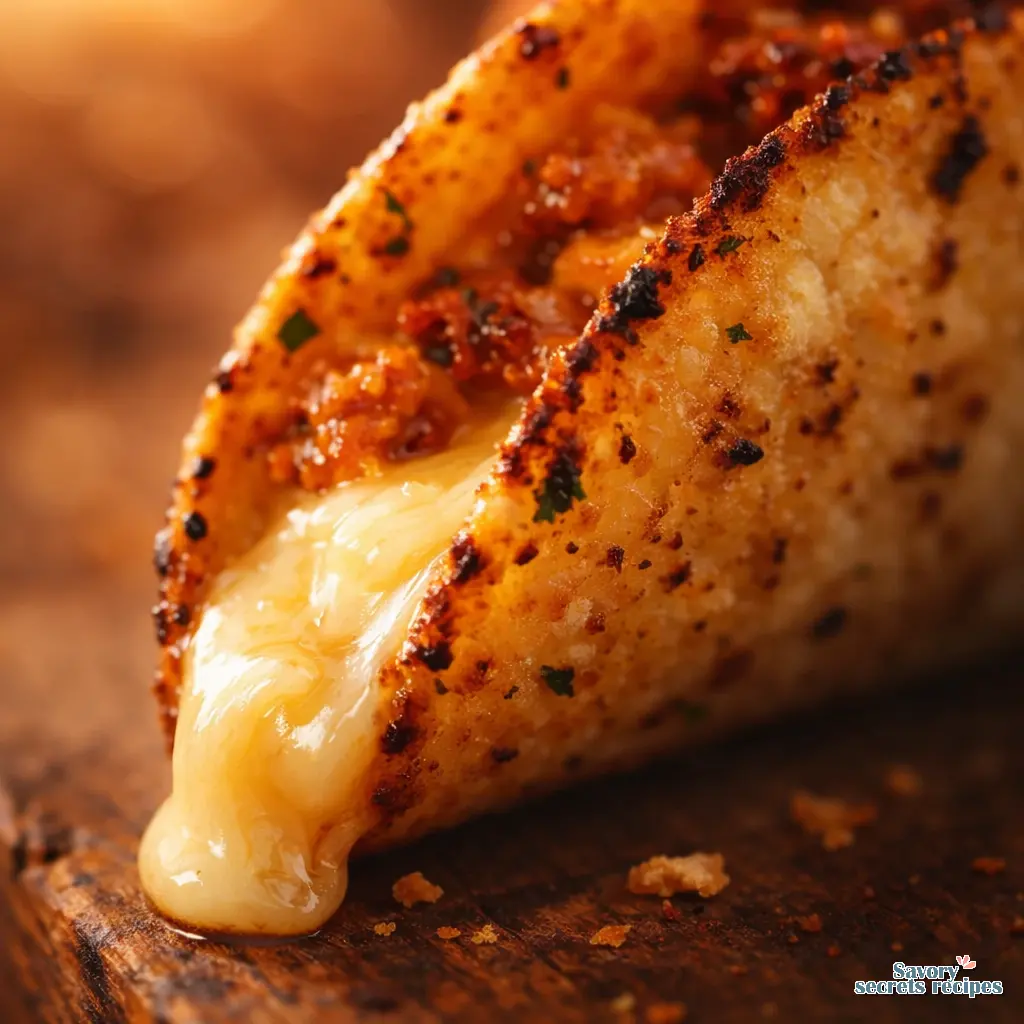
Once your chicken is ready and your tortillas are warm, you need to set up an assembly line. Line the baking sheet with parchment paper for easy cleanup. Now, here is the most important structural rule for baked crispy chicken tacos: the cheese goes in first.
I like a mix of monterey jack and sharp cheddar. You sprinkle a small handful of cheese directly onto the warm tortilla, then add the hot chicken mixture on top. As it bakes, that bottom layer of cheese melts and forms a waterproof seal between the moist chicken and the delicate corn tortilla. It completely prevents soggy bottoms. I’ll often let the cheese ooze out slightly to create crispy cheese edges on the baking sheet. It’s the best part.
Fold them over gently. Don’t overfill the tacos to ensure they stay closed. If they pop open, you’ve added too much filling. If you have a taco rack, you can make standing tacos. If you don’t? Just lay them flat on the sheet pan, or use an overturned muffin tin to hold them in place. Makes sense to me.
Common Mistakes & Fixes
Mistake: Overfilling the tortillas causing them to burst.
Solution: Stick to about 2 tablespoons of chicken per taco. They should fold easily and stay shut on their own.
Mistake: Using stale corn tortillas which crack instantly.
Solution: Always buy fresh, “super soft” tortillas and warm them in a damp paper towel before folding. Cold tortillas will always fail.
Mistake: Leaving too much liquid in the chicken mixture.
Solution: Simmer the chicken until the pan is nearly dry. The cheese barrier helps, but a soupy filling will eventually soak through.
Complete Mexican Feast: Side Dish Pairings
Since we’re baking these all at once, you have plenty of time to pull together some fresh sides while the oven does the work. I’m partial to finishing dishes with raw herbs and acid right before serving. It brightens everything and gives you textural contrast against the rich, cheesy filling.
In the spring, when avocados are perfect at the Santa Monica Farmers Market, I make a quick guacamole with lots of lime juice and fresh cilantro. If it needs more acid, it needs more acid. Taste as you go, adjust at the end. Set out bowls of sour cream, fresh pico de gallo, and maybe some pickled red onions. You can also warm up a can of refried beans to serve on the side. The contrast between the lava-hot, crunchy shell and the cold, fresh toppings is exactly what you want.
Make-Ahead & Freezing Mastery Guide
My daughter went through a phase last year where she’d only eat very specific textures. I didn’t want to fight it, but I also wasn’t going to make separate meals every night. That’s when I started relying heavily on batch cooking. You can easily prep these baked crispy chicken tacos ahead of time.
If you want to freeze them, do it before baking. Assemble the tacos completely, place them flat on a parchment-lined baking sheet, and freeze them until solid. Once they’re frozen, wrap them individually in plastic wrap and store them in a freezer bag. When you’re ready to eat, you just bake them straight from frozen. You’ll need to add about 5 to 7 minutes to the baking time, but the method remains exactly the same. The cheese still melts perfectly, and the shells still get incredibly crunchy.
Storage & Reheating Guide
Let’s talk about leftovers. If you have leftover baked tacos, refrigerate them in an airtight container for 3 to 4 days. But whatever you do, avoid the microwave to prevent sogginess. A microwaved taco is a sad, rubbery experience.
To bring that crunch back to life, use your oven or toaster oven. Heat it to 350°F and bake the tacos for 5 to 10 minutes until the cheese is bubbly again and the shell crisps up. Alternatively, you can reheat them stovetop in a skillet, quesadilla-style, for maximum crispiness. Just a dry pan over medium heat, a couple of minutes on each side. Perfect.
Frequently Asked Questions
Bringing It All Together
I’ve been teaching my daughter that cooking is about paying attention, and this recipe proves it. You’re just taking simple ingredients, applying the right technique with the oil and the oven, and ending up with something spectacular. The tray coming out of the oven, smelling like toasted corn and spices, is a pretty great weeknight victory. You get all that amazing crunch without having to scrub grease off your stove for an hour.
Give these baked crispy chicken tacos a try next time you need a quick dinner that actually feels like a feast. I share tons of variations on my Pinterest boards if you want ideas for different fillings or spice blends. Build the layers, don’t rush the base, and enjoy that first perfect crunch.
Reference: Original Source
Can you use corn tortillas for this hard shell chicken tacos recipe?
Absolutely. In fact, I prefer them. Corn tortillas get significantly crispier in the oven than flour ones. Just make sure you buy the super soft variety and warm them thoroughly before folding so they don’t crack down the middle.
What is the secret to making perfectly baked crispy chicken tacos in the oven?
The real secret is brushing the outside of the tortillas generously with oil instead of just using cooking spray. That oil layer essentially shallow-fries the corn shell in the oven heat. Flipping them halfway through guarantees an even, golden crunch on both sides.
How do you keep chicken tacos baked in oven from getting soggy on the bottom?
Two things. First, simmer your chicken filling until almost all the liquid evaporates. Second, always put a layer of cheese down on the tortilla before adding the meat. The melted cheese acts as a waterproof barrier protecting the shell.
What is the best cheese for oven baked chicken tacos to get a perfect melt?
I like a 50/50 blend of sharp cheddar for flavor and monterey jack for that perfect, gooey melt. You can also use Oaxaca cheese if you can find it. Pre-shredded cheese works fine, but grating it yourself melts much smoother.
How do you crisp corn tortillas in the oven for tacos to ensure they stay crunchy?
Bake them hot at 425°F, use plenty of olive oil on the exterior, and don’t overcrowd the pan. If they need a little extra help at the end, hit them with the broiler for about two minutes. Watch them closely so they don’t burn.
Can I bake the toppings like lettuce and avocado inside the taco?
I wouldn’t recommend it. Hot lettuce gets terribly wilted and bitter, and warm avocado can turn mushy. Bake only the meat and cheese. Add your cold, fresh toppings like pico de gallo and sour cream right before you eat.
How do I make these tacos spicier?
It’s easy to adjust the heat. Toss some diced fresh jalapenos directly into the chicken mixture as it simmers, or stir in a few dashes of your favorite hot sauce. You can also swap the cheddar for a spicy pepper jack cheese.
Can these be made dairy-free?
Yes, they can. Swap the regular cheese for a good quality plant-based melting cheese, and use cashew cream or a citrus-based avocado sauce instead of sour cream for serving. Just make sure your dairy-free cheese has a good fat content so it still creates that moisture barrier.


