


Crispy Oven Baked Stuffed Chicken No Frying
Ingredients
Method
- Preheat the oven to 375°F (190°C) and slice a pocket into the side of each chicken breast without cutting all the way through.
Nutrition
Notes
Why This Baked Stuffed Chicken Works (And Others Don’t)
I’ll be honest, chicken breast is tricky. It’s the part everyone thinks they should cook, but it’s so easy to mess up. Dry, bland, boring. I’ve eaten more sad chicken dinners than I care to remember. But here’s what I’m seeing: the secret isn’t in some complicated technique. It’s in understanding the oven’s role. This baked stuffed chicken recipe works because it respects the process. It’s not revolutionary. It’s just methodical.
My grandfather timed his tomato sauce with a wind-up kitchen timer that ticked so loud you could hear it from the stoop. Exactly 47 minutes, every Sunday. When I asked why not 45 or 50, he said ‘Because 47 is when the tomatoes stop fighting the oil.’ He was right about the emulsion point. Cooking is about finding that moment. For baked stuffed chicken, it’s when the internal temperature hits 165°F and the panko crust turns the color of peanut butter. That’s your moment.
This method gives you a crispy oven baked stuffed chicken without frying. No splatter, no mess. Just a hot oven doing the work. And because we’re using clean, simple ingredients no pork, no alcohol it feels like a meal you can serve anyone. Even in LA, where dietary notes are as common as traffic updates.
The Tools You Actually Need
You don’t need fancy gear. A good baking sheet, some parchment paper, and a wire rack. That’s it. The wire rack is non-negotiable, by the way. It lifts the chicken off the hot pan, letting hot air circulate underneath. This is how you avoid the dreaded ‘soggy bottom’ and get that crispy oven baked stuffed chicken texture all around.
For butterflying the chicken, any sharp chef’s knife will do. I find it’s easiest to do that using a sharp knife while gently pressing the chicken with the palm of my other hand, to keep it flat as I go. Start at the thinner edge and work your way through to the thicker side, leaving that side still attached. A meat mallet helps if your breasts are very thick. Tenderizing them slightly makes the chicken more tender and creates an even canvas for your filling.
Your pan’s not hot enough yet if you’re worried about sticking. Line that baking sheet with parchment or a silicone mat. I find it best to put some parchment paper onto a baking sheet, just so the cheese doesn’t stick and make cleanup difficult. Let the process do the work.
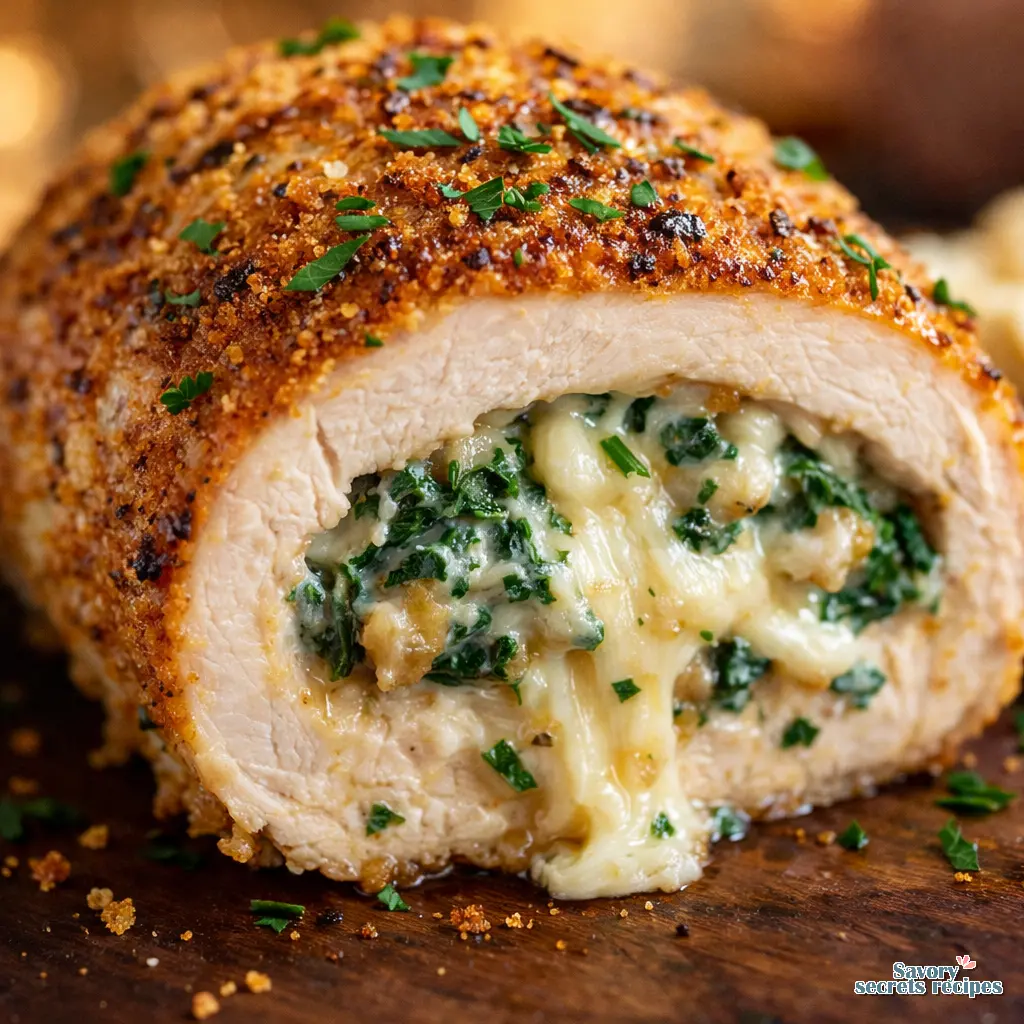
The Filling: Where Most Baked Stuffed Chicken Goes Wrong
Let me walk that back a bit. The filling isn’t just flavor. It’s structural. The reason this one works so well is twofold. First, the cream cheese mixture holds together. It doesn’t go oozing out. We’re not really stuffing these but sandwiching the ingredients inside. If the filling is too cheesy or too loose, it will slide out. Second, we’re using a slice of cheese instead of only shredded because it takes a bit longer to melt, and it tends to hold to itself better.
I use just under 1/2 cup of filling per chicken breast. Don’t overfill. As delicious as the cheesy spinach filling is, take care not to overstuff. It’ll be harder to fold, and the excess will leak out while the chicken bakes. That tracks with what I’ve seen in testing.
Now, about the spinach. I find it’s easiest to use frozen spinach that’s been thawed. Why? Because frozen spinach has already been shrunken in size and mixes into the filling easily. Yes, you need to remember to thaw it and squeeze out the extra liquid, but I think that’s still better than dirtying a pan to cook fresh spinach. However, if you do want to use fresh, you’ll need about half a pound of leaves. Sauté them first. You must drain the water. Squeezing excess water from zucchini or thawed spinach is key to avoiding a watery filling. Don’t skip this step. For more cheesy inspiration, explore our guide to perfect cheese stuffed chicken.
Shred your cheese from a block. Pre-shredded cheese has anti-caking agents that can make it melt poorly and taste… off. For the sliced cheese, you can substitute your favorite kind. I like Swiss here, but anything that melts will work cheddar, provolone, mozzarella. Your pan’s not hot enough yet if you’re using pre-shredded. Give it another minute of thought and grab a block instead.
The Science of Baking, Not Burning
How long to bake stuffed chicken breast at 400? That’s the wrong question. The right question is: what’s happening inside? At 400°F, you’re creating immediate oven spring on that panko crust. It sets quickly, sealing in juices. But you’re also risking a too-dark crust before the chicken cooks through. My sense is that 375°F is more forgiving for most home ovens, which can run hot or cold.
Carry-over cooking is real. When you pull the chicken out at 160°F, the residual heat will carry it to 165°F as it rests. If you pull it at 165°F, it’ll climb to 170°F or higher. That’s the difference between juicy and dry. You must let them rest! Resting allows the juices to redistribute. I never skip this step.
Make sure the internal temperature reaches 165°F on an instant-read thermometer. Check the thickest part of the chicken breast, not the cheesy filling, by accident! The filling will be hotter. If it’s not ready, it’s not ready. Don’t rush it. This is exactly right for food safety and quality.
Common Mistakes & Fixes
Mistake: The filling leaks out everywhere.
Solution: You likely overfilled or didn’t seal the chicken well. Use toothpicks to secure if needed, and remember that cream cheese helps bind it. I don’t think toothpicks are always needed, but if you’re worried, use them.
Mistake: The chicken is dry.
Solution: You probably overcooked it or didn’t let it rest. Use a thermometer and pull at 160°F. Let it rest for 5-10 minutes covered loosely with foil.
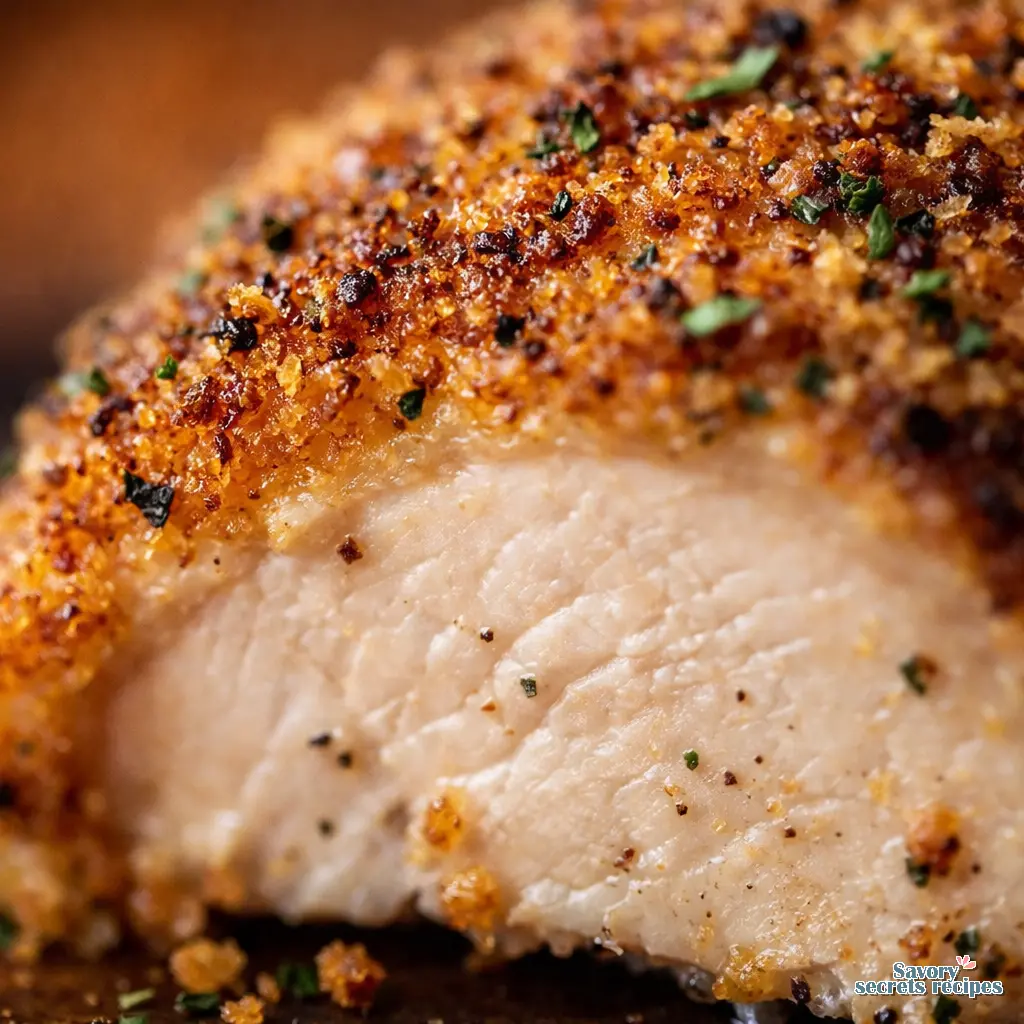
Mistake: The crust isn’t crispy.
Solution: You might have skipped the wire rack or the oil in the panko. You’ll mix together some panko breadcrumbs with a little bit of olive oil. It won’t seem like it wants to mix at first but keep stirring. That oil is crucial.
Mistake: Soggy bottom.
Solution: You baked directly on the sheet. Always use a wire rack. It’s the single best trick for crispy oven baked stuffed chicken no frying can match.
Can I Cook Vegetables on the Same Tray?
Yes, absolutely. For oven baked stuffed chicken breast with vegetables, it’s a great time-saver. But you need to think about cook times. Dense veggies like carrots or potatoes should be cut small or par-cooked. Quick-cooking veggies like asparagus or cherry tomatoes can go on the same tray from the start.
Place them around the wire rack, not underneath. They’ll roast in the drippings and fat. It’s less hands-on than using a skillet. So I can throw together a simple side dish without having to multitask. A sheet pan of roasted spring vegetables asparagus, halved baby potatoes, maybe some sliced zucchini is perfect right now. That’s what I’m talking about.
Season as you go, not at the end. Toss those veggies in oil, salt, and pepper before they hit the pan. They’ll caramelize better.
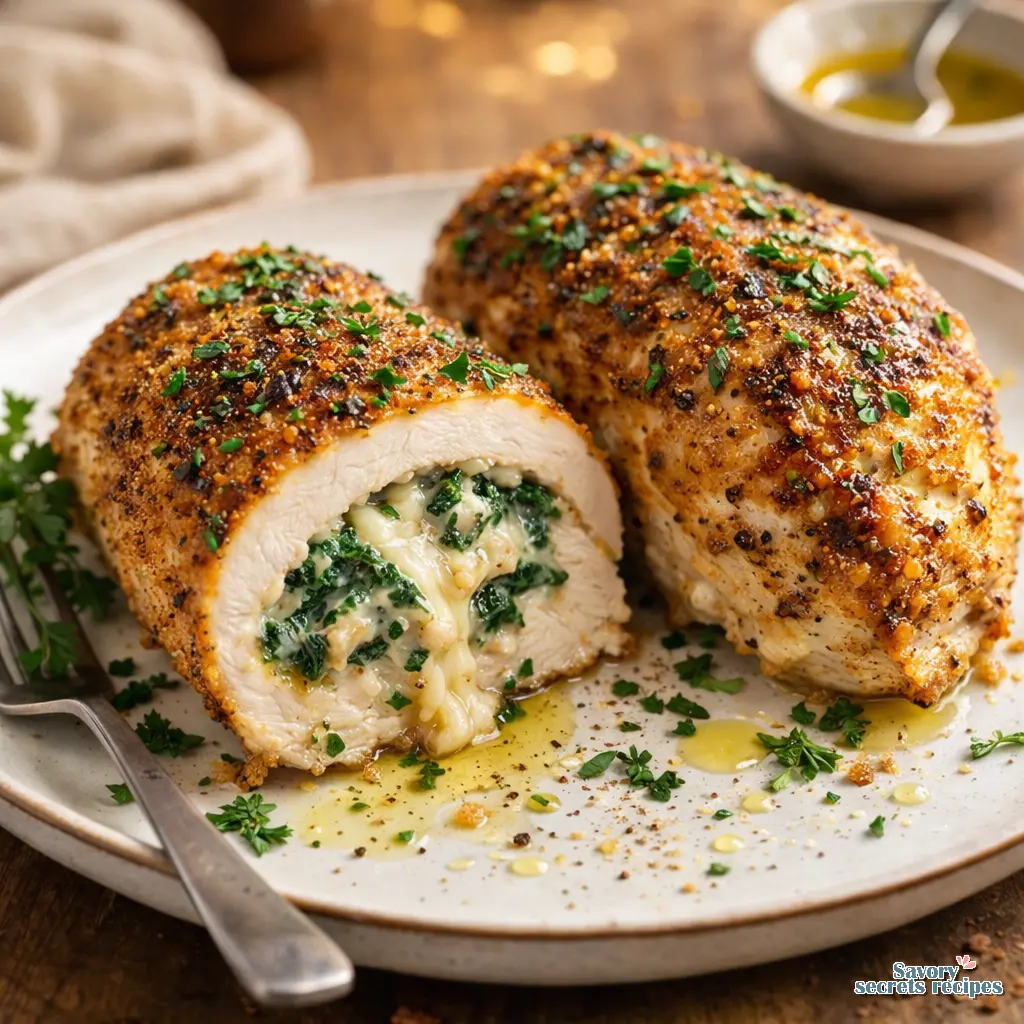
Sealing the Deal: How to Keep the Filling In
It’s a lot easier to season the chicken breasts before you add the spinach filling. I season the top, then flip them over and season the bottom before stuffing. This creates a flavor base. After you add the filling, fold the thicker side over and press the edges together. You’re creating a seal.
Some recipes tell you to use toothpicks. I’m fine with a little cheese melting out. But if you’re worried about the filling sliding out too much, you can absolutely use them. Secure the stuffed chicken breasts using toothpicks to keep the filling intact. Just remember to remove them or warn your guests. Fair enough?
The key is even thickness. If one side is super thick, pound it a bit. You want a relatively uniform pocket so it cooks evenly. This visual troubleshooting is something most recipes gloss over, but it makes all the difference.
Make-Ahead & Meal Prep Strategy
You can assemble these and freeze them raw. Don’t put the panko topping on before freezing though since it will fall off. Add that before cooking. You can cook them straight from frozen, but add an extra 50% to the cooking time. Make sure it reaches 165°F internally. You can add the panko halfway through. If the crust starts to get too brown, add a bit of foil on top.
For weekly meal prep, assemble the stuffed chicken and store them airtight in the fridge for up to a day before baking. The filling might make the chicken a tiny bit more tender, which is a good thing. Stretch this recipe further to reduce costs. This makes four large portions, which can easily be cut in half for eight servings.
I’m still working through this, but in my experience, the cream cheese filling holds up better to refrigeration than a ricotta-based one. It’s sturdier. Let’s table that for now, but it’s worth noting.
Variations: Play With Your Food
Once you’ve nailed the basic baked stuffed chicken method, play with it. That’s where cooking gets fun. Swap the spinach for sautéed mushrooms. Or diced sun-dried tomatoes packed in oil. Want to play with the filling some more? Other ingredients that work well are kale or finely chopped broccoli.
For the cheese, instead of cream cheese and parmesan, try ricotta, feta, or goat cheese. Each changes the texture and tang. To make the dish even creamier, the filling also includes a slice of cheese. I like Swiss, but gruyere is fantastic too. Discover more simple and juicy variations in our collection of easy chicken dinner recipes.
You could make this with boneless chicken thighs instead. Keep in mind that thighs can be more delicate, so take more care when pounding them. They’ll also need a slightly longer cook time. My sense is that breasts are more forgiving for beginners, though yours may differ.
Storage & Reheating: Don’t Ruin Your Leftovers
Store any leftover baked stuffed chicken airtight in the fridge for 3-4 days. These are at their best when served fresh, but leftovers are still great. You could also freeze them for up to 3 months. Wrap the cooled chicken breasts in plastic wrap or store them airtight before freezing.
To reheat, I’d avoid the microwave if you can. It turns the crust soggy. Wrap loosely in foil with a splash of chicken broth or water and bake at 325°F for about 15 minutes, or until heated through. If you’re using the oven, add that liquid and cover with foil to prevent drying out. You can reheat in a 350°F oven or use an air fryer if you have one.
Frequently Asked Questions
How long do I need to bake stuffed chicken breast at 400 degrees?
At 400°F, a typical stuffed chicken breast takes 22-28 minutes. But time is a guide, not a rule. Always check the internal temperature in the thickest part of the meat, not the filling. It should read 165°F. Using a wire rack ensures even cooking for your baked stuffed chicken.
How do you get crispy oven baked stuffed chicken without frying it?
The wire rack is the secret. It lifts the chicken, allowing hot air to circulate underneath so the bottom crisps up just like the top. Also, mix your panko with a bit of olive oil before pressing it on. That creates an irresistible, crunchy crust on your baked stuffed chicken.
What’s the best way to keep baked stuffed chicken from drying out?
Don’t overcook it. Use a thermometer and pull the chicken out at 160°F. Let it rest for 5-10 minutes the temperature will rise to 165°F and the juices will redistribute. Also, using a cream cheese-based filling adds moisture. Resting is non-negotiable for juicy baked stuffed chicken.
Absolutely. Place quick-roasting veggies like asparagus or cherry tomatoes around the wire rack. For denser vegetables, cut them small or give them a head start. They’ll cook in the delicious drippings, making cleanup easy and your baked stuffed chicken dinner complete.
How do you seal a stuffed chicken breast so the filling doesn’t leak?
Don’t overfill, and press the edges together firmly after folding. The cream cheese acts as a glue. If you’re worried, use toothpicks to secure the seam. I find they’re not always needed for baked stuffed chicken, but they’re great insurance for a neat presentation.
than spinach?
Sure, you can. I’ve had great results with kale, though you’ll need to chop it finely and maybe give it a quick sauté to soften it. Finely chopped broccoli florets work too, or you could go in a different direction with sautéed mushrooms or diced sun-dried tomatoes packed in oil. Just remember the rule: if it’s wet, squeeze it. You don’t want a watery filling in your baked stuffed chicken.
Do I need to drain the zucchini or spinach?
Yes, absolutely. This is non-negotiable. Squeezing every last drop of excess water from thawed frozen spinach or grated zucchini is the single most important step to avoid a soggy, leaking filling. I use a clean kitchen towel and really wring it out. Your baked stuffed chicken will thank you.
Expert Notes & Data Insights
After looking at how other folks tackle this dish, a few things stood out. Most recipes hit the basics don’t overfill, use a thermometer, let it rest. But they often miss the ‘why’. So let’s get into it.
First, the cream cheese. It’s not just for flavor. It acts as a binder. Its fat content and thick texture help hold the spinach and other cheeses together, creating a filling that’s less likely to make a break for it during baking. That’s the science behind why this one stays put better than a ricotta-based version.
Second, the slice of cheese versus shredded. A slice melts more slowly and tends to hold to itself. You’ll get some delicious, browned cheese that oozes out and crisps up, but the core of the filling stays intact. Pre-shredded cheese has starches to prevent clumping, which can interfere with that smooth melt. That’s why I always say to shred your own from a block.
And about that wire rack. It’s the difference between a crispy bottom and a steamed, soggy one. Lifting the chicken allows convective heat to hit all sides. It’s the oven’s version of frying without the oil. If you take one thing from this, let it be that.
Finally, the resting period. When you pull the chicken at 160°F, the residual heat continues to cook the proteins gently. More importantly, the muscle fibers, which tightened during cooking, begin to relax and reabsorb the juices that were forced to the center. Cutting in too soon lets all that moisture and flavor run right out onto your plate. Waiting five or ten minutes lets it settle back in. That’s not a tip; it’s the law of the kitchen.
So there you have it. Not just a recipe, but the method behind it. Now you know what to do, what not to do, and why. Go make it.


