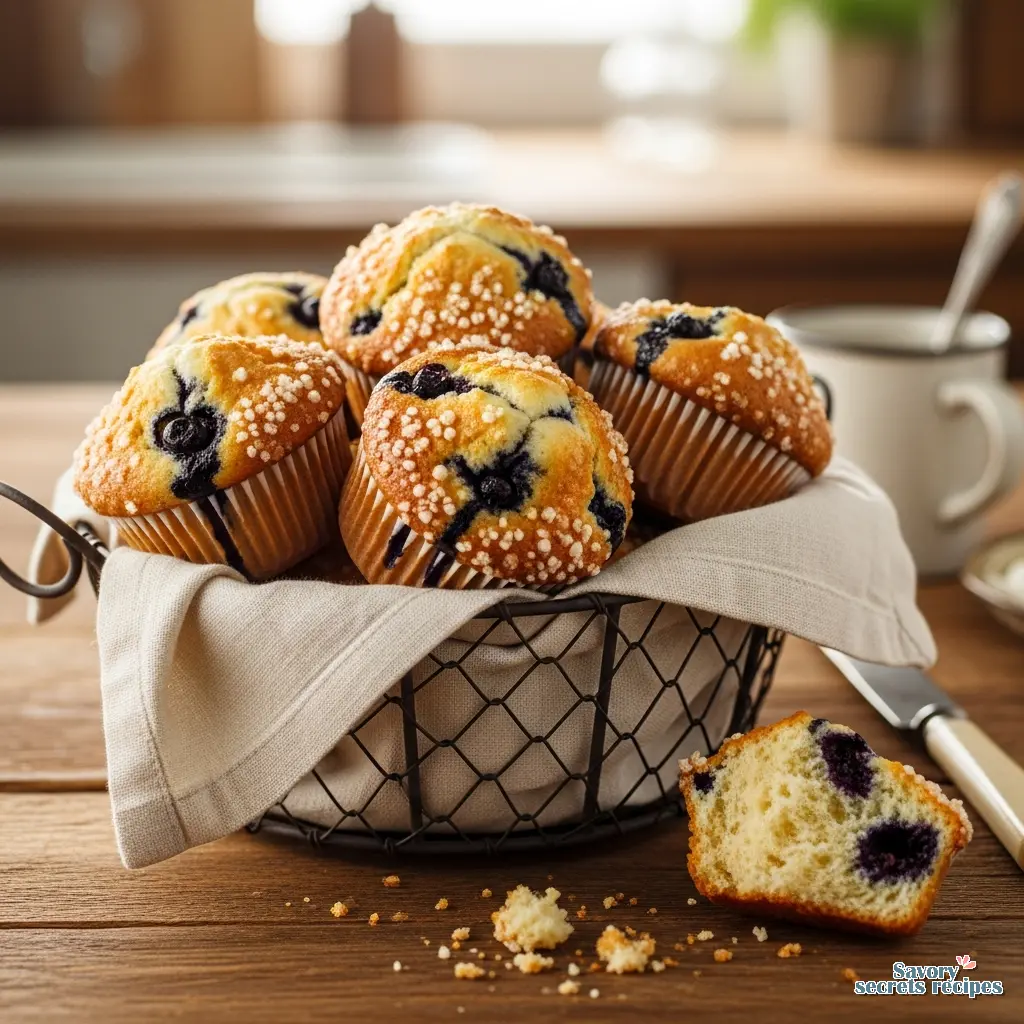
Blueberry Muffins with Streusel Topping
Ingredients
Method
- Preheat the oven to 425°F (220°C). Lightly grease a muffin tin and place 8 liners in the pan.
- Make the streusel first. In a small bowl, combine the cold butter, flour, brown sugar, and cinnamon. Use your fingertips to rub the butter into the dry ingredients until the mixture looks like coarse, crumbly breadcrumbs. Do not overwork it. Place the bowl in the refrigerator while you prepare the batter.
- Prep the blueberries. Toss the blueberries with 1 tablespoon of flour until lightly coated. This prevents them from sinking to the bottom. Set aside.
- Make the batter. In a large bowl, combine the sugar, egg, oil, milk, and vanilla. Stir until well combined.
- Add the dry ingredients on top of the wet mixture. Stir briefly, then mix until just combined. Do not overmix a few lumps are expected.
- Fold in the sour cream until just distributed, then gently fold in the flour-coated blueberries.
- Divide the batter evenly among the 8 liners, filling each to the top. Remove the streusel from the refrigerator and sprinkle it generously over each muffin.
- Bake at 425°F for 5 minutes. Do not open the oven door. This high heat creates the signature domed top.
- Reduce the heat to 375°F (190°C) and continue baking for 18 to 20 minutes, until a toothpick inserted in the center comes out clean. Add 3 to 5 extra minutes if using frozen berries.
- Let the muffins rest in the pan for 5 minutes, then transfer to a wire rack.
Notes
Why Your Muffin Pan Has Been Lying to You
Let’s be clear about this. I’ve eaten enough sad, flat muffins to know exactly why you are here. You want that dome. You want the bakery-style muffin top that spills over the edge of the paper liner, crunchy with sparkling sugar, while the inside stays impossibly soft. And most home recipes just don’t deliver that. They give you cupcakes without frosting. Or worse, dense little pucks that taste fine but look… well, homemade in the bad way.
My grandmother Zoya used to say baking is math you can eat. She was right. The difference between a flat muffin and a high-domed beauty isn’t magic. It’s temperature physics. We are going to blast these blueberry muffins with high heat initially to force that rapid rise, then drop the temperature to cook the center gently. That is the secret. That is how we get the dome.
I know it’s February and we’re all dreaming of summer berries, but this recipe works perfectly with frozen ones too. In fact, on a gray Chicago morning or even a cool Los Angeles winter day pulling a tray of these out of the oven smells like absolute victory. It smells like vanilla and warm fruit and the promise that today is going to be a good day. So grab your bowls. We’re not guessing on this one.
The Science of the Dome: High Heat is Non-Negotiable
Most recipes tell you to bake at 350°F or 375°F from start to finish. That is safe. It is also boring. If you want that explosive rise, that professional bakery look, you need thermal shock. We start these blueberry muffins at 425°F.
Here is what happens. The intense heat hits the baking powder and the steam in the batter immediately. The edges set rapidly, forcing the batter in the center to shoot upward because it has nowhere else to go. It creates that signature vault. After 5 minutes, we drop the heat to 375°F (or 350°F depending on your oven’s quirkiness) to finish baking the interior without burning the streusel topping.
I learned this the hard way after ruining a dozen batches for a photo shoot. I kept getting flat tops until I stopped being afraid of the heat. Just don’t walk away. Watch the windowpane test, not the clock. If your oven runs hot, you might need to drop the temp sooner. Trust your eyes.
Blueberry Prep: The Flour Toss Trick
There is nothing more tragic than cutting into a muffin and finding all the berries sitting in a soggy layer at the bottom. It happens because fruit is heavy and batter is light. Gravity wins every time unless we intervene.
The fix is simple but mandatory. Toss your blueberries in a tablespoon of all-purpose flour before folding them in. The flour coating creates friction between the berry and the batter, holding it in suspension. It’s like giving the berries little climbing grips.
Fresh vs. Frozen?
Let’s talk about this. Fresh is great when they are in season and firm. But in winter? Frozen wild blueberries are actually superior. They are smaller, so you get more fruit per bite, and they hold their shape better. If you use frozen, do not thaw them. If you thaw them, they bleed, and you will end up with gray, sad muffins. Rinse them quickly in cold water until the water runs light purple, dry them thoroughly with paper towels, toss in flour, and use immediately.
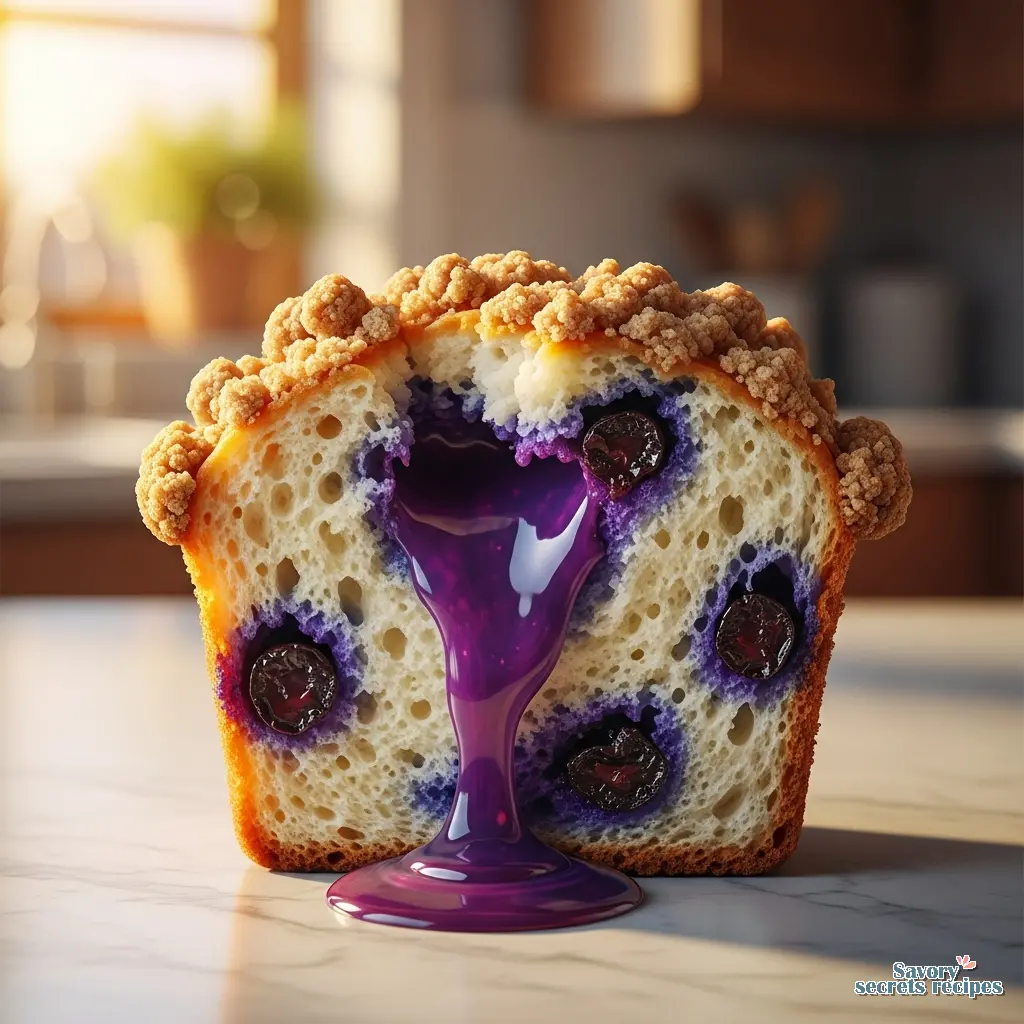
Another trick I love. Take about half a cup of your fresh berries and gently crush them before adding to the batter. This swirls a beautiful purple jamminess throughout the crumb that looks incredible.
The “Lumpy” Rule: Step Away from the Spatula
If you take nothing else from this article, remember this. Lumps are your friends. A smooth muffin batter is a ruined muffin batter. When you mix the wet ingredients into the dry, you want to stop the second the flour streaks disappear. Actually, stop before that. A few streaks of flour are fine.
Overmixing develops gluten. Gluten makes things chewy. We want bread to be chewy. We want muffins to be tender. If you beat this batter until it’s smooth, you will bake tough, rubbery projectiles. I use a silicone spatula and fold gently. Count your strokes. If you go over 12 to 15 folds, you are probably working it too hard.

The Streusel Factor: Cold Butter Matters
That crunchy, buttery lid is the best part of the muffin. I’m not debating this. To get it right, texture is everything. For the batter, we often use melted butter or oil for moisture. But for the streusel? The butter must be cold. Refrigerator cold.
You want to cut the butter into the flour and sugar until it looks like coarse breadcrumbs. If the butter melts, you get a paste. Paste bakes into a flat, greasy cookie on top of your muffin. We want distinct crumbles that bake up crunchy. If your kitchen is warm (and let’s be real, ovens heat up the room), pop your streusel bowl in the fridge while you make the batter. Temperature matters here.
Common Failures & How to Fix Them
I’ve seen every muffin disaster possible. Usually, it’s one of these three things.
Troubleshooting Guide
Mistake: The muffins are tough and rubbery.
Solution: You overmixed the batter. Next time, use the “folding” technique and stop while it still looks lumpy. It feels wrong, but it’s right.
Mistake: The bottoms are burnt but the tops are pale.
Solution: Your oven rack is too low, or your pan is dark metal. Move the rack to the upper third. If using a dark pan, reduce the temp by 25°F.
Mistake: The berries sank to the bottom.
Solution: You skipped the flour toss. Coat those berries in a tablespoon of the dry mix before adding them. It gives them traction.
Storage Secrets: The Saltine Hack
Here is the problem with blueberry muffins. The berries are wet. The streusel is dry. By day two, the moisture from the berries migrates to the topping, and your crunchy streusel turns into soggy mush. It’s heartbreaking.
I learned a trick from a caterer friend that changed everything. Line your airtight container with paper towels. Place the muffins in a single layer. Then and this is the weird part tuck 3 or 4 saltine crackers in with them. The crackers are desiccants. They absorb the excess atmospheric moisture in the container, keeping your toppings crunchy for an extra day or two. It sounds crazy. It works.
If you are freezing them (and you should, they freeze beautifully), wrap them individually in plastic wrap and then foil. They will keep for 3 months. To reheat, remove the foil and microwave for 30 seconds, or better yet, pop them in a 300°F oven for 5 minutes to re-crisp that topping.
Frequently Asked Questions
When you pull these out of the oven, prepare for your family to treat you like a professional pastry chef. The smell alone is enough to wake up the entire house. I usually eat the first one standing over the stove, burning my fingers a little, just to check the texture. You know, for quality control. It’s the best part of the job.
If you try this recipe, I want to see those domes. Seriously. Nothing makes me happier than seeing that high-heat trick work in someone else’s kitchen.
For more inspiration and visual guides on how to perfect your baking techniques, check out my Pinterest boards where I collect all my favorite variations.
Reference: Original Source