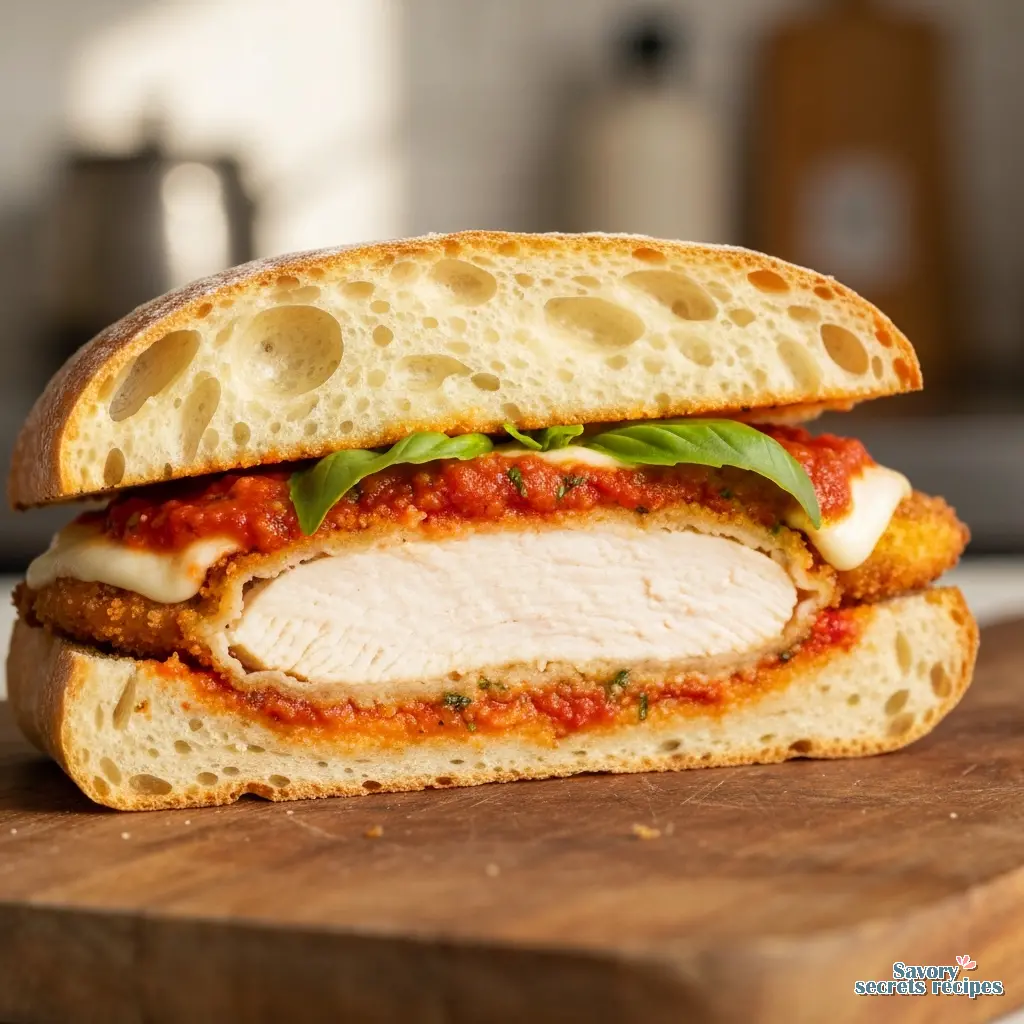
Crispy Garlic Bread Chicken Parmesan Sandwich
Ingredients
Method
- Heat 2 tablespoons of olive oil and 2 tablespoons of butter in a large pan over medium-high heat.
- Dredge both sides of the chicken in the finely crushed croutons.
- Place two chicken breasts at a time in the pan and reduce the heat to medium-low after one minute. Cook for 5 minutes, then flip and cook for an additional 5 to 7 minutes until the internal temperature reaches 160°F. Transfer to a plate, add more butter and oil, and repeat the process with the remaining chicken.
- Prepare the pesto while the chicken cooks.
- Butter the insides of the bread and sprinkle with garlic salt. Broil the bread open-faced until golden brown, then remove and set aside.
- Spread one or two spoonfuls of sauce onto the bottom piece of bread and place the chicken on top.
- Cover the chicken with more sauce and add mozzarella cheese.
- Place the sandwich under the broiler until the cheese is bubbly, then sprinkle with parmesan and add a smear of pesto. Close the sandwich with the top piece of bread and serve.
Nutrition
The Ultimate Chicken Parmesan Sandwich
Wednesday evening, about 35 minutes before dinner. During these cooler LA winter months when we actually use our ovens, there’s nothing quite like a proper chicken parmesan sandwich. I remember my uncle Marc letting me stand on a milk crate at his bistro’s prep station back in the 90s. He taught me how to properly break down a chicken. He’d check my cuts with a ruler. Seemed harsh at the time, but now I get it. Consistency matters.
Takeout places almost always get this sandwich wrong. You end up with a soggy bottom and rubbery meat. Let me show you what I mean. The heartbreak of a mushy sandwich base is completely avoidable. We’re going to fix that today. I know this sounds complicated, but I promise it’s easier than you think. You’ll get that satisfying crunch every single time. The secret is all in the barrier method and picking the right ingredients at Ralphs or Trader Joe’s.
Your kitchen is about to smell like garlic butter and bubbling mozzarella. That’s exactly right. Let’s build the perfect chicken parmesan sandwich.
Breading Station Efficiency Guide
I’ll be honest. The breading process can be a mess. My daughter insists on cracking the eggs whenever we make an egg wash. She gets shell fragments in there about half the time. I’ve learned to crack a few extras into a separate bowl that I can fish from. She’s so proud of herself that I just work around it. That’s a solid approach for cooking with kids.
For a classic chicken parm sandwich, you need an efficient station. Set up three shallow dishes. All-purpose flour first, then your egg wash, then your crumbs. You want to pound your chicken cutlets thin. This ensures even cooking and a better sandwich fit. Any chicken breast works if you prep it right. Just trust the process on this one. It’s actually quite forgiving.
Use a kitchen thermometer to ensure safety. The internal temperature must reach 165°F. I think most home cooks would benefit more from a good instant-read thermometer than from any other single tool. Carry-over cooking will bring it up those last few degrees.
The Science of Panko vs. Traditional Crumbs
Here’s the thing about that crispy coating. You have options. I’ve tested this on camera multiple times. I once caramelized onions on camera for what I thought was long enough, only to realize they were still blonde. I had to trust the process, not the clock. Same goes for frying a chicken parmesan sandwich.
If you use standard breadcrumbs, they soak up oil. If you use seasoned croutons crushed up, you get great flavor but uneven texture. I’d probably lean toward a 50/50 split. Panko breadcrumbs mixed with Italian seasoning crumbs. The panko provides structure and moisture resistance. The traditional crumbs fill the gaps. Add some parmesan cheese to the mix.
When you shallow fry this in a cast iron skillet, that sizzle is exactly what you want to hear. You’ll know it’s ready when the edges turn the color of peanut butter. That’s the good stuff.
Bread Selection Guide: Best Bread for Chicken Parm Sliders
What is the best bread for chicken parm sliders or a full-sized version? This is where most people run into trouble. A soft white roll will disintegrate. I’ve seen it happen. You need structural integrity for a chicken parmesan sandwich.
A sturdy ciabatta or a high-quality hoagie roll is your best bet. I usually grab fresh ciabatta from Whole Foods. You absolutely must toast it. A toasted bun is non-negotiable. Brush it with garlic butter and maybe a little fresh basil or parsley. Toast it until it’s golden. Makes sense to me, right? If you’re making a classic chicken parmesan burger style sandwich, use a sturdy brioche, but toast it hard.
The ‘No-Sog’ Barrier Technique
How do you make a chicken parmesan sandwich that isn’t soggy? The barrier method. Steam is the enemy of crispiness. I figured out how to light for steam and texture by screwing up a pasta video so badly we had to reshoot the entire thing. Steam ruins video, and it ruins bread.
Place a slice of provolone or mozzarella cheese directly on the toasted bottom bun. The cheese acts as a waterproof layer. Melt it slightly under the broiler. Then add your crispy chicken. You can even paint the chicken with extra sauce before adding cheese to start the soaking process on the meat, not the bread.
Now, let’s talk about marinara sauce. Don’t drown the chicken. Spoon a thick, reduced sauce over the top. Do the spoon test. If it runs off the back of a spoon like water, reduce it down. Top with more mozzarella and hit it with the broiler. Watch it closely. The exact second the broiler goes from perfect to burnt is a very short window. Not a huge deal, but worth noting.
Common Mistakes & Fixes
Mistake: The coating falls off your chicken parmesan sandwich.
Solution: This usually happens if the oil isn’t hot enough or you flipped the chicken too soon. Let the crust set before touching it.
Mistake: The bread is completely soggy.
Solution: You likely skipped toasting the bread or didn’t use the cheese barrier method. Always toast with garlic butter first.
Mistake: The sauce makes everything mushy.
Solution: You’re using a watery store-bought sauce. Simmer your marinara sauce longer so it thickens up. It should coat the back of a spoon.
Storage & Reheating: Keeping Your Chicken Parmesan Sandwich Crispy
I’m not totally sure why people microwave fried chicken, but please don’t. It gets rubbery instantly. If you have leftovers of your classic chicken parm sandwich, store the components separately if possible. Keep them in an airtight container in the fridge for up to three days. You can freeze the cooked cutlets for up to three months wrapped tightly in plastic and foil.
To reheat, the air fryer is your best friend. Set it to 400°F for about 15 minutes, flipping halfway. Spray with a little olive oil. It brings back that audible crunch perfectly. If you’ve already assembled your chicken parmesan sandwich, wrap it loosely in foil and bake at 350°F until warmed through. Then open the foil for the last few minutes to crisp the bread.
. Since you’re dealing with a lot of moisture, that toasted crust is your best friend.