


Easy Crispy Chicken Parmesan Recipe
Ingredients
Method
- Preheat the oven to 400°F (200°C). Lightly grease a 9x13-inch baking dish and set it aside.
- Pound the chicken cutlets to an even 1/2-inch thickness if necessary. Season both sides with 1/2 teaspoon kosher salt and 1/4 teaspoon black pepper.
- Prepare a breading station with three shallow dishes: one for all-purpose flour, one for eggs whisked with milk, and one for Italian breadcrumbs mixed with 1/4 cup grated Parmesan.
- Dredge each chicken piece in flour and shake off excess. Dip into the egg mixture, then press into the breadcrumb mixture until evenly coated. Set aside on a plate.
- Heat vegetable oil in a large skillet over medium-high heat. Fry the chicken in batches for 3 to 4 minutes per side until golden and crisp. Drain on a paper towel-lined plate.
- Heat olive oil in a small saucepan over medium heat. Sauté garlic for 30 seconds until fragrant. Stir in marinara sauce, Italian seasoning, remaining salt and pepper, and red pepper flakes. Simmer for 3 to 4 minutes.
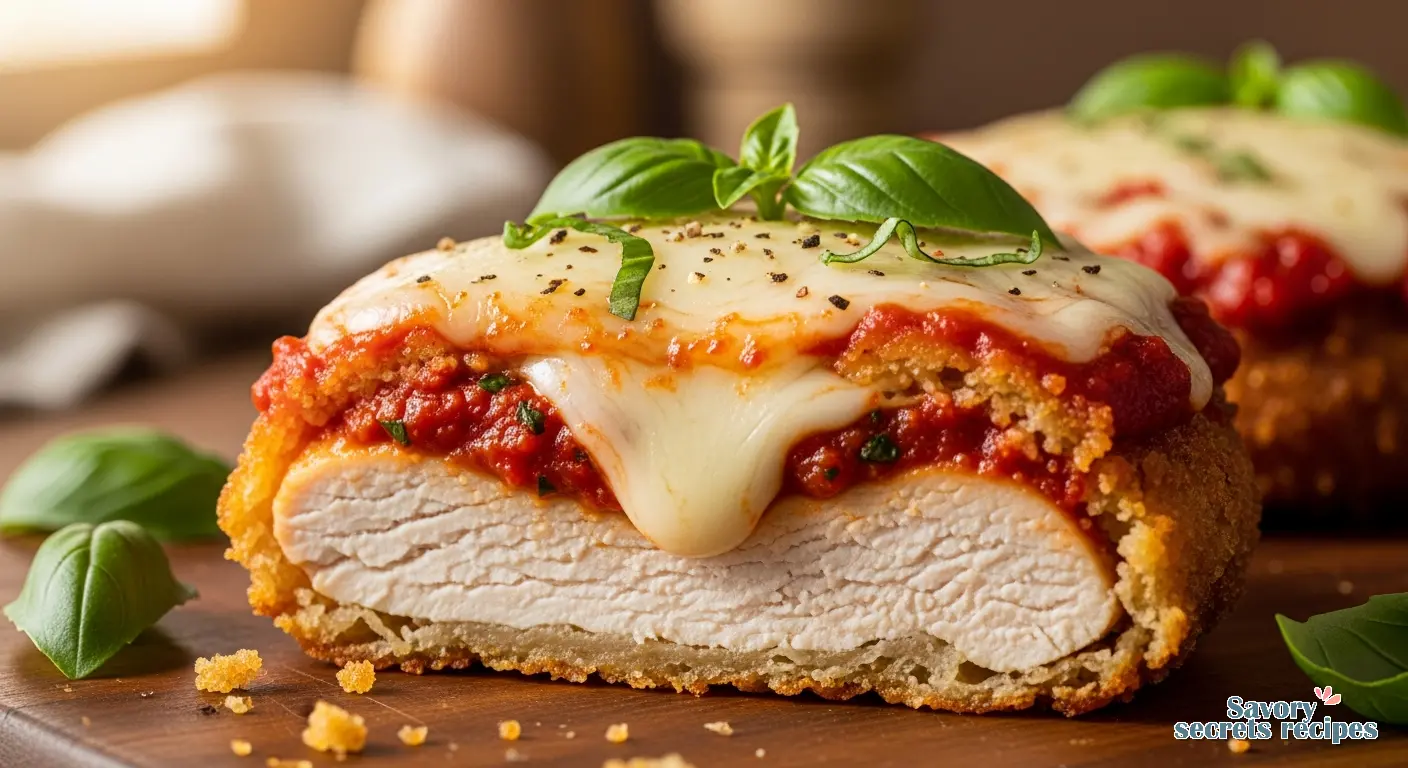
- Spread 1 cup of marinara sauce in the baking dish. Arrange chicken in a single layer. Top each cutlet with the remaining sauce, Parmesan, and shredded mozzarella.
- Bake for 10 to 12 minutes until the cheese is bubbly and browned and the chicken reaches an internal temperature of 165°F (74°C).
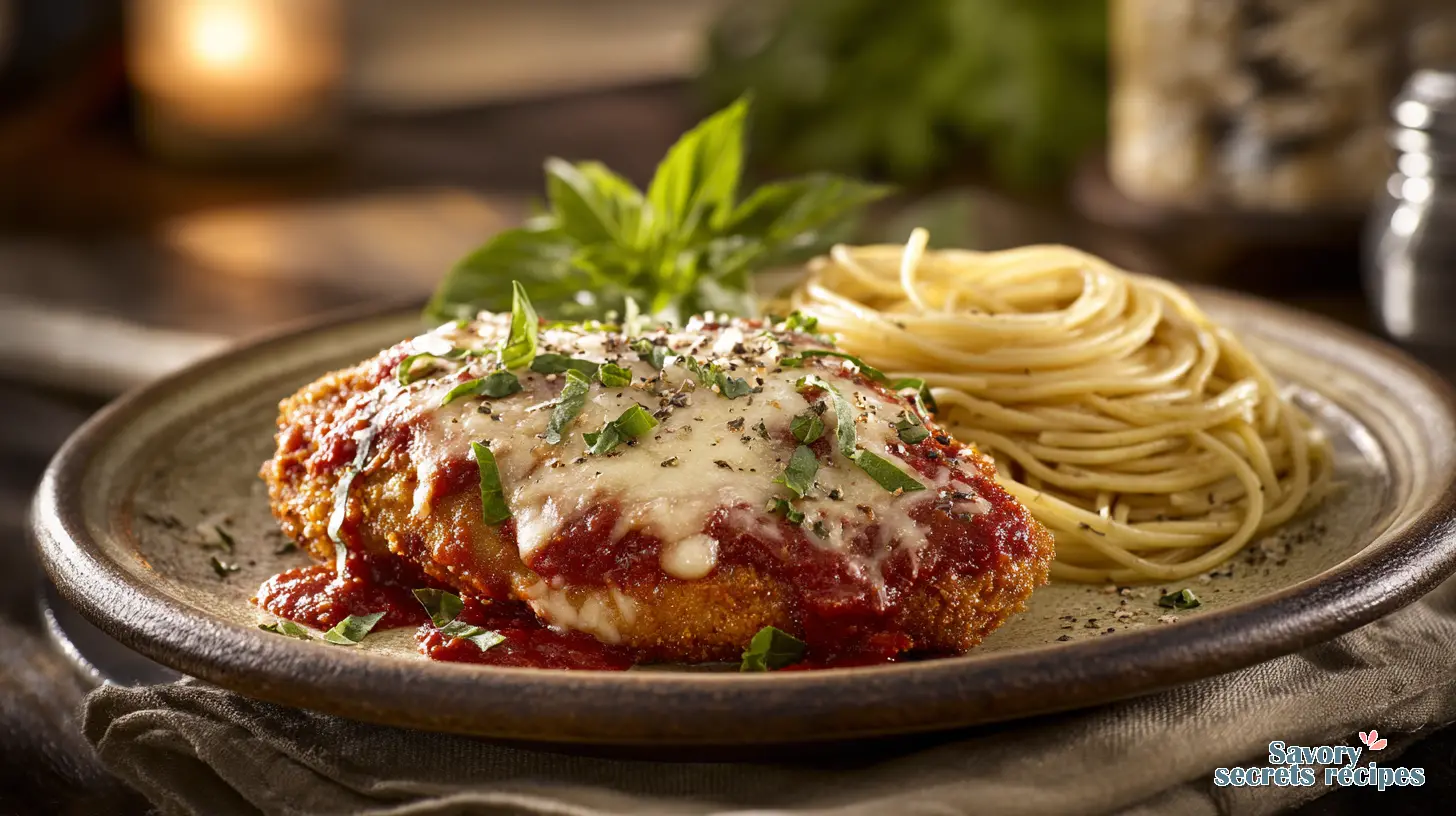
- Remove from the oven and garnish with fresh basil or parsley. Serve hot with pasta or your choice of side dishes.
Nutrition
Notes
The Promise of Real Classic Chicken Parmesan
We’ve all been there. It’s Wednesday evening, you’re exhausted from work, and you just want a win in the kitchen. You decide to make classic chicken parmesan. You spend forty minutes breading, frying, and baking, only to pull out a dish of rubbery meat sliding out of a soggy, pale crust. It’s incredibly frustrating. I think most of us just give up and order takeout after a failure like that.
I completely understand. Growing up, my abuela Marta cooked in her garage on a two-burner camp stove. She didn’t make Italian food, but she taught me the most important lesson in cooking: you listen to the food. She’d listen to her beans simmering, and I listen to the sizzle of my cast iron skillet. If you listen closely, your food tells you exactly what it needs.
Today, we’re fixing the soggy crust epidemic. I’m going to show you how to make a classic chicken parmesan that actually stays crispy under the sauce. It’s easier than you think. You just need a few solid techniques, a good dredging station, and a little patience. Let the heat do the work. Once you understand the basics, you’ll never order this at a restaurant again.
The Secret to Non-Soggy Chicken (Sauce Strategy)
Here’s what I wish someone had told me years ago. The biggest mistake people make with classic chicken parmesan is drowning it. They pour a lake of marinara sauce into a glass baking dish, drop the crispy chicken cutlets in, and then bury them in more sauce. See what I mean? You’re basically boiling your hard-earned crust.
Don’t put sauce under the chicken. Ever. That’s the one rule you have to follow. We only put a small amount of thick marinara sauce directly on top of the chicken. Leave the edges exposed. Those golden brown edges need to stay dry to keep their crunch. I use a stainless steel baking sheet instead of a glass pan for baking. Glass traps moisture and creates steam, which leads straight to soggy bottoms. Stainless steel conducts heat better and gives you a crispier bottom crust.
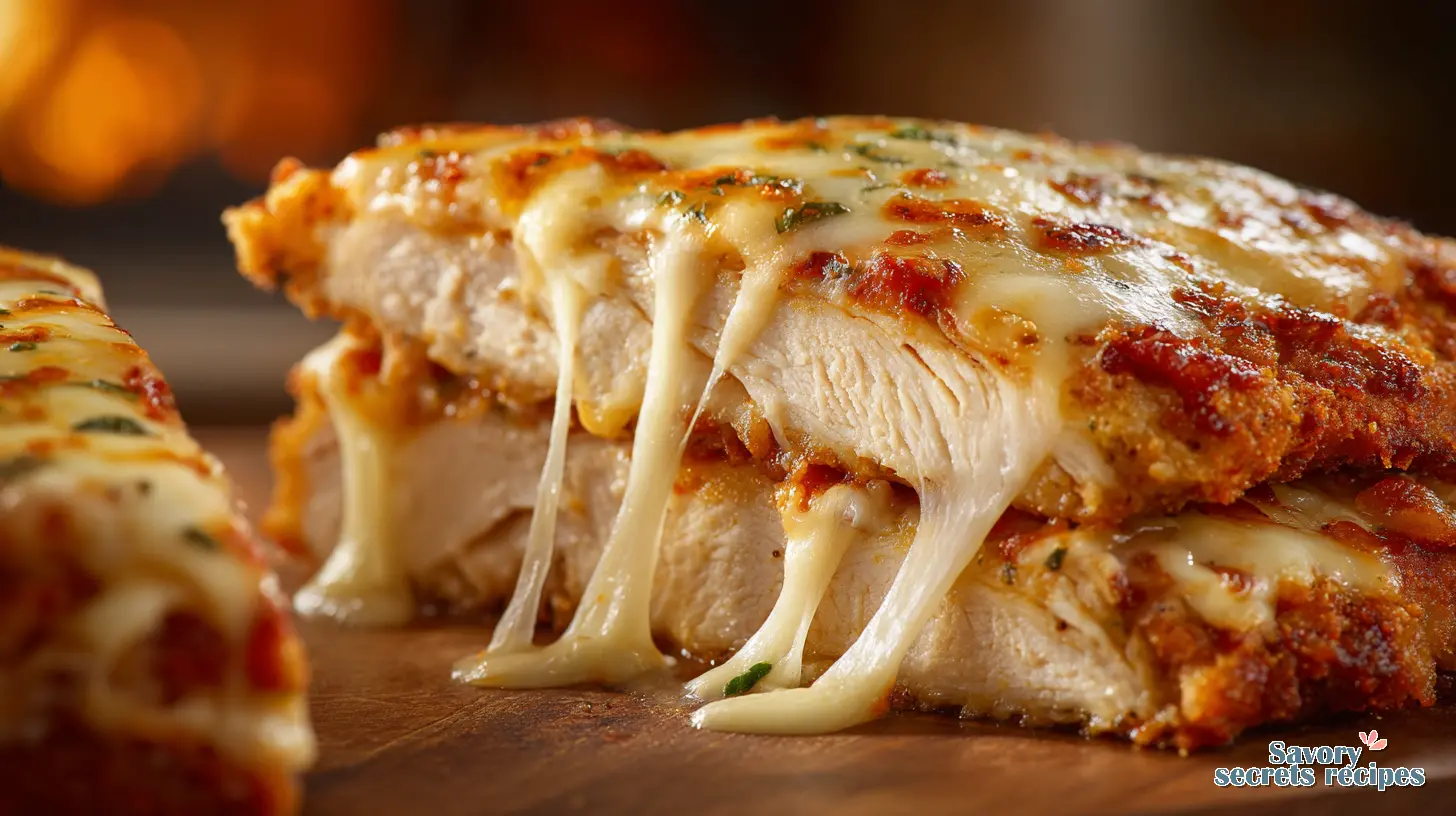
Also, don’t cover the chicken with foil while it bakes. Covering it creates a steam tent. We want dry, high heat to melt the low moisture mozzarella cheese. That’ll work perfectly every time.
Essential Prep: Pounding and Drying
Look, I’ll be honest. Pounding chicken breasts isn’t the most glamorous job, but you can’t skip it. If you leave the chicken cutlets thick on one end and thin on the other, they cook unevenly. The thin part dries out before the thick part is safe to eat. Grab a meat mallet and pound the chicken to an even 1/4 to 1/2 inch thickness. It guarantees uniform cooking.
Before you even think about the flour, you need to pat the chicken dry with paper towels. Surface moisture is the enemy of a good crust. If the chicken is wet, the flour turns into a paste and the whole coating will slip right off in the pan. I learned this the hard way trying to rush through a weeknight dinner. Just pat them dry. Good enough.
The Science of the Perfect Crust
The dredging station is just a simple assembly line. You need three shallow bowls: all purpose flour, beaten large eggs with a splash of milk, and your breadcrumbs. I use a mix of Panko breadcrumbs and Italian seasoned breadcrumbs. Panko gives you maximum crunch, while the Italian crumbs fill in the gaps. And here’s the real secret. Add finely grated Parmigiano-Reggiano directly into the Panko mixture. It toasts in the oil and tastes incredible.
To keep your fingers from turning into dough clubs, use the wet hand/dry hand technique. Use your left hand for the flour and breadcrumbs, and your right hand for the egg wash. It keeps things clean.
Once breaded, let the chicken rest for 15 minutes. Just let it ride on a cutting board. This rest period allows the flour to hydrate and acts like glue, helping the coating adhere perfectly. While it rests, heat your avocado oil for frying. You want a neutral oil with a high smoke point. Olive oil burns too fast. You’ll know it’s ready when a breadcrumb sizzles immediately upon hitting the oil. If it doesn’t have color, it doesn’t have flavor. Fry until golden brown.
Visual Troubleshooting: Why Your Breading Fell Off
Mistake: The breading falls off in the pan.
Solution: You probably skipped patting the chicken dry, or the oil wasn’t hot enough. Let the crust set before touching it in the pan. Don’t flip it early.
Mistake: The classic chicken parmesan is tough and chewy.
Solution: You didn’t pound the meat evenly, or you overcooked it. Pull the chicken when the internal temperature hits 165°F. Taste it now, adjust from there.
Mistake: The bottom crust is mushy.
Solution: You used a glass baking pan or put sauce under the chicken. Always use a stainless steel baking sheet and place fried cutlets on a wire rack to drain excess oil before saucing.
Mistake: The cheese didn’t melt nicely.
Solution: Pre-shredded cheese has anti-caking agents that ruin the melt. Always use fresh, whole-milk mozzarella for better melt and a buttery flavor. Keep the broiler ready to melt the cheese immediately after frying to preserve the crunch.
Air Fryer Instructions for Classic Chicken Parmesan
I know a lot of people are trying to avoid deep frying. Fair enough. You can absolutely make this an easy chicken dinner using an air fryer. It’s a solid alternative that still delivers a great crunch.
Follow the same dredging station process. Once breaded, spray the chicken cutlets generously on both sides with avocado oil spray. This is crucial because dry flour won’t brown in an air fryer. Preheat your air fryer to 380°F. Cook the chicken for about 10 to 12 minutes, flipping halfway through. You’ll know it’s ready when the edges pull back and the crust is golden brown.
Once the chicken hits an internal temperature of 165°F, spoon a little marinara sauce on top, add your fresh mozzarella, and air fry for another 2 minutes until the cheese is bubbling. It’s fast, it’s clean, and honestly, it’s pretty fantastic.
Make-Ahead Strategy for Dinner Parties
If you’re hosting friends for a Sunday dinner or a holiday gathering, you do not want to be standing over a hot stove frying chicken while everyone else is hanging out. I’ve done that, and it’s miserable. You need a make-ahead strategy.
You can bread and fry the chicken cutlets up to two hours before your guests arrive. Let them cool completely on a wire rack. Don’t put them in the fridge, just leave them at room temperature. When you’re about 20 minutes away from eating, place the cutlets on your stainless steel baking sheet. Top them with sauce and cheese, and bake at 425°F until the chicken is heated through and the cheese is molten. The high heat revitalizes the crust perfectly. Right there. That’s how you enjoy your own party.
Storage & Reheating Guide
If you actually have leftovers, storing classic chicken parmesan correctly is the difference between a great lunch tomorrow and a sad, soggy mess. Store the cooled chicken in an airtight container in the refrigerator for up to three days. If you want to freeze it, freeze the fried cutlets separately in freezer bags before you add the sauce and cheese. They’ll keep for 1-2 months.
When it’s time to reheat, step away from the microwave. The microwave destroys the crust. Instead, place the chicken on a baking sheet and heat your oven to 425°F. Cover it loosely with foil until it’s warm throughout, then remove the foil for the last few minutes to crisp up the edges. Season in layers with a little extra fresh basil right before serving.
Frequently Asked Questions
Bringing It All Together
There you have it. The secret to a classic chicken parmesan that actually stays crispy, looks gorgeous, and tastes like you spent all day in a professional kitchen. It’s all about controlling moisture, managing your heat, and treating the ingredients with a little respect. Get your pasta water boiling now, because dinner is almost ready. Throw some al dente spaghetti on the side with a little garlic powder and olive oil, and you’re set.
I know trying a new method can feel like a gamble, especially on a busy weeknight, but trust me on this one. The crunch is worth it. I share tons of variations and dinner ideas over on my Pinterest boards, so come hang out if you need more inspiration for your weekly meal rotation. Enjoy your masterpiece!
Reference: Original Source


One Response
My family loved this!