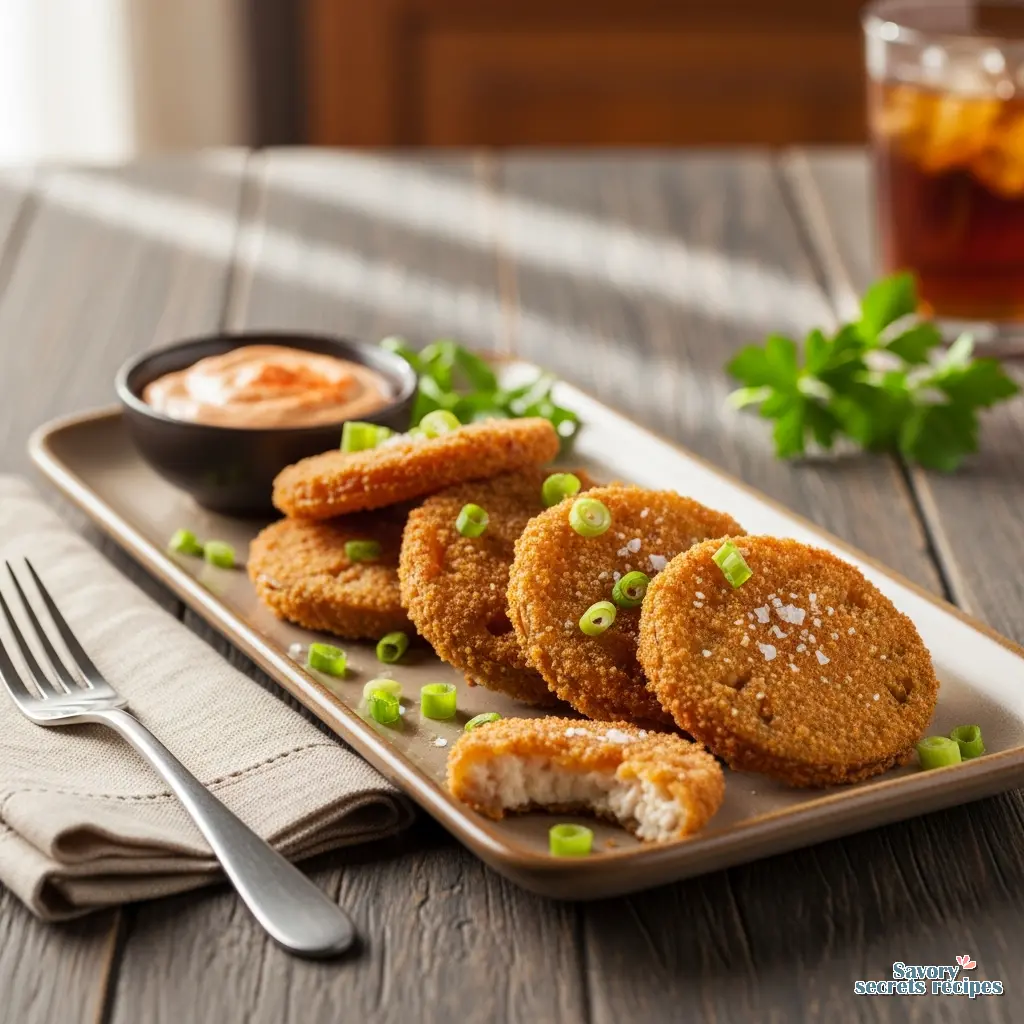
Crispy Fried Green Tomatoes With Panko Bread Crumbs
Ingredients
Method
- Place flour, eggs, and bread crumbs into three separate shallow bowls. Dip tomatoes in flour, then eggs, and coat thoroughly with bread crumbs.
- Heat oil to 375°F in an electric skillet or deep-fat fryer. Fry tomatoes in small batches for 2-3 minutes per side until golden brown. Drain on paper towels, sprinkle with salt, and serve immediately.
Nutrition
Notes
The Crunch That Changed My Mind
I grew up believing there was only one way to fry a green tomato, and that was in cornmeal. My mother fried them that way, her mother fried them that way, and generally speaking, you don’t mess with the classics in a Southern kitchen. But a few years back, during a particularly cold February when I was craving something that reminded me of summer, I ran out of cornmeal. I had a bag of Japanese panko in the pantry. I hesitated. It felt like a betrayal of my raising. But I tried it.
The result wasn’t just good. It was a revelation. While cornmeal gives you that familiar grit and earthiness, fried green tomatoes bread crumbs specifically panko offer a shatteringly crisp texture that holds up better against the moisture of the fruit. It’s lighter. It’s louder when you bite into it. And if you do it right, it stays crispy for twenty minutes on the wire rack, which is something cornmeal struggles to do.
I know some purists might roll their eyes at the idea of panko fried green tomatoes. Fair enough. But in my kitchen, texture is truth. If you want a coating that snaps rather than crumbles, this is the method you’re looking for. It works perfectly for a quick appetizer when you have friends coming over, or just as a side for a Tuesday night pork chop. Let’s get into how to make it happen without the breading sliding off in the pan.
Why Panko Works Better Than You Think
The main issue people have with fried green tomatoes is the “soggy factor.” Green tomatoes are full of water. When that water hits hot oil, it turns to steam. If your coating is too dense, that steam gets trapped and blows the breading right off the skin. I’ve seen it happen a hundred times.
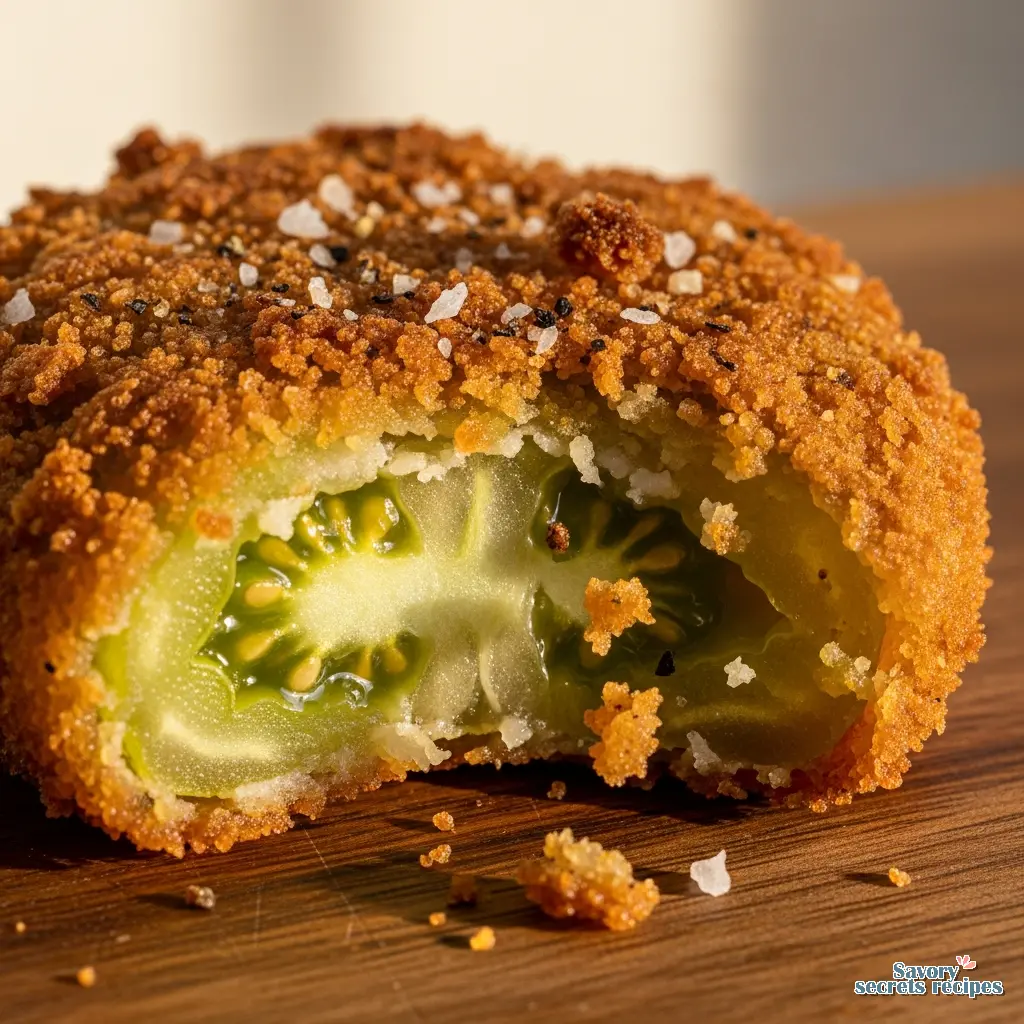
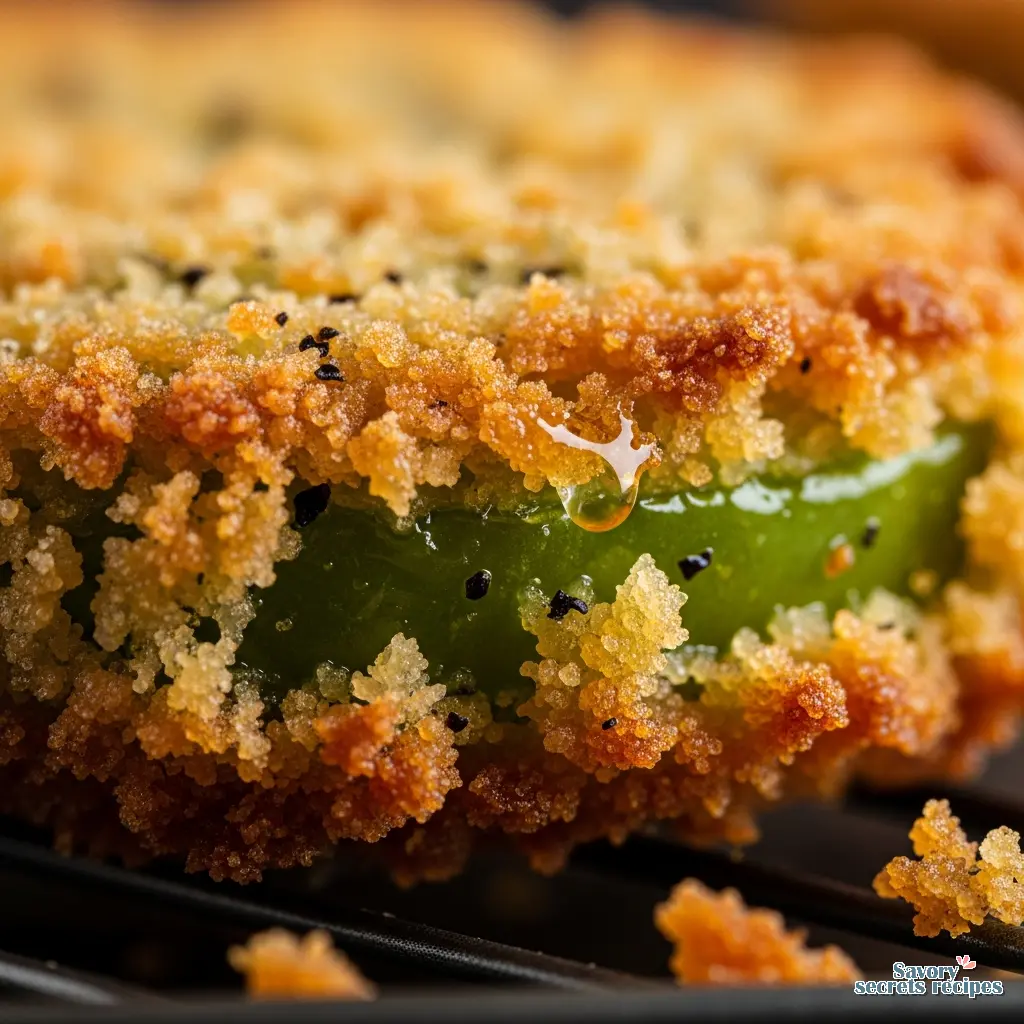
This is where panko breadcrumbs change the game. Because panko is processed using electrical current rather than heat, the crumbs are larger, sliver-shaped, and aerated. They don’t absorb oil the way standard bread crumbs or heavy flour dredges do. They create a lattice-like structure that lets the steam escape while the crust hardens.
When you make fried green tomatoes bread crumbs with panko, you are essentially building a rigid cage around the tomato. The result is a contrast that tracks perfectly: a hot, tart, softening center protected by a jagged, golden shield. It’s the same principle I use for onion rings. We aren’t just coating the food; we’re engineering a texture.
Selecting the Right Tomato (Don’t Ignore This)
You can have the best breading station in the world, but if your produce is wrong, you’re fighting a losing battle. I learned this the hard way trying to fry “green” tomatoes from a supermarket that were really just unripe red tomatoes. There is a difference.
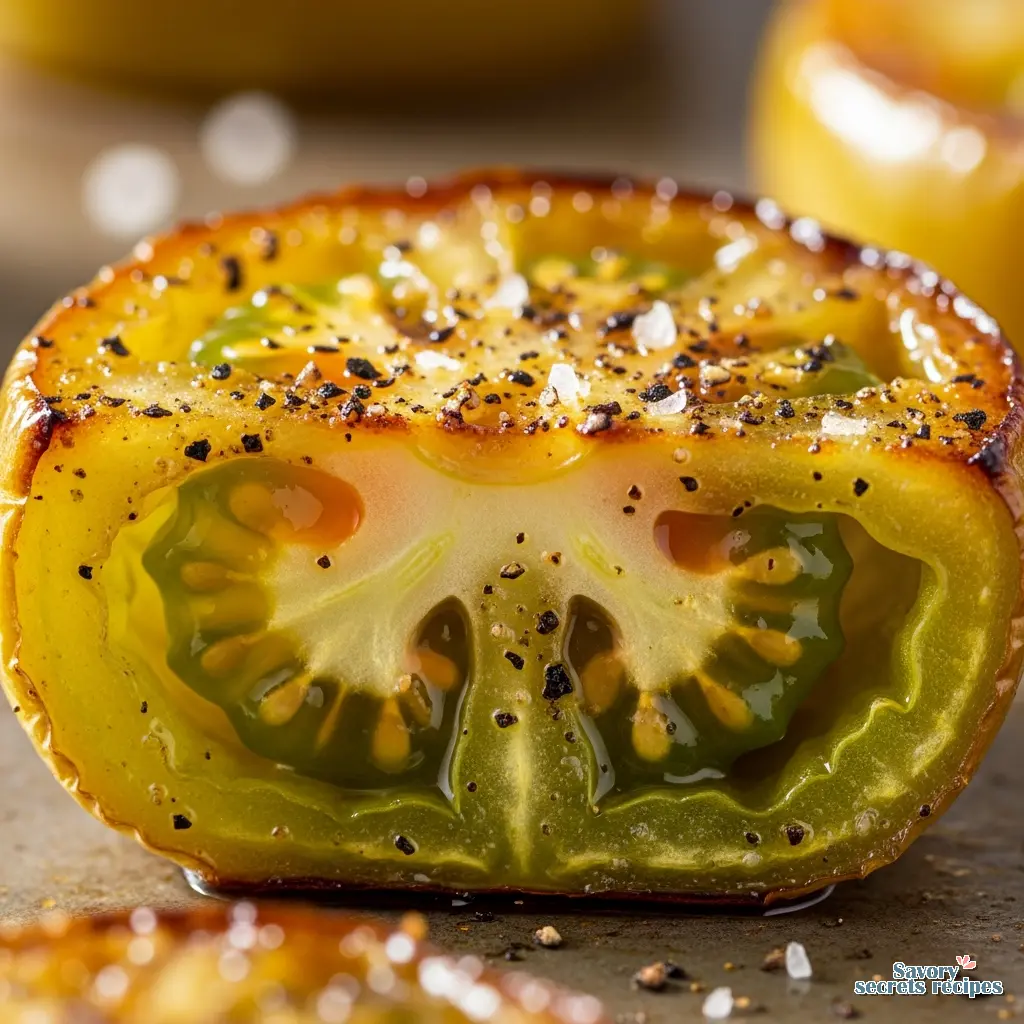
You want a tomato that is rock hard. If you squeeze it and there is any give, it’s too far gone for frying. It needs to be totally unripe. The acidity in a true green tomato is what cuts through the richness of the fried exterior. If the tomato has started to turn yellow or blush red, the sugar content is too high, and the structure will collapse in the hot oil. You’ll end up with mush.
Size matters too. I look for medium-sized ones, about the size of a baseball. If they are too big, the slices are wider than your spatula, and they break when you flip them. If they are too small, you spend all night frying for very little payoff. Stick to the medium ones. While baseball-sized is best for slicing, you can also use a recipe for green cherry tomatoes if you are working with smaller garden varieties.
The Science of the Dredge: Making it Stick
Here is the part where most home cooks stumble. You dip the tomato in egg, then crumbs, throw it in the pan, and watch sadly as the coating floats away from the tomato. I’ve been there. The fix is simple, but you have to follow the order of operations.
First, you must pat the slices dry with paper towels. I mean really dry. Surface moisture is the enemy of adhesion. If the tomato is wet, the flour turns to paste and slides off.
Second, we use a three-step standard breading procedure:
- Station 1: Seasoned Flour. This is your primer. It bonds to the dry tomato surface.
- Station 2: The Binder. Eggs beaten with a splash of buttermilk or water. The protein in the egg grabs the flour.
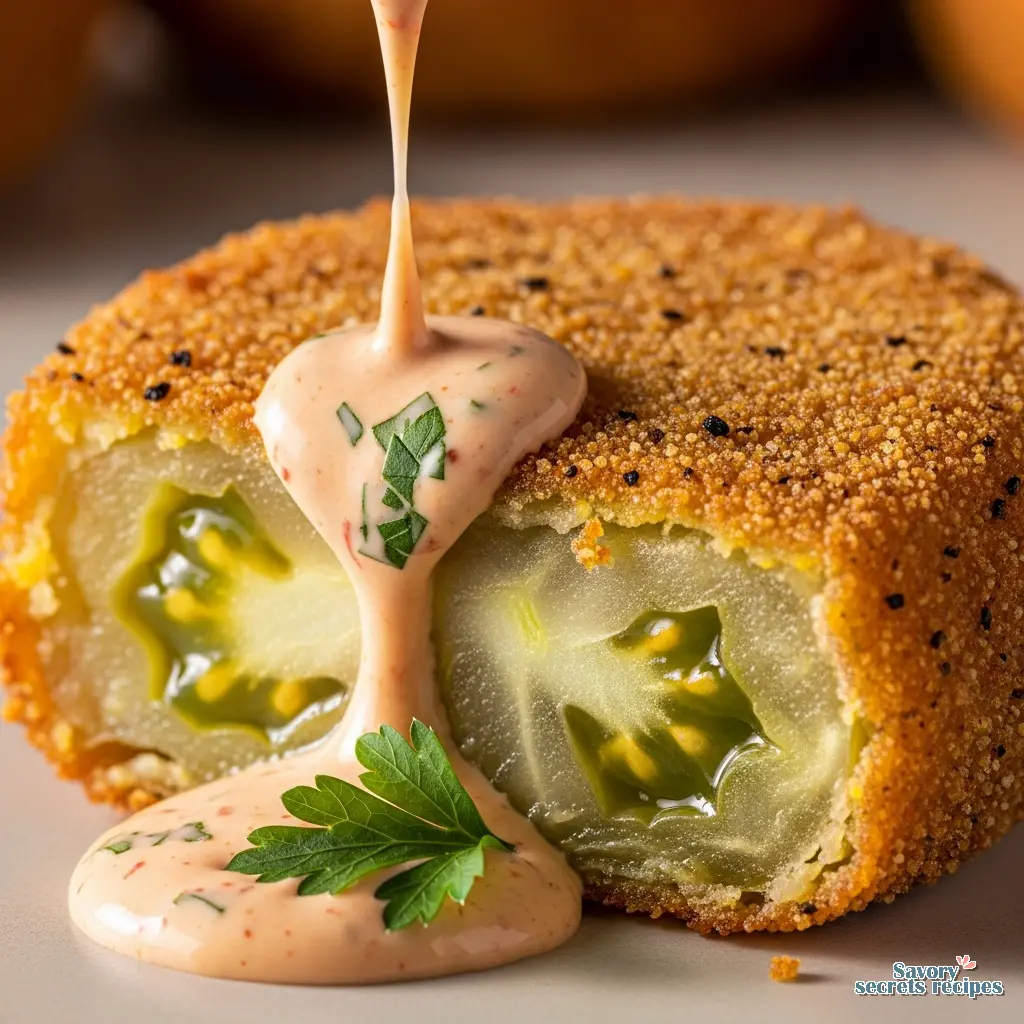
- Station 3: The Crunch. The panko bread crumbs.
But here is the real secret, the one I learned from Uncle Raymond regarding frying chicken that applies here too: The Press and The Rest.
When you put the tomato in the panko, don’t just roll it. Press the crumbs into the flesh with the palm of your hand. Really pack them on. Then, place the breaded slices on a wire rack and let them sit for 10 to 15 minutes before you even think about heating the oil. This rest period allows the gluten in the flour to hydrate and the egg to set, acting like glue. If you fry immediately, the bond is weak. If you wait, it’s concrete.
Frying: Temperature is Data
You don’t need a deep fryer for this. A good cast iron skillet is your best friend here. It holds heat better than stainless steel, which helps keep the oil temperature stable when you add the cold tomatoes.
You want your oil at 350°F to 360°F. If you have a digital thermometer, use it. If you don’t, drop a single panko crumb into the oil. If it sinks, it’s too cold. If it blackens instantly, it’s too hot. It should sizzle immediately and dance on the surface. That’s the one.
If the oil is too cool, the panko acts like a sponge and soaks up the grease. You’ll end up with heavy, oily tomatoes. If it’s too hot, the outside burns before the green tomato softens inside. You want that middle ground. And don’t crowd the pan. I tend to fry only 3 or 4 slices at a time. If you pack them in, the oil temp drops like a stone, and you’re back to the soggy problem. Let it ride, give them space. While they are still hot, you can start preparing a zesty remoulade for fried green tomatoes to serve on the side.
Common Mistakes & Fixes
Troubleshooting Your Fry
Mistake: The coating falls off in the pan.
Solution: You likely skipped the drying step or didn’t let them rest. Pat the tomatoes bone-dry before dredging, and let the breaded slices sit on a rack for 10 minutes to set the “glue.”
Mistake: The tomatoes are soggy and greasy.
Solution: Your oil was too cold. Keep it between 350°F and 360°F. Also, never drain on a flat plate; use a wire rack so air can circulate underneath.
Mistake: The crust burns before the tomato is tender.
Solution: You sliced them too thick. Aim for 1/4 to 1/2 inch thickness. Any thicker and the heat can’t penetrate fast enough.
Alcohol-Free Variation
This recipe can easily be made without alcohol. Here are the substitutions I recommend:
- Rum → pineapple juice + 1/2 tsp almond extract. For tropical sweetness
These swaps maintain the depth of flavor while keeping the dish completely alcohol-free. Perfect for family-friendly meals or personal preference.
Variations & Substitutions
While I stick to the classic fry, I know everyone has different setups. Here is how to adapt this fried green tomatoes bread crumbs recipe to your reality.
The Air Fryer Method
I was skeptical, but this works surprisingly well. Preheat your air fryer to 400°F. Spray the breaded tomatoes generously with cooking spray (this is crucial for browning). Cook for 8 to 10 minutes, flipping halfway through. They won’t have the same deep richness as oil-fried, but the crunch is solid.
Gluten-Free
This is an easy swap. Use a gluten-free all-purpose flour blend for the first station and gluten-free panko for the crust. I’ve done this for my niece, and honestly, the texture is almost identical. The gluten-free panko tends to be very crunchy, which is exactly what we want. For a lighter version of this snack, you might want to try air fried green tomatoes without breading to focus on the tartness of the fruit.
Spicy Kick
If you like heat, add a half teaspoon of cayenne pepper or Cajun seasoning to the flour mixture. You can also mix a little hot sauce into the egg wash. It adds a nice background hum of heat that pairs well with the tart tomato.
Storage & Reheating (The Air Fryer is King)
Fried food is always best right out of the skillet. That’s just a fact. But if you have leftovers, don’t microwave them. The microwave destroys the texture, turning that beautiful panko crust into a wet blanket.
To store them, place them in an airtight container with a paper towel on the bottom to absorb moisture. They will keep in the fridge for 2 to 3 days. To reheat, the air fryer is actually better than the oven. 375°F for about 3 to 4 minutes brings them back to life. If you use an oven, put them on a wire rack set over a baking sheet at 400°F for 8 minutes.
Frequently Asked Questions
A Final Thought on Southern Comfort
When you pull that first batch of fried green tomatoes bread crumbs out of the skillet, the kitchen is going to smell like everything good about the South. It’s savory, a little oily in the best way, and warm. I usually serve these with a spicy remoulade or just a little garlic mayonnaise with lemon. It cuts the richness perfectly.
Don’t worry if your first batch isn’t magazine-perfect. My first few attempts saw more breading in the oil than on the tomato. But once you get the feel for the heat and the patience to let the coating set, you’ll be making these every time you spot a green tomato at the market. And if you’re looking for more ideas on how to use panko or Southern classics, check out my Pinterest boards where I keep all my experiments.
Give it a try this weekend. Your family will thank you.
Reference: Original Source