Perfect Plain Fried Rice Recipe for Frying
Ingredients
Method
- Wash, peel, and cut the potatoes into french fries.
- Arrange the fries in a single, non-overlapping layer in a cast iron skillet and pour in enough oil to nearly cover them.
- Cook the potatoes over medium-low heat for 15 to 20 minutes, stirring occasionally to prevent sticking, until they are golden brown and crisp.
- Remove the fries from the oil and drain on paper towels, then season with salt, pepper, or preferred spices and serve immediately.
Notes
Why Most Home Frying Fails (And How to Fix It)
I remember standing on a step stool in my grandmother’s kitchen in Casablanca, watching her inspect a bowl of couscous. She would run her fingers through the grains, checking for clumps with the focus of a diamond cutter. “If the grains stick,” she would say, “the flavor has nowhere to go.” That tracks with what I’ve seen in my years as a food editor. Texture is everything. It is the difference between a sad, soggy bowl of mush and a plate of plain fried rice that sings with flavor.
We have all been there. You crave that takeout-style rice, the kind with distinct, chewy grains and that smoky aroma. You throw some fresh rice in a pan, and five minutes later, you are staring at a gummy paste that tastes like disappointment. It is frustrating. I have ruined plenty of batches myself before I understood the science behind it.
The secret to perfect plain fried dishes isn’t a fancy wok or a jet engine burner. It is patience. It is about understanding that rice needs to dry out to fry properly. This is the part I love because it turns a “leftover” problem into a culinary asset. When you master this plain fried technique, you stop looking at day-old rice as trash and start seeing it as gold. Let me walk you through this. We are going to fix your Friday night dinner game.
The Science of Crisp: Why Temperature Matters
Let’s get a little nerdy for a second. The enemy of frying is moisture. When you use fresh, hot rice, it is packed with water and steam. If you throw that into a hot pan, the moisture releases, the temperature drops, and your rice steams instead of fries. You end up with clumped, sticky starch.
For the perfect plain fried texture, we need retrogradation. That is a fancy word for what happens when starch molecules cool down and recrystallize. When you let rice sit in the fridge overnight, the starches harden. This is exactly what we want. It is similar to how I think about ice cream structure; you need those crystals to form correctly to get the right mouthfeel.
Temperature is doing the heavy lifting here. You need your oil hot enough to create a barrier that crisps the outside of the grain immediately. If the oil is too cool, the rice drinks it up like a sponge. Greasy rice is usually just rice that was cooked too slowly. We want a high smoke point oil like canola, peanut, or grapeseed. Olive oil is great for salads, but it will burn and taste bitter at the temperatures we need for this.
Essential Equipment: Wok vs. Skillet
I often get asked if you absolutely need a wok to make good plain fried rice. The honest answer? No. But it helps. Let’s compare the options so you can use what you have.
Carbon Steel Wok: This is the gold standard. The thin metal heats up instantly and cools down just as fast, giving you ultimate control. The high sides let you toss the ingredients without half of them landing on your stove. If you have one, use it. Just make sure it is seasoned properly so your eggs don’t stick.
Non-Stick Skillet: This is what most of us have in our LA apartments. It is perfectly fine. Actually, for beginners, it is often better because you don’t have to worry about the egg cementing itself to the pan. The trade-off is that you can’t get it quite as hot as carbon steel, so you might miss a little bit of that smoky “wok hei” flavor. But for a Tuesday night? It works.
Cast Iron: I tend to find cast iron a bit heavy for the tossing motion required here. It holds heat well, which is great for searing a steak, but it can scorch rice if you aren’t moving it constantly. If this is all you have, just be vigilant.
The “Plain” Philosophy: Ingredients & Prep
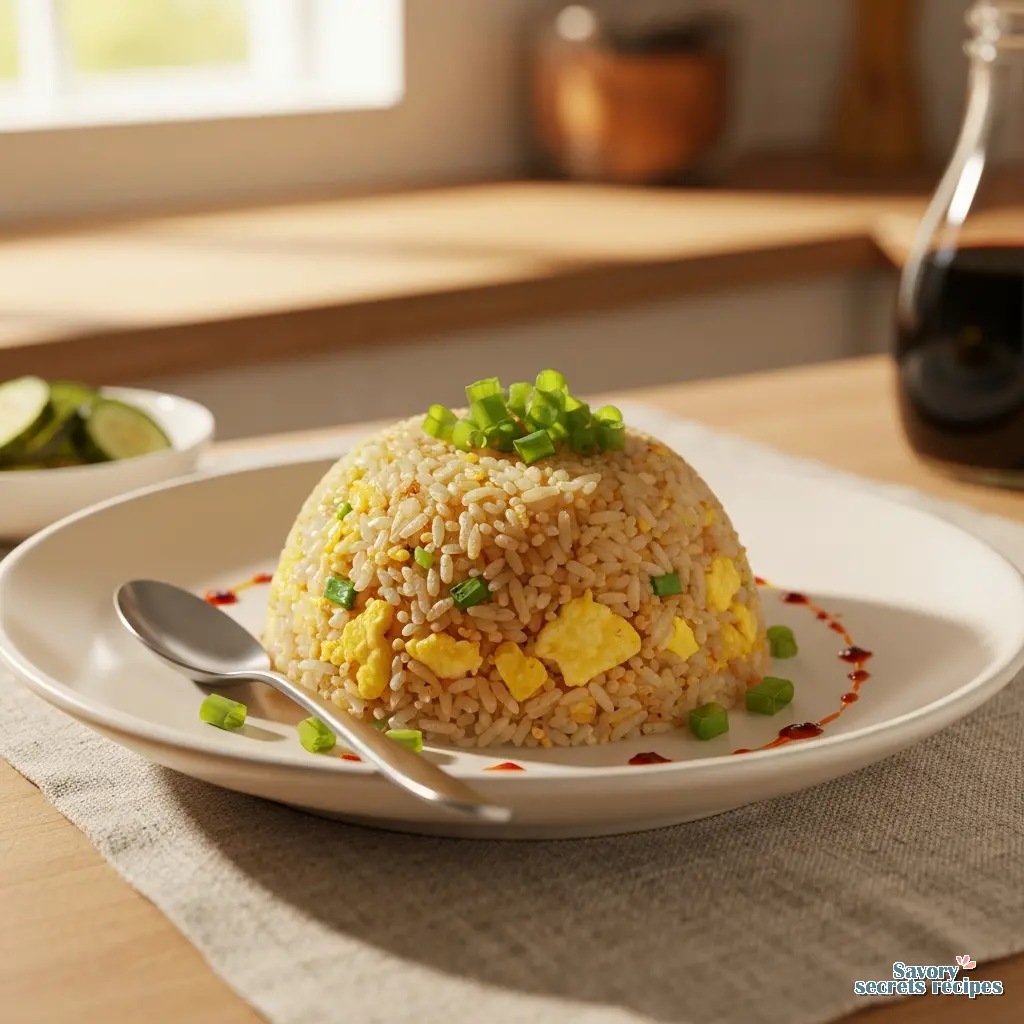
When I say “plain fried,” I don’t mean boring. I mean elemental. In my kitchen, plain is a test of technique. You can’t hide behind heavy sauces or fifty ingredients. It is just you, the rice, the oil, and the heat.
You need jasmine rice. It has the perfect balance of starch and structure. Long-grain white rice works too. Avoid short-grain or sushi rice unless you want a sticky texture, which is a different dish entirely.
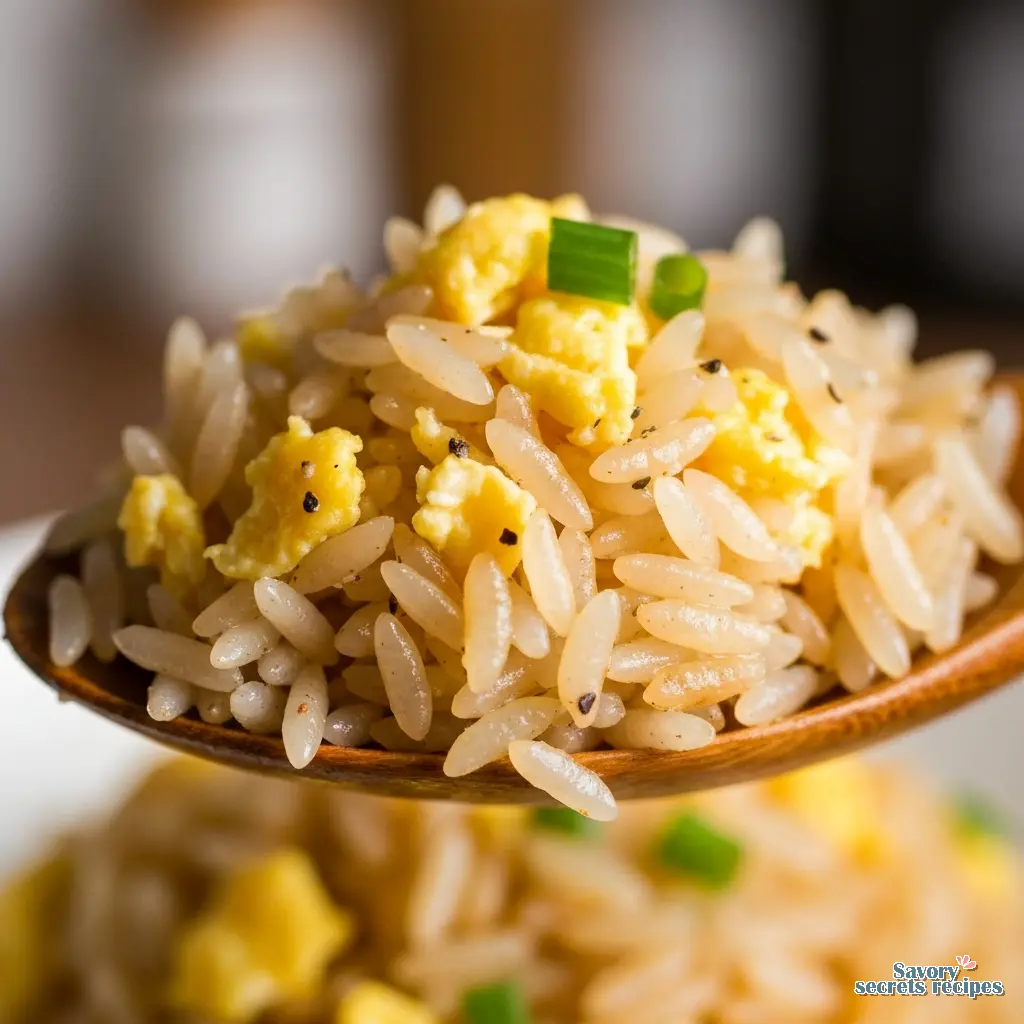
The Egg: This is your richness. I like to scramble it directly in the pan. It saves a bowl and I like the way the egg bits vary in size. Some get brown and crispy, some stay soft. That texture contrast is key.
The Seasoning: We are keeping it simple. Soy sauce for depth, salt for brightness, and white pepper. White pepper is crucial. It has a funky, earthy heat that black pepper just doesn’t have. It smells a bit like a barnyard, in the best possible way. Just a pinch changes everything. To round out the meal, you might consider pairing this rice with a savory canned collards recipe for a complete comfort food experience.
Step-by-Step: The Sizzle and The Toss
Here is where the magic happens. You want your pan hot. I mean, really hot. When you add the oil, it should shimmer and ripple. If you see wisps of white smoke, you are right in that window. Don’t panic. This is what we want.
1. Oil the Pan: Add your high smoke point oil. Swirl it around to coat the surface. This is not the time to be shy with oil; rice is thirsty, and oil conducts the heat. You can apply these same heat-conducting principles to protein when you follow a crispy fried chicken legs recipe.
2. The Egg First: Pour your beaten eggs into the center. They should puff up immediately. While they are still wet, scramble them vigorously. I like to pull them out when they are just set, so they don’t get rubbery. We will add them back later.
3. The Rice Drop: Add a little more oil if the pan looks dry. Now, dump in your cold, day-old rice. Break up any large clumps with your spatula or ladle. You should hear a loud sizzle. That sound is the moisture evaporating. It is the sound of success.
4. The Press and Flip: This is a technique I learned from watching street vendors. Press the rice into an even layer in the pan and let it sit for 15 to 20 seconds. Let it toast. Then toss or stir. Repeat this. We are frying the rice, not just warming it up. You want those little golden edges.
5. Season and Finish: Drizzle your soy sauce around the rim of the pan, not directly onto the rice. This sears the soy sauce and deepens the flavor before it coats the grains. Toss in your cooked egg, your scallions, and your white pepper. Give it one final toss.
Troubleshooting: When Good Rice Goes Bad
Even with the best intentions, things can go sideways. Let’s troubleshoot together.
Common Mistakes & Fixes
Mistake: The rice is mushy and clumping together.
Solution: You likely used warm or fresh rice. Next time, spread fresh rice on a baking sheet and pop it in the fridge for an hour to dry out rapidly. Or, you overcrowded the pan. Fry in batches if you are making a lot.
Mistake: The rice is sticking to the pan.
Solution: Your pan wasn’t hot enough, or you didn’t use enough oil. Don’t be afraid of the heat. If it sticks, remove the rice, scrub the pan, heat it until smoking, add oil, and try again.
Mistake: It tastes bland.
Solution: You probably under-salted. Rice absorbs a lot of seasoning. Add a pinch more salt or a splash of soy sauce. Also, don’t skip the white pepper.
Differentiation: Air Fryer Conversion Guide
I know, I know. An air fryer isn’t a wok. But sometimes you don’t want to stand over a hot stove, or maybe you are reheating leftovers. The air fryer is actually a brilliant tool for “frying” rice if you tweak the method.
To make plain fried rice in an air fryer, toss your cold rice with oil and soy sauce in a bowl first. Ensure every grain is coated. Spread it in a thin layer in the basket. Don’t pile it up. Cook at 380°F for about 10-12 minutes, shaking the basket every 3 minutes. It gets surprisingly crispy. It is a different texture crunchier, less chewy but for a quick lunch? It works.
This method is also perfect for crisping up toppings. If you want to add some crunch to your plain fried dish, try air frying shallots or garlic slices for 5 minutes until golden. Sprinkle them on top for texture.
Safety First: Handling High Heat
Cooking with high heat and oil demands respect. I have set off my smoke alarm more times than I care to admit. Here is how to stay safe.
Keep your kitchen ventilated. Turn on the fan and open a window before you start. If your oil starts to smoke heavily and smells acrid, it is too hot. Pull the pan off the heat immediately and let it cool. If a grease fire ever happens (knock on wood), never throw water on it. That will create an explosion. Cover the pan with a metal lid or a baking sheet to smother the flames. I always keep a lid nearby, just in case.
Storage and Reheating
If you have leftovers, you are in luck. Plain fried rice stores beautifully. Keep it in an airtight container in the fridge for up to 4 days. In fact, I think it tastes better the next day as the flavors meld.
To reheat, don’t just zap it in the microwave. It will dry out. Sprinkle a teaspoon of water over the rice, cover the container loosely, and microwave in 30-second intervals. Or, better yet, throw it back in a hot pan for two minutes to revive that texture. That sizzle is always worth the extra dirty pan.
Frequently Asked Questions
There is something deeply satisfying about taking a humble bowl of cold rice and transforming it into something golden and fragrant. It is a reminder that great cooking isn’t always about expensive ingredients; it is about care, timing, and understanding your materials. When you toss that first handful of rice into the pan and hear that aggressive sizzle, you will know you are on the right track. Your kitchen, your rules. Now go get that sizzle.
For more inspiration, check out my Pinterest boards where I collect all my favorite texture-focused recipes.
Reference: Original Source