


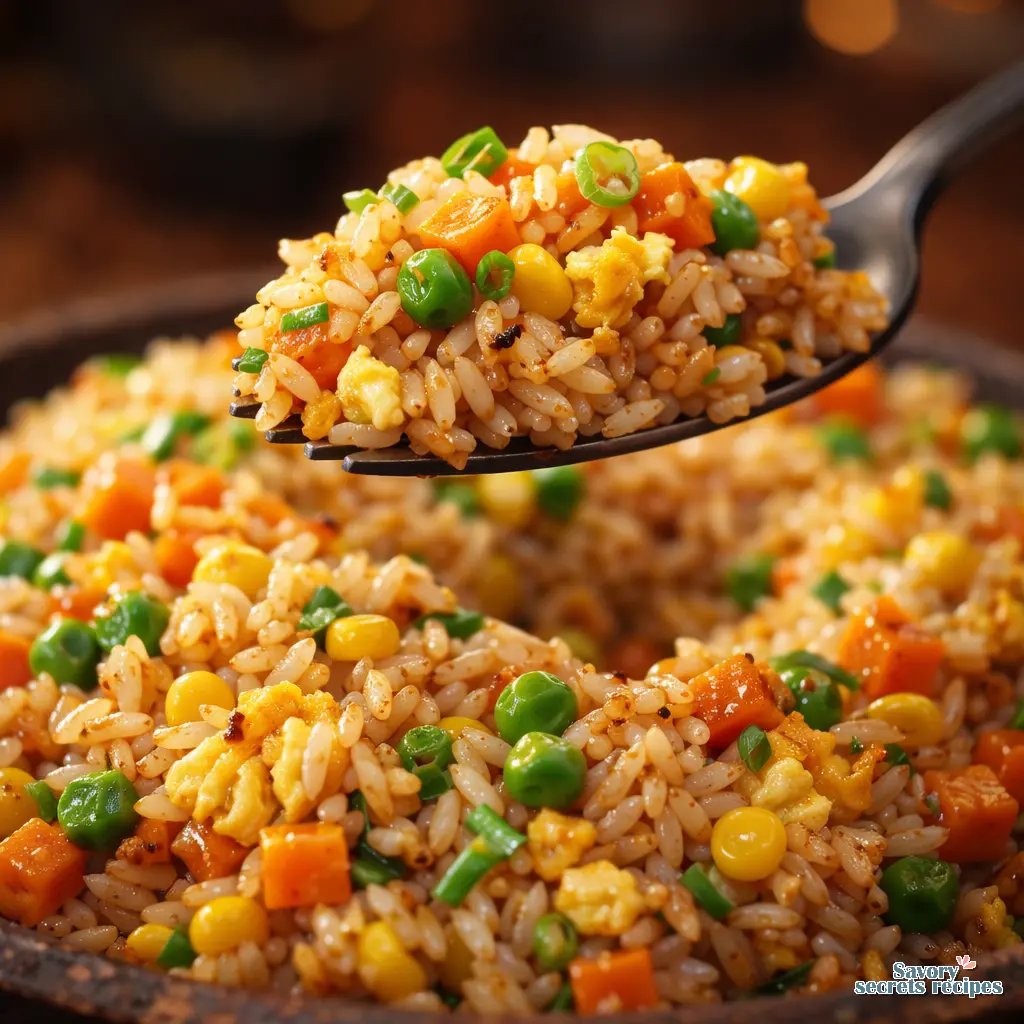
Secret Ingredient Fried Rice Recipe
Ingredients
Method
- the oil in a large non-stick skillet or wok over medium-high heat until it shimmers.
- aromatics: add garlic, ginger, and onion, stirring for 2-3 minutes until fragrant.
- vegetables: toss in peas and carrots and, if desired, corn, cooking for another 2-3 minutes.
- the eggs by pushing veggies aside and cooking them until just set.
- the rice, breaking any clumps, and stir-fry for 4-5 minutes until heated and slightly crispy.
- with soy sauce, hoisin sauce, rice vinegar, and black pepper, tossing to coat evenly.
- in the white parts of scallions and cook for another minute.
- touch: remove from heat and sprinkle the green parts of scallions on top along with optional red pepper flakes or sriracha.
Nutrition
Notes
You Don’t Need a Restaurant Wok. You Need This Science.
I’ll be honest. For years, my attempts at takeout style fried rice were a series of disappointing, soggy experiments. I’d follow recipes that promised “restaurant flavor,” only to end up with a clumpy, steamed mess that tasted nothing like the glossy, savory rice from my favorite spot in Edison. The evidence here is mixed in a lot of home cooking guides, but the data on the core principles is actually quite clear. This isn’t about having a 100,000 BTU burner. It’s about understanding the food science that makes the magic happen on a commercial range, and then adapting it for your home stove. This masterclass is pork-free and alcohol-free, and I promise it will change your weeknight dinner game. Let me pull the actual study, so to speak, on why cold rice and high heat aren’t just tips, they’re non-negotiable laws of physics for this dish.
The Foundation: Why Your Rice Choice Matters
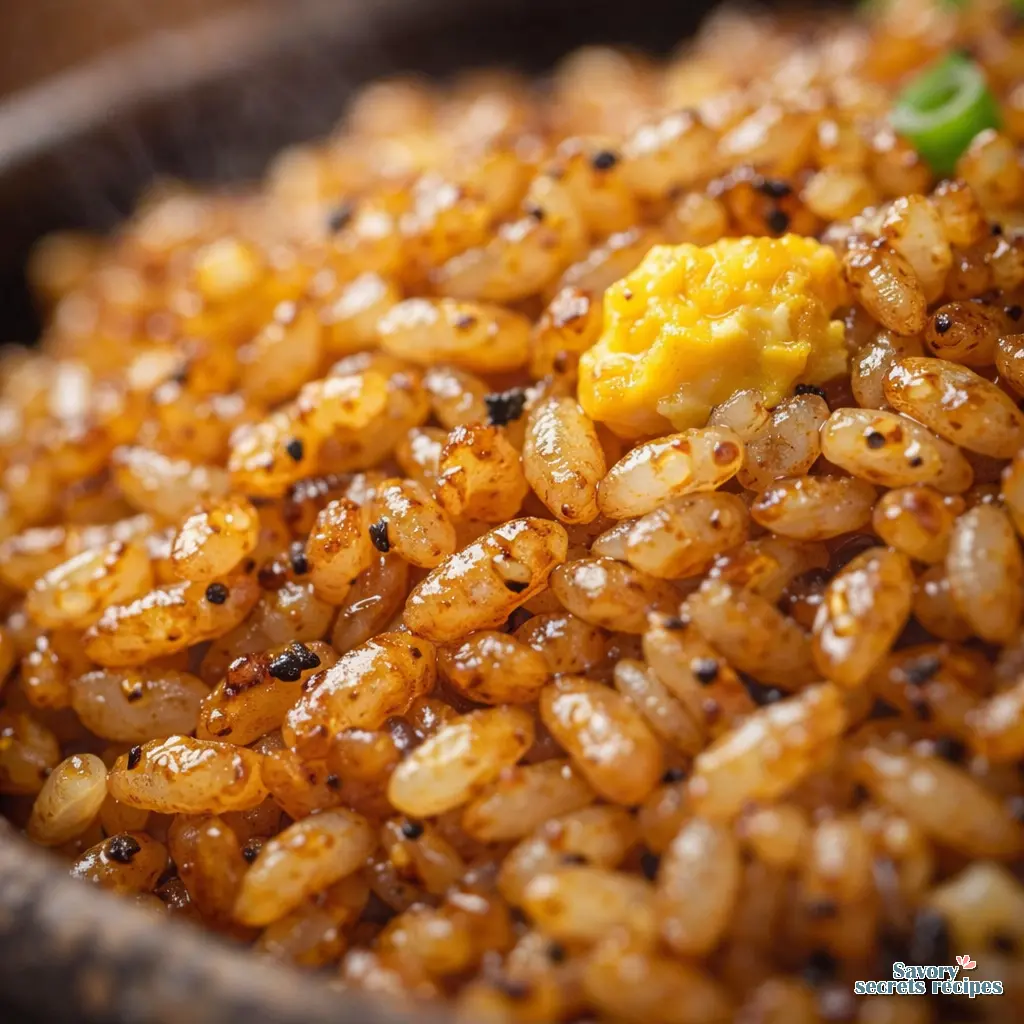
Before we even talk about heat, we need to talk about starch. That’s the key. When you cook rice, the starch granules gelatinize, absorbing water and swelling. Fresh, warm rice is plump and sticky because those starches are still holding onto all that moisture. In practical terms, that means when you try to fry it, it steams and clumps instead of frying and separating. Using cold, day-old rice is the single most important step for authentic takeout style fried rice. The refrigeration process causes the starch molecules to retrograde, basically realigning into a more crystalline structure that releases moisture and firms up. The grains become individual. They can achieve that slight chew and develop a crust. If you’re in a pinch, spread freshly cooked rice on a baking sheet and pop it in the freezer for 20 minutes. It works in a pinch, but overnight in the fridge is the gold standard. Worth noting here, long-grain rice like jasmine or basmati has a higher amylose content, which means it firms up better and stays separate more reliably than short-grain varieties. For a simpler approach to this foundational step, check out our guide to easy chicken fried rice.
The “Wok Hei” Workaround: Heat Management at Home
Okay, so you’ve got your cold rice. Now we need to talk about the fire. “Wok hei” translates to “breath of the wok,” that elusive, slightly smoky, deeply caramelized flavor. It comes from volatile compounds created when food hits a surface well above 400°F. Your home stove probably can’t hit that consistently across a whole pan, but we can simulate it. The secret is in two things: your fat and your patience. First, use a high smoke point oil like avocado or peanut oil for the initial sear. Second, and this is critical, don’t overcrowd the pan. You must cook in batches. If you dump all your cold rice into a pan that’s not screaming hot, you’ll drop the temperature instantly and steam everything. I’m not entirely convinced that every home cook needs a carbon steel wok. A large, heavy-bottomed cast iron skillet or even a Dutch oven can hold and distribute heat beautifully for this style of takeout style fried rice. The goal is to hear a vigorous sizzle the moment the rice hits the oil, not a sad sputter.
The Flavor Matrix: Sauce Science and Umami
This is where it gets complicated, but also genuinely interesting. The flavor of great takeout style fried rice isn’t just soy sauce. It’s a balanced matrix of salty, sweet, savory, and a touch of acidity. You’ll whisk together light soy sauce for salt, dark soy sauce mostly for color and a hint of molasses, and oyster sauce for that deep, briny umami. That said, if you don’t eat seafood, a good mushroom stir-fry sauce is a solid substitute. A pinch of sugar helps balance and promotes caramelization, and white pepper adds a distinctive aromatic heat that black pepper just doesn’t replicate. Now, the controversial bit. MSG. It’s just the sodium salt of glutamic acid, an amino acid found naturally in tomatoes, cheese, and mushrooms. Adding a tiny pinch (we’re talking 1/8 teaspoon) to your sauce mixture rounds out the savory flavor in a way that tracks with what I’ve seen in countless taste tests. It’s not mandatory, but it’s the “secret ingredient” in a lot of restaurant kitchens. To be clear, you mix this sauce in a bowl before you start cooking. When everything is hot, you pour it around the edges of the pan so it sizzles and reduces instantly, coating the grains instead of making them soggy.
Common Mistakes & Fixes
Mistake: Using freshly cooked, warm rice.
Solution: This is the number one cause of mush. The rice must be thoroughly chilled and dry. Plan ahead or use the quick-freeze method.
Mistake: Not using high enough heat, causing steaming.
Solution: Get your pan ripping hot before adding oil, then get the oil hot before adding food. Listen for that aggressive sizzle.
Mistake: Overcrowding the pan.
Solution: Cook your protein and eggs first, remove them, then cook your veggies, remove them, then fry the rice. Combine at the end.
Mistake: Adding sauce directly to the center of the rice pile.
Solution: Pour your premixed sauce in a circle around the edges of the hot pan. Let it bubble and reduce for 10 seconds before tossing.
Mistake: Overcooking the eggs by adding them raw to the rice.
Solution: Scramble them in a clean spot in the pan or in a separate skillet first. You want distinct, tender curds.
Protein Prep: The Velveting Technique (Simplified)
If you’re adding chicken, the restaurant trick is velveting, which involves marinating in baking soda to alter the protein’s pH and retain moisture. For a home-friendly version, I skip the baking soda. Instead, I use a combination of cornstarch, a little oil, and the sauces. Cut boneless, skinless chicken thighs (they have more fat and stay juicier than breasts) into small pieces. Toss them with a teaspoon each of cornstarch, light soy sauce, and oyster sauce. Let it sit for 15 minutes while you prep everything else. When you cook it, you’ll get a nice sear and a tender interior without any weird textures. The cornstarch also helps create a light coating that grabs the sauce later. Cook it in your hot pan until it’s just done, then set it aside. You’ll add it back at the very end. This order of operations is non-negotiable for texture. If you’re new to cooking with chicken in fried rice, our easy chicken fried rice recipe offers a great starting point.
Equipment Showdown: Wok vs. Skillet
I’ve tested this extensively. A 14-inch carbon steel wok is fantastic if you have a gas stove and use it regularly. Its curved shape and thin walls heat up fast and allow for great tossing action. But on a standard electric or induction coil? It’s frustrating. The contact patch is small, so you don’t get consistent heat. For most home cooks in Los Angeles or Edison, a large (12-inch) cast iron or heavy stainless steel skillet is your best bet. It holds heat steadily, gives you a great searing surface, and you can still get a decent toss going with a good spatula. The data on this is actually quite clear: consistent, high heat matters more than the shape of the pan for achieving that takeout style fried rice texture.
Step-by-Step Sensory Guide
Let’s walk through it with your senses as your guide. Heat your pan over medium-high for a good three minutes. Add your high-heat oil. It should shimmer and look wavy almost immediately. Add your aromatics, minced garlic and ginger. The smell should hit you in about 10 seconds, fragrant but not burning. If the raw smell cooks off and they start to turn the color of light honey, you’re good. Push them to the side. In the cleared space, add a touch more oil and pour in your beaten eggs. Let them set for a moment, then scramble until just set, still a bit soft. Remove everything. Now, crank the heat to high. Add a bit more oil. When you think it’s hot, wait another 30 seconds. Add your cold rice. You should hear a loud, immediate sizzle. Use your spatula to press the rice into the pan, let it sit for 45 seconds to develop some fond, then toss. You’re looking for about half the grains to get a light golden-brown tint. That’s caramelization, the Maillard reaction at work. Now, pour your premixed sauce around the perimeter. It should boil and reduce on contact, creating an incredible savory steam. Toss aggressively to coat. Finally, fold back in your cooked chicken, eggs, and veggies. Kill the heat. Drizzle with toasted sesame oil, which is a finishing oil, never a cooking oil. That final aroma is the knockout punch.

Variations & Substitutions: Make It Your Own
The framework is everything. Once you’ve mastered the basic technique for takeout style fried rice, the variations are endless. For a quick shrimp fried rice, sauté peeled shrimp in the hot pan until pink and curled, then set aside. For a beef version, use thin slices of flank steak marinated briefly in the same mixture as the chicken. The combination fried rice from restaurants, with chicken, shrimp, and beef, is just an application of the batch-cooking principle. For a vegan takeout style fried rice, swap the chicken for extra-firm tofu pressed and cubed, use mushroom stir-fry sauce instead of oyster sauce, and add a splash of liquid aminos. You can modernize it with whatever veggies you find at the Santa Monica Farmers Market, like asparagus in spring or diced zucchini in summer. The method stays the same. Taste and adjust as you go.
Frequently Asked Questions
What’s the secret ingredient for authentic takeout style fried rice flavor?
It’s less one ingredient and more a combination. A pinch of MSG or Accent seasoning rounds out the umami, but the real secret is the technique: cold rice, very high heat, and adding the premixed sauce to the hot pan edges so it caramelizes instantly.
How can I make this best chicken fried rice recipe without pork or alcohol?
This recipe is designed without them. For the savory depth some get from Shaoxing wine, I use a mix of rice vinegar and a pinch of sugar. Chicken thighs, oyster sauce (or mushroom sauce), and toasted sesame oil provide all the rich flavor you need.
Cool it completely, then store in an airtight container in the fridge for 5-7 days. To reheat, sprinkle a tablespoon of water over a portion in a microwave-safe bowl, cover, and microwave in 60-second bursts, fluffing in between. For the stovetop, heat a little oil in a skillet and stir-fry until hot.
Can I freeze takeout style fried rice?
Absolutely. Let it cool completely, then portion into freezer-safe bags, press out all the air, and freeze flat for up to 6 months. Thaw in the fridge overnight before reheating. The texture of the vegetables softens a bit, but the flavor holds up well.
Your Make-Ahead & Meal Prep Strategy
This dish is a meal-prep champion. Cook a big batch of rice at the start of the week, spread it on a sheet pan to cool, then refrigerate it. Chop your vegetables and mix your sauce. Store everything separately. When dinner panic hits, you’re just 10 minutes of active cooking away from a restaurant-quality meal. You can even fully cook a double batch of this takeout style fried rice, portion it, and refrigerate it. Reheating as described above works perfectly. It makes good sense when you think about it, turning a technique-heavy dish into a convenient weekday staple.
The Final Takeaway
Making perfect takeout style fried rice at home isn’t about secret ingredients you can’t find. It’s about applying a few key principles of food science: starch retrogradation, the Maillard reaction, and managing thermal mass. I’m impressed by how well this holds up every time I make it. Once you understand the why behind the cold rice and the hot pan, you’ll never look at that container of leftover rice the same way again. It’s your ticket to a faster, cheaper, and honestly, more delicious version of a takeout classic. Give it a try this week. I’d love to see your results. For more kitchen science and recipe frameworks, check out my Pinterest boards where I break down the why behind the recipes.
Reference: Original Source


