Fast Air Fried Lemon Garlic Tilapia
Ingredients
Method
- Pat the tilapia dry with clean paper towels to remove excess moisture and generously coat both sides of the fillets with cooking spray.
- Mix the Old Bay seasoning, garlic powder, and onion powder in a small bowl.
- Coat both sides of the tilapia with cooking spray and press the seasoning mixture firmly onto each side.
- Preheat the air fryer to 400°F if necessary and grease the basket with cooking spray. Arrange the fish in a single layer in the basket without overcrowding and cook for 6 minutes.
- Prepare the sauce by melting the butter in a small microwave-safe dish, then stir in the lemon juice, garlic powder, and onion powder.
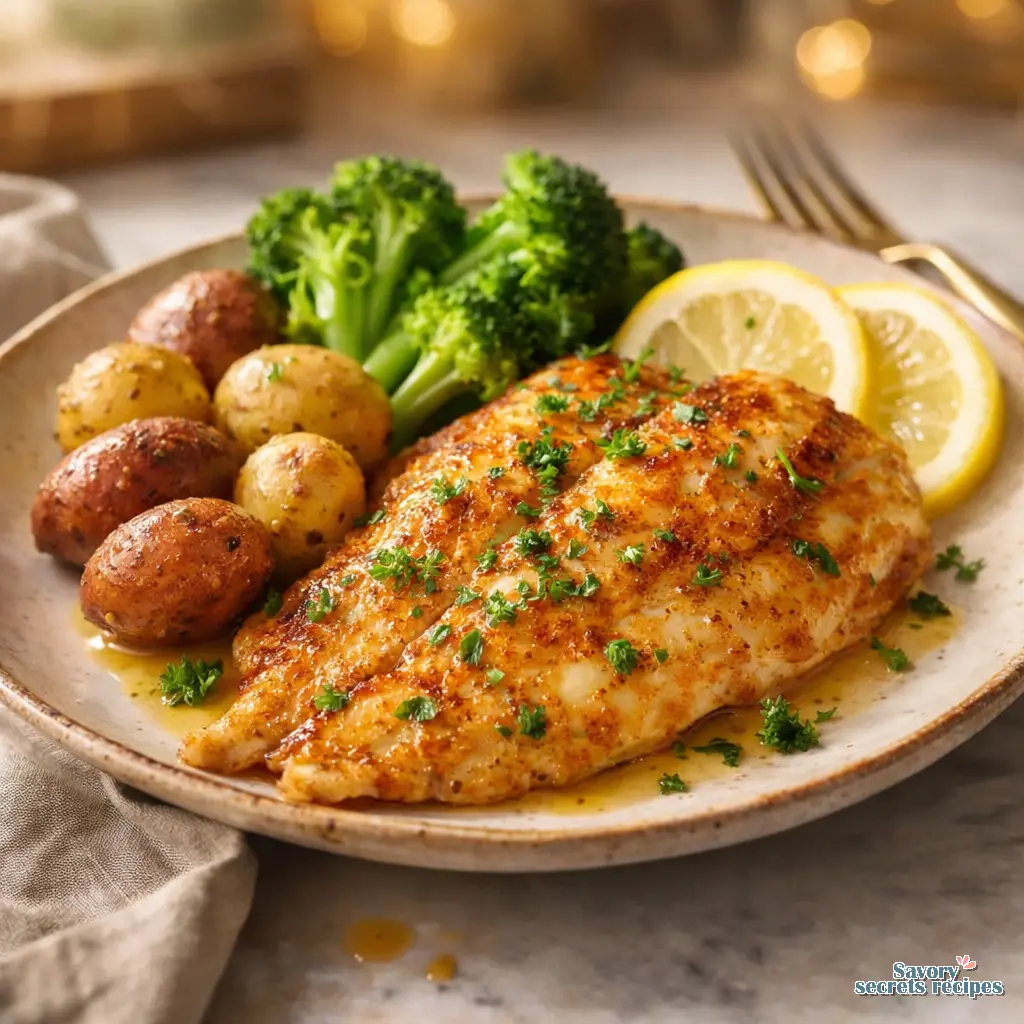
- Transfer the cooked fish to serving plates and drizzle with the lemon garlic sauce. Garnish as desired and serve.
Nutrition
Notes
- Use clean paper towels to thoroughly pat the tilapia dry before seasoning. Removing excess moisture helps the fish cook evenly and prevents it from steaming.
- If you don’t have Old Bay seasoning, you can substitute it with a simple blend of 1 teaspoon paprika, ½ teaspoon kosher salt, ½ teaspoon garlic powder, ½ teaspoon onion powder, and ¼ teaspoon black pepper.
- Instead of using cooking spray, you can brush olive oil directly onto both the fish and the air fryer basket to prevent sticking.
- Arrange the fillets in a single layer without overlapping. Overcrowding the basket can cause uneven cooking and prevent the fish from crisping.
- To safely remove the delicate fillets after cooking, use a large rubber spatula along with a pair of tongs to gently lift and support each piece.
- This recipe is part of our Air Fryer Recipes Collection.
- We love serving Air Fryer Tilapia with a scoop of Cilantro Lime Rice and some Air Fryer Broccoli on the side.
The 10 Minute Dinner That Actually Works
I remember standing on a stepstool in Opa’s kitchen in Whitefish Bay, watching him sharpen his knives on a whetstone every Sunday morning. He’d test the edge on a piece of newspaper. If it didn’t slice cleanly, he’d go another five minutes. I thought it was magic. Now I realize it was just consistency. That tracks with how I view kitchen tools today. I test a lot of countertop appliances for work, and I’ve found that a lemon garlic tilapia air fryer recipe is the absolute best way to check a machine’s convection consistency. Plus, it solves the ultimate weeknight panic.
It’s 6:00 PM on a Tuesday. You’re exhausted. I’m exhausted. We just want to eat without destroying the kitchen. This lemon garlic tilapia air fryer method is the ultimate dinner hack. You get crispy edges without deep frying, an ultra-low calorie meal, and absolutely no fishy smell lingering in your house. The tool should disappear in your hand, and in this case, the appliance does all the heavy lifting.
Quick Wins for Your Lemon Garlic Tilapia Air Fryer Setup
Before we get into the technical testing data, I want to give you a few quick wins for this lemon garlic tilapia air fryer method. I’ve ruined enough meals in my test kitchen to know what matters. First, you absolutely must pat the fish dry with paper towels. I know it seems fussy, but moisture is the enemy of browning. If you skip this, your seasonings won’t stick and the texture suffers.
Second, don’t flip the fish. I mean it. Tilapia is incredibly delicate. If you try to turn it halfway through, it’ll fall apart into a sad, flaky mess. Just let it do its work. The hot air circulation handles the bottom just fine. Finally, here’s a pro-tip I learned after scrubbing too many baskets: place thin lemon slices directly under the fillets. They act as a natural non-stick mat, infuse bright citrus flavor right into the meat, and make cleanup ridiculously easy.
Why Air Frying Beats Oven Baking for Tilapia
I’m constantly asked if countertop convection is really better than a standard oven. Fair enough. I was skeptical too. But the science of air frying lean fish proves it works better. A traditional oven relies on radiant heat, which takes forever to penetrate a thin, delicate protein like tilapia. By the time the outside gets any color, the inside is completely dried out. It’s frustrating.
An air fryer basket changes the physics. It blasts highly concentrated, rapidly circulating hot air directly onto the food. This creates a micro-environment that sears the garlic powder and butter onto the surface instantly, locking the moisture inside. That’s how you get that perfect crispy-tender contrast. All things considered, it’s exactly what you want to see when cooking seafood. It’s a true 10 minute meal that tastes like it took thirty.
Equipment Setup: Getting the Basket Ready
If the handle feels wrong, everything else suffers. The same logic applies to how you prep your air fryer basket. You have two good options here: parchment liners or olive oil spray. I prefer parchment liners with holes punched in them for maximum airflow. If you decide to spray the basket, use a manual pump bottle of olive oil or avocado oil.
Whatever you do, don’t use commercial aerosol non-stick sprays. In my testing, the chemical propellants in those cans degrade the non-stick coating on the basket over time. I learned this the hard way and had to replace a perfectly good unit. Clean as you go or regret it later, right? Also, arrange your tilapia fillets in a single layer. Don’t overcrowd the basket. The air needs room to move around each piece.
The Science of Air Frying Lean Fish
Good browning takes patience, but with lean seafood, patience leads to dry food. Tilapia has very little fat, which means it goes from perfectly cooked to tough and rubbery in about sixty seconds. The ideal air fryer settings for this are usually around 400°F. The high heat shocks the exterior.
You’ll want to check doneness early, usually around the 7 or 8 minute mark. The most accurate way to check is with a digital meat thermometer. You’re looking for an internal temp of 140 to 145°F. I know taking the temperature of a thin fish fillet seems like overkill, but the data should speak. It guarantees perfect results every single time.
Batch Cooking Strategy for Lemon Garlic Tilapia Air Fryer
I do pizza Fridays with my family, and my daughter has started rating the pizza cutter’s performance. She doesn’t know she’s doing product testing, but she is. When we switch to fish on weeknights, I face a different logistical problem: batch cooking. Most baskets only hold two fillets comfortably.
If you’re cooking for four, you’ll need two batches. To keep the first batch warm without drying it out, place the cooked fillets on a wire rack set inside a baking sheet. Tent it loosely with foil, not tightly, or the steam will ruin your crispy edges. Put the tray in your standard oven on the lowest “keep warm” setting while the second batch cooks. It’s a simple workflow that saves dinner.
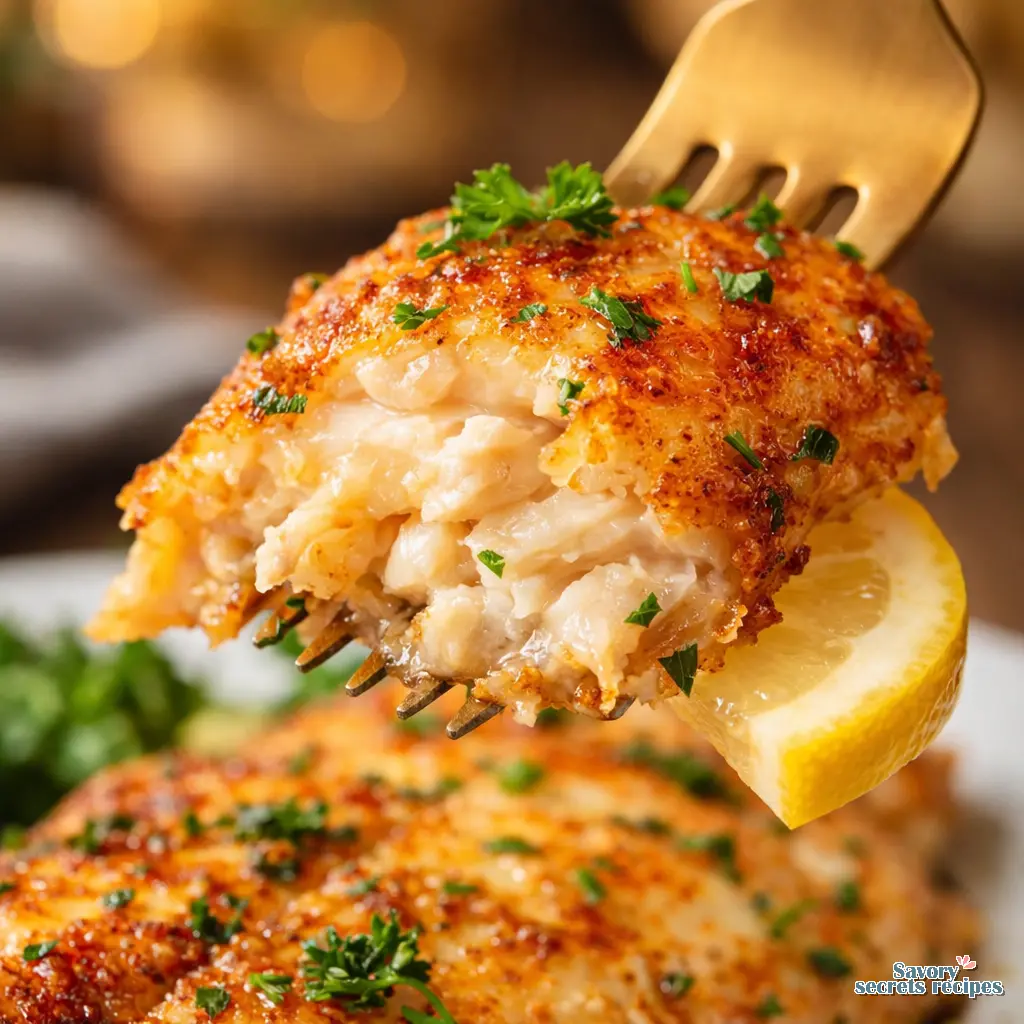
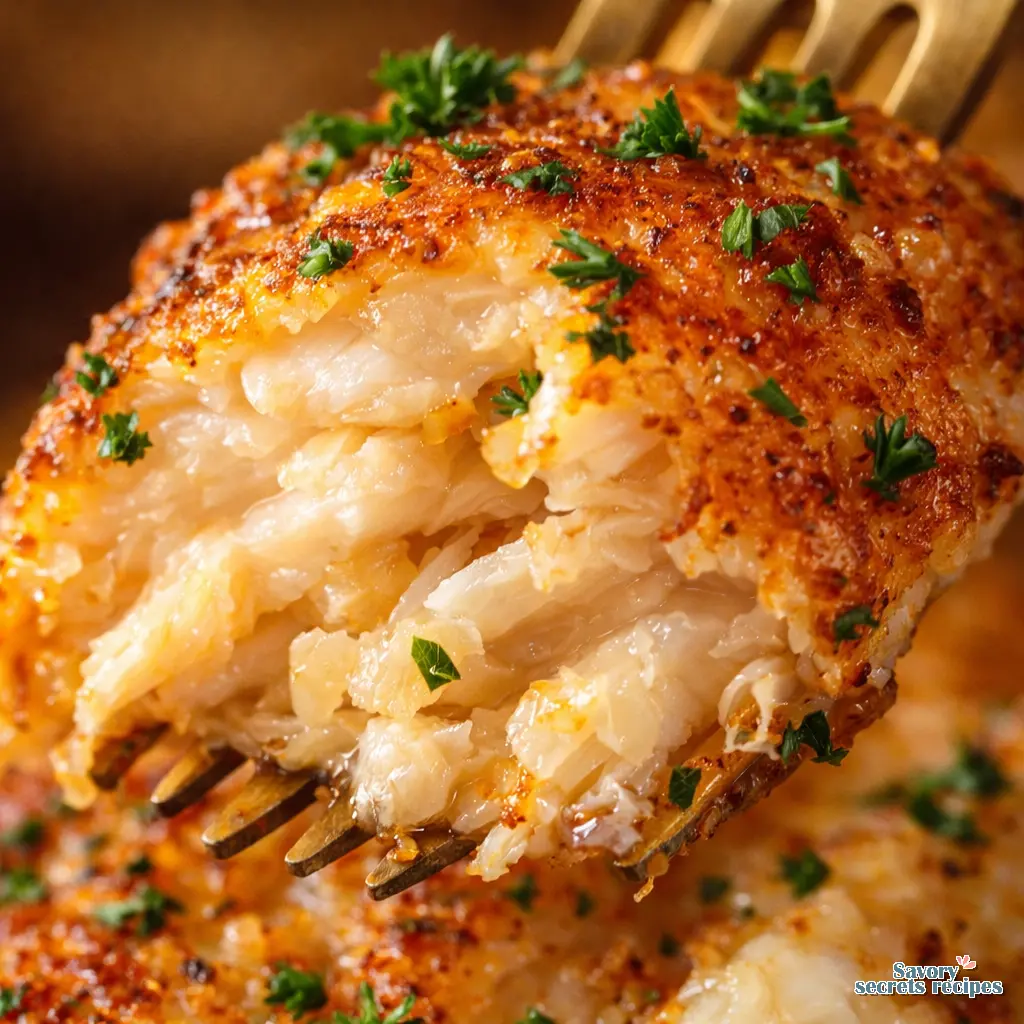
Visual Doneness Gallery
If you don’t have a thermometer handy, you’ll need to rely on visual cues. Raw tilapia is translucent and slightly pinkish-gray. As it cooks, the proteins denature and turn bright, opaque white. You’ll know your lemon garlic butter tilapia air fryer meal is ready when the thickest part of the fillet flakes easily when gently pressed with a fork.
Watch the edges, too. They should look slightly caramelized and crispy where the garlic powder and butter have browned. If the center still looks slightly glassy or wet, give it another 60 seconds. Just don’t walk away. It happens fast.
Common Mistakes & Fixes
Mistake: The fish is mushy and steamed instead of crispy.
Solution: You likely overcrowded the basket. The hot air must circulate completely around each fillet. Cook in smaller batches.
Mistake: The fillets fell apart into pieces.
Solution: You tried to flip them. Tilapia is too delicate for flipping in an air fryer. Leave them alone to cook on one side.
Mistake: The seasoning tastes gritty or didn’t stick.
Solution: You skipped the paper towel step. Always pat the fish completely dry before applying the butter and spice mixture.
Mistake: The meal is way too salty.
Solution: Check your store-bought seasoning blends. Many already contain heavy salt. Taste your blend before adding extra kosher salt.
Variations & Substitutions
I love when a tool does exactly one thing perfectly, but recipes need flexibility. If you’re out of tilapia, this exact lemon garlic tilapia air fryer method works beautifully with mahi-mahi or cod, though thicker cuts might need an extra minute or two. If you’re strictly dairy-free, swap the butter for a high-quality avocado oil or ghee.
For a different flavor profile, swap the lemon pepper and garlic powder for a robust Cajun or blackened seasoning. You can even sprinkle a little parmesan cheese on top during the last two minutes of cooking for a savory crust. It’s naturally keto friendly and low carb, making it a solid choice for almost any diet.
Storage & Air Fryer Reheating Instructions
Let’s talk leftovers. Store any remaining fish in an airtight container in the refrigerator for up to 3 days. When it’s time to reheat, please don’t use the microwave. It’ll turn your beautiful crispy fish into a rubbery, sad sponge.
Instead, put it back into your favorite countertop gadget. Reheat your lemon garlic tilapia air fryer leftovers at 350°F for about 3 to 4 minutes. It brings the crust right back to life without overcooking the center. Serve it alongside roasted asparagus, cauliflower rice, or a fresh arugula salad for a complete, healthy meal.
Frequently Asked Questions
Final Thoughts on This Lemon Garlic Tilapia Air Fryer Recipe
I tried to speed-test a food processor once by running it continuously for twenty minutes and burned out the motor. I learned that real-world testing means realistic scenarios. That’s why I love this lemon garlic tilapia air fryer recipe so much. It’s a realistic, everyday solution for busy people who still want to eat well. It’s fast, the cleanup is minimal, and the results are incredibly consistent.
Give it a try the next time you’re staring blankly into the fridge at 6:00 PM. I think you’ll be impressed by how much flavor you can build in ten minutes. For more inspiration and practical equipment tips, check out my Pinterest boards where I save all my favorite quick-dinner hacks. Happy cooking, and remember to clean as you go.
Reference: Original Source
What is the ideal air fryer tilapia temperature and time for a perfectly flaky result?
In my testing, 400°F for 8 to 10 minutes yields the best results. The high heat sears the outside quickly while keeping the inside tender. Always check it around the 7-minute mark, as machines vary and thin fillets cook remarkably fast.
How to cook frozen tilapia in air fryer with lemon if I forgot to thaw the fish?
You can absolutely cook it from frozen. Run the unseasoned frozen fillets at 350°F for 5 minutes first. This thaws them safely. Then, pat them dry, add your lemon garlic butter seasoning, and finish cooking at 400°F for another 7 to 9 minutes.
Can you put lemon slices in the air fryer with fish to enhance the citrus flavor?
Yes, and it’s actually my favorite trick. Placing thin lemon slices directly underneath the fillets acts as a natural non-stick barrier. It prevents sticking, makes cleanup effortless, and gently steams bright citrus oils up into the fish as it cooks.
What is the secret to making the best lemon garlic butter tilapia air fryer style?
The real secret is moisture control. You must pat the fillets completely dry before applying the butter and garlic powder. If the fish is wet, the butter slides off and the surface steams instead of forming that delicious, savory crust we all want.
How do I prevent my air fried lemon garlic tilapia from sticking to the basket?
Beyond the lemon slice trick, you can use perforated parchment liners designed specifically for these baskets. Alternatively, lightly coat the basket with a manual pump of olive oil spray. Never use aerosol cooking sprays, as they will permanently damage your basket’s non-stick coating.