Moist Gluten Free Marble Cake Recipe
Ingredients
Method
- Preheat oven to 350°F. Line an 8x4-inch loaf pan with parchment paper, leaving an overhang for easy removal, and set aside.
- Whisk together gluten-free flour, cornstarch, kosher salt, and baking powder in a separate bowl and set aside.
- Place room-temperature butter in a stand mixer bowl with the paddle attachment or a large bowl. Beat on medium-high speed for 2 to 3 minutes until smooth and light in color.
- Add granulated sugar and vanilla extract, then mix for an additional 2 minutes.
- Add eggs one at a time with the mixer on low, allowing 30 seconds for each to incorporate.
- Add dry ingredients to the wet ingredients in three parts, alternating with the milk, and mix until smooth.
- Transfer two-thirds of the vanilla batter to the loaf pan and smooth the surface with an offset spatula or spoon.
- Mix cocoa powder, additional sugar, and milk into the remaining batter for about one minute until smooth.
- Layer the chocolate batter over the vanilla batter and swirl them together using a butter knife or fork.
- Bake at 350°F for 55 to 65 minutes until golden brown and a tester comes out clean, or the internal temperature reaches 200°F.
- Cool the cake in the pan for 10 minutes, then transfer to a wire rack to cool completely.
Nutrition
Notes
The Search for a Truly Moist Gluten Free Marble Cake Recipe
Let me walk you through this. If you have ever bitten into a gluten-free baked good and felt like you were chewing on sweet sand, I see you. I really do. My daughter Priya helps me test all our kid-friendly desserts, which means I have a very honest five-year-old telling me exactly when something tastes weird. She once took a bite of my early attempt at a gluten free marble cake recipe, paused, and told me it tasted like the sandbox at the park. Back to the drawing board on that one.
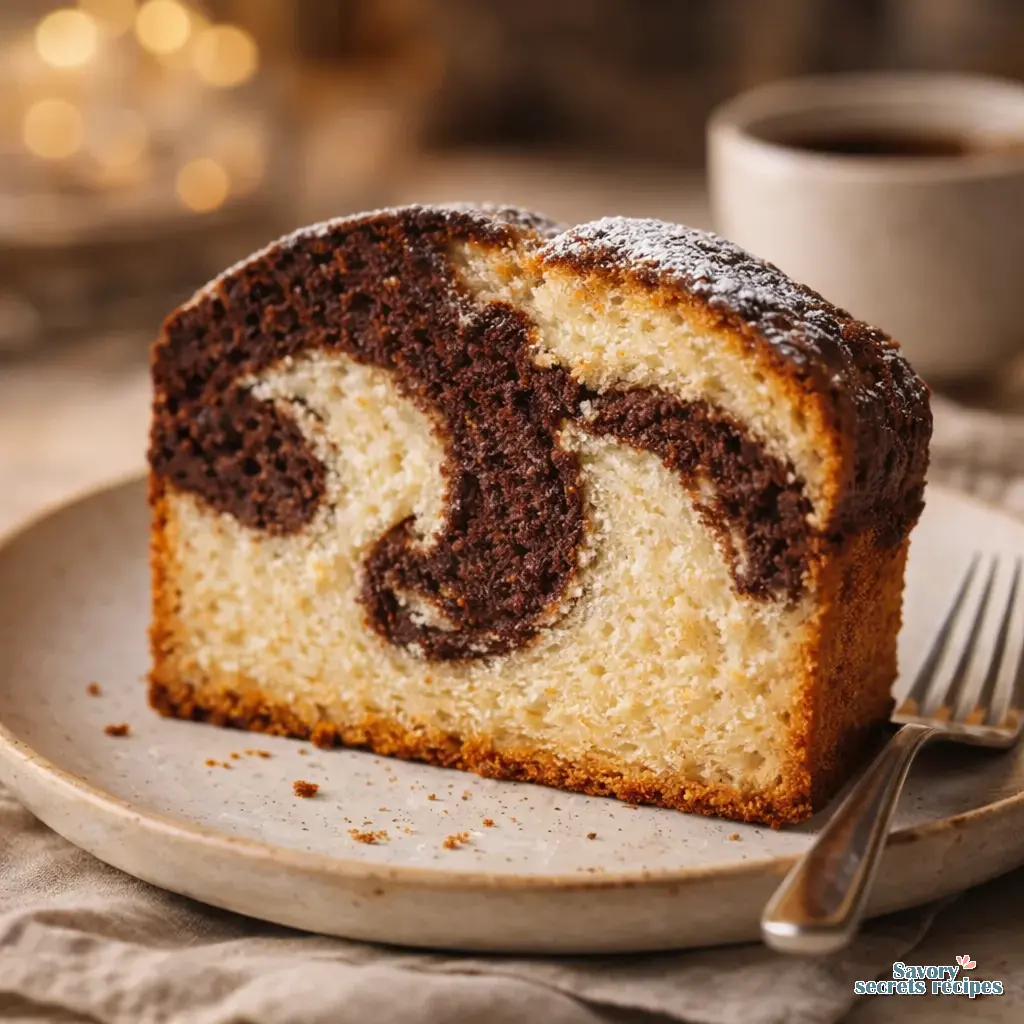
But this one really works. I was so happy with how this turned out after tweaking the ratios. We are aiming for a velvety, tender crumb that actually bends when you slice it. The kind of cake that makes you forget you are eating a modified recipe. During these beautiful Spring weekends in Los Angeles, I love having a slice of this with my morning coffee. You want a gluten free chocolate vanilla swirl that looks beautiful and stays soft for days. Let us figure out how to make that happen without the frustration.
Why This Recipe Works: The Moisture Equation
Here is what I have found works for true moisture retention. Gluten-free flours are notoriously thirsty ingredients. They soak up liquid aggressively and can leave your baked goods dry, crumbly, and heavy. To fight this, we use a specific combination of oil and sour cream.
Oil actually coats the flour particles better than butter does. This translates to a significantly softer loaf cake that stays fresh longer on your counter. Sour cream adds essential fat and acidity, which tenderizes the crumb beautifully. This solved the problem I was having with dry, hard edges on my early test batches. I mean, nobody wants a dessert they have to wash down with a giant glass of milk just to swallow it.
We also add a tablespoon of cornstarch to the flour blend. This mimics the lower protein content of cake flour, resulting in a much more tender, pound-cake-like crumb. It is a small addition, but worth the extra step.
Ingredient Notes: The Flour Factor
The texture you are looking for depends entirely on your flour choice. You need a high-quality gluten free 1-to-1 flour blend. In my testing, blends that rely heavily on rice flour, potato starch, and tapioca yield the best results for cakes.
Ensure your GF flour blend contains xanthan gum. If it does not, you must add one teaspoon to the recipe yourself. Xanthan gum provides the structural elasticity that gluten normally would. Without it, your cake will simply crumble into pieces when you try to slice it.
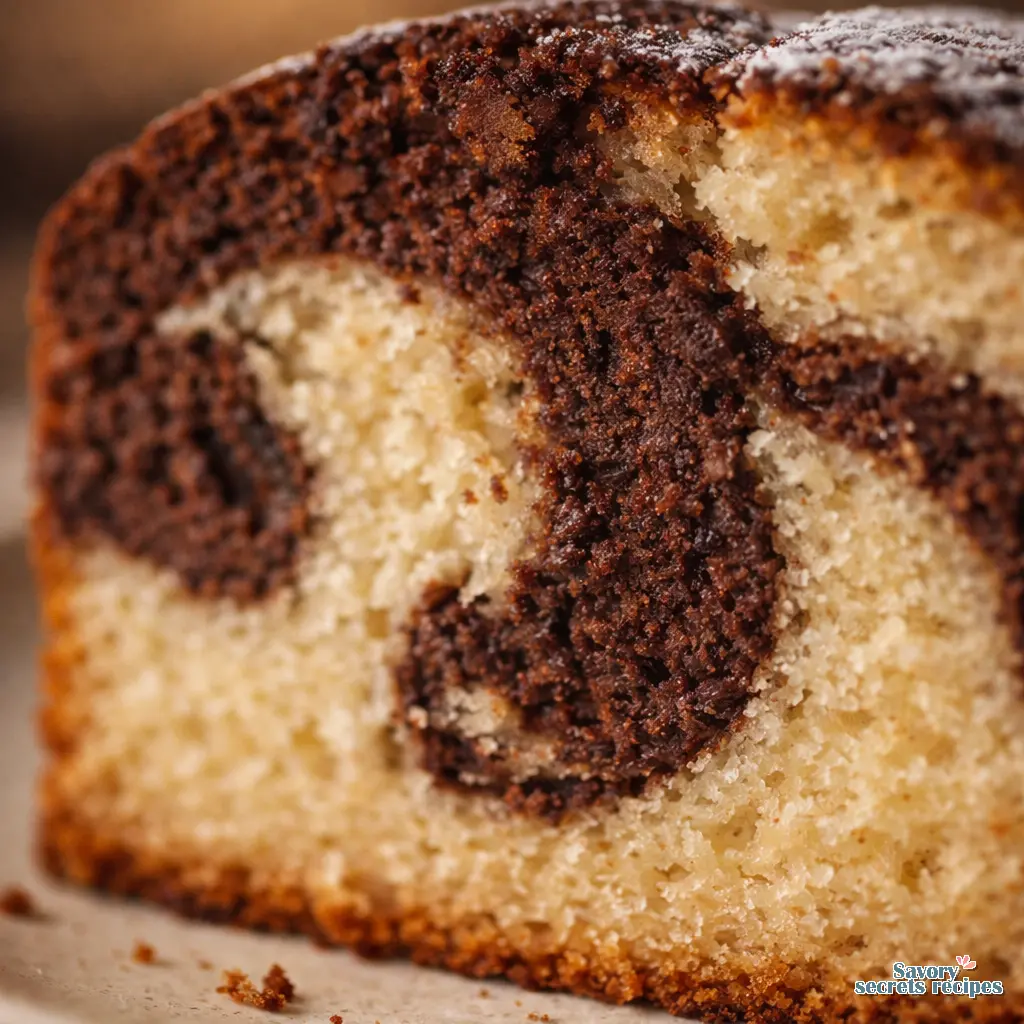
For the chocolate portion, use Dutch-processed cocoa powder. It has a lower acidity than natural cocoa and provides a richer flavor with a much darker color contrast. This makes your swirl pattern visually pop against the pale vanilla batter. Always double-check that your cocoa is certified gluten free, because cross-contamination in manufacturing facilities is surprisingly common.
The Magic of Room Temperature Ingredients
This is the part that matters most. Using room temperature ingredients (your eggs, milk, and sour cream) is absolutely critical for batter consistency. Cold ingredients will seize the melted butter or oil, preventing a proper emulsion. A broken batter leads to a dense, gummy cake.
If you forgot to prep your ingredients, do not panic. Just warm your cold eggs in a bowl of warm water for seven to eight minutes to speed up the prep. You can also microwave cold milk and sour cream for about 20 seconds to reach a lukewarm temperature. This should work perfectly, assuming your microwave runs true to standard wattage.
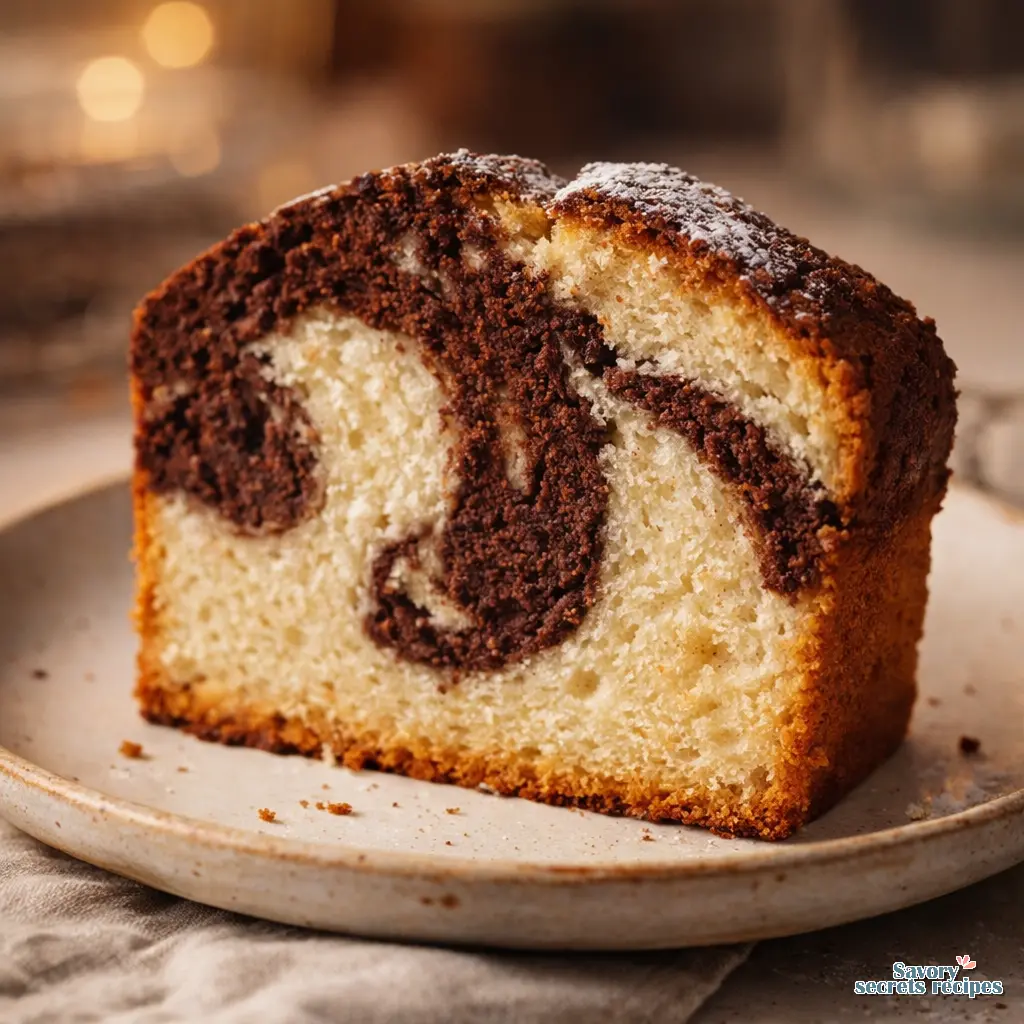
Visual Marbling Tutorial: The Perfect Swirl
How do you get that beautiful gluten free chocolate vanilla swirl in the batter? It is easier than you think. First, alternate scoops of vanilla and chocolate batter into your prepared loaf pan. Think of it like a checkerboard pattern.
Once all the batter is in the pan, take a butter knife or a thin wooden skewer. Plunge it straight down into the batter until you touch the bottom of the pan. Now, draw a continuous figure-eight pattern from one end of the pan to the other. Do this exactly twice. Stop right there. Over-swirling the batter results in a muddy brown color rather than distinct, beautiful marbles. If it looks a little messy and chaotic on top at this stage, that is normal. The oven will smooth it out.
Recipe Science: The Batter Rest Period
Here is a trick I learned from testing dozens of GF flours. Let your batter rest in the pan for 15 to 20 minutes before putting it in the oven. Gluten-free flours need extra time to hydrate and absorb liquids.
I remember my ajji letting her dosa batter sit on the counter, knowing exactly by the consistency when the rice and lentils had hydrated enough. We are applying that exact same principle here. Giving the starches time to swell means a smoother, softer cake and completely eliminates that gritty texture people associate with gluten-free baking. Use this resting time to preheat your oven.
Internal Temperature Guide for Doneness
Do not overbake this cake. GF cakes dry out much faster than traditional wheat cakes. You will know it is ready when a toothpick inserted into the center comes out with just a few moist crumbs attached.
To be safe, I highly recommend using a digital thermometer. This is your ultimate checkpoint. The internal temperature should register exactly 205°F to 210°F. Test it at the 45-minute mark, though it might take an extra five minutes depending on your specific oven calibration.
Variations & Substitutions
I prefer recipes that give you decision points, because your kitchen and your pantry are not exactly like mine.
- Dairy-Free Option: Use oil instead of butter, and swap in a lactose-free sour cream or a thick, unsweetened plant-based yogurt. Use almond milk or oat milk in place of regular milk.
- Almond Flour Addition: For even more moisture, you can substitute a quarter cup of the GF flour blend with finely milled almond flour. It adds a lovely richness.
- Chocolate Chip Marble: Fold 50 grams of mini chocolate chips into the chocolate batter before swirling. It adds great texture.
- All-Purpose Flour: I am often asked this. If you are not celiac and just want a great marble cake, you can swap the GF flour 1:1 with regular all-purpose wheat flour. Just keep the cornstarch in the recipe for tenderness.
Common Mistakes & Fixes for Gluten Free Marble Cake Recipe
Mistake: The cake turned out incredibly dry and crumbly.
Solution: You likely measured the flour with measuring cups. Always measure your flour by weight in grams using a digital scale for accuracy. Scooping packs too much flour into the cup.
Mistake: The cake sank in the middle after baking.
Solution: Your batter was likely underbaked, or your ingredients were too cold, causing a poor emulsion. Always check that internal temperature of 205°F before removing it from the oven.
Mistake: The inside is a muddy, solid light brown color.
Solution: You over-swirled the batter. Stick to just two figure-eight motions with your knife. Trust the process.
Storage & Freezing Guide for Your GF Marble Cake
What is the best way to store a gf marble cake to keep it fresh for several days? First, let it cool completely on a wire rack. If you trap steam while it is warm, the crust will turn to mush.
Once cool, store it at room temperature in an airtight container for three to four days. I actually prefer to store mine in a large ziplock bag with the seal left slightly ajar. This specific trick prevents the moist pound-cake texture from making the exterior sticky.
To freeze, wrap the entire loaf, or individual slices, tightly in plastic wrap, then place in a freezer-safe bag. It keeps for up to three months. You can thaw slices at room temperature, or just microwave a frozen slice for 30 to 45 seconds. It tastes incredible warm.
Frequently Asked Questions
Final Thoughts
I genuinely love the problem-solving part of this work. Figuring out exactly why a gluten free marble cake recipe fails and tweaking it until it is perfectly soft is incredibly satisfying to me. Bringing a beautifully swirled cake to a weekend brunch and watching everyone enjoy it, knowing it is completely safe for your family to eat, is the best feeling.
Serve this with a dollop of freshly whipped cream or just enjoy it plain with your afternoon tea. If you try this, let me know how the swirl turns out. For more inspiration and variations on classic bakes, check out my Pinterest boards where I save all my favorites.
Reference: Original Source
How do you make a gluten free marble cake recipe moist instead of dry?
The secret is adding extra fat and acidity. I use a combination of oil and sour cream in the batter. Oil coats the gluten-free flour particles better than butter, preventing them from drying out, while sour cream tenderizes the crumb beautifully.
What is the best gluten free flour for marble cake to achieve an authentic texture?
In my testing, grain-based blends like King Arthur Measure for Measure or Bob’s Red Mill 1-to-1 work best. You need a blend containing rice flour, tapioca, and potato starch. Avoid paleo or grain-free almond/coconut blends for this specific recipe, as they will not rise properly.
Can I make this gluten free marble cake recipe no xanthan gum?
You really need a binder to replace the gluten structure. If your flour blend does not contain xanthan gum, you must add 1 teaspoon. If you are entirely allergic to xanthan gum, you can try substituting with 1.5 teaspoons of psyllium husk powder, though the texture will be slightly denser.
Can I turn this recipe into a Vegan Gluten Free Marble Cake?
Honestly, it is difficult. This recipe relies heavily on three eggs for structure and lift, which is crucial in GF baking. While you can swap the dairy for plant-based alternatives easily, replacing that many eggs with flax eggs usually results in a dense, gummy cake. I recommend finding a dedicated vegan recipe instead.
Can I add Chocolate Chips to Marble Cake?
Absolutely. I love doing this. Fold about 50 grams (a generous quarter cup) of mini semi-sweet chocolate chips directly into the chocolate batter portion before swirling it into the pan. Mini chips work best because they will not sink to the bottom of the gluten-free batter.
I am not celiac. Can I make this cake with all purpose flour?
Yes, you can. If you do not need a gluten free marble cake recipe, simply swap the GF flour blend for standard all-purpose wheat flour using the exact same measurements. Keep the tablespoon of cornstarch in the recipe, as it helps create that tender, bakery-style crumb.