Traditional German Marble Cake Recipe
Ingredients
Method
- Preheat the oven to 350°F. Position the oven rack in the bottom third and generously grease a Bundt or large round cake pan with butter.
- Combine softened butter, granulated sugar, and salt in a large mixing bowl. Using an electric hand mixer or a stand mixer with a paddle attachment, beat on medium speed for 2 to 3 minutes until pale, smooth, and creamy.
- Scrape down the sides of the bowl with a silicone spatula, then add the vanilla and mix for 30 seconds.
- Add eggs one at a time, beating for 30 seconds and scraping the bowl after each addition. Continue until all eggs are incorporated, even if the batter appears curdled.
- Pour in the milk and beat for an additional 30 seconds, then set the mixture aside.
- Whisk the flour and baking powder together in a separate large mixing bowl.
- Gradually add the flour mixture to the egg mixture while mixing on low speed. Scrape the bowl to ensure no dry pockets remain in the thick batter.
- Transfer two-thirds of the cake batter into the prepared baking pan.
- Add cocoa powder, espresso powder, and milk to the remaining batter. Mix until fully combined, scraping the sides of the bowl as needed.
- Pour the chocolate batter over the light batter. Drag a knife through the mixtures to create a marbled effect, taking care not to over-mix and lose the contrast.
- Bake for 45 to 60 minutes until a toothpick or knife inserted into the center comes out clean.
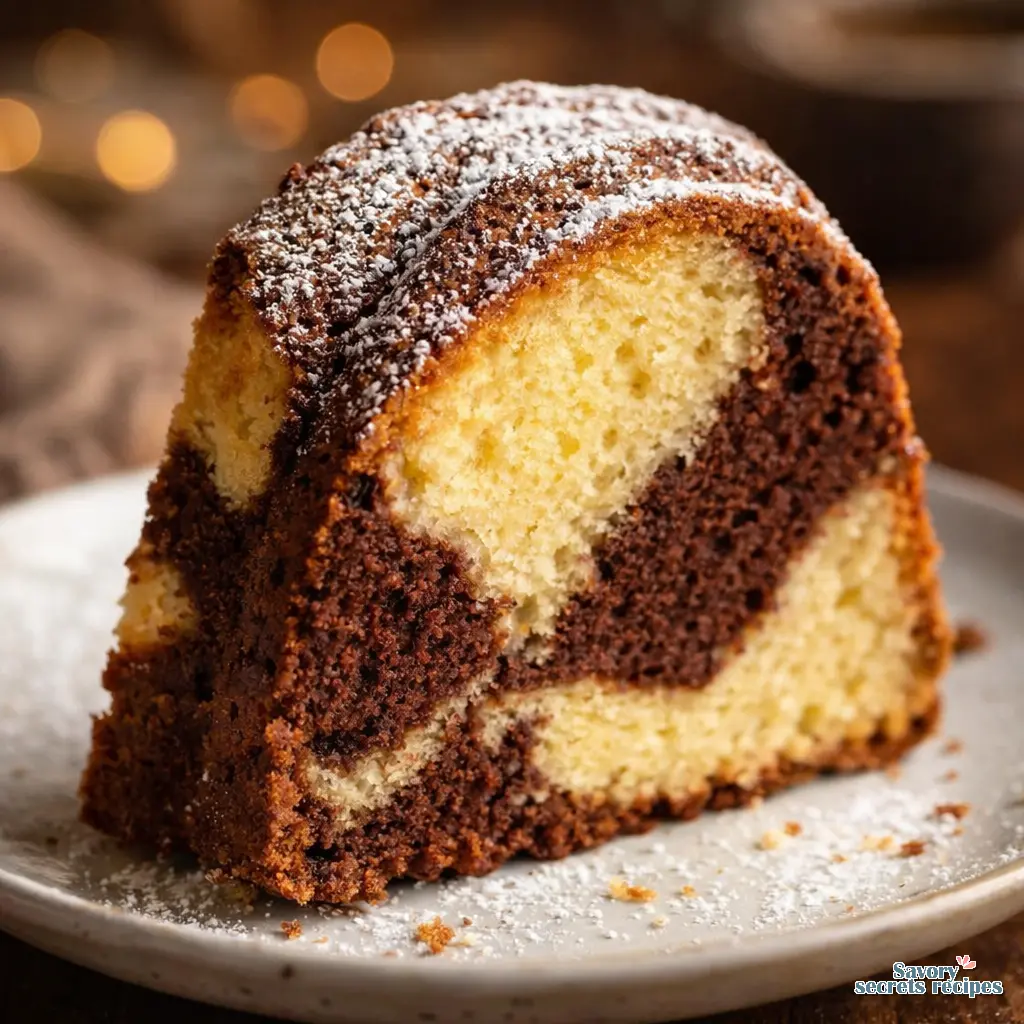
- Cool the cake on a rack for 10 minutes, then invert the pan to release it. Allow the cake to cool completely on the rack before dusting with powdered sugar.
Nutrition
Notes
- The cake batter is very sticky and thick. Use a rubber spatula or knife to help spread it into all the sides and edges of the Bundt pan.
- When swirling the vanilla and chocolate cake together, use long, gently sweeping motions with your knife. Don't go overboard, since Marmorkuchen is usually light on to top half, revealing the hidden marble effect only as you slice into the cake.
- Use a serrated knife to trim off the crispy bottom of the cake, so it can stand flat and level on your plate or cake stand.
The Pursuit of an Authentic german marble cake marmorkuchen
I remember standing on a stepstool in Opa’s kitchen in Whitefish Bay, watching him measure ingredients for his Sunday baking. He’d test the edge of his favorite mixing spoon, tapping it against the ceramic bowl. If the sound wasn’t a solid, heavy thud, he wouldn’t use it. I thought it was magic. Now I realize it was just consistency. He brought that exact same precision to his german marble cake marmorkuchen.
In practice, most American marble cakes fail the basic moisture test. They’re overly sweet, painfully dry, and usually rely on artificial flavors. That tracks with our modern obsession with speed over technique. But an authentic marmorkuchen is entirely different. It has a dense crumb, subtle sweetness, and a buttery flavor that actually tastes like real butter.
I’ve tested dozens of pans and variations to get this right. Living half the year in Los Angeles, where spring means breezy 65-degree afternoons, I find myself craving this exact cake with a strong cup of coffee on the patio. It brings a piece of my grandfather’s Düsseldorf kitchen straight to the West Coast. I know this sounds a bit nostalgic, but the technique here is purely objective. Let it do its work, and you’ll see exactly why this traditional recipe outlasts any boxed mix.
The Secret to a Moist german marble cake marmorkuchen
I prefer tools and ingredients that feel substantial. There’s a balance point where you know something is well-made. The exact same logic applies to your butter. American grocery store butter contains up to 20% water. When that water hits a hot oven, it turns to steam, evaporates, and leaves your cake dry.
All things considered, springing for European butter is mandatory here. You want a fat content of at least 82%. That higher fat ratio coats the flour proteins, preventing gluten development and giving you that incredibly fine texture characteristic of real German baking. You’ll smell the difference before the cake even goes into the oven. It smells rich, almost nutty.
Another crucial factor is temperature. I tried to speed-test a baking method once by using cold eggs and cold butter, and the batter completely separated. The emulsion broke. Learned that real-world testing means following the rules. Ensure all your ingredients are at room temperature. The butter should yield to gentle pressure but not look greasy. This allows the sugar to aerate the butter properly during the creaming process, which is the only way to get a dense crumb that isn’t heavy.
The Science of Cocoa in Marble Cake
Here’s what usually goes wrong. You divide your perfectly mixed vanilla batter, dump dry cocoa powder into one half, and bake it. Predictably, the chocolate section turns out crumbly and dry. Cocoa powder acts exactly like flour in a batter. It absorbs liquid aggressively.
To fix this, you have to compensate. You’ll add a little extra milk to the cocoa portion to keep the chocolate layer moist. It’s a simple step, but skipping it ruins the texture. I also highly recommend using a touch of espresso powder. It doesn’t make the cake taste like coffee. Instead, it pushes the chocolate flavor forward, making it taste darker and richer.
Common Mistakes & Fixes
Mistake: Overmixing the batter after adding flour.
Solution: This leads to a tough, rubbery cake. Stop mixing the second the flour disappears. Don’t overmix the batter after adding egg whites either, you need to maintain that fluffiness.
Mistake: Using cheap hot chocolate mix.
Solution: Use real unsweetened cocoa powder. If you want to go a step further, melted dark chocolate combined with cocoa powder provides even better flavor and moisture.
Mistake: The cake tastes flat or lacks that classic bakery aroma.
Solution: You forgot the rum flavor. Since we don’t use alcohol, a high-quality rum extract is essential. It provides that nostalgic bakery scent without any actual liquor.
Intricate Bundt Pan Troubleshooting
If the handle feels wrong, everything else suffers. That’s my philosophy with kitchen knives, and it applies perfectly to cake pans. A traditional german marble cake marmorkuchen is baked in a Gugelhupf pan. These are usually heavy cast aluminum with deep, twisting ridges.
I’m not convinced that silicone pans have any place in serious baking. In my testing, silicone doesn’t conduct heat well enough to create that beautiful, slightly crisp golden crust on the outside of the cake. Stick to heavy metal pans. Nordicware makes excellent ones that last generations.
Pan preparation is where most people fail. You must grease the pan heavily with softened butter, getting into every single crevice. Then, dust it evenly with flour, tapping out the excess. Do not use cooking spray. The chemical propellants bake onto the pan and leave a sticky residue that ruins the non-stick surface over time. Clean as you go or regret it later.

3 Different Marbling Styles for Your german marble cake marmorkuchen
My daughter has started rating the performance of my kitchen tools. She doesn’t know she’s doing product testing, but she is. Last week, she rated my cake marbling technique. If it looks like a muddy brown mess, it fails. Over-marbling is the easiest way to ruin the visual appeal of this cake.
Here are three reliable ways to marble your batter. First, the classic ‘Figure Eight’. You layer the vanilla batter, top it with the chocolate batter, and use a serving fork in figure-eight motions around the ring of the pan. It creates a subtle, delicate swirl. Just go around exactly once. Trust me.
Second, the Butter Knife Method. Use a butter knife with the flat side up. Plunge it down to the bottom of the pan and weave it back and forth in a tight zigzag pattern. This creates bolder, thicker marbling that looks incredibly striking when sliced.
Third, the Layered Drop. Alternate scoops of vanilla and chocolate batter next to each other, then add a second layer directly on top, alternating the colors. Don’t swirl it at all. The batter naturally pushes together in the oven, creating large, distinct blocks of color. It’s exactly what you want to see if you prefer distinct flavor separation.
German Coffee Culture & Serving
In Germany, ‘Kaffee und Kuchen’ isn’t just a quick snack grabbed on the way to your car. It’s a deliberate pause in the afternoon. Usually around 3 PM, people sit down with a proper cup of coffee and a slice of cake. It’s a tradition I’ve tried to keep alive, even when the Los Angeles pace of life tries to rush it.
A traditional german marble cake marmorkuchen doesn’t need heavy frosting. That would mask the buttery flavor. The most authentic presentation is a simple, heavy dusting of powdered sugar right before serving. It settles into the ridges of the Gugelhupf shape and looks beautiful.
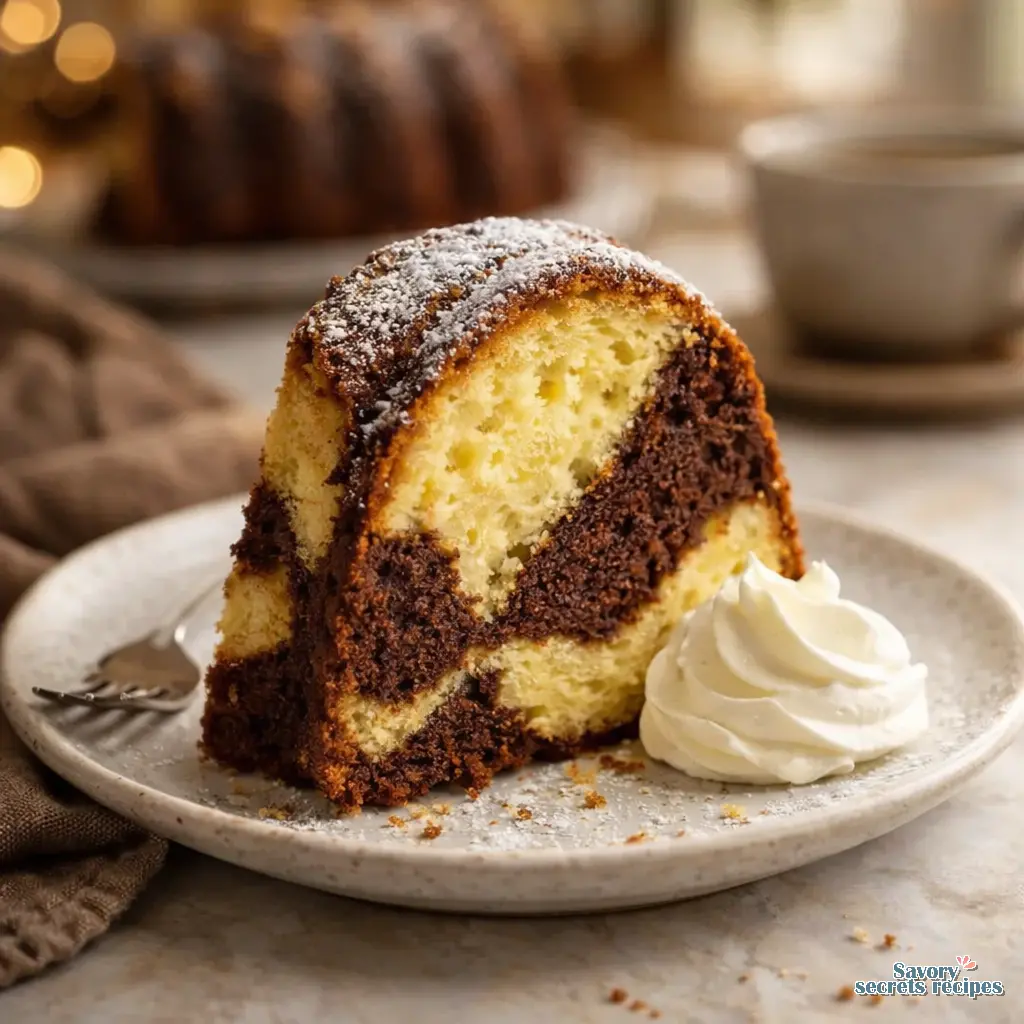
If you want to dress it up, serve it with a dollop of unsweetened whipped cream, known as Sahne. The richness of the cream balances the slightly dry, dense crumb of the cake perfectly. Alternatively, a simple dark chocolate glaze poured over the top helps retain moisture and adds a nice visual contrast.
Freezing & Long-Term Storage Guide
I’ve seen what happens to baked goods left out in dry climates. They turn into bricks within forty-eight hours. Proper storage is non-negotiable if you want your german marble cake marmorkuchen to last.
For short-term storage, keep the cake covered at room temperature in a glass cake dome. It’ll stay fresh for about three to four days. Don’t put it in the refrigerator unless your kitchen is excessively hot. Refrigeration actually speeds up the staling process by crystallizing the starches in the flour.
For long-term storage, this cake freezes exceptionally well. Wrap individual slices tightly in plastic wrap, then place them in a heavy-duty freezer bag. They’ll keep for up to three months. When you want a slice, just let it sit on the counter for an hour to thaw. It tastes just as good as the day you baked it.
Frequently Asked Questions
Bringing the Tradition Home
Testing recipes and equipment has taught me that the best results come from respecting the process. You don’t need fancy gadgets to make an incredible german marble cake marmorkuchen, just good butter, a heavy pan, and a little patience. Whether you’re serving it for a busy family gathering or a quiet afternoon coffee on the patio, the dense, buttery crumb speaks for itself.
I hope you take the time to bake this weekend. Let the kitchen smell like vanilla and cocoa, and enjoy the satisfaction of pulling a perfectly clean, golden cake out of the pan. Guten Appetit.
For more inspiration, check out my Pinterest boards where I save all my successful baking tests and equipment recommendations.
Reference: Original Source
Why is my german marble cake marmorkuchen dry?
You likely overbaked it or skipped adding extra milk to the cocoa batter. I’ve found testing for doneness 10 minutes early saves the cake. A toothpick should have moist crumbs, not raw batter. Also, ensure you’re using high-fat European butter to retain moisture.
How do I get the perfect marble swirl in my german marble cake marmorkuchen?
Use a serving fork and make exactly one continuous figure-eight motion through the batter ring. Over-swirling is a common trap that turns the inside into a muddy brown mess. Less is absolutely more here. Let the contrasting colors stand out.
Can I bake this german marble cake marmorkuchen in a regular loaf pan instead of a Bundt pan?
Yes, you absolutely can. You’ll need to adjust the baking time, usually adding about 10 to 15 minutes depending on your oven. Keep an eye on it and tent it with foil if the top browns too quickly before the center sets.
How long does marmorkuchen stay fresh?
Stored properly under a glass dome at room temperature, it stays fresh for up to four days. If you want to keep it longer, slice it, wrap the pieces tightly in plastic wrap, and freeze them. They thaw beautifully on the counter in an hour.
Why did my german marble cake marmorkuchen stick to the pan?
You probably used cooking spray or didn’t grease the crevices well enough. Always use softened butter applied heavily with a brush, followed by an even dusting of flour. Also, don’t leave it in the pan too long after baking; flip it out after ten minutes.