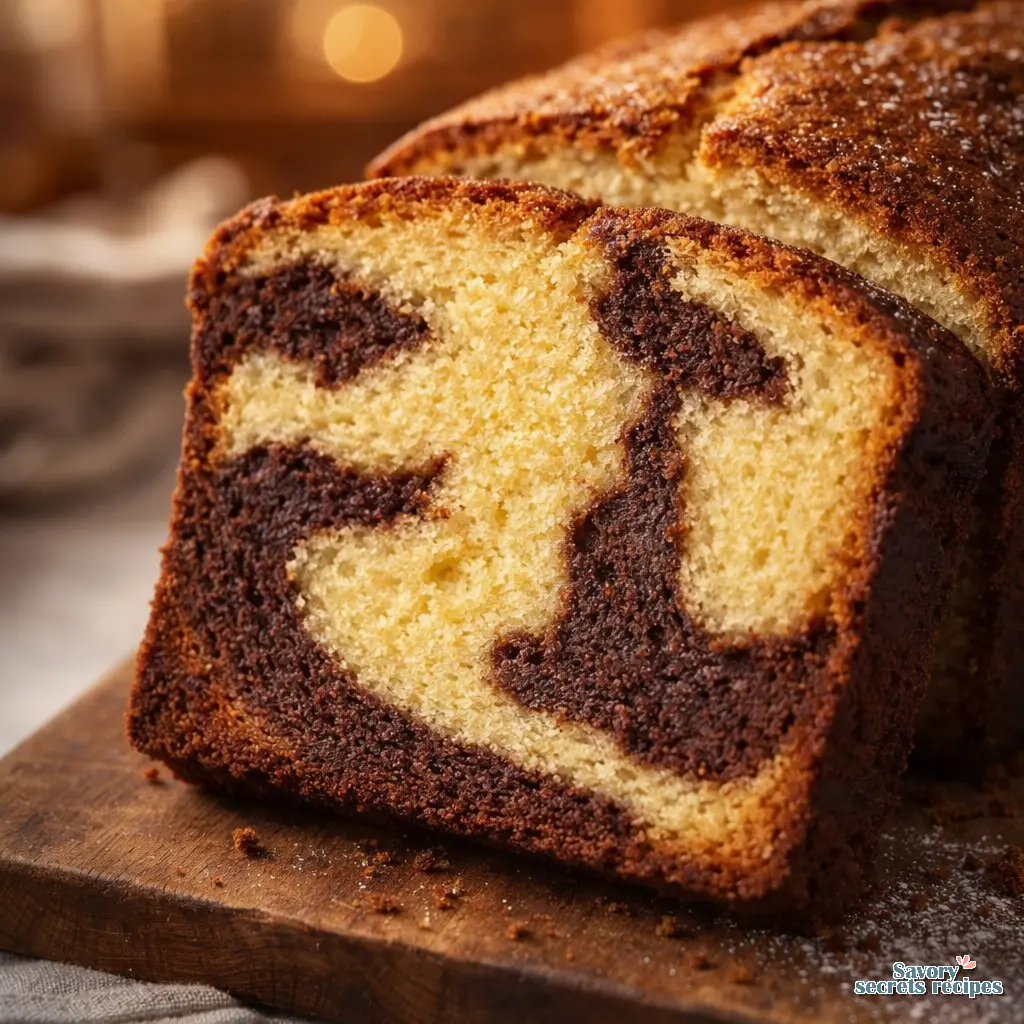
Moist Classic Marble Loaf Cake From Scratch
Ingredients
Method
- Preheat the oven to 350°F and position a rack in the center, or just below the center if using a Pullman loaf pan.
- Whisk together the flour, salt, sugar, baking soda, and baking powder in a large bowl.
- Add the eggs, butter, vanilla extract, and cream cheese, then beat for 2 minutes using a paddle attachment or hand mixer, starting slowly and increasing speed until the mixture is light and fluffy.
- Scrape down the sides of the bowl as necessary.
- Transfer slightly less than half of the batter to a medium bowl, then sift the cocoa powder and add the milk (or optional espresso/cold brew) to the remaining batter in the mixer bowl.
- Beat on high speed to combine, scrape the sides of the bowl, and mix briefly once more.
- Lightly grease a loaf pan and line it with a parchment paper sling that covers the bottom and two long sides.
- Use a 1/4 cup scoop to drop portions of the vanilla batter into the bottom of the pan.
- Space the vanilla scoops evenly to cover half the bottom, leaving gaps for the chocolate batter.
- Scoop the chocolate batter into the gaps between the vanilla portions.
- Repeat the layering process for the remaining batter, alternating colors so chocolate is stacked on top of vanilla and vice versa.
- Smooth the top of the batter with a rubber spatula once all of it has been added to the pan.
- Bake for 30 minutes, rotate the pan 180 degrees, and bake for another 25 to 30 minutes; extend the total bake time to over an hour if using a Pullman loaf pan.
- Test for doneness by inserting a toothpick into the center; it should come out clean or with a few moist crumbs, but no wet batter.
- Cool the cake in the pan for 10 minutes, then use the parchment sling to lift it onto a wire rack to cool completely before preparing the ganache.
- Cool the loaf to room temperature, then wrap it in plastic or place it in a zip-top bag to store at room temperature overnight.
- Finely chop the chocolate and place the shards into a heat-safe bowl.
- Heat the heavy cream in a saucepan until it just reaches a boil, or microwave it in 30-second intervals, stirring carefully to prevent bubbling over.
- Pour the hot cream immediately over the chopped chocolate.
- Let the mixture stand for 1 minute, then whisk until it forms a smooth glaze.
- Let the ganache rest for about 10 minutes, whisking occasionally until it thickens slightly.
- Pour the ganache over the cooled loaf cake to coat the top.
- Allow the cake to sit for 20 minutes to let the ganache set before slicing and serving.
Nutrition
Notes
- Make sure all the ingredients are at room temperature – this will help get a smooth and fluffy cake batter.
- Check your loaf pan size! This makes a huge difference when it comes to the shape and bake of your cake. I recommend making this loaf cake in this 1 lb loaf pan. If you want to make it in a pullman pan, note that you’ll need to increase everything in the recipe by 1/3 but don’t increase the baking soda or baking powder.
- To make sure the loaf cake comes out of the pan easily and cleanly, you need to line the loaf plan. To properly line the loaf pan, lightly grease the pan and then place a parchment paper sling (a rectangle of parchment paper that is long enough to go down one side of the pan, across the bottom, and back up the other side, it should also be narrow enough as to not go up the two short sides) into the pan. The parchment paper will stick to the grease and the cake will not stick to the parchment paper.
- If the cake starts to get too dark, lay a piece of foil over the top to keep it from browning further.
- Let the cake cool for 10-15 minutes before using the parchment paper to lift it out. Then allow it to cool fully on a wire rack.
- This cake tastes best the next day. So I recommend wrapping it up with plastic wrap or in an airtight ziptop bag once it has cooled and then store it at room temperature over night. The next day you can drizzle the top with the chocolate ganache and leave it to sit for 20 minutes to let the ganache set a little before slicing.
The Engineering Behind a Proper Classic Marble Loaf Cake
Spring is creeping into Los Angeles, and with Easter brunch planning in full swing, my mind always wanders back to my Opa Klaus. He emigrated from Düsseldorf in 1968 and treated his kitchen like a laboratory. I remember standing on a stepstool in his kitchen, watching him measure ingredients for his Sunday bakes. He was incredibly strict about it. Level measurements, no heaping spoons, everything recorded in a little leather notebook. I still have that notebook.
One of the recipes in that worn little book is the inspiration for this classic marble loaf cake. I know exactly what you are looking for here. You want that nostalgic, bakery-quality slice that actually tastes like two distinct flavors, not just a muddy, dry sponge. I have tested dozens of variations of the vanilla chocolate swirl cake over the years. I can tell you right now that most recipes fail because they treat the chocolate portion as an afterthought. They just dump dry cocoa into half the batter and call it a day.
That results in a dry chocolate section that crumbles when you cut it. We are going to fix that. In my testing, I found that treating the two batters with respect yields a perfectly moist crumb and a beautiful swirl pattern. Good baking takes patience, but the results are exactly what you want to see. Let’s break down how to make a classic marble loaf cake from scratch that actually works.
The Secret to a Moist Crumb: Structure vs. Hydration
I prefer recipes that feel substantial without being overly dense. There is a balance point where you know a cake is well-made, but it is not heavy on the palate. The secret to a classic marble loaf cake that stays soft for days comes down to your dairy choices. You need acidic dairy. Period.
Many older recipes just call for whole milk. That tracks for a basic sponge, but a loaf pan requires a longer bake time. Whole milk simply does not provide enough fat or acidity to tenderize the gluten strings. You want to use sour cream or buttermilk. The acidity breaks down the tough protein structures in the flour. If you do not have buttermilk, you can make a DIY version with milk and a splash of lemon juice, but honestly, real cultured buttermilk or full-fat sour cream gives the best texture.
I also want to touch on flour. Cake flour vs all purpose is a debate I see constantly. In my testing, substituting about a quarter of your all-purpose flour with cake flour gives you a lighter, finer crumb. It mimics that professional bakery texture perfectly. You do not have to do it, but your mileage may vary with straight all-purpose flour if you tend to overmix.
The Hair Dryer Fix for Curdled Batter
I see this happen all the time. You are creaming butter and sugar, everything looks great, and then you add your eggs. Suddenly, the batter looks like cottage cheese. It has curdled. This happens because your eggs were too cold and they shocked the butter, causing the emulsion to break.
The Fix: Grab your hair dryer. Seriously. Point a hair dryer on a warm setting at the outside base of your mixing bowl while the mixer runs on low. The gentle heat warms the butter just enough to bring the emulsion back together into a smooth, fluffy batter. It is a brilliant little trick that saves you from starting over.
Pan Material Comparison: Metal vs. Glass
As an equipment editor, I cannot let you bake this without talking about your pan. The tool should disappear in your hand, or in this case, the oven. The material of your loaf pan drastically changes how your classic marble loaf cake bakes.
Glass pans hold onto heat forever. They take longer to heat up, but once they do, they blast the outside of your cake. This often leads to a dark, tough crust before the center is even close to done. Dark metal pans do something similar; they absorb heat rapidly and can burn your edges.
I prefer a light-colored aluminum loaf pan. It conducts heat evenly and gives you a beautiful golden brown crust. Also, check your pan size. A standard 1-pound loaf pan (about 8.5 x 4.5 inches) is ideal here. If you use a larger Pullman pan or a 9×5, your cake will be flatter and bake faster. Whatever pan you use, always create a parchment paper sling. Leave an overhang on the long sides. It makes lifting the finished cake out completely effortless.
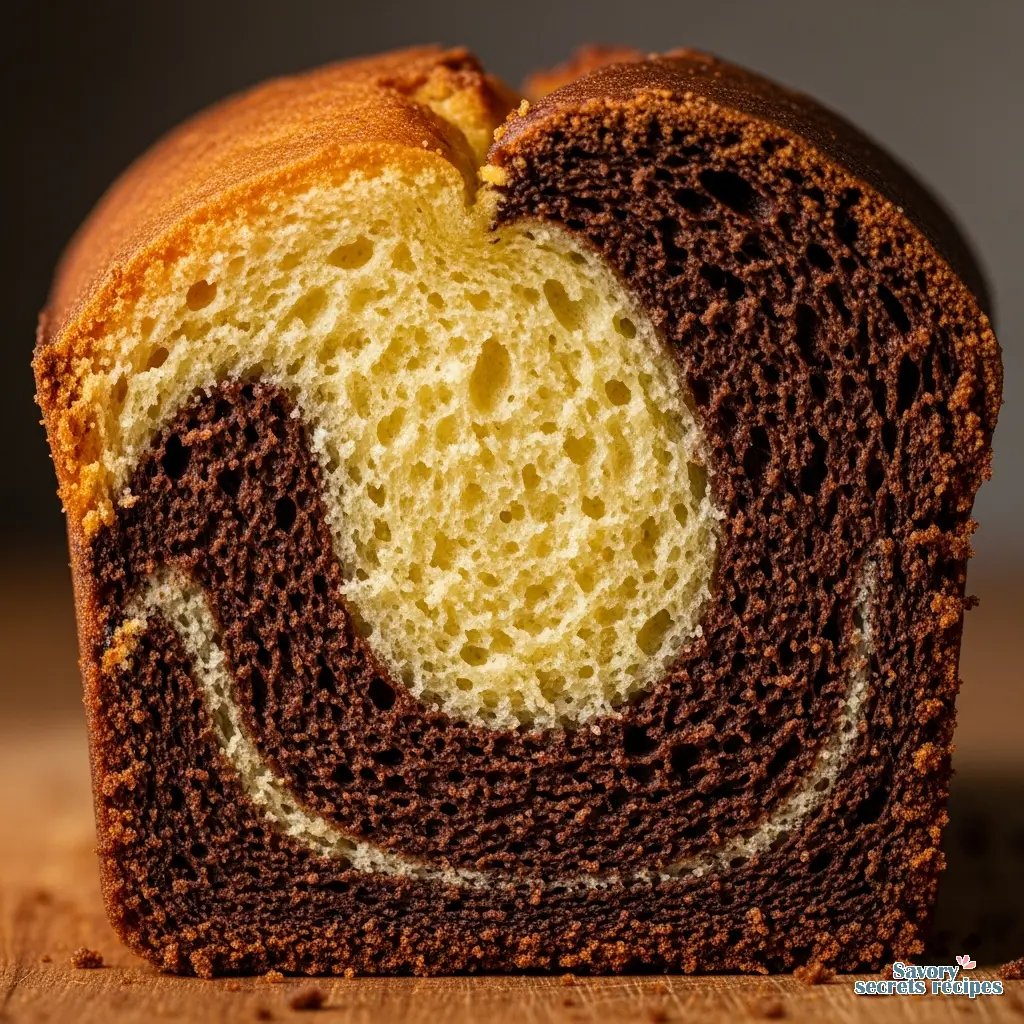
The Science of Blooming Cocoa for the Chocolate Swirl
This is where most recipes fall short. If you just whisk dry unsweetened cocoa powder into half your batter, two bad things happen. First, the cocoa absorbs moisture, making the chocolate portion noticeably drier than the vanilla. Second, the chocolate flavor stays flat. It tastes like dust.
We are going to bloom the cocoa. You need to warm the liquid (I usually use a bit of whole milk) before mixing it with the cocoa powder. The heat dissolves the cocoa butter trapped in the powder, releasing a massive amount of flavor compounds. It smells absolutely incredible, like a high-end chocolate shop.
I also add a tiny pinch of espresso powder to the chocolate portion. I know some people hesitate here, but trust me, it does not make the cake taste like coffee. It simply deepens the chocolate profile, making it taste richer. For the vanilla half, use high-quality pure vanilla extract. If you want that authentic bakery taste, a few drops of ‘Princess Cake and Cookie Flavor’ mixed with the vanilla is exactly what you want to see. It gives it that distinct, professional aroma.
Mastering the Swirl Pattern
My daughter insists on helping with the swirling step. It usually means batter ends up on the counter, but she is learning that baking requires a gentle hand. Getting the perfect swirl in your classic marble loaf cake is all about restraint.
You want to alternate scoops of vanilla and chocolate batter into your prepared loaf pan. Think of it like a checkerboard. Once all the batter is in, take a butter knife or a skewer. Plunge it straight down into the batter and draw a continuous ‘S’ shape from one end of the pan to the other. Then, do one more figure-eight pattern. Stop right there. Do not overmix the two batters when swirling, or you will lose the clear definition and end up with a muddy, light-brown cake.
Bake it until it passes the toothpick test. For a marble cake, you want to test the center, right in the thickest part of the dome. If the top is getting too dark but the center is still wet, cover it loosely with a foil tent. Good browning takes patience. Once it is done, let the cake cool for 10-15 minutes in the pan before using your parchment sling to lift it onto a cooling rack. If you cut it while it is lava-hot, the structure will compress and turn gummy.

Storage & Freezing Guide for Your Classic Marble Loaf Cake
I am not convinced that most home cooks need a vacuum sealer for baked goods, but proper storage is non-negotiable if you want to keep that moist crumb intact. A classic marble loaf cake actually tastes better on day two, provided you store it correctly. The moisture redistributes, and the vanilla extract flavors meld beautifully with the chocolate.
Keep it at room temperature. Wrap the completely cooled cake tightly in plastic wrap, then place it in an airtight container or a large zip-top bag. It will stay fresh and soft for 3 to 4 days. Do not put it in the refrigerator. The cold temperature actually accelerates starch retrogradation, which is a fancy way of saying it dries the cake out faster.
If you want to freeze it, this cake performs exceptionally well. I slice it using a serrated bread knife (a slicing guide helps if you want perfectly even pieces). Wrap each slice individually in plastic wrap, then put them all in a freezer bag. They will keep for up to a month. You can just pull out a slice for a quick breakfast or a late-night snack. Defrost it at room temperature, or give it about 15 seconds in the microwave to restore that fresh-baked softness.
Frequently Asked Questions
Final Thoughts on the Perfect Bake
I sometimes wonder if my preference for methodical baking is purely objective or partly nostalgia for Opa’s kitchen. But when you slice into this classic marble loaf cake and see those sharp, distinct swirls of vanilla and chocolate, the results speak for themselves. The contrast between the rich cocoa and the pure vanilla extract is exactly what you want to see. Clean as you go, take your time with the swirl, and you will have a bakery-quality loaf that your family will devour.
If you give this recipe a try, I would love to see how your swirl pattern turns out. Every cake is a unique piece of art. For more inspiration and equipment reviews, check out my Pinterest boards where I save all my favorite successful test kitchen runs. Happy baking.
Reference: Original Source
How to make classic marble loaf cake moist?
In my testing, the key to a moist crumb is using room temperature ingredients and acidic dairy. Swapping regular milk for full-fat sour cream or buttermilk tenderizes the gluten. Also, be sure not to overbake it; pull it exactly when the toothpick test comes out clean.
Can you freeze a classic marble loaf cake?
Absolutely. It freezes beautifully. I recommend slicing the cooled cake first, wrapping each piece tightly in plastic wrap, and storing them in a freezer-safe bag. They last up to three months. Just thaw a slice at room temperature when you are ready for it.
What is the difference between Loaf Cake and Pound Cake?
A pound cake traditionally uses equal parts butter, sugar, eggs, and flour, resulting in a very dense, heavy crumb. A loaf cake, like this classic marble loaf cake, uses leavening agents like baking powder and more liquid dairy, creating a lighter, fluffier texture that still holds its shape.
How to get the center of the loaf cake to rise?
A sunken center usually means the butter and sugar were over-creamed, trapping too much air that collapses during baking. It can also happen if your oven is too hot, causing the edges to set before the center structure forms. Use an oven thermometer to verify your temperature.
Why is my classic marble loaf cake dry?
This usually happens from over-measuring your flour or baking it too long. Always spoon and level your flour, never scoop directly with the measuring cup. Additionally, if you did not bloom the unsweetened cocoa powder with warm liquid, the dry cocoa will sap moisture right out of the batter.
How do you store marble cake?
Store your classic marble loaf cake at room temperature, tightly wrapped in plastic wrap or sealed in an airtight container, for up to 4 days. Never store it in the refrigerator, as the cold air alters the starch structure and dries out the cake incredibly fast.
Why does my marble cake have holes in it?
Large holes, often called tunneling, occur when you overmix the batter after adding the flour. Overmixing develops too much gluten. It can also happen if you trap large air pockets while layering the vanilla and chocolate batters into the loaf pan. Tap the pan firmly on the counter before baking.