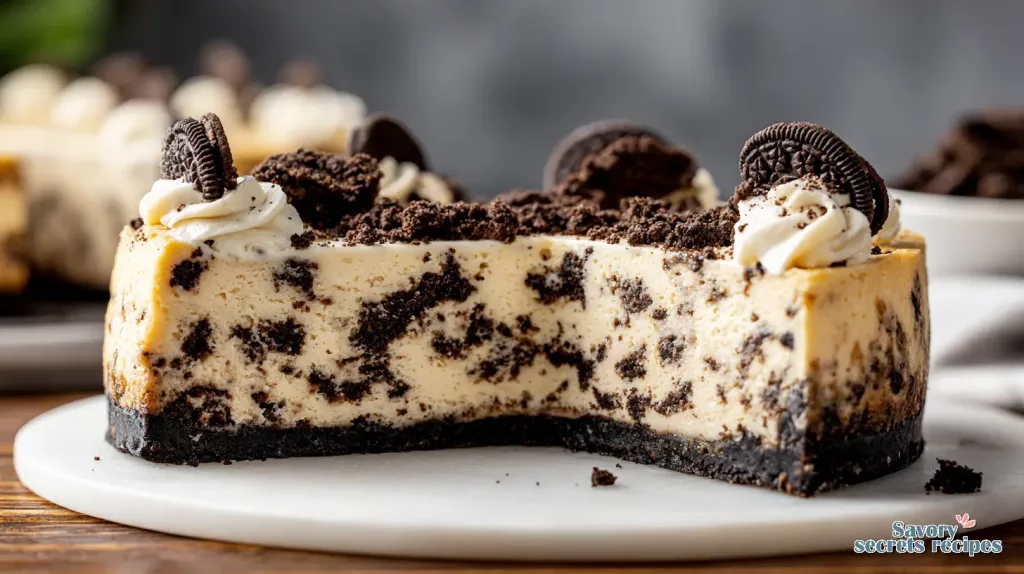
Easy Cookies Cream Cheesecake
Ingredients
Method
- Crush 24 Oreo cookies into fine crumbs, then mix with melted butter until it resembles wet sand.
- Press the cookie mixture firmly into the bottom of a 9-inch springform pan, then refrigerate.
- Beat the softened cream cheese with powdered sugar and vanilla until smooth.
- Whip the heavy cream until stiff peaks form, then gently fold it into the cream cheese mixture.
- Roughly chop 8 Oreos and fold them into the filling, reserving some for topping.
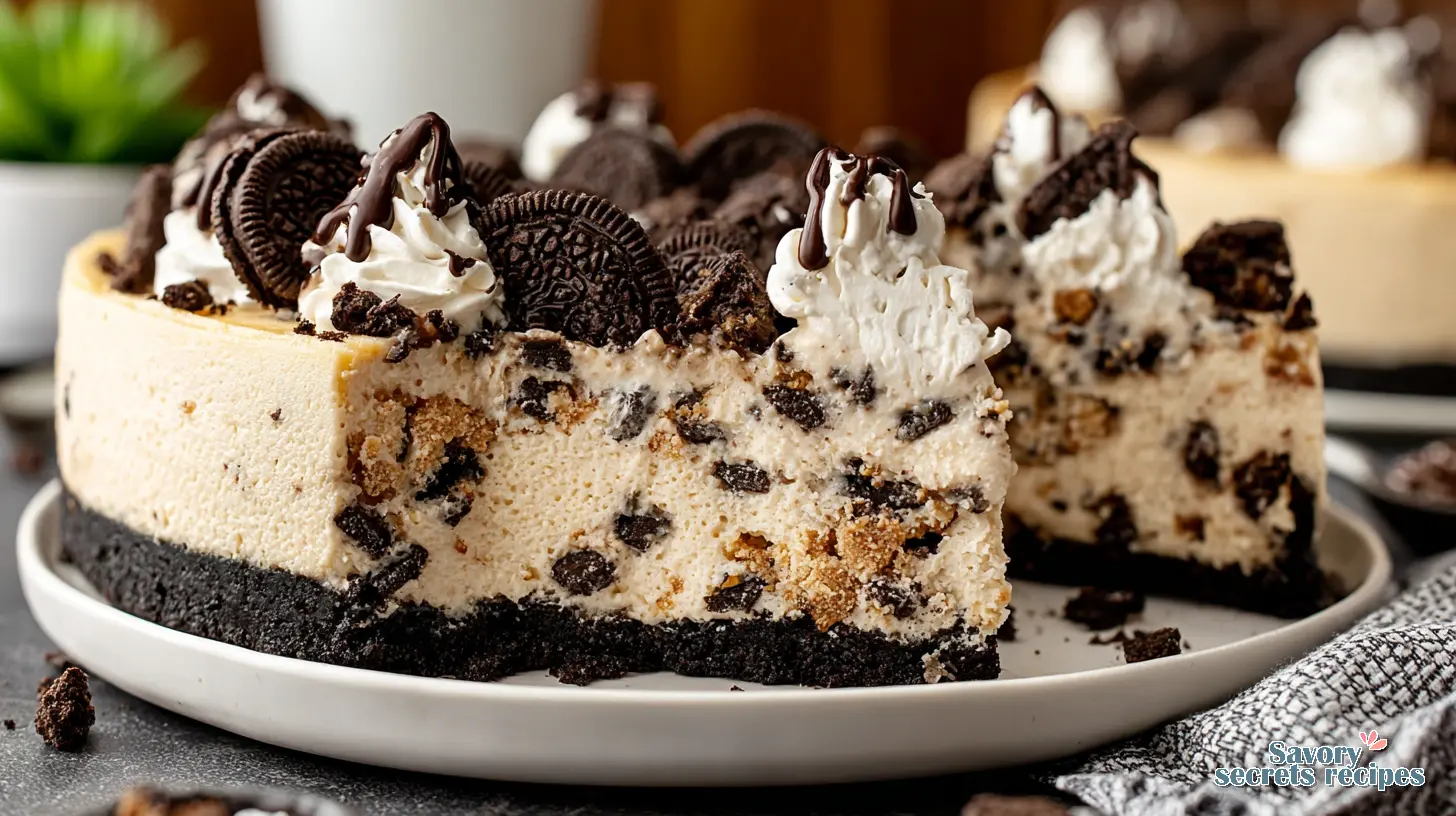
- Pour the filling over the chilled crust, smooth the top, and sprinkle the remaining cookie pieces on top.
- Cover with plastic wrap and refrigerate for at least 4 hours, preferably overnight.
Nutrition
Notes
Why This Cookies Cream Cheesecake Will Be Your New Obsession
Look, I’ll be honest. When I first started messing around in the kitchen, cheesecakes felt like this whole big, intimidating thing. All those horror stories about cracks, or a sunken middle, or a soggy crust? Yeah, I’ve been there. I even remember trying to film a soufflé once for a video, and I opened the oven door a little too soon, just to check. Collapsed instantly. Not a huge deal, but worth noting that temperature stability is crucial for delicate bakes like that, and cheesecakes are no different.
But here’s the thing about that: once you understand a few key principles, baking a truly stunning cookies cream cheesecake isn’t just doable, it’s actually pretty simple. You’ll get that perfectly smooth, rich, and creamy texture that feels like pure decadence in every bite. It’s a show-stopper, truly, and it’s going to make you feel like a total pro.
Especially now, as we’re heading into spring here in Los Angeles, the days are getting longer, and we’re looking for something that feels special without being overly heavy. This cookies cream cheesecake, with its cool, creamy texture, is just the ticket. It’s perfect for a spring gathering or just a cozy evening dessert.
Getting Your Ingredients Ready for the Best Oreo Cheesecake Dessert
The foundation of any great dessert, especially something as rich as an Oreo cheesecake dessert, really comes down to the ingredients. It’s not being fussy, it’s the difference between a good cheesecake and an absolutely incredible one. You’ll find everything you need for this cookies cream cheesecake at your local Ralphs or maybe a quick run to Trader Joe’s for some quality cream cheese.
One of the most important things for a smooth, lump-free filling is ensuring all your ingredients, especially the cream cheese, are at room temperature. Makes sense to me, right? Cold cream cheese just doesn’t blend as smoothly, and you’ll end up overmixing trying to get rid of lumps, which is one of those common cheesecake mistakes we want to avoid.
I’d probably lean toward a good quality vanilla extract here too. It really makes a difference in the overall flavor of the cream cheese filling. As for the Oreos, standard ones are your best bet. If you’re thinking about using a flavored or DoubleStuf Oreo for the crust, you’ll want to remove the filling from about half of them. Here’s the thing about that: those extra fillings can cause your crust to weep oil, and nobody wants a soggy bottom.
Building Your Cookies Cream Cheesecake, Step by Step
Alright, let’s talk about how we bring this cookies cream cheesecake to life. We’re going to break it down into manageable chunks, because honestly, I sometimes wonder if we over-complicate things in video because we need to fill time, when the actual technique is pretty straightforward.
This process is all about building layers of flavor and texture, starting with that irresistible chocolate cookie crust. Then we’ll move onto the rich cream cheese cookie cake filling, bake it just right, and finish with a light and fluffy topping. You’ve got this.
Crafting that Perfect Chocolate Cookie Crust
First up, the crust. You’ll start by crushing your Oreo cookies. You can do this in a food processor, which is super quick, or put them in a zip-top bag and bash them with a rolling pin. My daughter insists on helping with this part whenever we bake, and she’s so proud of herself, even if it’s not perfectly uniform. That tracks.
Mix those cookie crumbs with some melted butter. The key step here is to press this mixture firmly into your springform pan. I mean, really pack it down. This prevents a crumbly crust later on. You want it to be like a solid base for that rich cream cheese cookie cake filling. Pop it in the fridge for a bit to firm up while you get the filling ready.
Mixing the Rich and Creamy Filling
Now for the star of the show: the rich and creamy filling. Remember what I said about room temperature ingredients? That’s exactly right. Make sure your cream cheese is soft. You’ll beat the cream cheese with powdered sugar until it’s super smooth, then gently mix in the vanilla extract.
This is where most people run into trouble: overmixing. Don’t do it. Once you add the heavy whipping cream and the additional crushed Oreos, you’ll want to mix on a low setting, just until everything is combined and smooth. Overmixing can incorporate too much air, leading to cracks later. Trust the process on this one.
The Water Bath Technique: Your Secret to a Crack-Free Cheesecake
Okay, let’s talk water baths. I know this sounds complicated, but it’s genuinely the best way to get a perfectly smooth, crack-free surface on your homemade cheesecake. A water bath provides a moist, even heat environment, which helps the cheesecake bake slowly and prevents it from drying out and cracking.
You’ll wrap the bottom of your springform pan with foil a couple of times to prevent any water from seeping in. Then, place the pan in a larger roasting pan and pour hot water into the roasting pan, coming about halfway up the sides of your cheesecake pan. If you’re really not feeling the water bath, fair enough, you can still get a good result by placing a roasting pan with hot water on the rack below the cheesecake. Just bake at 320°F for about 45 minutes.
Whatever method you choose, do not open the oven door during baking. It causes drastic temperature changes, and that’s a recipe for cracks. Let it do its thing. You’ll know it’s ready when the edges are set, but the center still has a slight wobble, like firm Jell-O. That tracks.

Adding the Decadent Whipped Cream Topping
Once your rich cream cheese cookie cake has baked and cooled gradually, it’s time for the final flourish: the whipped cream topping. This adds another layer of creaminess and a beautiful contrast to the crunchy cookie crust and the smooth filling.
You’ll whip heavy whipping cream until it forms soft peaks. You can add a little powdered sugar and vanilla extract to it for extra flavor, but it’s totally optional. Then, gently spread it over the chilled cookies cream cheesecake. Finish it off with some extra crushed Oreos or even whole cookies for a really impressive presentation. The smell of that vanilla with the chocolate cookies, it’s just the good stuff.
Troubleshooting Common Cookies Cream Cheesecake Hiccups
Even with all the best intentions, baking can throw a curveball or two. But don’t worry, most common cheesecake mistakes have easy fixes. Here’s a look at some common issues and how to tackle them, so your cookies cream cheesecake turns out perfectly every time.
Common Mistakes & Fixes
Mistake: Your cheesecake has cracks.
Solution: This usually happens from drastic temperature changes or overmixing. Use room temperature ingredients, don’t overmix the batter, and cool your cheesecake gradually in the oven with the door propped open, then at room temperature before chilling in the fridge. The water bath technique really helps here.
Mistake: The center is unset or wobbly.
Solution: It probably just needs more baking time. The center should have a slight wobble, but not be liquid. Trust the process; it will firm up as it cools. An instant-read thermometer should read 150°F-155°F in the center.
Mistake: Soggy cookie crust.
Solution: This can be from too much butter in the crust, or flavored Oreos with too much filling. Remember to remove filling from half the Oreos if they’re DoubleStuf or flavored. Also, ensure your springform pan is well-wrapped if using a water bath.
Mistake: Lumpy filling.
Solution: Cold cream cheese is the culprit. Always make sure your cream cheese is at room temperature before you start mixing. That tracks. Beat it well until smooth before adding other ingredients.
Creative Cookies & Cream Cheesecake Variations
The beauty of a classic cookies cream cheesecake is how easily you can adapt it. I’m not precious about traditional methods if a shortcut gets you ninety percent of the way there with half the effort. It depends on your goals, you know?
If you’re looking to make this cookies & cream cheesecake gluten free, that’s totally doable. Just swap out regular Oreo cookies for gluten-free Oreos. They’re widely available at most major supermarkets like Vons or Whole Foods Market now, and they work perfectly for both the crust and the filling.
As for using another Oreo flavor, absolutely! Imagine a mint cookies cream cheesecake or a peanut butter one. Just remember my earlier note about removing some of the filling from half the cookies if they’re DoubleStuf or a particularly creamy flavored variety. This prevents excess oil in your chocolate cookie crust. It’s a small adjustment, but it makes a big difference in the final sweet treat.
Make-Ahead & Storage Tips for Your Sweet Treat
One of the best things about making a decadent dessert like this cookies cream cheesecake is that it’s fantastic for making ahead. That’s a solid approach, especially if you’re planning a party dessert or need something for a family favorite gathering. It actually benefits from a good chill time, so plan for at least 6-8 hours, or even overnight, in the refrigerator.
Once it’s completely cooled and chilled, cover the cheesecake loosely with plastic wrap or place it in an airtight container. It’ll keep beautifully in the refrigerator for up to 4 to 5 days. Just wait to add the whipped cream topping until you’re ready to serve, if possible. That’s a small detail that really makes a difference in presentation.
If you want to freeze your cookies cream cheesecake, that’s an option too, and it’s great for meal prep Sundays or just having a sweet treat on hand. Just make sure to freeze it without the whipped cream topping. Once it’s solid, wrap it tightly in plastic wrap, then a layer of aluminum foil. It’ll stay good in the freezer for up to 3 months. When you’re ready for a slice, thaw it overnight in the refrigerator. Makes sense to me.
Frequently Asked Questions
Let’s Get Baking This Indulgent Cookies Cream Cheesecake!
So, there you have it. A truly indulgent cookies cream cheesecake that’s not just delicious, but also totally achievable. When you pull this out of the fridge, perfectly smooth and topped with that creamy goodness, you’ll feel that sense of triumph I’m always chasing in the kitchen. It’s genuinely satisfying.
Go ahead, grab those ingredients on your next grocery run to Ralphs or Trader Joe’s. You’ll thank yourself later. And hey, if you try this recipe, I’d love to see how it turns out. For more inspiration and recipe ideas, check out my Pinterest boards. Happy baking!
Source: Nutritional Information
Can I make this cookies & cream cheesecake gluten free?
Yes, absolutely! To make this cookies cream cheesecake gluten free, simply use gluten-free Oreo cookies. Most major grocery stores, like Whole Foods Market or even Costco, carry them now. They perform just like regular Oreos in both the crust and the rich and creamy filling.
Can I use another Oreo flavor to make this cheesecake?
You totally can! Using different Oreo flavors is a fun way to create dessert variations. Just a heads up: if you choose a flavored Oreo that’s also a DoubleStuf variety, I’d recommend scraping out the extra filling from about half of the cookies you use for the chocolate cookie crust. This helps prevent the crust from becoming too oily or weeping.