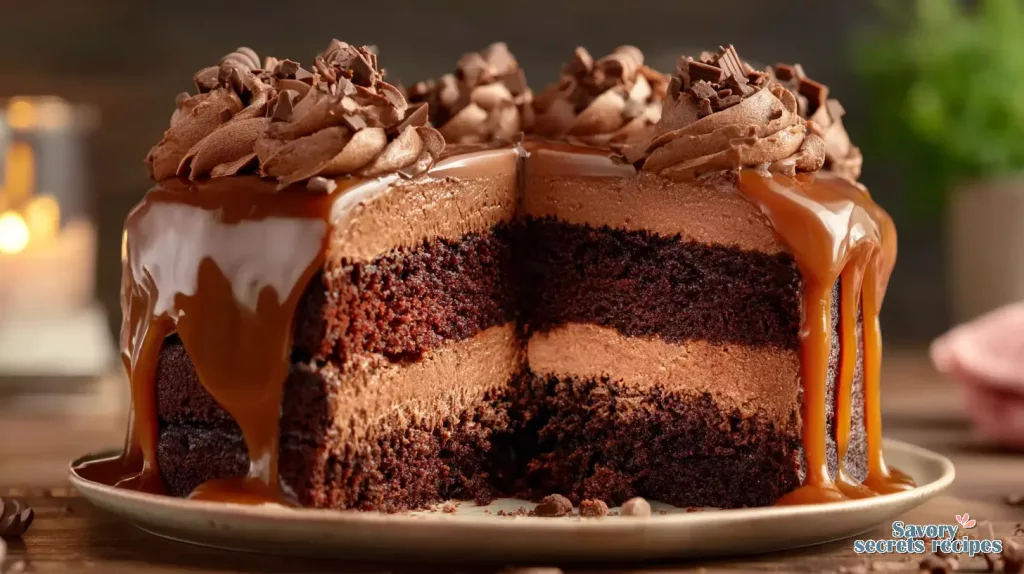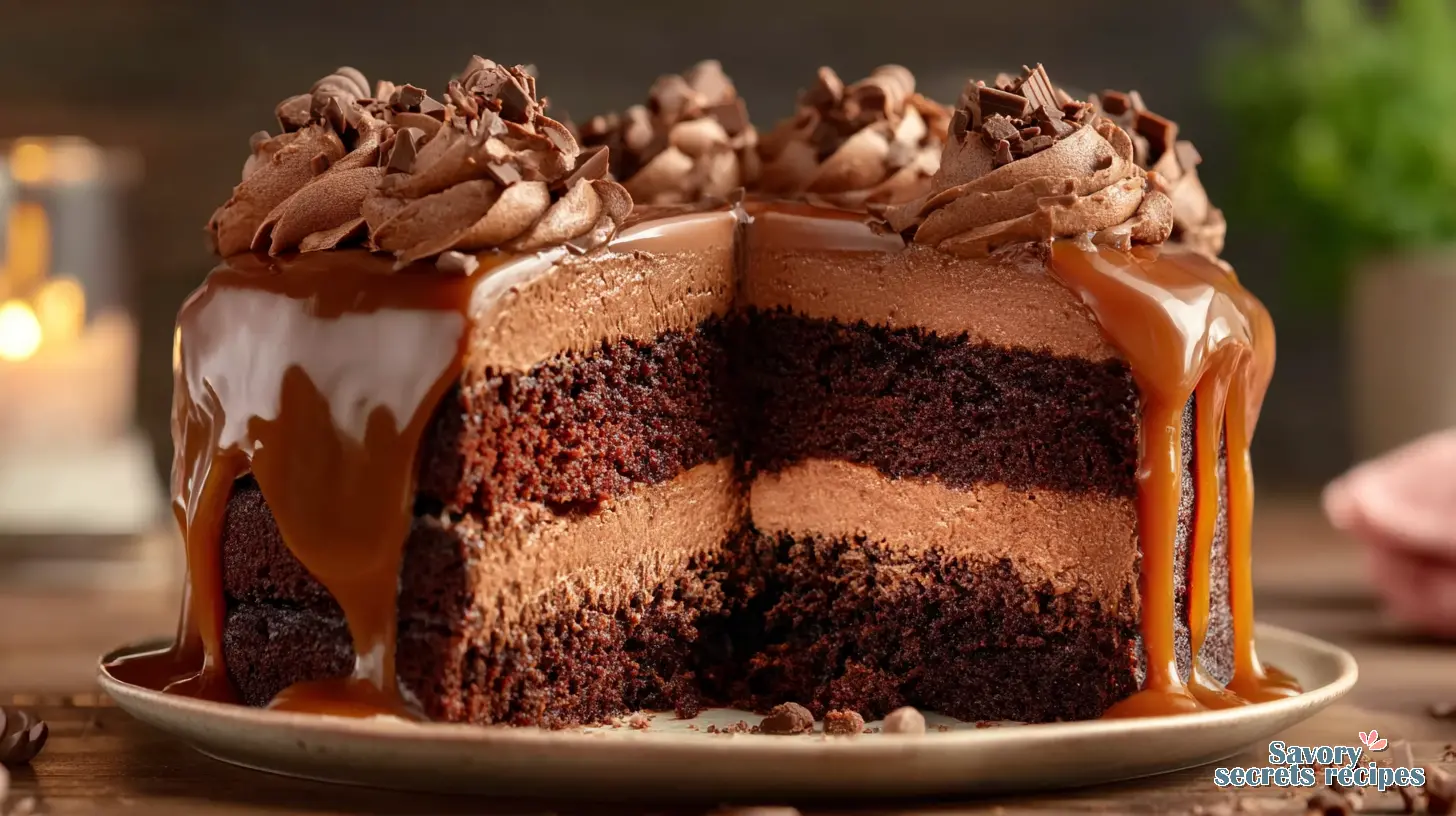
Decadent Chocolate Caramel Drip Cake for Any Occasion
Ingredients
Method
- Preheat the oven to 350°F (175°C). Grease and line two 9-inch round cake pans.
- For the cake batter, whisk together flour, cocoa powder, sugar, baking powder, baking soda, and salt in a large bowl.
- Add eggs, buttermilk, oil, and vanilla; mix until just combined.
- Carefully stir in hot water or coffee.
- Bake for 30–35 minutes, or until a toothpick inserted into the center comes out clean.
- Cool in the pans for 10 minutes, then remove and cool completely on wire racks.
- For the frosting, beat butter until creamy. Add cocoa powder, then powdered sugar, cream, vanilla, and salt; beat until fluffy.
- To assemble, level the cakes if needed. Frost the first layer, add the second, and then frost the top and sides.
- Decorate with your preferred chocolate cake design.
Nutrition
Notes
Unlocking the Magic of a Chocolate Caramel Drip Cake
I’ve been there, staring at those impossibly glossy, perfectly dripped cakes on social media, thinking, "No way I could ever make that." It’s like a magic trick, isn’t it? The kind of thing that seems reserved for professional bakers or, I don’t know, people who don’t have butter melting on their counter in the mild California spring weather.
Honestly, I used to get so stressed about baking something impressive for a celebration. I remember once trying to caramelize onions for a video shoot, and I pulled them off the heat way too early, thinking they were "done." They were blonde, barely softened, and definitely not the deep, sweet caramel I needed. Had to reshoot the whole thing. Learned to trust the process, not the clock.
But here’s the thing about a truly decadent chocolate caramel drip cake: it looks fancy, sure, but it’s actually much more achievable than you’d think. This recipe for a rich chocolate caramel drip cake isn’t about perfection, it’s about understanding the key steps. And when you get those right, you’ll feel like a total baking rockstar.
Why This Chocolate Caramel Drip Cake Recipe Works So Well
Look, I’m all about getting to the good stuff without unnecessary fuss. This chocolate caramel drip cake recipe isn’t just another pretty face; it’s designed for success. For one, we’re talking about a moist chocolate cake that holds its own, layer after layer. You won’t get a dry, crumbly mess here, I promise.
The caramel sauce? It’s the star, and we’ll get it just right so it flows beautifully without being too runny or too thick. That’s a solid approach, if you ask me. Plus, we’re building in some clever techniques for that glossy drip effect that’ll make everyone ask for your secret.
I mean, who doesn’t want to serve a dessert for special occasions that gets genuine "wows"? This recipe focuses on simple, achievable steps that build confidence, even for baking for beginners. We’re going for that professional looking cake without the professional stress. Makes sense to me.
Getting Your Ingredients Ready
Before we even think about turning on the oven, let’s talk ingredients. Quality matters, especially when you’re making a rich drip cake dessert like this. I prefer European-style butter for anything where you’ll actually taste it; that higher fat content makes a real difference in your buttercream.
Here’s the thing about that: you’ll want your eggs, buttermilk, and any milk to be at room temperature. It helps everything emulsify better, giving you an even bake. Fair enough, right?
And when you’re measuring flour, don’t pack it into the cup. Weighing your flour is best, but if you’re using cups, spoon it into the measuring cup then level it off. This prevents a dense, dry cake. You’ll find good quality all-purpose flour and cocoa powder at your local Ralphs or Vons, and Trader Joe’s usually has good vanilla extract, too.
Baking the Perfect Chocolate Cake Layers
Alright, let’s get those chocolate cake layers in the oven. This is your foundation, so we want it right. The key step here is making sure your dry and wet ingredients are properly combined without overmixing. Overmixing develops the gluten too much, and you’ll end up with a tough cake, and we don’t want that.
You can substitute the buttermilk with a quick trick if you don’t have it: add 1 tablespoon of lemon juice to 1 cup of regular milk, stir it, and let it sit for about five minutes. It’ll curdle slightly, and that’s exactly what you want.
Bake your cake layers on the middle rack of the oven. If you’re doing multiple pans, you might need to bake in batches to ensure even cooking. And please, please, let your cakes cool completely before you even think about frosting them. I’m not totally sure, but that’s probably the most common mistake I see people make. It’s gotta be cool, like 30 minutes to an hour and a half.
Crafting Your Own Salted Caramel Sauce
Now, this is the good stuff. Making homemade caramel sauce can feel intimidating, but trust the process on this one. You’ll know it’s ready when it turns a beautiful amber color, like a dark peanut butter. Don’t let the sugar cook for too long, though; add your heavy cream and butter as soon as it melts.
This is where most people run into trouble: getting the consistency right. If your caramel seems too thick, you can always add a tiny splash more heavy cream, a teaspoon at a time, until it loosens up. If it’s too thin, let it simmer gently for a few more minutes to reduce.
After you’ve added the cream and butter, return it to the heat for a few seconds to re-melt any sugar chunks. Strain the caramel through a fine-mesh sieve if you see any sugar crystals hanging around. And here’s the real secret: cool that caramel completely before you even think about adding it to your buttercream. If it’s too hot, you’ll melt or curdle your frosting, and that’s not a huge deal, but worth noting.
The smell of browning butter always takes me back to learning classical French technique; that moment when it shifts from foaming to nutty is still satisfying every single time.
Silky Smooth Salted Caramel Buttercream Frosting
Okay, with our cake layers baked and cooled, and our caramel doing its thing, it’s time for the frosting. A rich, smooth chocolate buttercream is crucial for this chocolate caramel drip cake. The secret to getting that perfect texture? Very soft butter.
I mean, not melted, but definitely soft enough that your finger leaves a deep indent. If your butter is too cold, you’ll get clumps, and nobody wants that in their buttercream. Trust me on this.
Once you’ve got your butter and powdered sugar going, let the mixer run on low for a good 4-5 minutes. This helps remove air bubbles, resulting in that dreamy, smooth finish we’re after. You’ll thank me when you’re spreading it like a dream. You can adjust the salt in the buttercream to your preference; I’d probably lean toward a little extra for a salted caramel kick.
Assembling Your Chocolate Caramel Drip Cake
Now for the fun part: putting it all together! You’ll want your cake layers to be cold for assembly; it just makes them so much easier to handle and prevents crumbling. I’ll take a look at it and say, this is the key step here.
Start with a thin layer of chocolate buttercream on your serving plate or cake stand, then place your first cake layer. Spread a thin layer of caramel buttercream on both sides of your cake layers as you build, creating a barrier. This prevents the caramel sauce from soaking directly into the cake, which can make it soggy.
Then, pipe a "dam" of buttercream around the edge of the first layer and fill the center with some of your homemade caramel sauce. Stack your next layer and repeat. Once all your layers are stacked, apply a thin crumb coat of frosting all over the cake. This traps any loose crumbs. Refrigerate it for 15-20 minutes, or until that crumb coat is set.
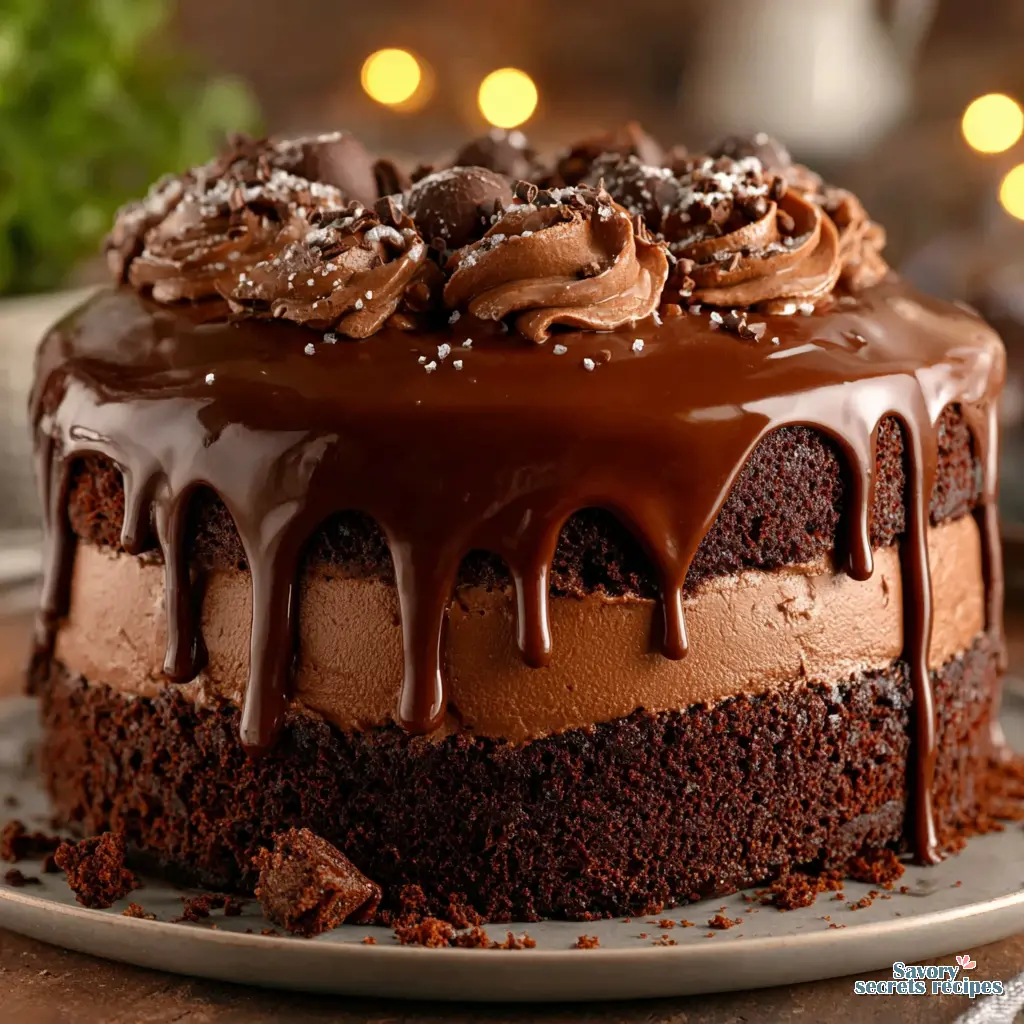
After the crumb coat is firm, apply your final layer of chocolate frosting. Use an offset spatula to get a nice, smooth finish, maybe swooping some frosting on top to leave little indents that’ll cradle the caramel drip. Chill the cake again, this time for at least an hour, until it’s super cold before applying the caramel drip. This is critical for a clean, defined drip.
Quentin’s Pro Tips for a Showstopper Drip Cake
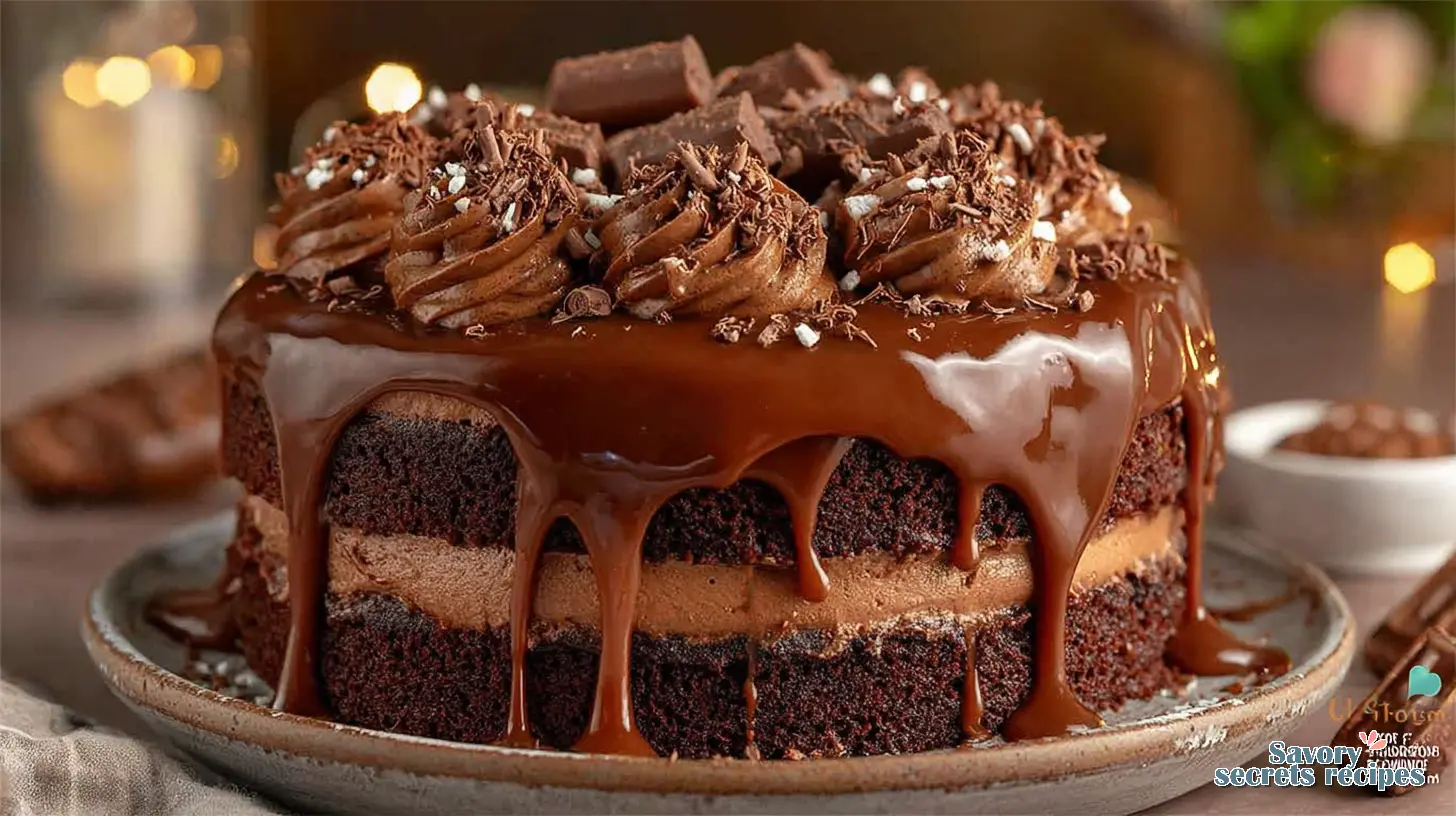
Getting that perfect, glossy caramel drip on your chocolate caramel drip cake isn’t just luck; it’s all about consistency and temperature. Here’s what I wish someone had told me early on: the caramel for your drip needs to be at room temperature, not warm, not cold, just right. This is where most people run into trouble.
Before you commit to dripping all over your beautiful cake, do a quick test. Spoon a little caramel onto a vertical surface, like the side of a bench scraper or a plate. See how it flows. If it runs too fast, let it cool a bit more. If it barely moves, warm it gently in 5-second bursts in the microwave, stirring each time.
You can use a piping bag with the tip snipped off for precise drips, a spoon for a more organic, veil-like effect, or even just pour it carefully for a dramatic look. And remember that super cold cake? That’s what makes the caramel set beautifully as it hits the surface. That tracks.
Creative Swaps and Variations
This chocolate caramel drip cake recipe is incredibly versatile, honestly. I love recipes that scale easily. You could easily turn these into individual dark chocolate salted caramel cupcakes by baking them for about 13-15 minutes in a 350°F (180°C) oven. That’s a solid approach for a party.
For dietary adaptations, you can swap out the all-purpose flour for a good quality gluten-free flour blend, often found at Whole Foods or even larger Ralphs stores. For a dairy-free option, use a plant-based buttermilk (like almond or soy milk with lemon juice) and a dairy-free butter alternative in the cake and buttercream. You’ll want to use a coconut cream-based caramel for the sauce, too. It’s not really a casserole. Well, it is, but it’s delicious.
You can also use store-bought caramel sauce if you’re in a pinch; just make sure it’s a good quality one. I’m not precious about traditional methods if a shortcut gets you ninety percent of the way there with half the effort. It just depends on your goals.
Common Baking Headaches and How to Fix Them
Mistake: Your cake layers are dense and dry.
Solution: You probably packed your flour into the measuring cup. Always spoon flour lightly into the cup and level it off, or better yet, weigh it. Also, ensure your ingredients like eggs and buttermilk are at room temperature for better emulsification.
Mistake: Your buttercream is lumpy or grainy.
Solution: This usually means your butter wasn’t soft enough. Let it sit out until it’s very soft but not melted. Also, run your mixer on low for several minutes after adding powdered sugar to smooth out those air bubbles and dissolve any sugar crystals.
Mistake: The caramel drip is soaking into the cake or running off too quickly.
Solution: The cake wasn’t cold enough, or the caramel was too warm/thin. Ensure your assembled and frosted cake is super chilled, and test your room-temperature caramel on a plate first. I learned this the hard way trying to rush a shoot.
Mistake: Your caramel sauce has crystallized or has sugar chunks.
Solution: Don’t stir the sugar too much before it fully melts. If crystals form, you can try adding a tiny bit of water and simmering gently, or just strain it through a fine-mesh sieve. Make sure to return it to heat briefly after adding cream to re-melt any remaining crystals.
Mistake: The frosting is melting as you apply it.
Solution: Your cake wasn’t completely cool. You’ve gotta let those layers chill down. If the frosting itself seems too soft, pop it in the fridge for 10-15 minutes and then re-whip it.
Frequently Asked Questions
Storing, Serving, and Savoring Your Creation
Once you’ve put all that effort into creating this beautiful chocolate caramel drip cake, you want to make sure it stays fresh. As I mentioned, refrigeration is your best bet for the assembled cake, keeping it covered to prevent it from drying out. It’s usually good for about 3-5 days. If you’re looking to really plan ahead, you can freeze individual unfrosted cake layers wrapped well in plastic wrap and foil for up to a month.
When you’re ready to serve, I’d suggest letting it come to room temperature for about an hour. That lets the cake soften up and the flavors really shine. This cake is amazing on its own, but it’s also complimented well by a scoop of vanilla bean ice cream. That’s exactly right.
If you’ve got leftover homemade caramel sauce, just store it in an airtight container in the fridge for up to two weeks. You can reheat it in 20-second microwave increments, stirring between each, until it’s drizzling consistency again. It’s perfect for drizzling over other desserts or even your morning coffee.
Go Bake That Masterpiece!
You’ve got all the tools and knowledge now to create a truly impressive chocolate caramel drip cake. When you make this, you’ll love the reactions you get from friends and family. It’s the kind of centerpiece dessert that makes any gathering feel special, especially during these mild spring evenings in Los Angeles.
Don’t be afraid to experiment a little, and most importantly, have fun with it. You’ve got this now go bake that masterpiece! Let me know how it goes in the comments below, or share your creations on social media. For more inspiration on beautiful desserts and baking tips, check out my Pinterest boards; I share tons of variations there.
Source: Nutritional Information
<!– wp:rank-math/faq-block {"questions":[{"id":"faq-question-1776738924233","title":"Can I make Chocolate Caramel Drip Cake ahead of time?","content":"Absolutely! This chocolate caramel drip cake is great for making ahead. You can bake the cake layers a day or two in advance, wrap them tightly, and store them at room temperature. The caramel sauce can be made up to two weeks ahead and kept in the fridge. Assemble and frost the day before serving, keeping it chilled.”,”visible”:true},{“id”:”faq-question-1776738924234″,”title”:”How do I store leftover Chocolate Caramel Drip Cake?”,”content”:”To keep your decadent chocolate caramel drip cake fresh, store it in the refrigerator, lightly covered or in an airtight container. It’ll stay delicious for 3-5 days. For longer storage, you can freeze individual slices, wrapped tightly in plastic wrap and then foil, for up to a month. Thaw at room temperature before enjoying.”,”visible”:true},{“id”:”faq-question-1776738924235″,”title”:”Can you put caramel sauce between cake layers?”,”content”:”Yes, you definitely can put caramel sauce between cake layers! The trick is to create a "dam" or border of buttercream frosting around the edge of each cake layer. This holds the caramel in place and prevents it from oozing out the sides. It also helps prevent the caramel from soaking into the cake too much.”,”visible”:true}]} –>