


Savory Garlic Scampi with Pre Cooked Shrimp Recipes
Ingredients
Method
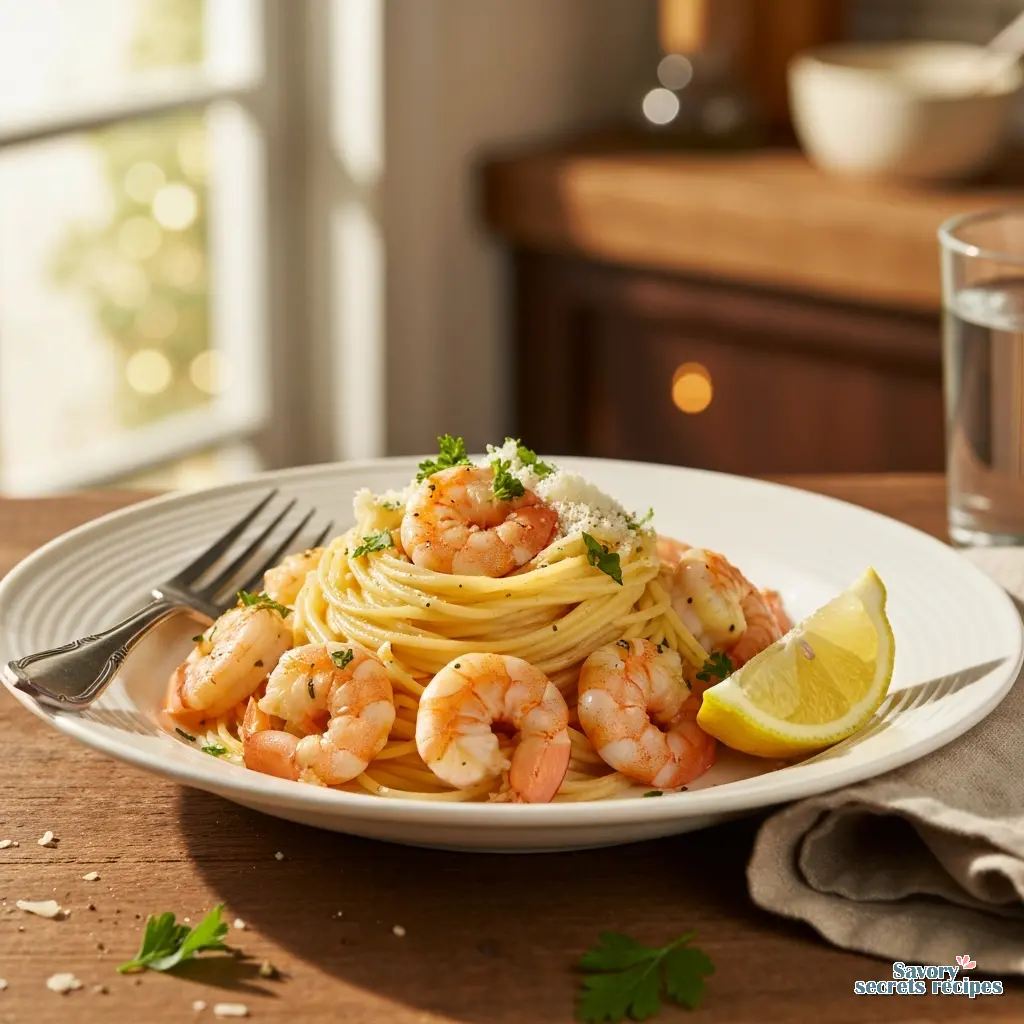
- Boil the pasta according to package directions and reserve ⅓ cup of the cooking water.
- Heat olive oil over medium heat for 1-2 minutes, add garlic, and sauté for approximately one minute.
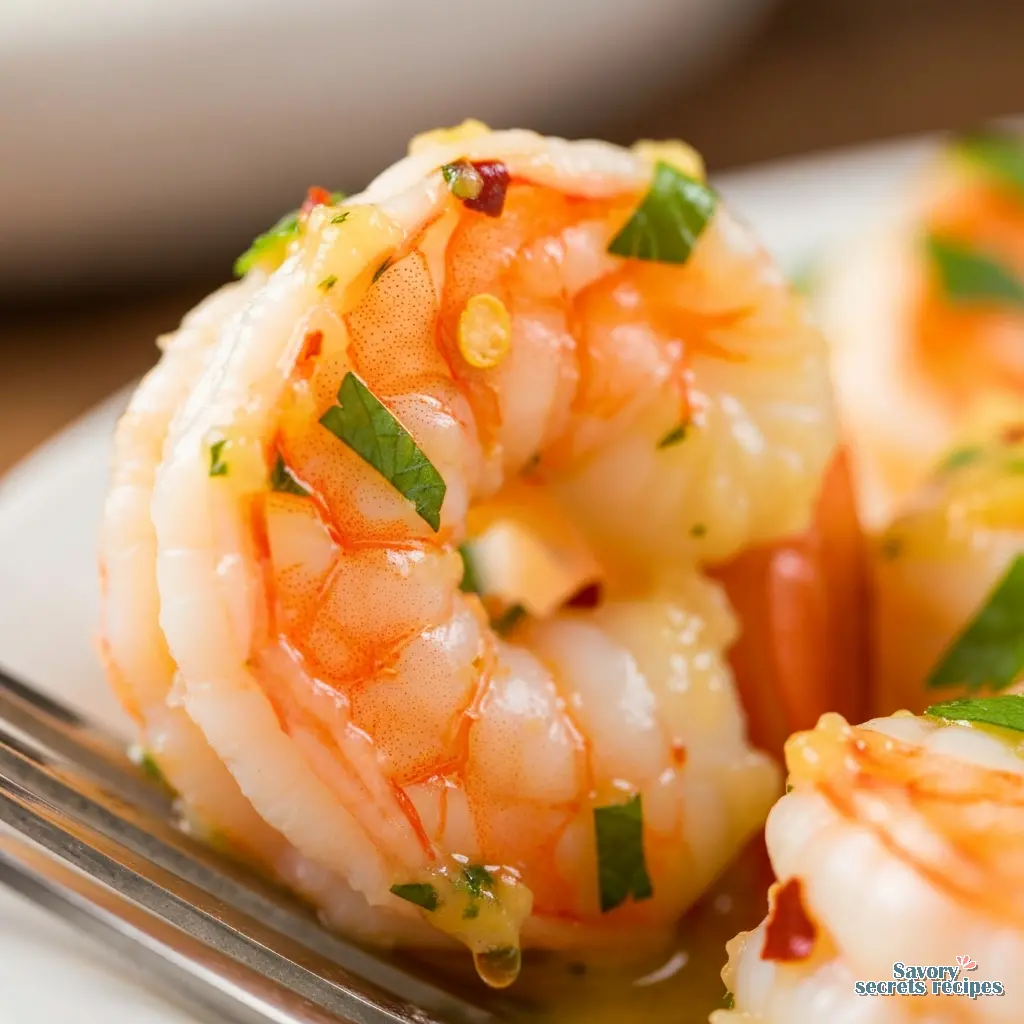
- Add shrimp to the pan and season with salt and pepper. Cook for 2-3 minutes, flip, and cook for an additional 1-2 minutes until the shrimp begin to turn pink.
- Add the pasta water and red pepper flakes. Simmer for 2-3 minutes until the liquid reduces and the shrimp is cooked through.
- Stir in 2 tablespoons of butter and the juice of half a lemon, using less if a milder flavor is preferred.
- Remove from heat. Plate the pasta, top with the shrimp and sauce, and garnish with fresh chopped parsley and parmesan cheese.
Nutrition
Notes
Why I Keep a Bag of Pre-Cooked Shrimp in the Freezer
It usually happens on a Tuesday. I’m staring into the refrigerator at 6 PM, the kids are hungry, and I have absolutely no plan. We’ve all been there. The mental load of cooking a full meal from scratch feels impossible, but takeout feels like a defeat. This is exactly when I reach for my secret weapon: that bag of frozen, already cooked shrimp.
I know what you’re thinking. “Omar, isn’t pre-cooked shrimp rubbery? Doesn’t it taste like the freezer?” generally speaking, yes. It can be all of those things if you treat it like raw shrimp. But if you handle it with a little respect, it transforms into the fastest, most reliable protein in your arsenal. I’m talking about a restaurant-quality dinner on the table in under 15 minutes. No peeling, no deveining, no raw seafood anxiety. If you have more time to cook from scratch, mastering a few easy shrimp recipes is a great way to expand your kitchen skills. While you wouldn’t use this method for a crispy shrimp recipe, it is the best way to keep pre-cooked varieties moist.
I remember my grandfather in Essaouira telling me that the fish will tell you when it’s ready. With pre-cooked shrimp, the fish is telling you it’s already ready. Your job isn’t to cook it. Your job is simply to wake it up without ruining it. Once I understood that distinction, everything changed. Let me show you how to master already cooked shrimp recipes so you never have to stress about a weeknight seafood dinner again.
The Golden Rule: Thawing Matters More Than Cooking
If there is one thing I need you to take away from this, it’s that you cannot toss frozen shrimp directly into a hot pan. Well, you can, but you’ll end up with shrimp that are tough on the outside and icy in the middle. Not exactly appetizing.
From what I’ve seen in home kitchens, patience is the missing ingredient. The protein fibers in shrimp are delicate. When they freeze, they tighten up. If you shock them with heat immediately, they seize. You want to ease them back to life.
The Overnight Method (Best for Texture)
Ideally, you move the bag from the freezer to the fridge the night before. I place them in a colander set over a bowl to catch the melting ice so they aren’t swimming in water. This slow thaw preserves the most moisture.
The 20-Minute Quick Thaw (Real Life)
Let’s be honest. I rarely plan that far ahead. For the Tuesday night panic, use the cold water method. Place the shrimp in a sealed bag and submerge them in a bowl of cold water. Cold water, not warm. Warm water might seem faster, but it starts cooking the shrimp immediately and encourages bacteria growth. Change the water every 10 minutes. usually, they are ready to go in about 20 minutes.
The ‘Already Cooked’ Reheating Masterclass
This is where most already cooked shrimp recipes go wrong. You are not cooking the shrimp. You are reheating them. It sounds like a small detail, but it makes all the difference.
I learned a hard lesson from a line cook in Boston years ago. He watched me sautéing shrimp and shook his head. “You’re killing it twice,” he said. He was right. Since the shrimp is already boiled or steamed at the processing plant, applying high heat for a long time just squeezes the remaining moisture out.
The 1-Minute Warm-Through Rule
Here is my method for hot dishes like pasta or tacos:
This gentle warming method is perfect for shrimp and cheese recipes where you want the cheese melted but the protein tender.
1. Build your flavor base first. Sauté your garlic, onions, and spices. Make your sauce completely. Let it bubble and thicken.
2. Remove the pan from the heat. Yes, take it entirely off the burner.
3. Toss in the thawed shrimp. The residual heat of the sauce is enough to warm the shrimp through without tightening the proteins further.
4. Cover for 60 seconds. Let them sit in that warm bath. That’s it.
When you take that first bite, you’ll notice the snap. It’s tender, not chewy. It’s a game changer.
Visual Cues: The ‘C’ vs. The ‘O’
Even with pre-cooked shrimp, you need to watch the shape. It’s the most reliable indicator of texture.
The ‘C’ Shape: This stands for “Cooked” (or in our case, perfectly reheated). The shrimp curls loosely. This is what you want. It means the muscle is relaxed and tender.
The ‘O’ Shape: This stands for “Overcooked.” If the shrimp curls into a tight circle, the fibers have contracted. It will be rubbery and dry. If your pre-cooked shrimp look like tight little donuts coming out of the bag, they were likely overcooked at the factory. In that case, keep the heating time to mere seconds.
Sizing Cheat Sheet: Decoding the Bag
I tend to ignore labels like “Jumbo” or “Large” because they aren’t regulated. One brand’s jumbo is another brand’s medium. Instead, I look at the count per pound. It’s the small numbers on the corner of the bag, like 16/20 or 31/40.
- 16/20 (Extra Jumbo): You get 16 to 20 shrimp per pound. These are substantial. I use these for shrimp cocktail or when the shrimp is the main event.
- 21/25 (Jumbo): A great all-purpose size. Perfect for tacos or skewers.
- 31/40 (Medium/Large): These are smaller. I’d lean toward using these for stirring into pasta, fried rice, or salads where you want a bite of shrimp with every forkful.
For most already cooked shrimp recipes, especially pasta, I prefer the 31/40 size. They warm up instantly and distribute well throughout the dish. This size is also excellent for a fast shrimp and veggies recipe on busy nights.
Flavor Boosting: Because They Can Be Bland
Let’s be real. Pre-cooked shrimp don’t absorb marinades the way raw shrimp do. The proteins are already set, so the marinade just slides right off. You can soak them for hours, but the flavor won’t penetrate deep inside.
So, how do we fix this? We focus on surface area and finishing sauces.
The Fat Carrier: You need a fat to carry the flavor. Butter or olive oil is essential. I always toss the thawed shrimp in a little seasoned oil before adding them to anything.
The Acid Pop: A squeeze of fresh lemon juice right before serving wakes up the flavor. It cuts through the “freezer” taste that lingers sometimes.
Fresh Herbs: Since we aren’t cooking the flavor in, we add it at the end. Fresh parsley, cilantro, or dill added at the very last second gives you that fresh profile we are looking for.
Common Mistakes & Fixes
Mistake: Cooking the shrimp in the sauce for 5-10 minutes.
Solution: Add shrimp at the very end. Turn the heat off. Let them warm through for 1 minute only.
Mistake: Thawing in the microwave.
Solution: I know it’s tempting, but this creates hot spots that turn rubbery. Stick to the cold water bowl method.
Mistake: Buying shrimp with ice crystals inside the bag.
Solution: This usually means they thawed and refroze. Skip that bag. Look for loose, individual shrimp.
Cold vs. Hot: Choosing Your Adventure
Sometimes the best way to cook pre-cooked shrimp is… not to. In the summer, or when I’m just too tired to turn on the stove, cold preparations are superior. The texture of thawed, high-quality cooked shrimp is actually perfect for cold salads.
Cold Applications: Think shrimp salad with celery and mayo (like a lobster roll), fresh spring rolls, or tossed into a grain bowl with quinoa and avocado. Just make sure you pat them very dry with a paper towel first. Watery shrimp ruins the dressing.
Hot Applications: Stir-fries, pastas, and soups. Just remember the rule: add them last. If you are making a soup, take the pot off the heat and drop the shrimp in right before you ladle it into bowls.
Storage & Leftovers
If you have leftovers (though in my house, we rarely do), storage is simple. Place the pasta and shrimp in an airtight container in the fridge. They will keep for up to 3 days.
Reheating is tricky. I generally advise against microwaving the shrimp if you can avoid it. It just blasts them into rubber. Instead, I usually eat the leftovers cold it makes a great pasta salad for lunch. If you must heat it, do it gently in a pan with a splash of water or broth to loosen the sauce, keeping the heat very low.
Frequently Asked Questions
Final Thoughts
Cooking doesn’t always have to be a project. Sometimes, it’s just about getting a healthy, protein-rich meal on the table before everyone melts down. Using already cooked shrimp recipes isn’t cheating. It’s smart cooking. It’s knowing which corners you can cut without sacrificing quality.
When you sit down to this pasta, twirling that garlic-coated angel hair around your fork, you won’t be thinking about the freezer bag. You’ll just be enjoying a great meal. And honestly, that’s what matters. For more inspiration on quick weeknight wins, check out my Pinterest boards where I collect my favorite shortcuts.
Give this a try next Tuesday when the panic sets in. I think you’ll be surprised at how good “fast food” can taste.
Reference: Original Source
Can I use already cooked shrimp in recipes that call for raw shrimp?
Yes, but you have to adjust the timing significantly. If a recipe says to simmer the shrimp for 5 minutes, ignore that. Cook the dish all the way through, then stir in your thawed cooked shrimp at the very end just to warm them up.
How do I make already cooked shrimp taste better?
It’s all about the fat and acid. Toss them in warm garlic butter or olive oil with red pepper flakes. Finish with fresh lemon juice. Since they don’t absorb marinade well, the surface coating is where all your flavor lives.
How to heat up shrimp that’s already cooked without making it rubbery?
The secret is residual heat. Don’t cook them over a flame. Get your sauce or liquid hot, turn off the heat, add the room-temperature shrimp, and cover the pan for 60 seconds. That gentle warmth is all they need.
Do I have to wash precooked shrimp?
I always give them a quick rinse with cold water. It helps remove any lingering ice crystals or “freezer taste” from the bag. Just make sure to pat them completely dry with paper towels before adding them to your dish so you don’t water down your sauce.
Can I pan fry already cooked shrimp?
You can, but be very fast. I’m talking 30 seconds per side in a hot pan just to get a little color or sear. If you leave them longer, the texture suffers. Personally, I think warming them in sauce is safer for texture.
What sauces pair well with cooked shrimp?
They love bright, acidic, or creamy sauces. A classic garlic butter is unbeatable. They also work beautifully with pesto, a spicy tomato marinara, or a simple vinaigrette if you are serving them cold in a salad.
Can cooked shrimp be used in pasta?
Absolutely, it is one of my favorite uses. The texture of angel hair or linguine matches the shrimp perfectly. Just remember to reserve some pasta water to create a silky sauce that coats the shrimp nicely.
What is the two hour rule for shrimp?
Food safety is critical with seafood. Shrimp should not be left out at room temperature for more than two hours. If it’s a hot day (over 90°F), that window shrinks to one hour. When in doubt, keep them cold.


7 Responses
Total game changer for a Tuesday night. Thawing the shrimp properly like you suggested really made the difference in the final dish.
I made this tonight and it was so fast! I never thought to use pre-cooked shrimp for scampi, but it saved me so much time and the texture was perfect.
This looks delicious, Omar! If I only have raw shrimp on hand, how much longer should I cook them in the pan before adding the pasta water?
I’d recommend searing your raw shrimp for about 1 to 2 minutes per side until they just turn pink and opaque. Keep a close eye on them to ensure they stay tender and don’t overcook once you add the pasta water!
The flavor was spot on, but I found the red pepper flakes a bit too spicy for my kids. Next time I’ll probably cut that in half, but the lemon and garlic combo was perfect.
This worked exactly as written, thanks!
My family loved this!