


Best Creamy Southern Grits Recipe with Heavy Cream
Ingredients
Method
- Combine water, heavy cream, and half-and-half in a pot.
- Bring the liquid to a boil.
- Whisk in the grits slowly and steadily.
- Reduce the heat to low and cover the pot.
- Cook for 5 to 7 minutes, whisking frequently.
- Remove the pot from the heat.
- Stir in butter and season with salt and pepper to taste.
- Serve the grits immediately.
Notes
The Search for the Best Creamy Grits Recipe
I still remember the first time I tried to make grits in my tiny apartment kitchen during college. It was a disaster. I followed the package instructions to the letter, and the result was… well, let’s just say it was closer to wallpaper paste than breakfast. It was grainy, watery, and honestly pretty sad. I called my teta, Samira, asking where I went wrong. She laughed in that warm way of hers and told me, “Noor, you’re reading too much and feeling too little. You have to watch how the corn drinks the water.” Understanding what is grits and how the corn is processed is the first step to mastering the texture.
That tracks with my experience in the test kitchen now. We often get so caught up in the exact science that we forget the intuition. But after years of testing, and I mean years, I’ve finally nailed down the best creamy grits recipe that balances that scientific precision with the soul-warming comfort we’re all looking for. Especially right now. It is February in Michigan, and looking out my window at the grey slush, I need something that feels like a hug in a bowl.
If you’ve been struggling with bland, watery mush, let me walk you through it. We are going to fix that today. This method gives you that restaurant-style velvety consistency without needing a culinary degree. You’ve got this.
Why This Recipe Works: The Science of Starch
Here is the thing about corn. It is stubborn. To get that velvety consistency we are after for the best creamy grits recipe, we need to coax the starch out of the corn gently. Think of it like risotto. If you just boil it rapidly, the outside of the grain cooks too fast while the inside stays hard. That is how you get grit.
I’ve found that the secret lies in a two-stage liquid process. We start with water. Water is the best vehicle for hydrating the corn granules initially because it penetrates the kernel faster than dairy, which has fat and protein molecules that can block absorption. Once the corn is hydrated and tender, then we add the heavy cream and milk. This technique ensures the grits are fully cooked through before we thicken the mixture into that luxurious texture.
Also, and this is crucial, we salt the water before the grits go in. My daughter Layla always asks why we can’t just add salt at the end. I had to explain to her that if you wait until the end, you’re just salting the sauce, not the corn itself. It makes a huge difference in the depth of flavor.
The “No-Package” Rule & Choosing Your Grits
Let’s be real for a second. The instructions on the back of the bag are usually wrong. They almost always underestimate the cooking time and the liquid ratio. In my tests, following the package usually leads to dry, stiff grits that solidify the second they hit the plate. So, ignore the package. Trust the process here instead.
When shopping, you will see a few options:
- Instant Grits: These have been precooked and dehydrated. Honestly? Avoid them if you can. They lack the corn flavor and texture we want.
- Quick Grits: These are ground fine to cook faster. They are okay in a pinch, but you won’t get that deep, toasted corn flavor.
- Stone-Ground Grits: This is the gold standard. They are ground between stones (hence the name), leaving the germ intact. This gives you a speckled texture and a rich, nutty flavor. Brands like Anson Mills are fantastic, but even the grocery store stone-ground options work well.
If you are using stone-ground grits, I’d probably lean toward soaking them overnight if you have time. It cuts down the cooking time significantly. But if you are cooking on a Tuesday morning before work? The quick soak method works wonders too.
The Liquid Equation: Milk, Water, or Cream?
I get asked this constantly: “Can you make grits with milk?” or “Should I use strictly water?” The answer is yes, and no. Cooking entirely in milk is risky because milk scorches easily. Plus, as I mentioned, water hydrates the corn better.
For the best creamy grits recipe, I use a ratio of 4:1 liquid to grits. I start with water and chicken broth (or vegetable broth) for the savory base. The broth adds a depth that water alone just can’t provide. Then, we finish with heavy cream and whole milk. This gives you the best of both worlds: tender, fully cooked corn and a rich, glossy finish.
The Technique: Whisking and Simmering
This is your checkpoint. Once your water and broth are boiling, you are going to pour the grits in a slow, steady stream while whisking constantly. I mean constantly. If you dump them all in at once, you’ll get clumps that no amount of cooking will fix. You want to keep the water moving to suspend the grains until they start to thicken.
After that initial whisk, turn the heat down to low. I mean really low. You want a gentle bubble, like a lazy volcano, not a rapid boil. Cover the pot. This traps the steam and helps the grits cook evenly. But don’t walk away! Come back every few minutes to whisk. This agitation releases the starch, which is the key to that creamy texture. It’s similar to how I learned to make risotto in culinary school agitation equals creaminess.
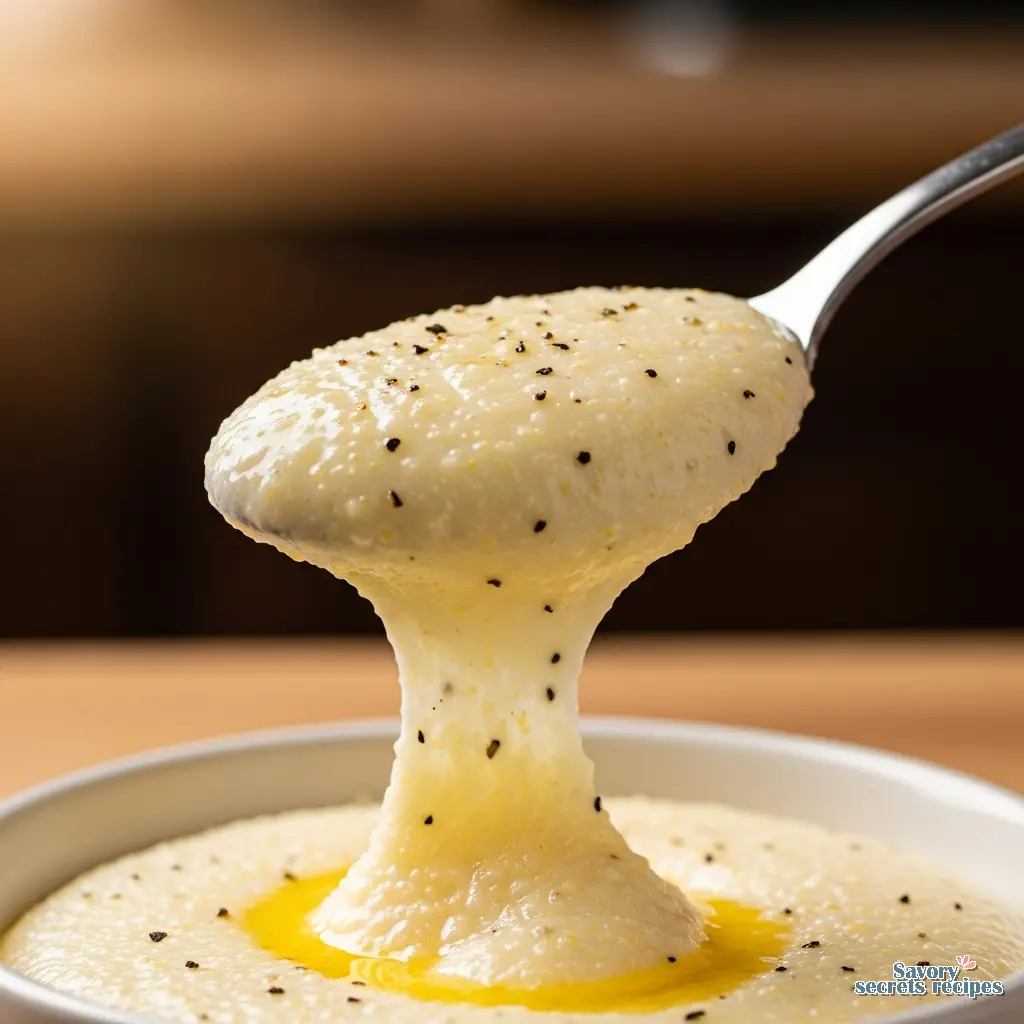
The mixture will look thin at first. Don’t panic. As the grains swell, they will absorb the liquid. Depending on your grind, this can take anywhere from 20 to 45 minutes. You’re looking for the texture of wet sand initially, transitioning to a thick porridge.
Troubleshooting Texture
Even with the best instructions, variables happen. Maybe your stove runs hot, or your grits are older and drier. Here is how to fix it:
- Too Thick: If your spoon stands up straight in the pot and doesn’t move, they are too thick. Whisk in a splash of warm milk or broth. Do this gradually until they loosen up.
- Too Thin/Runny: If they are still soupy after 30 minutes, take the lid off. Let the excess moisture evaporate while you continue to cook. Just keep whisking so they don’t burn on the bottom.
- Lumpy: It happens to the best of us. If you have stubborn lumps, you can use an immersion blender for a few seconds. It’s a bit of a cheat, but it works. Just don’t overdo it or you’ll make glue.
Flavor & Variations: Making It Your Own
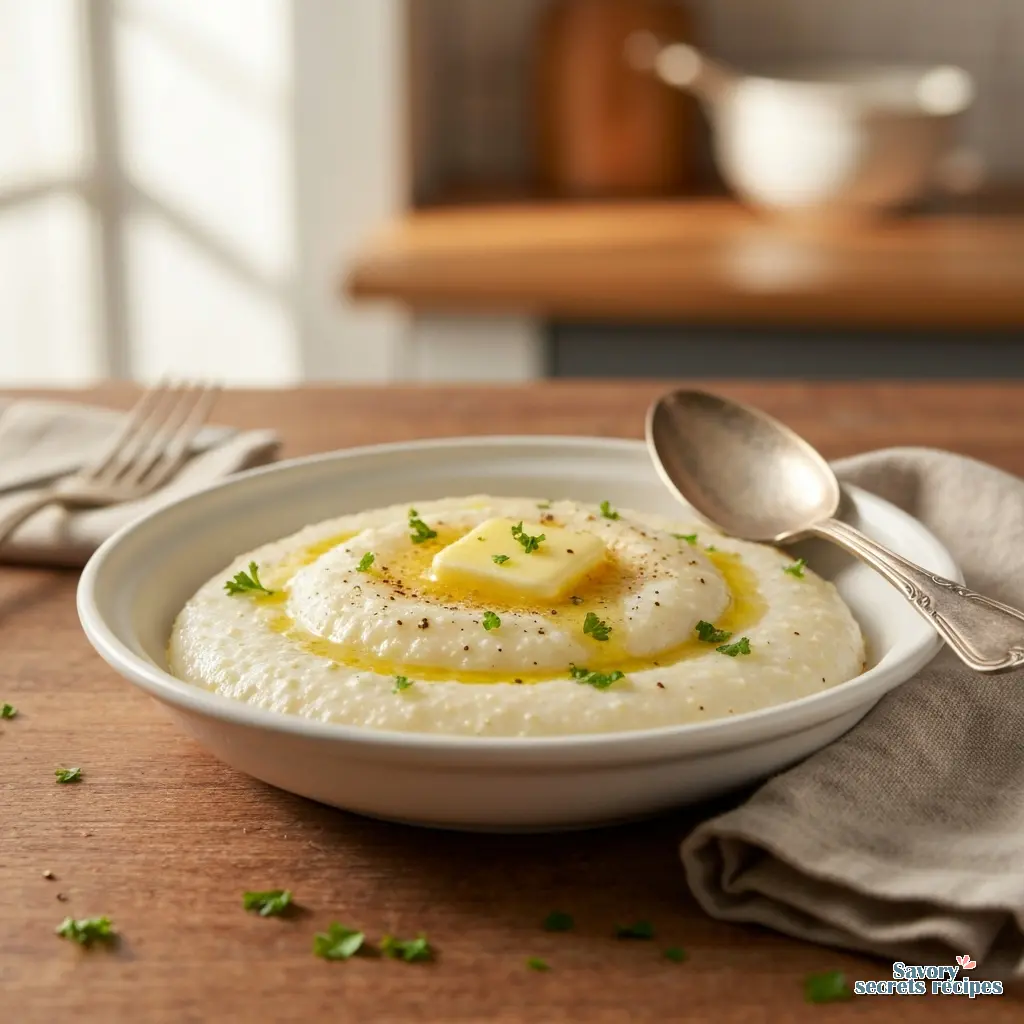
The base recipe is fantastic, but grits are a blank canvas. This is where you can have fun. For a classic Southern breakfast, I love stirring in sharp cheddar cheese at the very end. The sharpness cuts through the richness of the cream perfectly. Gouda is another great option if you want something smokier.
If you are serving this for dinner, maybe with shrimp or braised short ribs, try stirring in some roasted garlic or fresh thyme. It changes the whole profile. And for my dairy-free friends, I hear you. You can absolutely use almond milk or oat milk, though the flavor will be nuttier. Just be sure to use unsweetened varieties, or you’ll end up with dessert grits.
One thing I learned from my time testing recipes: always finish with a knob of cold butter. Stirring it in right at the end helps emulsify the sauce and gives the grits a glossy, professional sheen. It’s a small step that makes a big difference.
Storage & Reheating: The Next Day
Leftover grits will solidify into a brick. That is just the nature of cornstarch. But don’t throw them out! You can slice that “brick” and fry it in a pan with a little butter for grit cakes, which are delicious.
If you want to reheat them to be creamy again, you’ll need to add liquid. Put the cold grits in a saucepan with a splash of milk or water. Break them up with a spoon and heat gently over low heat. Whisk as they warm up, and they should smooth right back out. You might need to add a little more liquid than you think.
Frequently Asked Questions
Bringing It All Together
When you take that first creamy bite, you’ll understand why we fuss over the details. It’s more than just corn and water; it’s about taking simple, humble ingredients and coaxing them into something spectacular. It reminds me of watching my teta make dough it’s about the feel, the smell, and the patience.
So, put on some music, maybe pour yourself a coffee, and enjoy the slow stir. It’s a nice way to slow down on a busy morning. And hey, for more inspiration on comforting breakfasts and family meals, check out my Pinterest boards where I save all my favorites.
Enjoy your cozy morning.
Reference: Original Source
What is the secret to great grits?
In my experience, the secret is patience and salt. You must cook them low and slow to let the starch release, and you absolutely must salt the water before adding the corn. If you salt at the end, the flavor just sits on top.
Is it better to cook grits in milk or water?
I’ve found a combination works best. Start with water (or broth) to hydrate the corn kernels fully, then finish with milk or heavy cream for richness. Cooking solely in milk can lead to scorching and uneven cooking.
How do I keep grits creamy for a party?
Keep them in a slow cooker on the “warm” setting. You’ll likely need to stir in a little extra warm milk or broth every 30 minutes or so, as they will continue to thicken while they sit.
What is the difference between old fashioned grits and regular grits?
It’s mostly about the grind. Old-fashioned grits are ground coarser and take longer to cook, usually 20-30 minutes. Regular or “quick” grits are ground finer to cook in 5 minutes. For the best creamy grits recipe, I prefer the texture of old-fashioned or stone-ground.
Should you soak grits overnight before cooking?
You don’t have to, but it helps. Soaking stone-ground grits reduces cooking time and helps them cook more evenly. If you plan ahead, it’s worth it. If not, just add a few extra minutes to the simmer time.
What cheese is best for grits?
Sharp cheddar is the classic choice because it melts well and adds a tangy contrast to the sweet corn. Smoked Gouda, Parmesan, or even cream cheese work beautifully too depending on what flavor profile you want.
How do I fix lumpy grits?
Don’t worry, it happens. If whisking vigorously doesn’t break them up, use an immersion blender for just a few seconds. It smooths them out instantly. Just be careful not to over-blend or they can become gummy.


2 Responses
The flavor was spot on, but they were a bit too rich for my taste with both the cream and the half n half. I think next time I’ll use a bit more water to balance it out.
Made these this morning and added a handful of sharp cheddar at the end. Best grits I’ve ever had, even better than the ones at my favorite brunch spot!