


Bakery Style Banana Bread 5 Bananas
Ingredients
Method
- Adjust the oven rack to the lower third position and preheat the oven to 350°F (177°C). Grease a 9x5-inch loaf pan with nonstick spray and set aside.
- Whisk the flour, baking soda, salt, and cinnamon together in a medium bowl and set aside.
- Beat the butter and brown sugar in a large bowl using a mixer fitted with a paddle attachment on medium-high speed until light and creamy, about 3 minutes. Add the eggs one at a time while mixing on medium speed, beating well after each addition and scraping the sides of the bowl as needed. Beat in the yogurt, vanilla, and mashed bananas until combined.
- Add the dry ingredients to the wet ingredients and beat on low speed until just combined, taking care not to over-mix. Fold in the nuts or chocolate chips if using.
- Pour the batter into the prepared pan and bake for 60–65 minutes, covering loosely with foil halfway through. Bake until a toothpick inserted in the center comes out clean, then cool in the pan on a wire rack for 1 hour before removing to cool completely on the rack.
- Store the bread tightly wrapped at room temperature for up to 3 days or in the refrigerator for up to 1 week.
Notes
The Search for the Perfect Loaf
I remember standing on a wooden stool in my teta’s kitchen in Heliopolis, watching her fold butter into dough. She’d count the folds in Arabic wahid, itnayn, talata and make me repeat them. I was seven and thought I was learning numbers. I was actually learning ratios. That memory came rushing back last Tuesday in my Jersey City kitchen when I pulled a loaf of bakery style banana bread out of the oven. It had that specific smell. You know the one. It’s not just “banana.” It’s caramelized sugar, toasted nuts, and that deep, warm scent of butter that’s been on the verge of burning.
For years, I struggled with banana bread. My home loaves were always… fine. They were edible. But they lacked that tall, majestic dome you see in coffee shop display cases. They were often too wet at the bottom or, worse, dry and crumbly like day-old cake. I used to be a “cup measurer,” scooping flour directly from the bag, until I realized why my results were so inconsistent. The dough will tell you when it’s ready, my teta used to say, but sometimes you need a scale to translate what it’s saying.
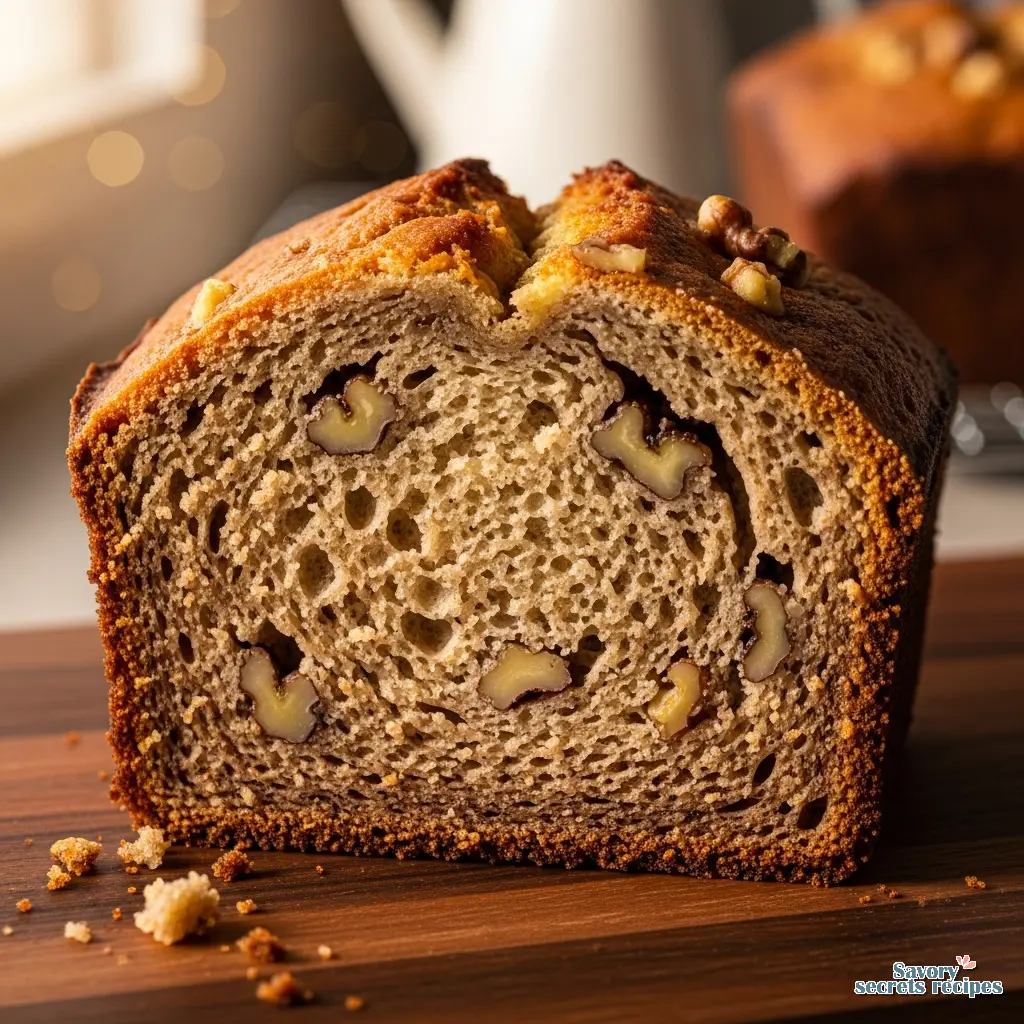
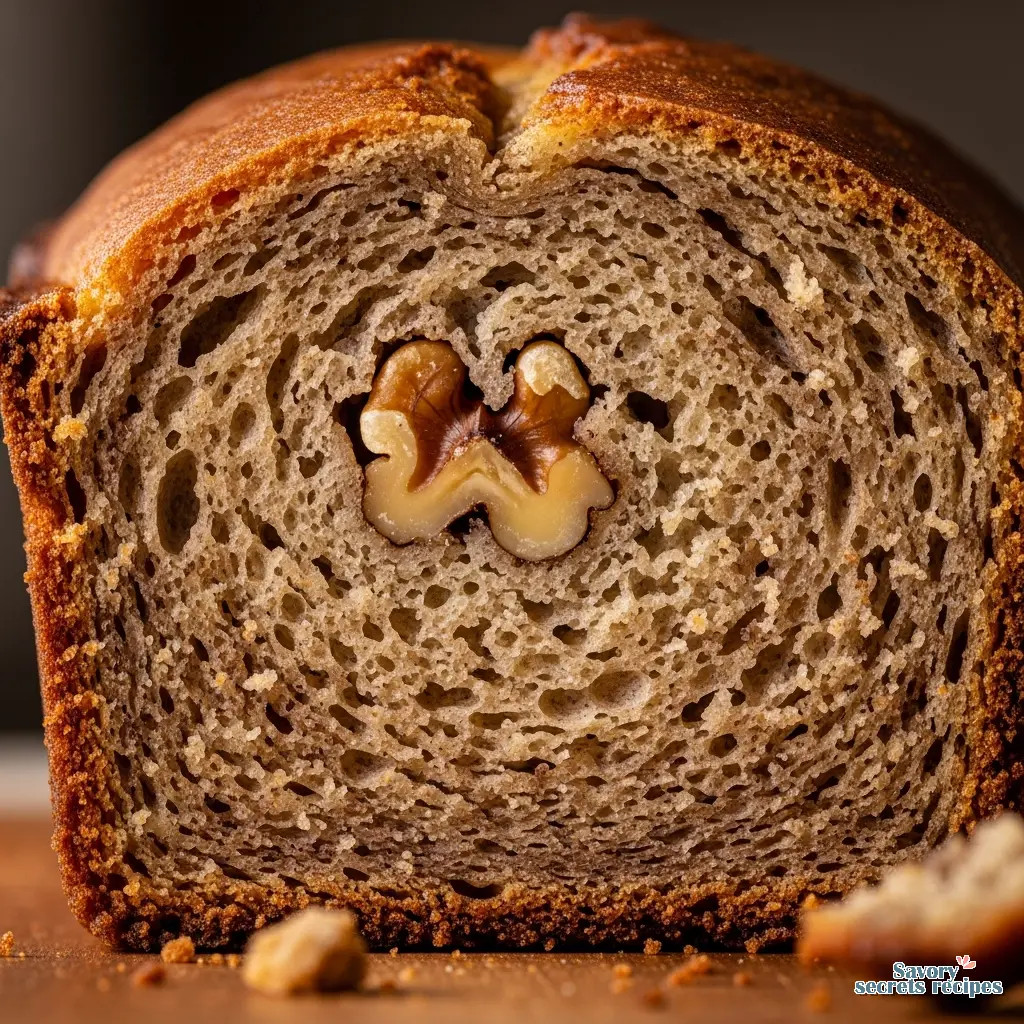
This recipe is the result of working through the variables. It’s not just about using up old fruit. It’s about the specific science of using five whole bananas yes, five without turning the batter into soup. It’s about achieving that professional crack down the center that feels like a badge of honor. When you slice into this, you’ll see a crumb that is dense but tender, moist but fully cooked. It is, frankly, the ultimate banana bread.
The Science of the Dome
Let’s talk about the dome. That high, cracked top is the hallmark of a true bakery style banana bread. It’s not accidental. It’s thermal physics. Most home bakers bake their quick bread at a steady 350°F (175°C). That works, but it doesn’t give you the drama. I’ve found that starting the oven hotter around 425°F (220°C) for the first ten minutes creates a rapid burst of steam and gas expansion. This is called “oven spring.” It forces the batter up before the crust sets completely.
After that initial lift, we drop the temperature. If we kept it high, the outside would burn before the middle was done. By lowering it to 350°F, we allow the center to cook through gently. This temperature shift is the detail that changes everything. It’s similar to how we bake feteer to get those puffed layers, just adapted for a dense batter.
Another factor is the leavening. We’re using baking soda here, not yeast. This is a quick bread, meaning the lift comes from a chemical reaction between the alkaline soda and the acidic ingredients in the batter. That brings me to the yogurt. The acidity in Greek yogurt (or sour cream) reacts vigorously with the soda, creating carbon dioxide bubbles that get trapped in the thick batter. That’s your lift. That’s your dome.
The Five-Banana Rule
Most recipes call for three bananas. Maybe four if they’re small. We are using five. I know, it sounds like too much moisture. I can hear you asking, “Mira, won’t this be gummy?” Not if we balance the dry ingredients correctly. The beauty of using five bananas is the flavor intensity. You get a deep, fermented banana sweetness that you just can’t fake with extract.
However, five bananas bring a lot of liquid. To counter this, we need a flour-to-fat ratio that can hold that structure. We rely on butter for flavor, but I’ve seen some bakers use oil for moisture. I stick with butter because, honestly, the flavor profile is superior, and the bananas provide enough moisture on their own. The key is to measure your bananas. You want about 500g to 600g of mashed fruit. If you have giant American supermarket bananas, five might be too many. Trust the scale here. If you have 800g of banana, you’re making soup, not bread. For those with fewer overripe fruits, a standard 2 banana loaf recipe provides a smaller but equally delicious alternative.
Also, ripeness matters. I’m not talking about yellow bananas with a few brown spots. I’m talking about bananas that look like they should be in the compost. Black. Squishy. Smelling slightly like alcohol. That’s when the starches have fully converted to sugar. If your bananas are still yellow, bake them in their skins at 300°F for 15 minutes until they turn black. It’s a quick ripening hack that saves the day.
Ingredient Notes & Substitutions
I’m still working out the best approach for every pantry, but here is what I know works for this specific texture.
The Flour: I use all-purpose flour. I’ve had people ask about bread flour. Can you make banana bread with bread flour? You can, but it will be chewier. Bakery style implies a tender crumb, not a chewy one. Stick to AP flour (around 120g per cup if you must use volume, but please, use a scale). If you find AP flour too heavy, experimenting with banana bread with cake flour can yield an even lighter, more delicate crumb.
The Sugar: We use brown sugar. Light or dark, it doesn’t matter much, though dark adds more molasses flavor. The acidity in brown sugar also helps activate the baking soda. White sugar just doesn’t provide the same moist crumb.
No Vanilla? No Problem: If you’re out of vanilla extract, don’t panic. I often use a tablespoon of maple syrup or even a splash of dark rum (if you consume it, though I usually stick to extracts). A pinch of cardamom or extra cinnamon can also mask the lack of vanilla. The bananas are doing the heavy lifting anyway.
The Yogurt Factor: You need that thick, acidic dairy. Greek yogurt is my go-to. Sour cream works perfectly too. In a pinch, buttermilk is okay, but it’s thinner, so your batter might be looser. If you are dairy-free, a thick coconut yogurt works, or even applesauce, though applesauce lacks the fat that makes the crumb tender.
The Muffin Method (Don’t Overmix!)
This is where most recipes skip the detail. The method we use is called the “muffin method.” You mix the wet ingredients in one bowl and the dry in another. Then you combine them. It sounds simple, but the nuance is in the wrist. When you add the wet to the dry, you want to fold gently.
If you use an electric mixer here, you will develop gluten. Gluten is great for my teta’s feteer, but it is the enemy of tender banana bread. Overmixed batter leads to a tough, rubbery loaf with tunneling (those weird long holes). I use a silicone spatula or a wooden spoon. I stop mixing when I still see a few streaks of flour. They will disappear in the oven. Trust me.
My daughter insists on helping with the mashing, and I let her. She uses a potato masher, which is actually perfect. You don’t want a smooth puree. You want chunks. Those chunks become pockets of intense banana flavor in the final loaf. If you use a mixer to mash, you get baby food. We want texture. Learning this technique is also helpful if you are adding bananas to muffin mix to upgrade a boxed starter.
The Bakery Secret: Sugar Crust
Here is a little trick I picked up from a bakery in Bay Ridge. Before the loaf goes into the oven, sprinkle coarse sugar down the center. You can use turbinado sugar or even just granulated sugar. This does two things. First, it creates a crunchy, sparkly crust that contrasts beautifully with the soft interior. Second, it guides the crack. The sugar weighs down the surface slightly and encourages the batter to split right where you want it to.
If you really want to go gourmet, slice a sixth banana in half lengthwise and lay it on top, cut side up. It looks stunning, like something from a magazine. Just be aware it adds moisture to the top, so you might need to bake it five minutes longer.
Troubleshooting Common Disasters
I have a notebook where I’ve logged every single batch failure since 2019. Here are the most common issues with big batch banana bread recipes and how to fix them.
The Gummy Bottom: This usually means your ratio of banana to flour was off (too much banana) or you didn’t bake it long enough. If the top is browning too fast but the center is raw, tent it with aluminum foil. Don’t take it out until a thermometer reads 200°F to 206°F (93°C-96°C). The toothpick test can be misleading if you hit a banana chunk.
The Sunken Center: This is heartbreaking. It happens if you open the oven door too early to peek. The rush of cold air collapses the structure before it sets. Keep the door closed for at least the first 45 minutes. It can also happen if you used too much baking soda.
The Brick: If your loaf is heavy and dense, you likely overmixed the batter or added too much flour. If you scoop flour with a cup, you might be packing in 30% more than the recipe needs. Use a scale. It’s the only way to be sure.
Storage and Freezing
Bakery style banana bread actually tastes better the next day. The moisture redistributes, and the flavors meld. I wrap mine in plastic wrap and leave it on the counter. It stays moist for about 3 to 4 days. If you need to keep it longer, put it in the fridge, but be warned: the fridge can dry it out slightly.
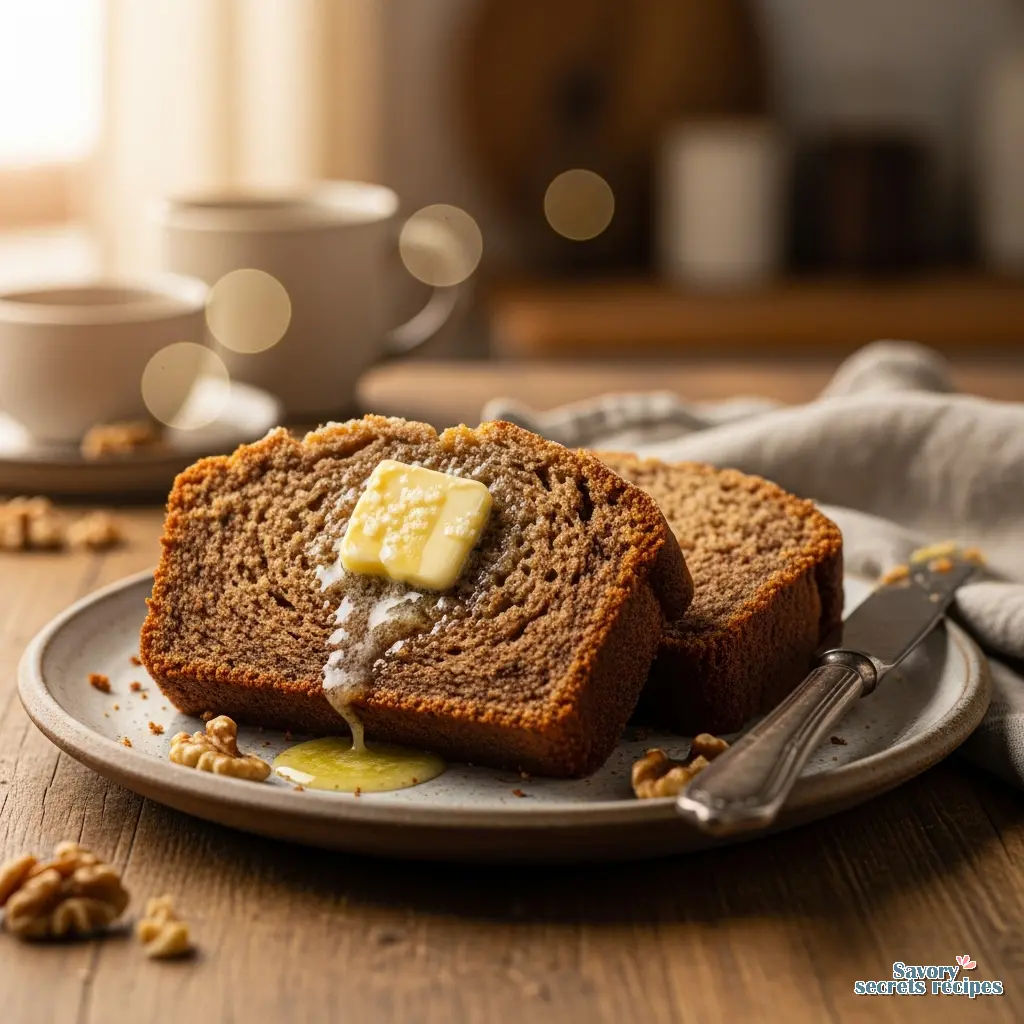
Freezing is a great option. I like to slice the loaf first, then wrap individual slices in plastic and then foil. This way, I can pull out one slice for breakfast, toast it, and slather it with salted butter. It freezes well for up to 3 months. Just thaw it on the counter or give it a quick zap in the microwave.
Frequently Asked Questions
When you pull this tall, steaming loaf out of the oven, give it at least thirty minutes to cool. I know, the smell is torture. But if you cut it too hot, the steam escapes too fast and the bread can dry out. Once it’s cool, slice a thick piece. Maybe toast it. Definitely butter it. You’ll never go back to the 3-banana version again. This is the detail that changes everything.
I’d love to see your domes! For more inspiration and variations, check out my Pinterest boards where I collect all my favorite baking experiments.
Reference: Original Source
What makes banana bread “bakery style”?
It comes down to the high dome, the dense yet tender moist crumb, and the rich flavor. Bakery style banana bread uses a higher volume of bananas (often 5!) and specific baking temperatures to create that professional rise and caramelized crust that home recipes often miss.
Can I use frozen bananas?
Absolutely. I do this all the time. Thaw them completely in a bowl first. They will release a lot of liquid. Do not drain this liquid! That “banana liquor” is pure flavor and moisture. Mash it all back into the batter. You might need to add a minute or two to the bake time.
Why is my banana bread dry?
You likely used too much flour or not enough banana. If you scooped the flour with a cup, you probably packed it down. Weighing your ingredients (grams) prevents this. Also, overbaking is a culprit. Check it ten minutes before the recipe says to.
Can I make this without a mixer?
Yes, and you should! I prefer making this by hand. A mixer can easily overwork the batter, activating the gluten and making the bread tough. A simple whisk for the wet ingredients and a spatula for folding is all you need for that perfect tender texture.
How do I know when it’s done?
The toothpick test is classic, but a digital thermometer is better. The internal temperature should be between 200°F and 206°F. If you use a toothpick, it should come out with a few moist crumbs attached, not wet batter and not completely clean.
What if I don’t have sour cream or yogurt?
You can make a quick buttermilk substitute by adding a teaspoon of vinegar or lemon juice to regular milk and letting it sit for 5 minutes. It won’t be as thick, so your dome might be slightly less dramatic, but the flavor will still be fantastic.


