


Mastering the Weeknight Dinner Survival Guide
Here’s the deal. We’ve all experienced the absolute heartbreak of a burrito blowing up in our hands. You take one hungry bite, and suddenly half your dinner is sitting on your lap. It’s frustrating, messy, and honestly, it ruins the meal. With Cinco de Mayo right around the corner, or just another chaotic Tuesday in Los Angeles, skip the long takeout lines. Let me walk you through this classic beef burrito. It’s easier than you think to get that restaurant-quality, tight roll right in your own kitchen. For those looking for a faster alternative, a quick mexican dinner is a great way to save time.

How to Make a Classic Beef Burrito at Home
Ingredients
Method
- Brown the ground beef in a sauté pan until it is no longer pink.
- Add the taco seasoning and water, then stir and cook for one minute.
- Mix in the refried beans and adjust the consistency as necessary.
- Prepare or heat the Mexican rice.
- Microwave the tortillas for 30 seconds until warm.
- Layer the beef mixture, rice, chips, cheese dip, shredded cheese, and sour cream onto the tortilla.
- Fold in the sides and roll the tortilla into a burrito.
- Toast the burrito in a skillet if desired and serve with salsa.
Notes
I remember standing on a milk crate at my grandfather Vicente’s taqueria in San Antonio. He’d toast enormous flour tortillas on a flat top grill until they bubbled and blistered. That smell of roasted garlic, cumin, and toasted dough still means the weekend to me. Honestly, my first ten burritos at home were ugly. Really ugly. But they tasted amazing. Today, you’ll learn exactly how to build a classic beef burrito that looks professional and tastes incredible, all in under 35 minutes.
Why This Classic Beef Burrito Recipe Works for Meal Prep
I know weeknights get chaotic. Between the traffic on the 405 and juggling family schedules, sometimes you just need dinner ready yesterday. That’s why this classic beef burrito is built specifically for the freezer. Real talk, most homemade burrito recipes turn into a soggy, unappealing mess after three days in the fridge. Not this one.
We’re using lean ground beef and a custom seasoning blend. No store-bought packets here. Just a simple mix of cumin, chili powder, garlic powder, and onion powder. We brown the meat properly in a heavy cast iron skillet. You’re looking for that bark to set up on the beef before you even think about adding any liquid. That deep browning is your foundational flavor base. It’s the difference between tasting like a restaurant and tasting like a microwave dinner.
The Science of Sogginess
Let’s talk about the enemy of a good meal prep burrito. Moisture. In my experience, though your mileage may vary, watery vegetables are the main culprits for a blowout. Limit fresh tomatoes or raw cucumber if you plan to freeze your classic beef burrito. They turn into absolute mush when thawed.
If you want crunch, swap lettuce for cabbage. Cabbage maintains its texture beautifully even after freezing and reheating. Also, don’t freeze raw avocado. It turns brown and weirdly bitter. Instead, serve fresh guacamole on the side when you’re ready to eat. Pre-cook vegetables like bell peppers and zucchini before adding them to your filling ratios. You want to cook that excess water out completely. Trust your thermometer, not the clock, when cooking meat. But for veggies, trust your eyes. Let the filling cool down before assembly. Wrapping lava-hot filling guarantees a soggy bottom, and nobody wants that.
Tortilla Brand Review for Freezer Durability
Not gonna lie, your choice of flour tortillas makes or breaks this whole operation. I tested a bunch of brands from Ralphs, Vons, and Trader Joe’s. You’ll need a large, 10-inch to 12-inch burrito sized flour tortilla. Regular, thick flour tortillas hold up best for freezing. Some of those ultra-thin, low-carb wraps? They shatter like glass when you try to fold them cold.
If you shop at Costco, grab the thickest restaurant-style tortillas you can find. They have the elasticity needed to stretch over Mexican rice and black beans without tearing. Before you fold, steam the tortilla for 15 seconds in the microwave. Or toast it lightly on a dry skillet. It makes the gluten pliable and easy to work with. That’s the sweet spot right there. This preparation method is also ideal when making an easy beef tortilla wrap for lunch.
Visual Folding Guide: How to Fold a Burrito So It Doesn’t Fall Apart
This is where it gets good. Learning burrito folding is a life skill. My abuelo used to say a loose burrito is just a messy taco. Let me walk you through this simple technique.
First, warm the tortilla. This is a non-negotiable step. Add your filling carefully. Don’t overstuff it. A scoop of cooked Mexican rice, some refried beans, the seasoned ground beef, and shredded cheese. Leave a two-inch border all around the edges.
Next, fold the left and right sides in until they almost touch in the center. Bring the bottom edge up and over the filling. Tuck it tightly under the filling with your fingers, pulling back slightly to compress the ingredients. Roll it forward firmly until sealed. If you get a small tear, don’t panic. Just patch it with a tiny piece of tortilla and a dab of cheese dip. Perfect.
Common Mistakes & Fixes
Mistake: The tortilla tears while rolling.
Solution: You’re working with cold tortillas. Always steam or lightly toast them first to activate the gluten and make them stretchy.
Mistake: The burrito is soggy after reheating.
Solution: You likely added wet ingredients like fresh salsa or tomatoes before freezing. Keep wet ingredients as dipping sauces on the side.
Mistake: The filling is bland.
Solution: You didn’t brown the meat enough before adding spices. Let that ground beef develop a dark, crusty sear in the skillet first.
Variations & Substitutions
I tend to think the classic version is best, but I could be wrong. You can absolutely customize your classic beef burrito to fit what you have in the fridge. That’s the beauty of this meal.
For a spicy kick, add diced jalapeños or extra chili powder to the beef skillet. A splash of your favorite salsa roja mixed right into the meat works wonders. If you want a smoky profile, mix a little BBQ sauce into the ground beef while it simmers. For a veggie-heavy option, sauté corn, black beans, and bell peppers until they’re nicely charred.
You can easily swap the protein. Shredded chicken or plant-based crumbles work beautifully. Just keep the best seasoning for homemade beef burritos exactly the same. Doing keto? Use a high-protein wrap, but remember to handle it gently. Dairy-free? Omit the shredded cheese and sour cream, and rely on a rich, smooth guacamole for that creamy texture.
Tips for Freezing & Storage
Let’s lock in all that hard work. Double wrapping is your absolute best friend here. Wrap each classic beef burrito tightly in plastic wrap first. Then, wrap it snugly in aluminum foil. The plastic stops freezer burn, while the foil protects it from getting crushed in the drawer.
Store them in the fridge for 2 to 4 days in an airtight container. Or, keep them in the freezer for up to 3 months. Always label them with a date and the contents. I learned this the hard way when I found a mystery foil brick from two years ago hiding behind the frozen peas. Nobody wants to play freezer roulette.

Air Fryer vs. Oven Reheating Comparison
My son, who’s ten, recently asked why we can’t just microwave frozen burritos the whole way. So I showed him. One was a microwaved, soggy mess. The other was pan-seared with a crispy, golden crust. He got it immediately. Now we’re talking about proper reheating.
The Microwave-to-Pan Method is my daily go-to. Microwave the frozen classic beef burrito for 2 to 3 minutes on 50 percent power just to thaw the center. Then, sear it in a hot skillet with a tiny bit of oil. You’ll get that incredible, toasted tortilla crunch. That sizzle when it hits the pan is pure magic.
If you have an air fryer, thaw it in the microwave first, then air fry at 375°F for 5 to 7 minutes. It gets incredibly crispy all the way around. For the oven method, keep it wrapped in foil and bake at 350°F for 35 to 40 minutes. The foil gently steams the inside while the outside slowly crisps. Pull it now and let carryover do the work. Let it rest for 5 minutes before slicing.
Frequently Asked Questions
Wrapping It All Up
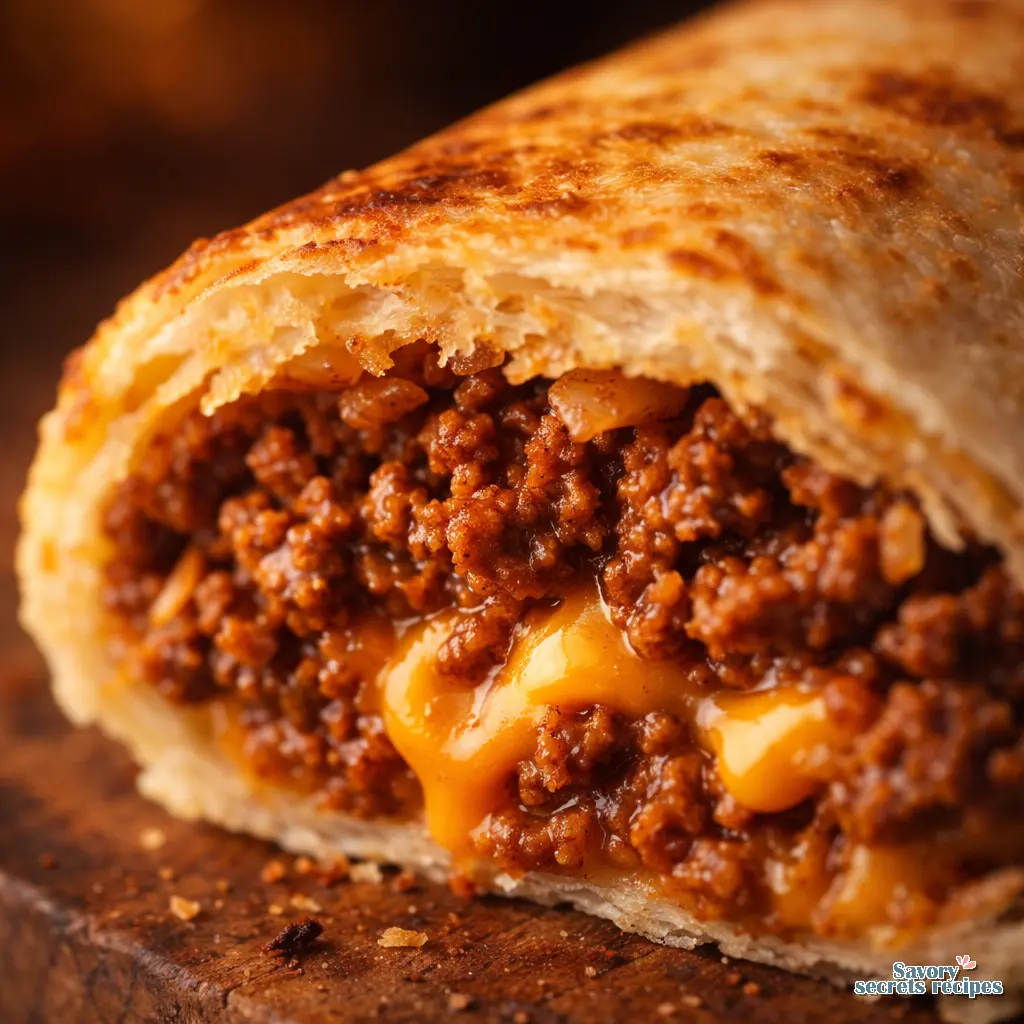
There you have it. A classic beef burrito that easily rivals your favorite neighborhood taqueria. When you slice it open, let that steam rise, and hit it with a dollop of sour cream and a squeeze of fresh lime juice. The color, the smell, the crunch, it’s all there. Take a quick photo before you devour it, because they won’t last long on the plate. Your family is going to love this new Friday night tradition. For more fire-cooking inspiration and meal prep ideas, check out my Pinterest boards where I save all my favorites. Let me know what your favorite extra filling is in the comments below. Keep those fires burning!
Reference: Original Source
What is the best seasoning for homemade beef burritos?
Skip the store-bought packets. I blend cumin, chili powder, garlic powder, onion powder, salt, and black pepper. It gives your classic beef burrito a deep, authentic flavor without the extra sodium and preservatives. Toasting the spices in the pan with the beef wakes them right up.
How to fold a burrito so it doesn’t fall apart while eating?
Warm your tortilla first so it’s pliable. Don’t overstuff it. Fold the sides in, bring the bottom up and over the filling, tuck it tightly under the ingredients, and roll firmly. Searing the seam-side down in a skillet seals it completely.
What are the essential ingredients in a classic beef burrito?
You need lean ground beef, a robust taco seasoning, Mexican rice, refried or black beans, and a good melting cheese like Monterey Jack. I also like adding a crunch factor like crushed Doritos inside, but that’s totally optional.
How to make a classic beef burrito at home that stays crispy?
The secret is moisture control and the final sear. Cool your filling before assembling. Once rolled, toast the burrito in a hot skillet with a tiny bit of oil. It creates a golden crust that resists getting soggy, even if it sits for a few minutes.
Can you freeze this homemade burrito recipe for meal prep?
Absolutely. This classic beef burrito is designed for the freezer. Leave out wet ingredients like fresh tomatoes or lettuce. Wrap tightly in plastic wrap, then foil. They’ll keep perfectly for up to 3 months. Thaw in the microwave, then crisp in a pan.


