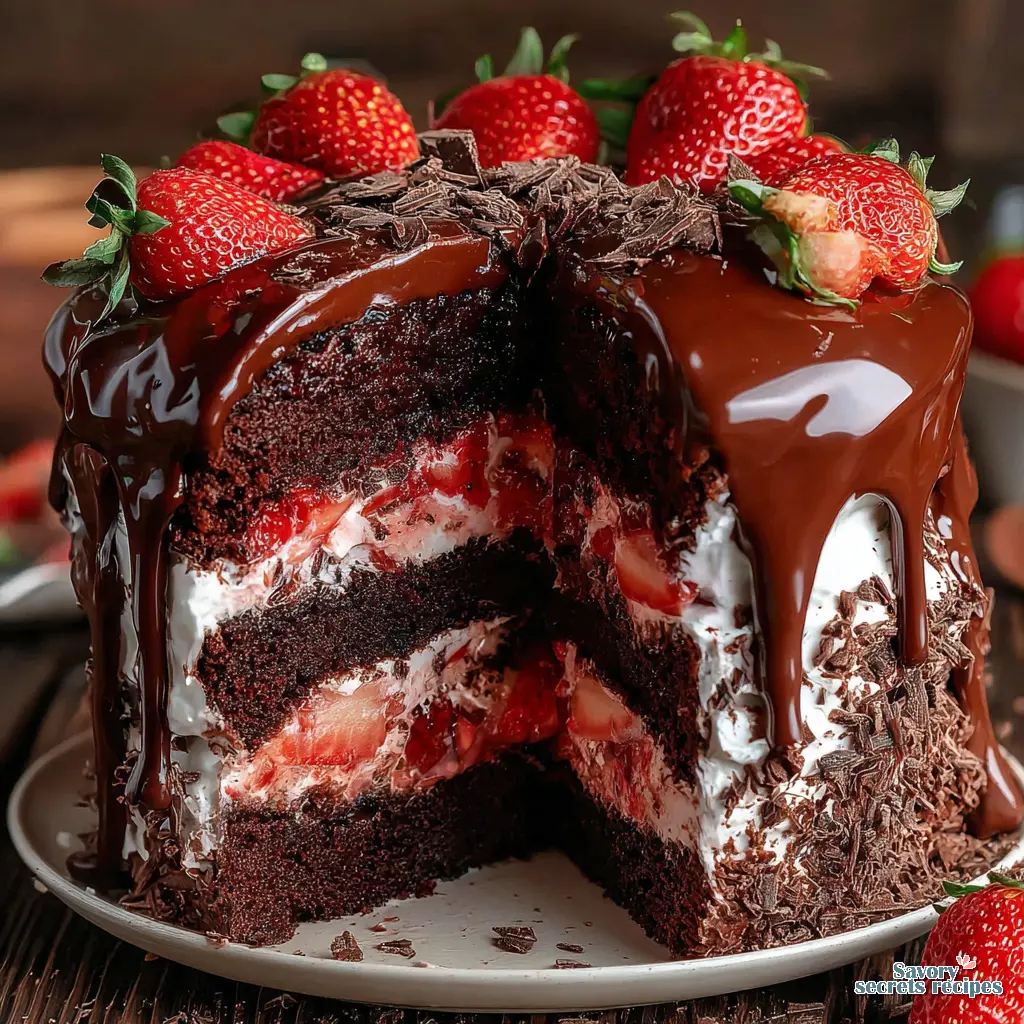
Strawberry Chocolate Drip Cake Recipe
Ingredients
Method
- Preheat the oven to 175°C (350°F). Grease and line three 8-inch round cake pans.
- Sift together flour, cocoa powder, baking powder, baking soda, and salt in a bowl.
- Whisk sugar, eggs, buttermilk, oil, and vanilla in a separate bowl. Gradually add the dry ingredients to the wet ingredients, mixing gently.
- Add the hot coffee last, mixing until smooth.
- Divide the batter evenly between the pans.
- Bake for 25–30 minutes, or until a toothpick inserted into the center comes out clean.
- Cool completely.
- Combine chopped strawberries, 3 tablespoons of sugar, and lemon juice in a saucepan.
- Cook over medium heat until the berries soften and release their juice.
- Mix cornstarch with water to create a slurry. Stir it into the strawberry mixture and cook until thickened, about 1–2 minutes.
- Cool completely.
- Beat 250g of butter until creamy.
- Gradually add powdered sugar, then 3 tablespoons of strawberry puree and vanilla.
- Add 2–3 tablespoons of cream or milk as needed to reach a spreadable consistency. Beat until light and fluffy.
- Place one cake layer on a serving plate. Spread a layer of strawberry filling, then a layer of strawberry buttercream.
- Repeat with the second layer.
- Top with the third cake layer and frost the entire cake with the remaining buttercream. Smooth the sides and top.
- Heat 150ml of heavy cream until just simmering.
- Pour over 150g of chopped dark chocolate. Let it sit for 2 minutes, then stir until smooth and glossy.
- Let cool slightly until thick but still pourable.
- Carefully drip ganache around the edges of the chilled cake using a spoon or squeeze bottle.
- Pour the remaining ganache on top and spread gently.
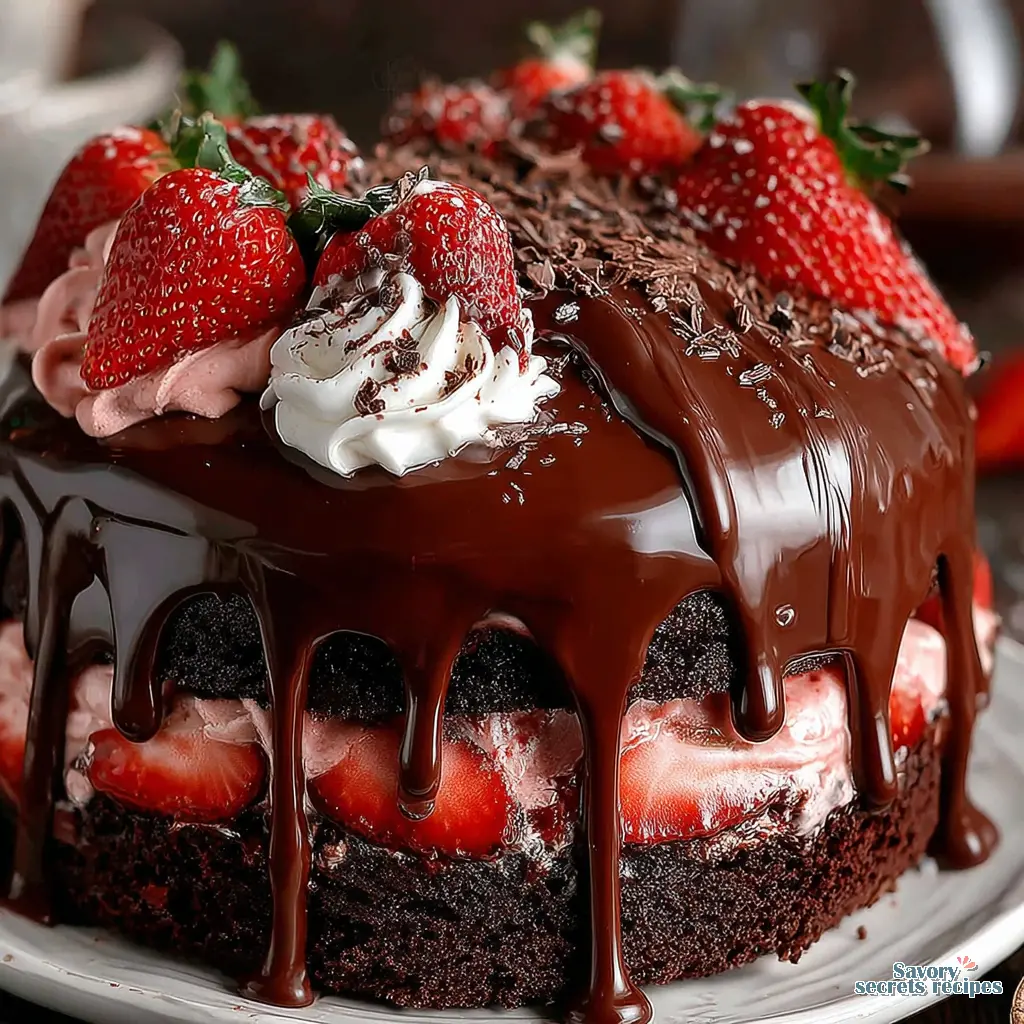
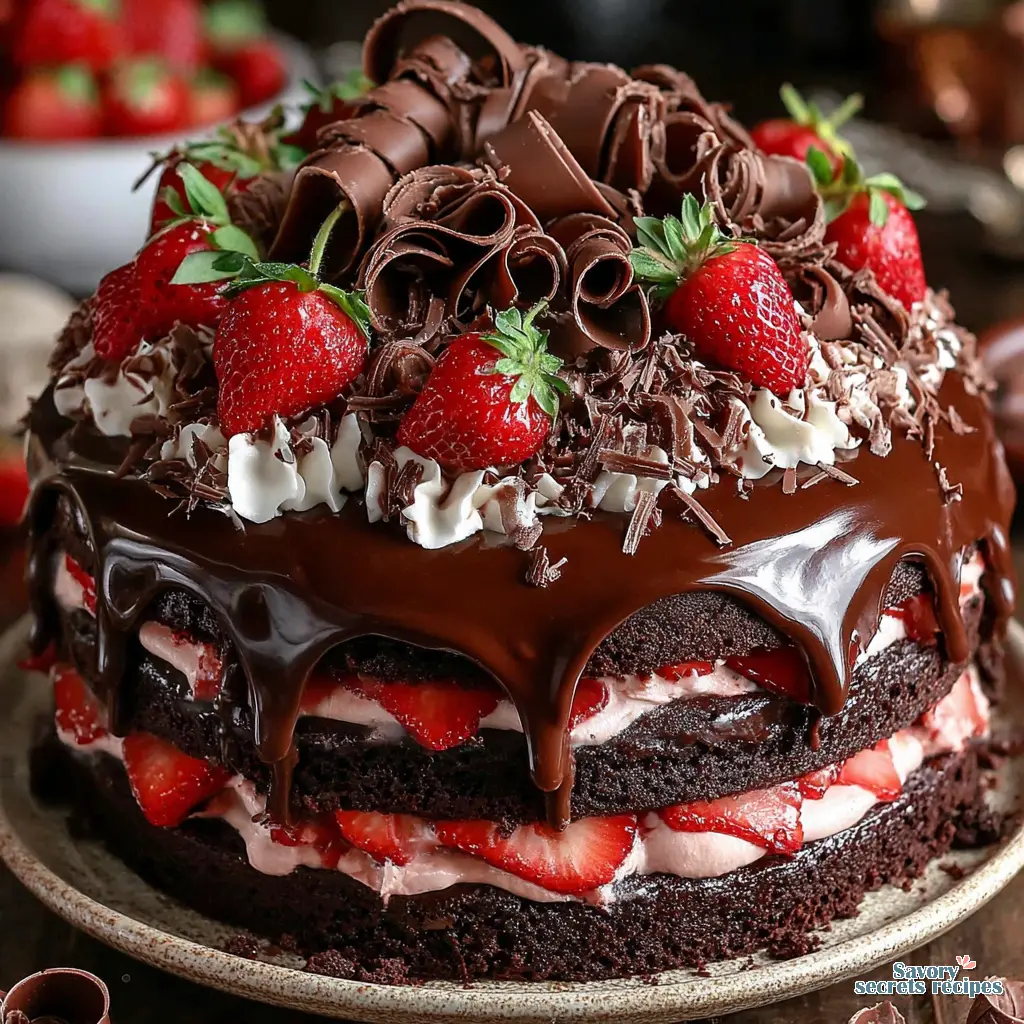
- Top with fresh strawberries and chocolate curls.
- Chill the cake to set the ganache before serving.
Nutrition
Notes
Why You’ll Love This Chocolate Strawberry Drip Cake
Okay, let’s be honest. The first time I tried to make a drip cake, it was a mess. The ganache was too thick and clumpy, the drip looked like a sad little icicle, and I was so frustrated I nearly gave up on cake decorating altogether. I remember that feeling, standing in my kitchen in Astoria, staring at what was supposed to be a birthday surprise. That tracks with what I’ve seen from so many home bakers. You want that stunning, glossy chocolate strawberry drip cake you see all over Pinterest, but the technique feels like a secret you’re not in on.
Let me walk you through this. This recipe is about demystifying that process. We’re going to build a rich chocolate cake that stays incredibly moist, layer it with a fresh strawberry filling that actually tastes like berries, and top it all with a chocolate ganache drip that looks professional. The best part? It’s built on principles, not magic. When you understand why the ganache needs to be a specific temperature, or why we chill the cake before the drip, the whole thing becomes so much less intimidating. This is the part I love, taking a seemingly complex dessert and breaking it down into manageable, foolproof steps.
The Foundation: A Deeply Moist Chocolate Cake
Everything starts with the cake layers. If they’re dry or crumbly, no amount of beautiful frosting can save it. I’m keeping an eye on two things here: moisture and structure. The buttermilk and oil in this recipe are doing the heavy lifting for tenderness. But the real secret? Blooming the cocoa powder.
You see, cocoa is a dry powder. When you mix it with the hot coffee (or water), you’re giving it a chance to hydrate properly before it goes into the batter. This unlocks a deeper, richer chocolate flavor and ensures the cocoa blends smoothly without any dry, bitter pockets. That’s the sweet spot. Don’t skip the sifting, either. Cocoa loves to clump, and a few seconds with a sifter makes all the difference for that velvety batter texture.
And about those eggs. I know it’s an extra step, but try to remember to set them out ahead of time. Room temperature eggs incorporate so much more easily into the batter, creating a smoother, more cohesive mix. If you forget, no panic. Just place them in a bowl of warm water for about 10 minutes. Your mileage may vary depending on your kitchen’s temperature, but this little trick usually works for me.
Crafting the Perfect Strawberry Layer
For the filling, we’re using fresh strawberries. In my experience, though yours might differ, frozen berries can make the filling too watery unless you’re very careful about draining them. For the best flavor, look for ripe, fragrant strawberries at your local Ralphs or farmers’ market. Spring is the perfect time for this in LA.
The process is simple: cook down chopped berries with a bit of sugar and lemon juice until they break down. The cornstarch slurry is our thickener. You’re looking for that ribbon stage when you drag a spoon through the pot and it leaves a clear path for a second before filling in. This needs time to cool completely before using it, or it’ll melt your frosting and make the layers slide. I tend to make this component first so it has plenty of time to set up while I bake the cakes.
Want even more fresh berry flavor? Here’s a pro tip: after you spread the frosting on your cake layer, you can lay a single layer of thinly sliced fresh strawberries on top before adding the cooked filling. It gives this incredible burst of texture and bright flavor. Just pat them dry first.
Mastering the Glossy Chocolate Ganache Drip
This is where most of the anxiety lives, right? Getting that perfect, glossy drip that elegantly trails down the sides without pooling at the bottom. Let’s troubleshoot together before we even start. The number one rule: your frosted cake must be cold. I’m talking at least 30 minutes in the fridge, maybe more if your kitchen is warm. A chilled cake sets the ganache quickly, so it stops where you want it to.
Now, the ganache itself. Equal parts by weight of finely chopped dark chocolate and hot heavy cream. Temperature is doing the heavy lifting here. The cream should be hot enough to melt the chocolate completely, but not boiling violently. I heat mine until I see small bubbles just starting to form around the edges of the saucepan. Pour it over the chocolate, let it sit for a minute to settle, then stir gently until it’s perfectly smooth and glossy.
This next part is crucial. The ganache needs to cool to a specific consistency. Too warm, and it’ll run right off the cake. Too cool, and it’ll be a thick, un-pourable blob. Right in that window is when it coats the back of a spoon but still drips off in a smooth ribbon. Test it on the side of your bowl first. Give it a minute to settle between tests. This is what works in my kitchen: usually about 10-15 minutes of cooling at room temperature does the trick.
Step-by-Step Assembly for a Flawless Finish
First, level your cakes if they have a dome. A simple serrated knife works perfectly. If you want perfectly even layers from the start, use damp cake strips around your pans. They’re a game-changer for avoiding the dome altogether.
Place your first layer on a cake board or plate. I like to pipe a small dam of frosting around the edge. This creates a little wall to hold the strawberry filling in place and prevent it from squishing out the sides when you stack the next layer. Spread your cooled strawberry filling inside that dam. Add the next cake layer and repeat, then give the whole cake a thin crumb coat of frosting. Chill it. This initial chill sets everything and makes the final frosting coat so much cleaner.
After the final frosting coat, chill again. Seriously, don’t rush this. A cold cake is your best friend for the drip. Apply the ganache drip using a spoon or a small squeeze bottle, starting at the edges and letting gravity do its work. Then, pour the remaining ganache on top and spread it gently to the edges with an offset spatula. The texture should read smooth when you drag a spoon through it.
Now for the fun part. Decorate with fresh strawberries, chocolate shavings, or whatever you like. That texture is exactly what we’re after. It’s so satisfying when it comes together.
Common Chocolate Strawberry Drip Cake Mistakes & Fixes
Mistake: The ganache drip is too runny and pools at the bottom.
Solution: Your cake wasn’t cold enough, or the ganache was too warm. Pop the cake back in the fridge for 20 minutes and let the ganache cool a bit longer before trying again.
Mistake: The ganache is too thick and won’t drip.
Solution: Gently re-warm it with a 5-second burst in the microwave, or add a tiny splash of warm cream and stir until it loosens up. Add the cream 1 tablespoon at a time.
Mistake: The strawberry filling makes the cake layers soggy.
Solution: Ensure the filling is completely cool before assembly. That frosting dam is also critical for containing the moisture.
Mistake: The cake layers are dry.
Solution: Don’t overmix the batter, and don’t overbake. Use the toothpick test – a few moist crumbs are perfect. Also, fluff your flour with a spoon before spooning it into your measuring cup and leveling it off.
Storage, Make-Ahead, and Serving Your Masterpiece
Because of the fresh fruit and dairy-based frosting, this chocolate strawberry drip cake needs to be refrigerated. Cover it tightly with a cake dome or loosely with plastic wrap (use toothpicks to keep the wrap from touching the frosting). It’ll stay fresh for up to 4 days.
You can absolutely make components ahead. The baked cake layers can be wrapped tightly in plastic and frozen for up to 2 months. Thaw in the fridge overnight. The strawberry buttercream can be made and refrigerated for up to two weeks. Just let it come to room temperature and re-whip it before using. The ganache can also be made ahead and stored in the fridge; gently re-warm it to get back to a drippable consistency.
To serve, let the cake sit out at room temperature for about 20-30 minutes before slicing. This takes the chill off the frosting and makes it easier to cut through those beautiful layers. Use a sharp knife dipped in hot water for the cleanest slices.
Frequently Asked Questions
Your Showstopper Awaits
When you present this chocolate strawberry drip cake, that first moment of silence followed by the “wow” is everything. It’s the thrill of transforming flour, sugar, and berries into something that feels like a celebration. This recipe is more than a list of steps; it’s a set of principles that will give you the confidence to tackle not just this cake, but any layered dessert that comes your way.
Now we’re getting somewhere. You’ve got this. I’d love to see your beautiful creations. For more inspiration and baking tips, you can always check out my Pinterest boards. Happy baking!
Source: Nutritional Information
Can I use frozen strawberries for the chocolate strawberry drip cake filling?
You can, but you need to be careful. Thaw them completely and drain the excess liquid very well, even patting them dry. The extra moisture can make your filling too runny. I don’t recommend frozen berries for decorating the top, as they get mushy.
How long does a chocolate strawberry drip cake stay fresh?
Store it covered in the refrigerator for up to 4 days. The ganache and fresh berries mean it needs to be kept cold. For the best texture and flavor, I recommend enjoying it within 2-3 days.
What’s the best way to create even layers for this cake?
Use a kitchen scale to divide the batter evenly between pans. For perfectly flat layers, use damp cake strips. If you get a dome, just use a serrated knife to level the cakes once they’re completely cool. It’s simpler than it looks.
Can I make the chocolate ganache drip with milk chocolate?
Yes, but the consistency will be different. Milk chocolate has more fat and sugar, so your ganache will be sweeter and softer. You might need to use a slightly higher ratio of chocolate to cream to get a drip that sets properly. Test it first.
Does this chocolate strawberry cake need to be refrigerated?
Absolutely, yes. Because of the fresh strawberry filling, buttercream frosting, and ganache, it must be kept covered in the refrigerator. Always let it sit out for a bit before serving to soften slightly.
Can I freeze the assembled drip cake?
You can freeze the frosted cake before adding the drip and fresh berry decorations. Wrap it tightly in several layers of plastic wrap and freeze for up to a month. Thaw in the fridge overnight, then add the ganache and berries fresh.
Can I use freeze-dried strawberries in the frosting?
For a potent berry flavor without extra moisture, yes. Grind about 1 cup of freeze-dried strawberries into a fine powder. Mix 3-4 tablespoons of that powder into your buttercream. You may need to add a touch more cream to compensate for the dry ingredient.
Help! I’m out of buttermilk for the cake.
Don’t stress. Make a quick substitute: add 1 tablespoon of lemon juice or white vinegar to a measuring cup, then fill it to the 1-cup line with regular milk. Give it a stir and let it sit for 5 minutes until it curdles slightly. Now you’ve got homemade buttermilk.
Why is there coffee in the chocolate cake?
The coffee doesn’t make the cake taste like coffee. It just deepens and enriches the chocolate flavor, making it taste more chocolatey. If you’re avoiding caffeine, you can use hot water instead. The blooming effect on the cocoa is what’s important.
Can I make this chocolate strawberry drip cake gluten-free?
I haven’t tested it myself, but a reader told me she had perfect results using a 1:1 gluten-free baking flour blend. Just make sure your blend contains xanthan gum or a similar binder for structure.
Can I make a dairy-free version?
It’s possible with substitutions. Use alternative milk with lemon juice for the buttermilk, dairy-free butter for the frosting, and ensure your chocolate is dairy-free. The texture of the ganache might vary slightly, so do a small test batch first.