


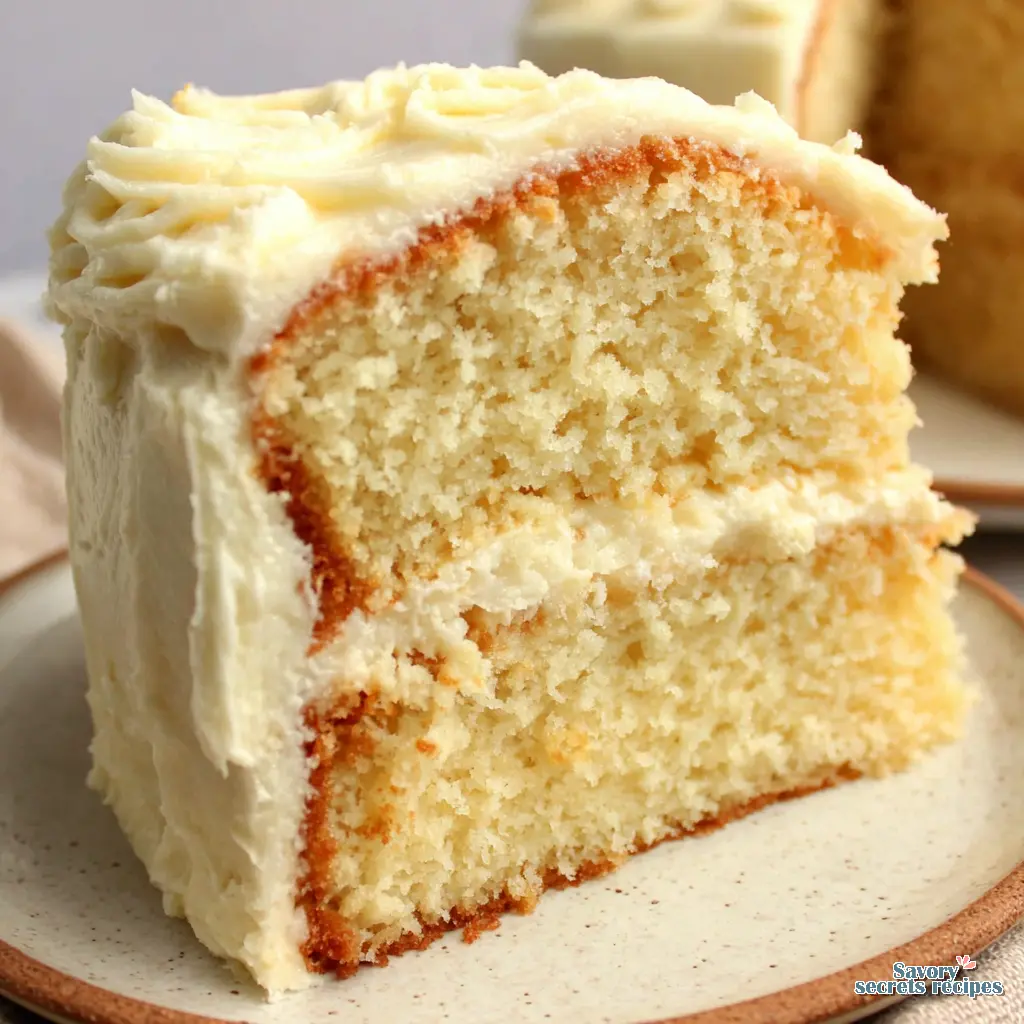
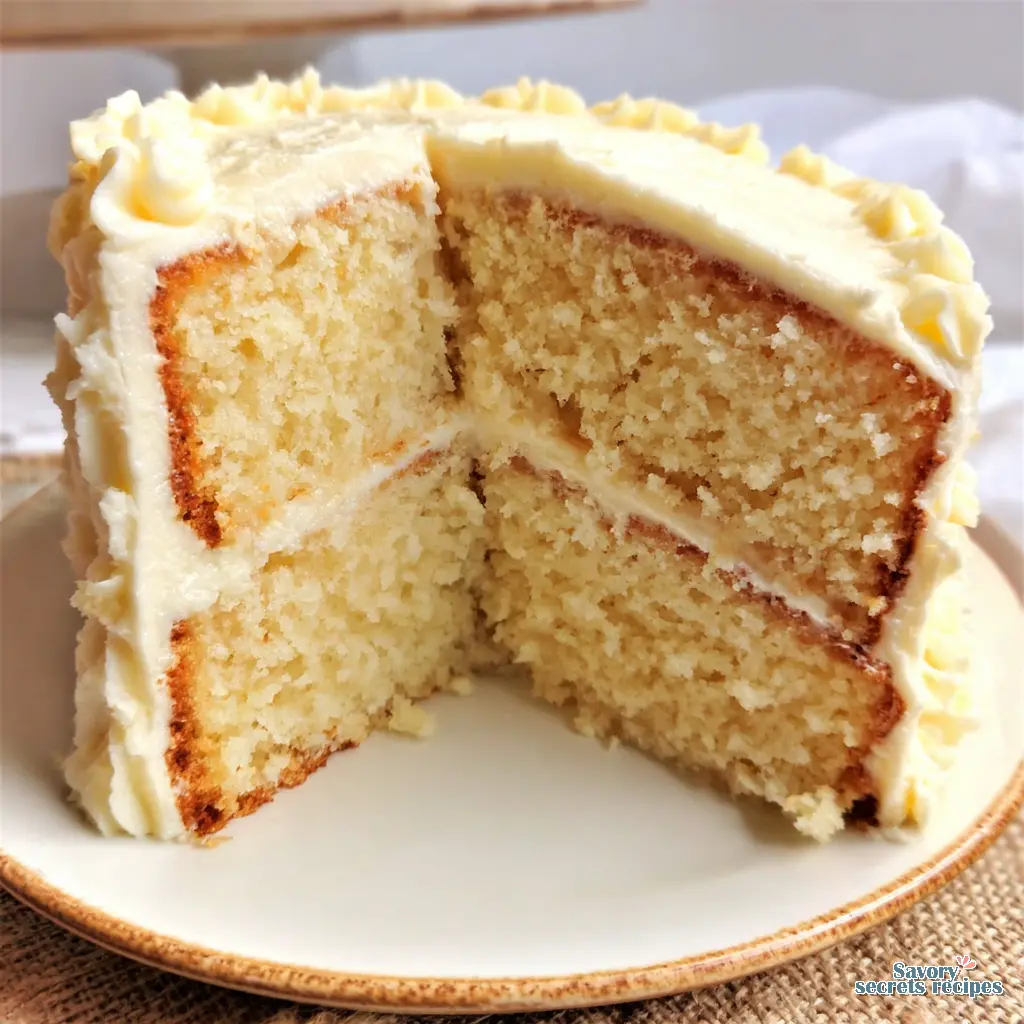
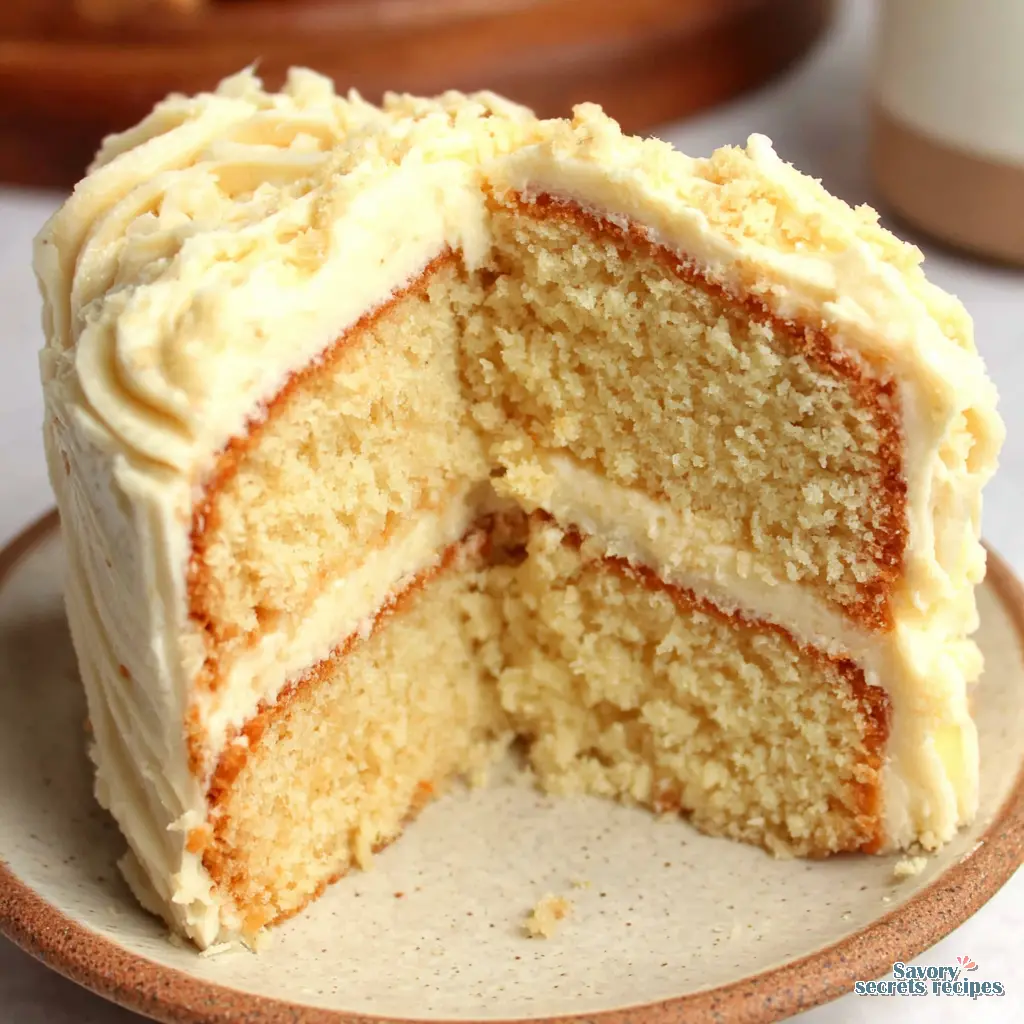
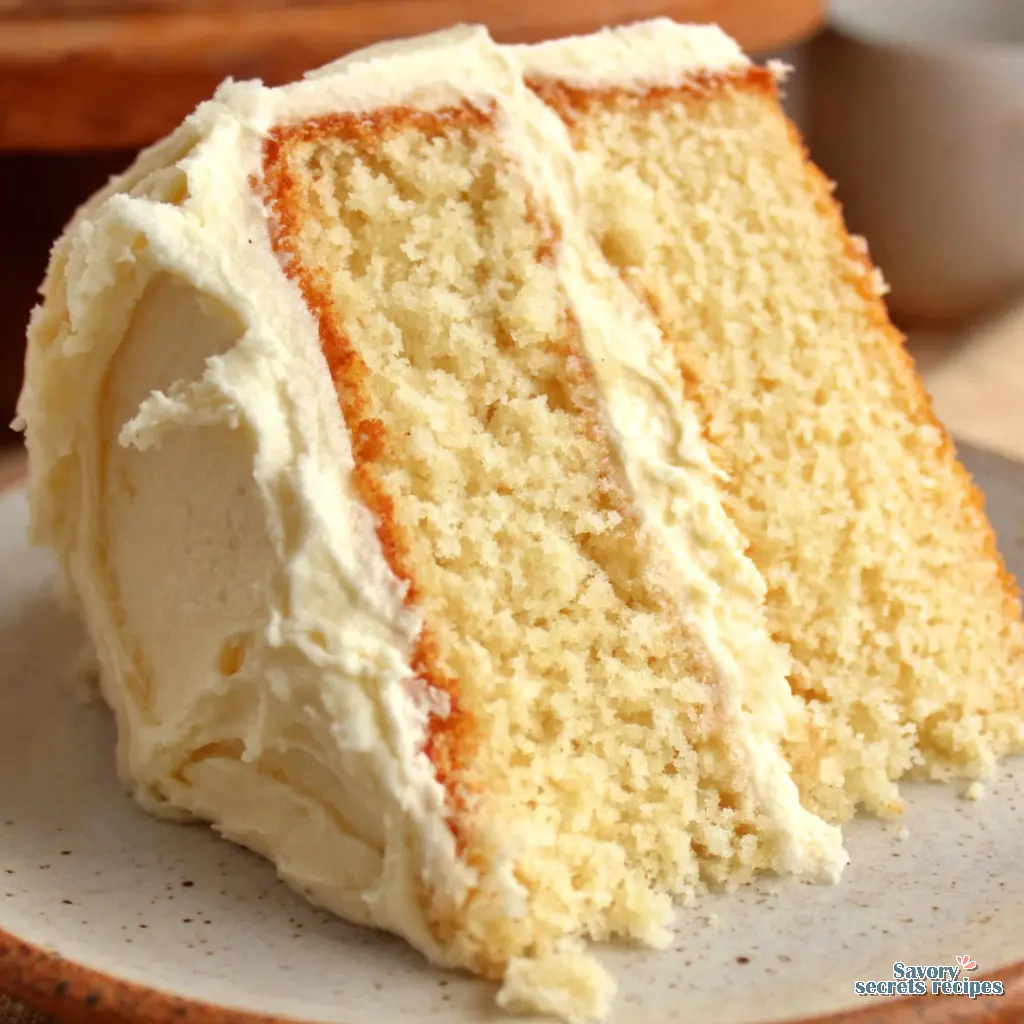
Best Classic Vanilla Cake Recipe for Birthdays
Ingredients
Method
- Preheat oven to 350°F (175°C). Grease and flour two 8-inch round cake pans or line them with parchment paper circles.
- Whisk together the flour, sugar, baking powder, and salt in a large bowl.
- Add softened butter to the dry ingredients and beat with an electric mixer on low speed until the mixture resembles coarse sand.
- Lightly whisk the eggs, milk, and vanilla extract together in a separate bowl.
- Gradually pour half of the wet mixture into the flour mixture while mixing on low speed until just combined, then scrape down the sides of the bowl.
- Add the sour cream and mix briefly until incorporated.
- Pour in the remaining wet mixture and beat on medium speed for approximately 1 minute until the batter is smooth and fluffy, taking care not to overmix.
- Divide the batter evenly between the prepared cake pans.
- Bake for 30 to 35 minutes or until a wooden pick inserted into the center comes out clean.
- Cool the cakes in the pans for 10 minutes, then invert them onto a wire rack to cool completely.
- Level the cooled cake layers if necessary and frost with creamy vanilla buttercream.
Notes
The Quest for the Perfect Classic Vanilla Cake
I remember standing on a step stool in my grandmother’s kitchen in Casablanca. She was heating honey for chebakia, showing me how it should form a soft ball in cold water. I burned myself twice trying to test it before I learned patience. That is still exactly how I think about baking. Temperature is doing the heavy lifting here. That same lesson applies perfectly to baking a classic vanilla cake.
You want to know how to make a moist vanilla layer cake from scratch that actually stays moist. I totally get it. So many times we bake a beautiful dessert, only to cut into a dry, crumbly mess right before a party. It’s incredibly frustrating. Well, let me walk you through this. We’re going to solve the dry cake problem today. Whether you’re planning a birthday cake for a loved one or looking for the ultimate Easter dessert, this classic vanilla cake is the reliable, show-stopping base you need. The smell of vanilla filling the home is just pure magic. Perfect. Let’s get started.
The Science of the Velvet Crumb
Why does this classic vanilla cake work so well? It comes down to a specific technique. We’re using a hot milk method combined with a touch of buttermilk. I know this sounds a bit fussy, but trust me on this. The hot milk and unsalted butter mixture helps preserve aeration in your eggs. You must use the hot milk immediately. Do not stop once the beating process starts to prevent bubble loss.
I tend to find, but test it yourself, that adding just a bit of buttermilk provides the perfect acidic tang to balance the granated sugar. This combination is what creates that incredibly soft velvet crumb we all want. The texture should read smooth when you drag a spoon through the batter. It’s so satisfying when it comes together. If you are looking for a lighter alternative, a soft vanilla sponge cake offers a different but equally delicious texture.
Temperature and Measurement Tips for Success
Look, I’ll be honest. Room temperature ingredients are absolutely non-negotiable for proper emulsification. If your eggs are cold, warm them in a bowl of warm water for five minutes. If you have a cold kitchen, de-chill your mixing bowls with warm water first. That tracks with what I’ve seen in professional bakeries across Los Angeles. When I do my weekly Trader Joe’s run, I make sure to pull my dairy out the second I get home to let it warm up.
Precision in measuring your cake flour is the number one cause of failure. You must spoon and level your flour. Please don’t scoop directly from the bag. Honestly, use a kitchen scale for precision. It makes everything so much easier. I prefer natural stabilizers and precise weights because the crystals will tell you everything you need to know about your batter’s structure. These precision tips are the secret to any successful homemade vanilla cake recipe.
Visual Batter Troubleshooting Guide
Let’s troubleshoot together. Sometimes your classic vanilla cake batter looks entirely wrong, and panic sets in. If it looks curdled or split, your unsalted butter or eggs were probably too cold. Give it a minute to settle. You’re looking for that ribbon stage where the batter falls back on itself and sits on the surface for a moment. That’s the sweet spot.
Incorporate your egg whites and yolks one at a time for proper emulsification. Fold your dry ingredients by hand to avoid over-mixing. Over-mixing develops gluten and makes your classic vanilla cake tough. I learned this the hard way during a kids baking workshop last summer. We over-mixed a batch, and it came out like bread. Lesson learned.
The Ultimate Vanilla Brand Review
My nephew Omar refuses to eat anything with little dark bits in it. When I make desserts for family gatherings, I usually have to strain out every single vanilla bean seed. But for a classic vanilla cake, those little specks of vanilla bean paste are absolutely beautiful. They tell your guests that this is a premium, from-scratch dessert.
I highly recommend using a high-quality alcohol-free vanilla. Alcohol-free vanilla provides a pure, clean flavor that doesn’t bake off as harshly in the high heat of the oven. If you can’t find paste, a pure extract works, but the paste gives you that gorgeous visual appeal. The aroma alone is worth the slight splurge.
High-Altitude Adjustment Table
I know many of you baking this classic vanilla cake live well above sea level. In my experience, though yours might differ, high altitude requires a few specific tweaks to prevent your cake from collapsing. Increase your oven temperature by 15 to 25 degrees Fahrenheit. This sets the structure faster.
You’ll also want to decrease your baking powder slightly. Ensure your baking powder is fresh and active before you even start. Finally, add a couple of tablespoons of extra whole milk to keep the batter hydrated in the drier mountain air. This needs time to hydrate properly, so let the batter sit for just a minute before panning. This hydration technique is also vital when making a soft vanilla sponge cake at high elevations.
Make-Ahead Celebration Timeline
Can you bake this best classic vanilla cake recipe for birthdays a day in advance? Yes, absolutely. In fact, I prefer it. Breaking up the work takes the stress out of entertaining.
Day 1: Bake your classic vanilla cake layers in pans lined with parchment paper. Bang the cake pans on the counter before baking to remove large air bubbles. Cool the layers completely on a wire rack before frosting to prevent melting. Wrap them tightly in plastic wrap and store them at room temperature.
Day 2: Make your cream cheese frosting. Do a quick crumb coat to lock in the moisture. The smooth glide of the spatula during the crumb coat is honestly my favorite part. Chill the cake in the fridge to set.
Day 3: Apply your final layer of frosting using an offset spatula and a rotating cake stand. Refrigerate the decorated cake for one hour to set the crumbs for clean slicing. The pride of that first clean slice is unbeatable.
Common Mistakes & Fixes
Mistake: Using cold eggs or dairy.
Solution: This breaks the emulsification and leads to a dense cake. Always bring ingredients to room temperature. Warm eggs in water for 5 minutes if you are in a rush.
Mistake: Scooping flour directly with a measuring cup.
Solution: This packs the flour and guarantees a dry cake. Always spoon and level your flour, or better yet, use a kitchen scale.
Mistake: Over-baking by even just a few minutes.
Solution: Check your classic vanilla cake early. Pull the cake when moist crumbs are attached to the toothpick, not when the toothpick is bone dry.
Mistake: Frosting a semi-warm cake.
Solution: This melts the frosting and collapses the layers. Cool your layers completely on a wire rack before even thinking about adding frosting.
Storage and Freezing Guide
I’m keeping an eye on how long these cakes last because nobody wants to waste good ingredients. A fully frosted classic vanilla cake can be stored at room temperature in an airtight container for 2 to 4 days. The frosting actually acts as a seal to keep the moisture locked inside the velvet crumb.
If you need to keep it longer, store it in the fridge for up to 5 days. Just remember to bring it back to room temperature before serving for the best texture. For long-term storage, unfrosted layers can be wrapped tightly in plastic wrap and aluminum foil, then frozen for up to 3 months. Let them thaw at room temperature before you begin decorating. If you have leftover frosted slices, wrap them individually so you can grab a quick treat whenever the craving hits. Keeping these storage tips in mind will ensure your easy vanilla dessert remains fresh for days.
Frequently Asked Questions
Bringing It All Together
There’s nothing quite like the moment you pull a perfectly baked classic vanilla cake from the oven. It reminds me of those Friday afternoons in my grandmother’s kitchen, where everything felt possible and smelled amazing. I know getting the texture right can feel intimidating, but once you understand how the temperature and ingredients interact, you’ll be baking this on repeat. Serve it with some fresh strawberries from the farmers market or just a simple dusting of confectioners sugar.
I love when readers send me photos of their bakes with perfect texture. It means the instructions were clear enough, and that makes everything worthwhile. For more inspiration and variations, check out my Pinterest boards where I save all my favorite decorating ideas. Happy baking, and enjoy every single bite of that beautiful cake!
Reference: Original Source
What is a room temperature egg?
A room temperature egg feels neutral to the touch, not cold. It usually takes about 30 to 45 minutes on the counter. If you’re in a rush, just submerge cold eggs in a bowl of warm water for five minutes. This ensures your classic vanilla cake batter emulsifies perfectly.
Why is vanilla cake so hard to get right?
It’s because vanilla leaves no place to hide. Unlike chocolate, which masks imperfections, a classic vanilla cake relies entirely on the precise balance of fat, sugar, and flour. Temperature control and careful measuring are what separate a dense cake from a fluffy, bakery-style masterpiece.
Why is my vanilla cake dry?
Dryness usually comes from over-measuring your flour or over-baking the cake. Scooping flour packs it down, adding way too much to the bowl. Always spoon and level. Also, pull your cake out when a toothpick comes out with a few moist crumbs, not completely dry.
How can I convert this recipe to different pan sizes?
This classic vanilla cake is versatile. For vanilla cupcakes, bake for 17 to 18 minutes. For a 9×13 sheet cake, bake for about 30 minutes. If you use a bundt pan, expect it to take 40 to 60 minutes. Just keep an eye on it and test the center.
Can I make this classic vanilla cake in advance?
Absolutely. I actually prefer it. You can bake the layers a day ahead, wrap them tightly in plastic, and leave them at room temperature. Frosting a slightly chilled, rested cake is much easier and results in fewer crumbs pulling up into your offset spatula.
Can I get measurements by weight/grams?
Yes, and I strongly encourage it. Using a kitchen scale to measure your cake flour and sugar in grams is the best way to guarantee a perfect velvet crumb every single time. It takes the guesswork out of the process completely.
What if I don’t have buttermilk?
Don’t panic. You can make a quick DIY buttermilk. Just add one tablespoon of fresh lemon juice or white vinegar to a measuring cup, then fill the rest with whole milk to reach the required amount. Let it sit for 10 minutes to curdle before using it in your classic vanilla cake.


