


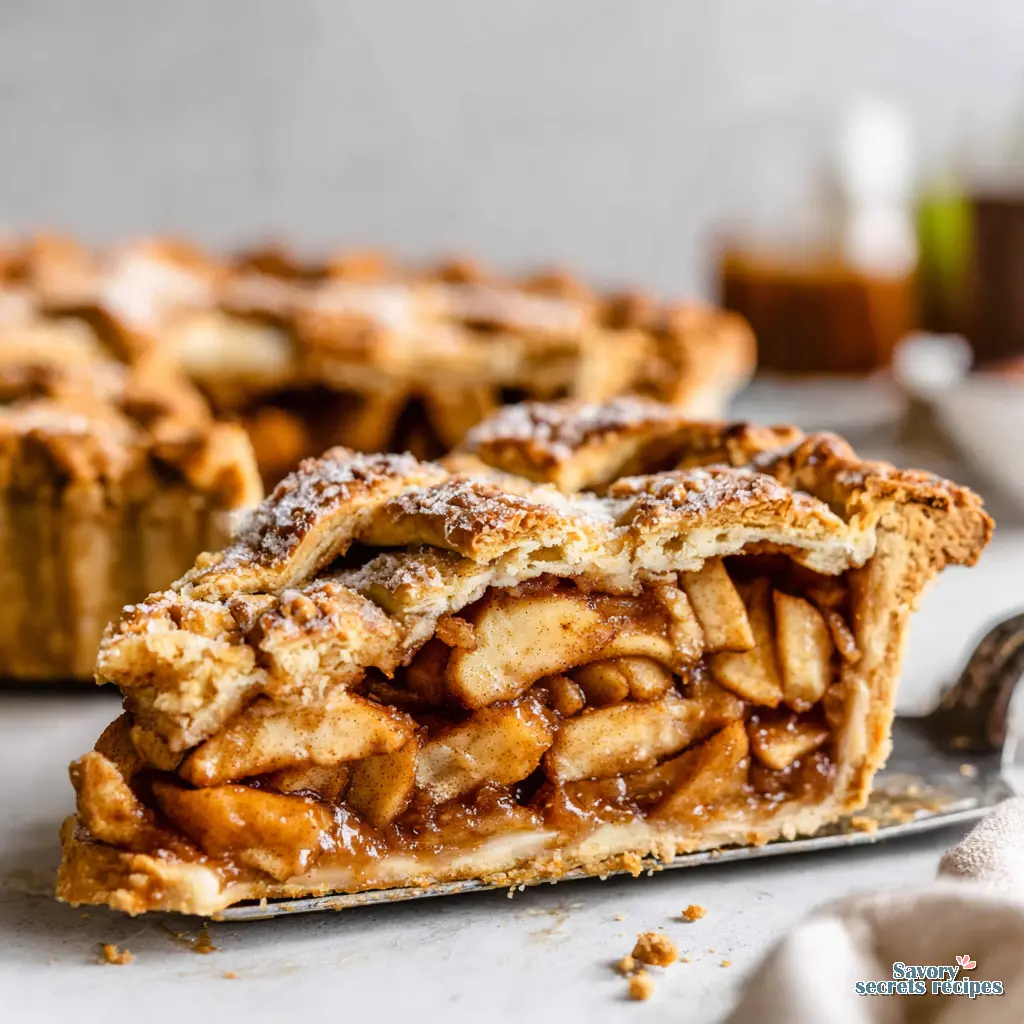
Traditional American Apple Pie Recipe with Lattice Top
Ingredients
Method
- Combine the all-purpose flour, sugar, and salt in a large bowl.
- Add the cubed cold butter to the flour mixture.
- Pinch the butter into the dry ingredients until the mixture consists of half tiny pieces and half medium-sized pieces.
- Add water and knead the dough by hand just until it comes together, ensuring visible butter spots remain.
- Wrap the dough in plastic and refrigerate for 30 minutes to 2 days, or freeze for up to 2 months.
- Peel, core, and cut the apples into 5mm slices and place them in a large bowl.
- Cook the apple slices and filling ingredients in a saucepan over medium heat until the liquid thickens to a honey-like consistency.
- Remove the apples from the heat and allow them to cool completely before assembling the pie.
- Reserve one-third of the dough for the lattice and roll out the remaining dough on a floured surface to a 3mm thickness.
- Transfer the dough to the pan, press it into the corners, and leave the excess dough untrimmed.
- Dust the base of the crust with almond flour and add the apple filling.
- Roll the reserved dough to a 2mm thickness and cut it into 2cm (2/3-inch) strips.
- Lay the strips across the pie in one direction, spaced 1cm (1/2-inch) apart.
- Fold every other strip back halfway, place a perpendicular strip across them, and unfold the strips.
- Continue weaving the lattice by alternating the folded strips for both halves of the pie.
- Trim the excess dough to leave a 1cm (1/3-inch) overhang.
- Fold the overhanging dough underneath itself to create a thickened edge.
- Crimp the edges by pinching the dough between your thumb and index finger while pressing from the inside with your other hand.
- Brush the lattice and edges with an egg wash, taking care to avoid the filling.
- Sprinkle brown sugar over the top of the pie.
- Cover the edges with foil and bake at 180°C (350°F) for 30 minutes, then remove the foil and bake for another 30 minutes until golden.
- Cool the pie on a wire rack until it reaches a warm serving temperature.
- Remove the pie from the pan and transfer it to a serving dish.
- Serve a slice of the apple pie with a large scoop of vanilla ice cream.
Notes
The Anatomy of a Clean Read
I remember my grandmother Elaine arranging apricots from her Pasadena backyard on a plain white plate. She would turn each piece slightly, moving one apricot just a fraction of an inch. I was maybe seven at the time. I asked her why she was doing it. She told me it was so my eye would know exactly where to land. I think about that every single time I style a shoot. A great homemade apple pie recipe is exactly like that plate of apricots. It needs a clean read.
With Easter right around the corner, this is the only dessert you really need to focus on. Spring in Los Angeles means we are finally getting some incredible produce at the Santa Monica Farmers Market, but there is still a slight chill in the evening air. It is actually cold enough to have the oven on for a couple of hours. That smell of cinnamon and butter filling the house takes me right back to Elaine’s kitchen. For a simpler version of these nostalgic flavors, you might also enjoy an easy baked apple pie.
I know pastry dough terrifies a lot of people. I’m not totally sure why we decided pie is supposed to be stressful, but I promise you it isn’t. This homemade apple pie recipe is designed to give you that gorgeous, golden-hued, cinnamon-spiked result without the panic. We are going to build in layers. By the time you pull that pie plate out of the oven, you’ll have perfectly buttery shards of crust and a filling that actually holds its shape on the fork. That’s the one.
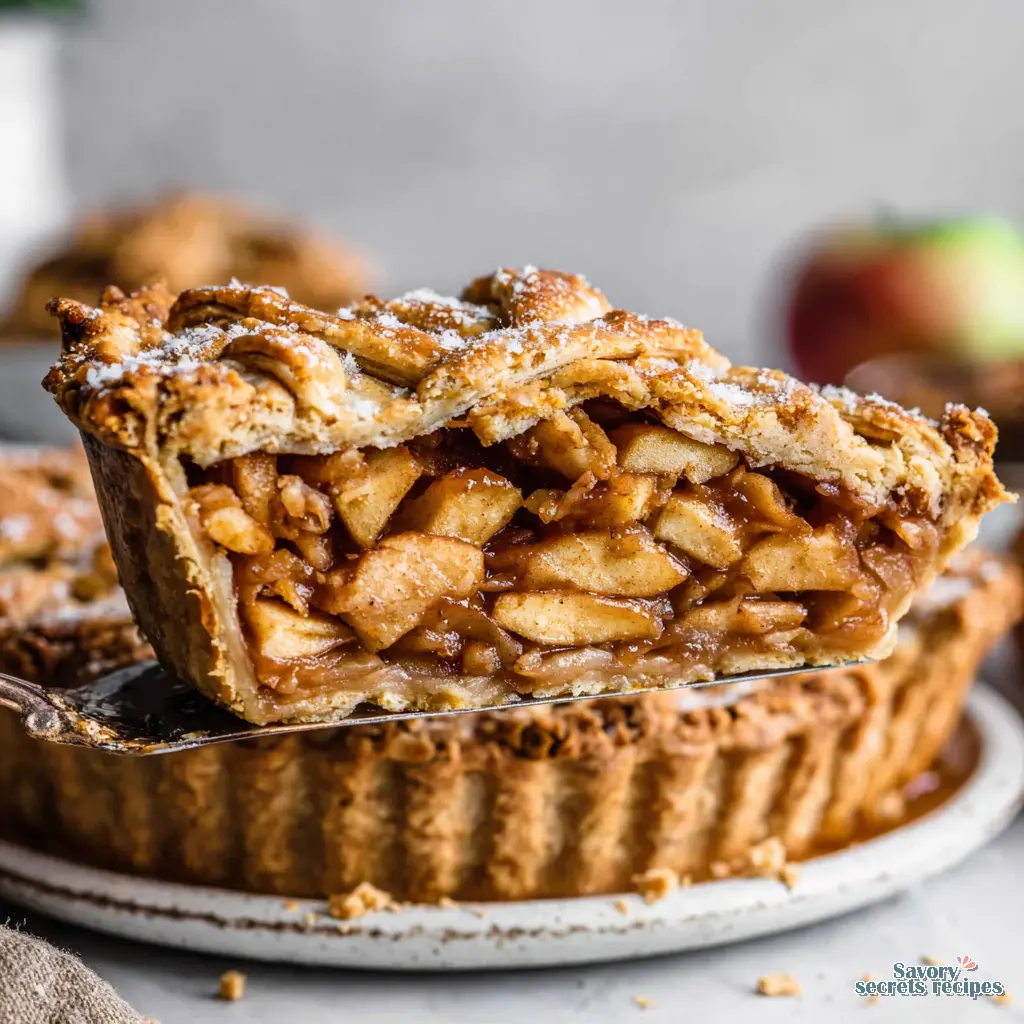
The Apple Flavor Map: Tart vs. Sweet
In food photography, I prefer vegetables and fruits that keep their structure. Nothing that wilts or turns to mush between styling and shooting. The same rule applies to the best apples for homemade apple pie filling. You want apples that hold their shape under high heat. Let me see it hold up on the plate.
I always compare a few different approaches before settling on a final recipe. When you are building a homemade apple pie recipe, you have three main options for your fruit.
Option 1: The All-Tart Approach. Using 100% Granny Smith apples gives you incredible structure. They do not break down into applesauce in the oven. The tradeoff is that they lack complex sweetness. You will need to bump up the sugar slightly.
Option 2: The All-Sweet Approach. Using varieties like Gala or Golden Delicious. I honestly do not recommend this. They photograph flat, and they taste flat. They also tend to get overly soft. Too muddy.
Option 3: The Blended Approach. This is my absolute favorite method. Mix Granny Smith for structure and tartness with Honeycrisp or Pink Lady for natural sweetness and a slight floral note. It gives you perfect contrast. Just grab your apple corer, slice them into thin, uniform pieces for even baking, and toss them in a little lemon juice to prevent browning while you work.
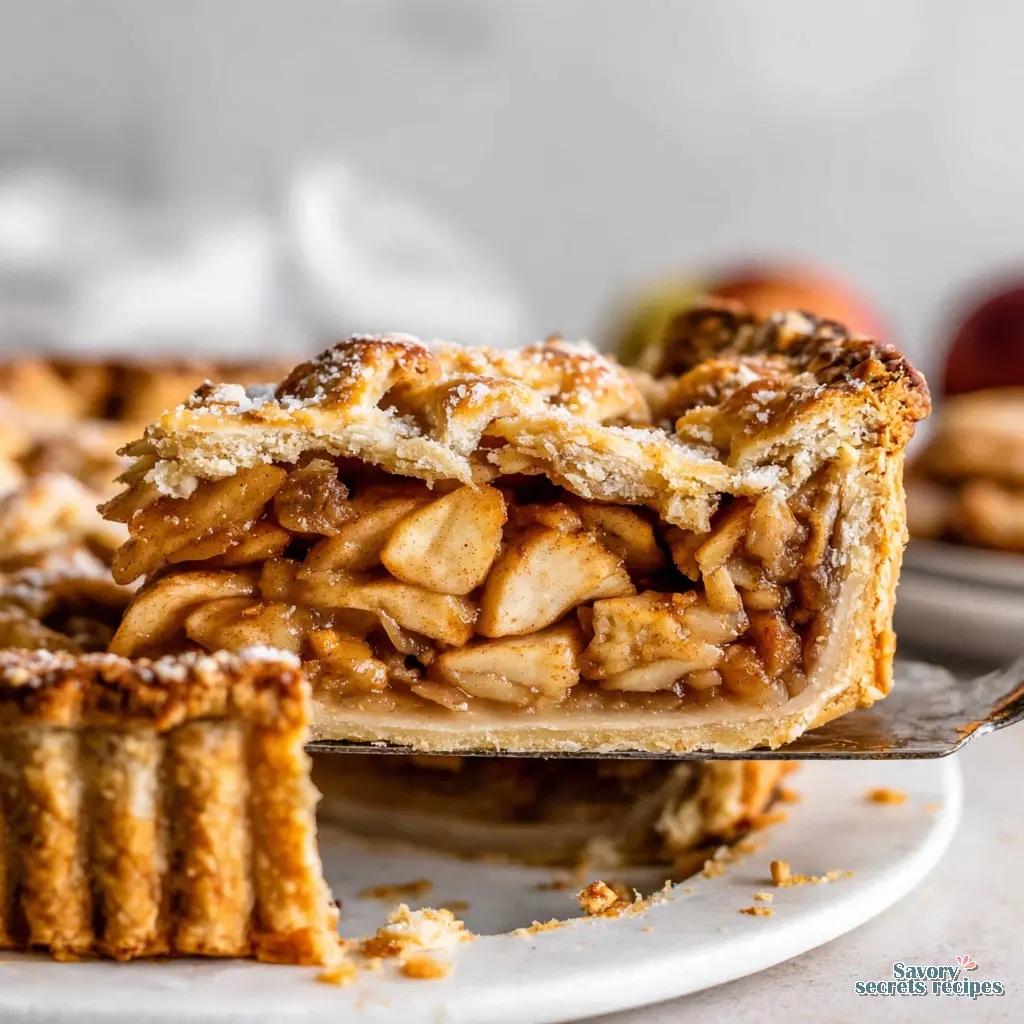
Building the Perfect Flaky Crust
If you want to know how to make apple pie crust from scratch with butter, you only need to remember one rule. Cold is key. If your butter gets warm, your crust will bake flat and tough. We want flaky layers that shatter when your fork hits them.
Start with very cold unsalted butter and all-purpose flour. Use a pastry blender to cut the butter into the flour until you see pea-sized chunks. Do not overwork it. Those little pockets of butter are going to melt in the hot oven, creating steam. That steam pushes the layers of flour apart. That is exactly how you get flakiness.
Add ice-cold water just a drizzle at a time. If the dough doesn’t hold together when you squeeze a handful, add a tiny bit more water. Once it comes together, wrap it and chill the crust thoroughly. This prevents the butter from melting before it hits the oven. Your mileage may vary depending on how warm your kitchen is, but a good hour in the fridge is mandatory.
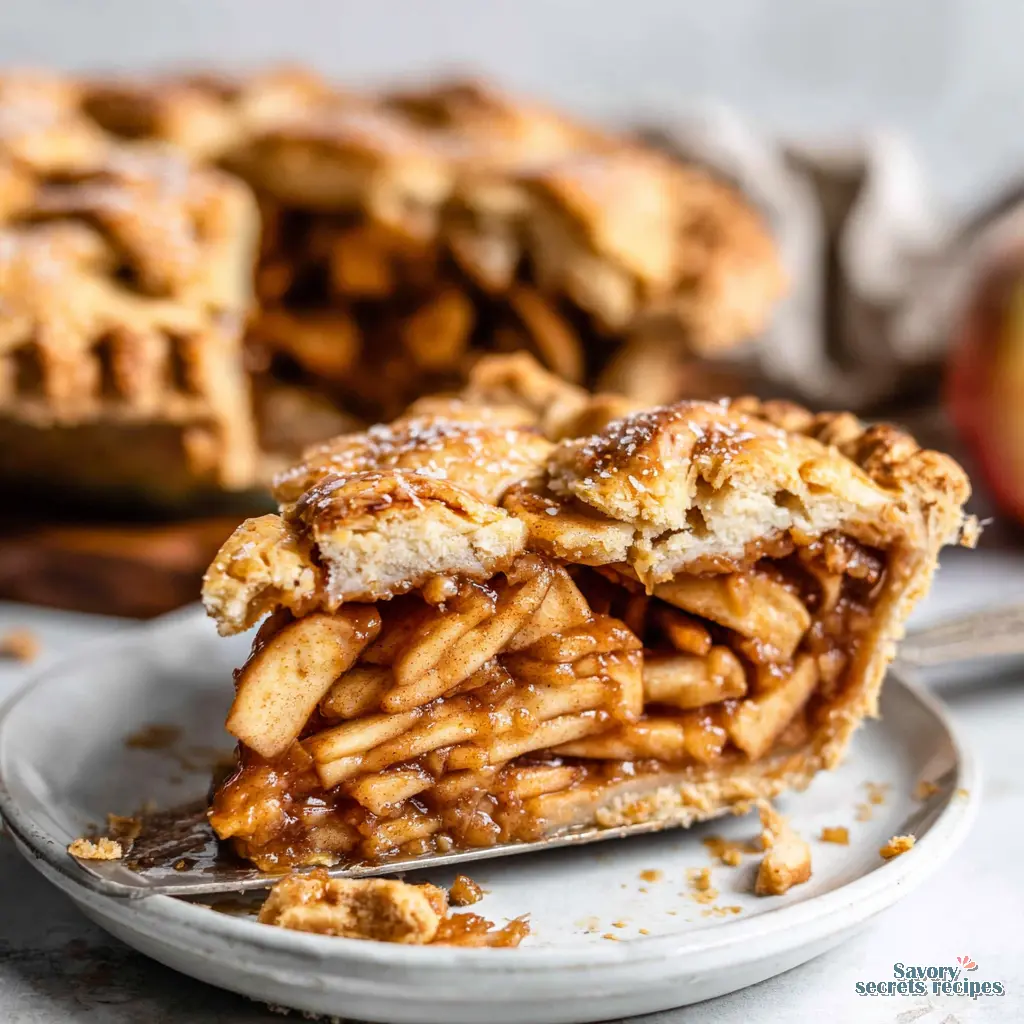
The Science of the Perfect Pie Filling
Early in my career, I over-styled a soup. I added too many garnishes and tried to build too much height. It looked busy and confused. My editor looked at the monitor and said, “What am I supposed to look at?” Now I edit down ruthlessly. A great homemade apple pie recipe requires the same editing. Skip pre-cooking the apples. Let the oven do the work for a fresher texture.
But we do need to talk about thickeners. A runny pie is a sad pie.
Cornstarch: This is a classic choice. It sets up firmly and gives you a very clean slice. However, it can sometimes leave a slightly cloudy appearance in the filling. Just remember, don’t overheat the filling sauce before baking, or it may separate or over-thicken.
All-Purpose Flour: Flour is easy because you always have it on hand. The tradeoff is that it mutes the apple flavor slightly and gives the filling a matte, opaque look. That’ll photograph flat.
Tapioca Starch: This is my personal favorite for a homemade apple pie recipe. It creates a glossy, clear gel that lets the color of the apples shine through. It also handles freezing and thawing beautifully. Mix it with your brown sugar, cinnamon, and a pinch of nutmeg. These aromatic spices are the secret to any successful traditional apple dessert.
Weaving a Lattice Top (A Visual Guide)
Creating a traditional american apple pie recipe with lattice top is all about visual rhythm. It looks incredibly complex, but it is just a simple over-under pattern. If you’re short on time, an easy baked apple pie offers the same great taste without the intricate weaving.
Roll your top dough out with a rolling pin and cut it into even strips. Lay half of your strips vertically across the filled pie plate. Fold every other vertical strip back on itself. Lay one horizontal strip across the flat vertical strips. Unfold the folded strips over the horizontal one. Now, fold back the alternating vertical strips. Place another horizontal strip. Repeat. It is just building in layers.
Once you finish weaving, trim the edges and start crimping them together to seal the pie. This venting allows steam to escape so your crust doesn’t puff up and detach from the apples. Finally, brush the lattice crust with an egg wash (just one egg beaten with a splash of water) and sprinkle with turbinado sugar. That egg wash is what gives you that professional, shiny, golden brown finish. Perfect contrast.
Baking & Troubleshooting (Getting That Golden Brown)
I learned to trust my light meter over my eye when I ruined a stone fruit shoot in afternoon light that went too warm. In baking, you have to trust your oven thermometer and your visual cues. You want a deep golden color, almost the color of peanut butter. If it is pale beige, it is not quite there yet.
Common Mistakes & Fixes
Mistake: The edges of the crust burn before the center is done.
Solution: Use an aluminum foil shield. Cut a 3-inch center hole in a piece of foil and place it over the pie for the first 25 minutes. This protects the edges while letting steam escape from the center.
Mistake: The dreaded soggy bottom.
Solution: Start baking at a high temperature (around 425°F) for the first 20 minutes to set the bottom crust quickly. Then reduce the heat to 375°F to finish cooking the apples. Also, using a deep casserole dish or a glass pie plate helps conduct heat better than cheap metal pans.
Mistake: The pie filling is watery when sliced.
Solution: You sliced it while it was still hot. I know the anticipation is torturous, but you must let the pie cool for at least 1-2 hours (up to 8 hours) on a cooling rack to let the juices set.
Storage & Freezing Instructions
If you are meal prepping for a holiday or just want to save a slice of this homemade apple pie recipe for later, you have a few options. I prefer to keep it at room temperature, loosely covered with foil, for up to 2 days. The crust stays flakier this way. If you need it to last longer, refrigerate it covered for 4-7 days.
To reheat, drop individual slices in the microwave for 30 seconds, or put the whole pie back in a 350°F oven until warmed through. Serve it with a massive scoop of vanilla bean ice cream. That melting cream against the warm, sharp cinnamon filling is exactly it.
Frequently Asked Questions
Final Thoughts on the Perfect Slice
I question whether my visual-first approach makes me overly fussy sometimes. But when you pull a beautifully woven, golden-brown pie out of the oven and hear the juices bubbling at the edges, you realize the details matter. This homemade apple pie recipe requires a little patience, especially during that agonizing cooling period, but the first clean slice you lift out of the pan makes it all worth it.
Try it this weekend. Master the lattice, dial in your apple blend, and let the oven do the heavy lifting. I share tons of visual guides and variations on my Pinterest boards if you want to see how I style different crust edges. Happy baking, and remember to trust the process.
Reference: Original Source
Does this homemade apple pie recipe need to be refrigerated?
Not immediately. You can safely keep this homemade apple pie recipe at room temperature for two days, loosely covered. After that, I definitely recommend moving it to the fridge where it will stay fresh for up to a week. Just warm it up before serving.
Can you freeze a homemade apple pie before or after baking?
You absolutely can. I actually prefer freezing it unbaked. Wrap the assembled pie tightly in plastic wrap, then a layer of foil to prevent freezer burn. It holds up for 3 months. Bake it straight from frozen, just add about 20 extra minutes to your baking time.
What are the best apples for a homemade apple pie recipe?
For the best texture and a really clean read on the plate, I blend tart Granny Smith apples with sweet Honeycrisp or Pink Lady. This combination gives you the perfect contrast of firm structure and complex, natural sweetness without turning into mush in the oven.
How do I prevent a soggy bottom crust in my homemade apple pie recipe?
The trick is high initial heat. Start your oven at 425°F for the first 20 minutes to quickly set and crisp the bottom pastry. Also, make sure your dough is thoroughly chilled before it goes in. Cold butter equals flaky layers, not soggy bottoms.


