


Moist Traditional Banana Bread Recipe with Butter
Ingredients
Method
- Preheat your oven to 350°F (175°C).
- Grease a 9x5-inch loaf pan.
- Whisk together the flour, baking soda, and salt in a small bowl.
- Combine the melted butter, vegetable oil, granulated sugar, eggs, and vanilla extract in a large bowl.
- Stir in the mashed bananas.
- Add the dry ingredients to the wet mixture and stir gently until just combined.
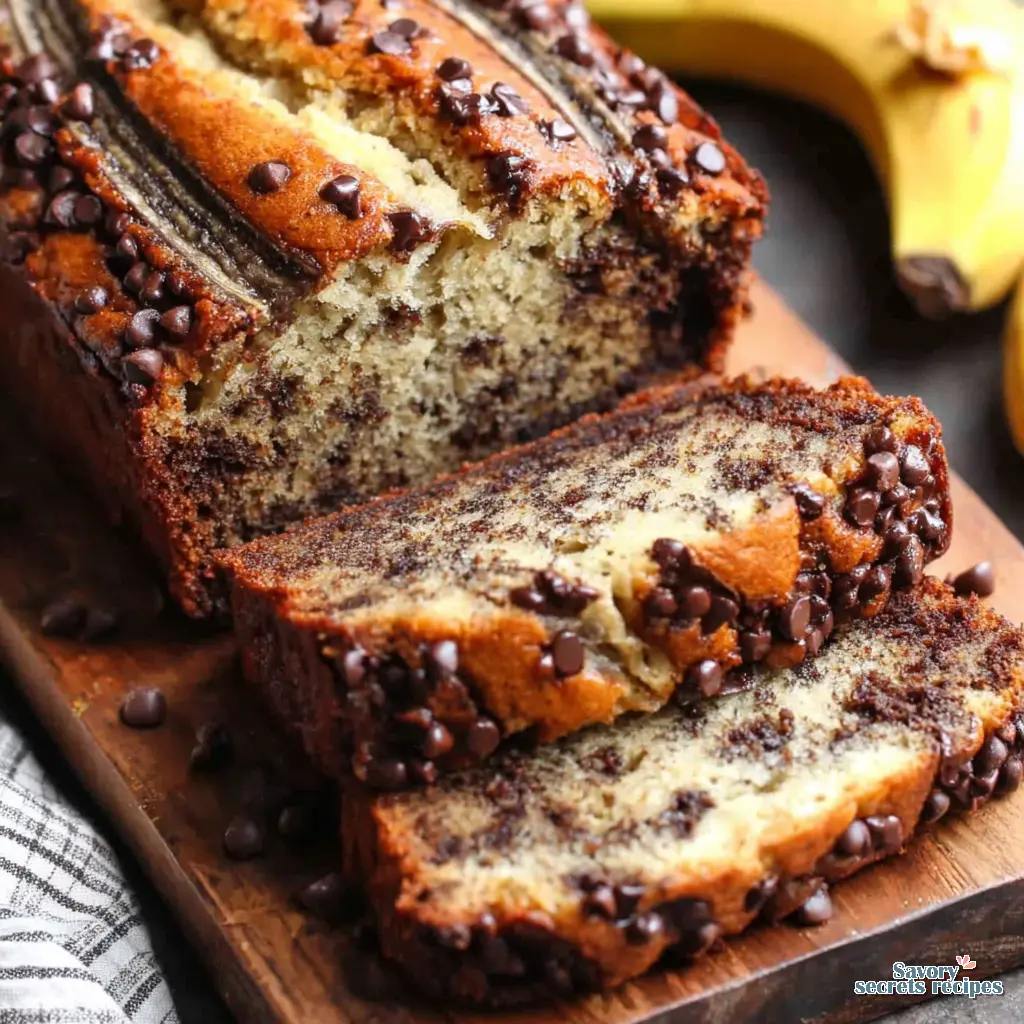
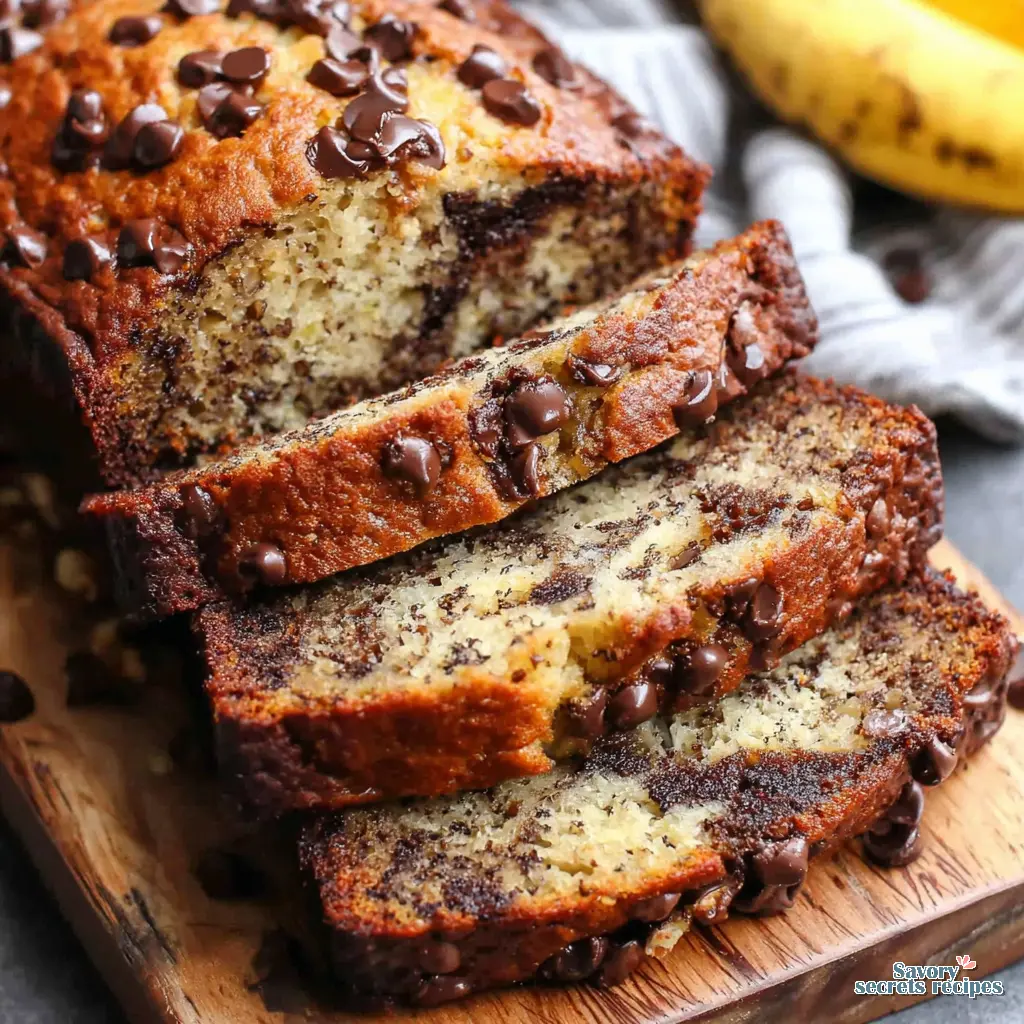
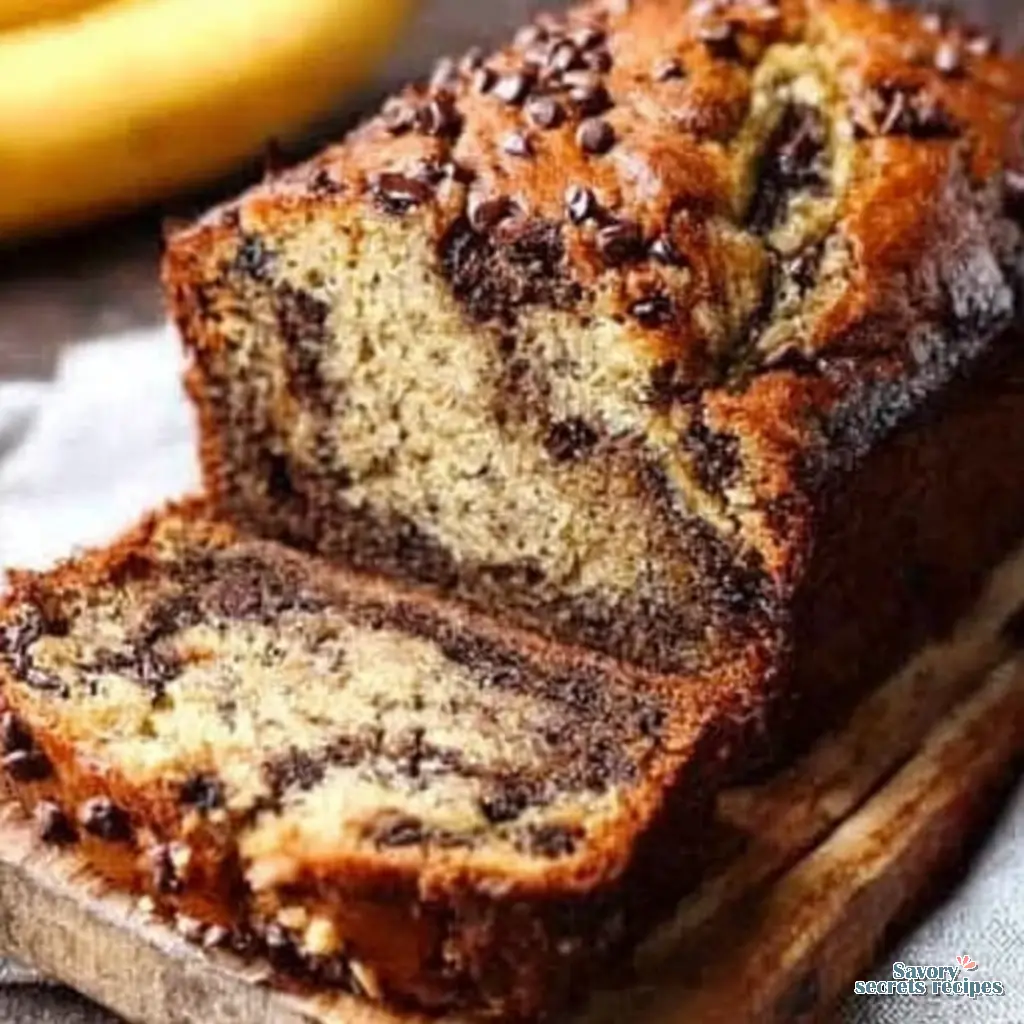
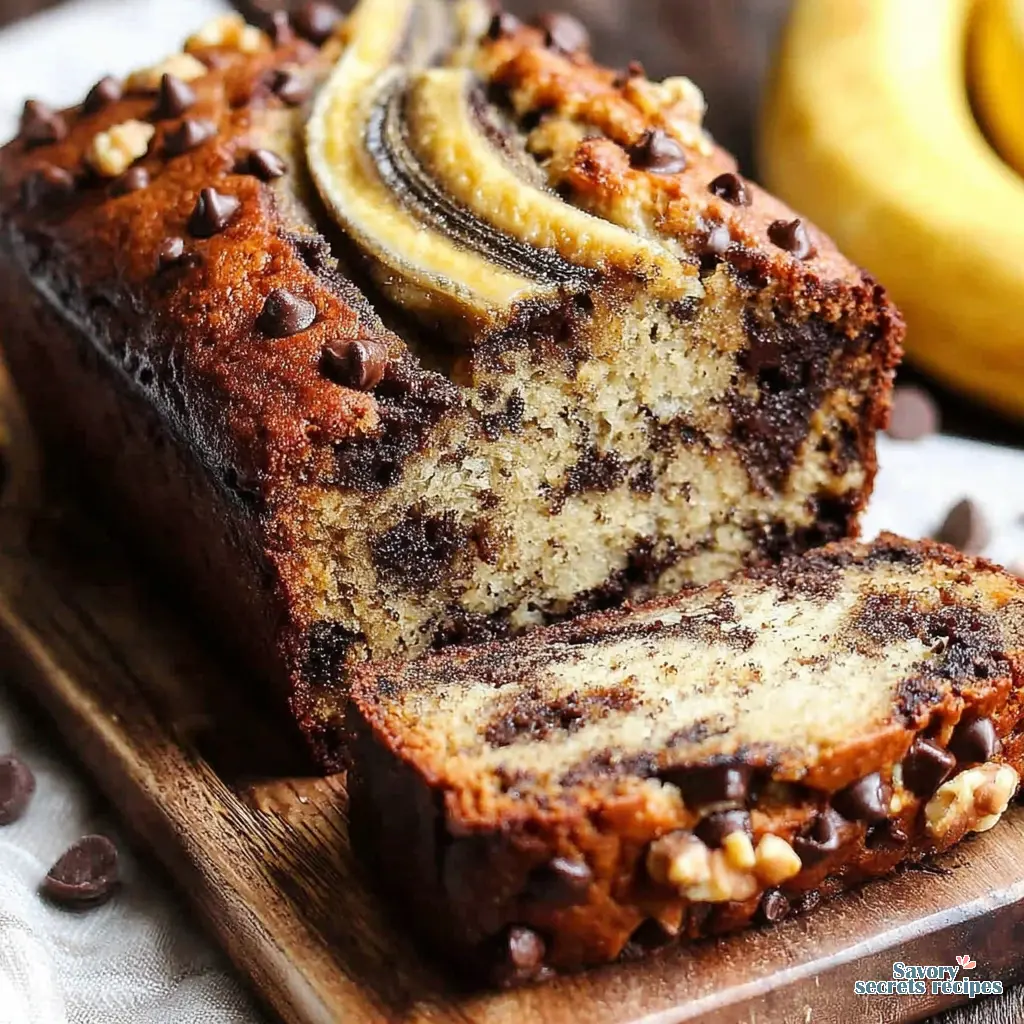
- Fold in the chocolate chips.
- Pour the batter into the prepared loaf pan.
- Bake for 50–60 minutes, or until a skewer comes out with a few moist crumbs.
- Cool the bread in the pan before transferring it to a wire rack.
Nutrition
Notes
The Ultimate Spring Baking Project
You know that familiar sight. Those three neglected bananas sitting on the counter, slowly turning from speckled yellow to completely black. Most people see food waste. I see the foundation of a truly perfect homemade banana bread recipe. With Easter brunch just around the corner, this is the ultimate addition to your spring holiday spread.
I remember standing on a step stool in my grandmother Lalla Fatima’s kitchen in Casablanca. She was teaching me how to make chebakia. She’d test the honey by dropping a bit into cold water, showing me how it should form a soft ball. I burned myself twice trying to test it myself before I learned patience. That tracks with what I’ve seen in baking ever since. Temperature and timing are doing the heavy lifting here. When you want a homemade banana bread recipe that yields a perfectly golden brown, moist crumb, you can’t rush the process.
If you’re tired of dry quick breads and inconsistent oven temperatures ruining your weekend baking, let me walk you through this. We’re going to turn those ugly, overripe bananas into a tender, cinnamon-perfumed loaf that stays fresh for days. Perfect.
The Science of Overripe Bananas
Let’s troubleshoot together before we even turn on the oven. The biggest mistake people make with any homemade banana bread recipe is using bananas that are just a little brown. You really want them entirely black. As bananas ripen, their starches convert to sugars. This natural caramelization is what gives traditional banana bread baking its rich, deep flavor.
Here’s a quick visual ripeness chart for your homemade banana bread recipe:
- Yellow with brown speckles: Great for eating, terrible for baking. Your loaf will be dry and lack flavor.
- Half brown, half black: Acceptable if you’re in a rush, but you’ll miss out on the maximum sweetness.
- Completely black and squishy: That’s the sweet spot. This is exactly what we want.
If your bananas aren’t ready, you’ve got options. You can ripen bananas in a 250°F oven for 15 to 20 minutes until the skins turn black. Give it a minute to settle and cool before peeling. Alternatively, toss them in a paper bag with an apple for 24 hours. The ethylene gas from the apple speeds up the ripening process beautifully. This method ensures you always have the right fruit on hand for a quick and easy banana loaf.
One-Bowl Mixing Method
I love recipes that don’t require dragging out the stand mixer. For this classic homemade banana bread recipe, you just need a large mixing bowl, a fork, and a sturdy spatula. Mashing bananas with a fork actually gives you the best texture. You want some small lumps remaining. It shouldn’t look like baby food.
Once your bananas are mashed, whisk in your melted butter and brown sugar. I prefer using a combination of brown and white sugar. The molasses in the brown sugar provides acidity, which reacts with the baking soda to help the bread rise. Next, add your room temperature eggs and pure vanilla extract. Temperature matters heavily here. Cold eggs will cause your melted butter to seize up into tiny, unpleasant chunks.
Now we’re getting somewhere. When you fold in your all-purpose flour, baking powder, baking soda, salt, and a dash of cinnamon, stop stirring the exact second the dry ingredients disappear. Overmixing develops the gluten, leading to a dense texture. The batter should look lumpy and thick. (I know this sounds counterintuitive, but trust me on this).
Pan Size, Timing, and Altitude Adjustments
In my experience, though yours might differ, pan size is the most overlooked variable in baking. A standard 8×4-inch loaf pan produces taller loaves with that beautiful, domed center-crack. A 9×5-inch pan produces flatter loaves and requires a shorter bake time. I always line my pan with parchment paper, leaving an overhang so I can easily lift the bread out later. Using the correct pan size is essential for achieving the texture of a truly soft banana bread.
If you’re using a glass pan instead of metal, drop your oven temperature by 25°F. Glass holds heat longer and can cause the edges to overbake before the center sets. You’re looking for a perfectly golden crust. If it starts browning too quickly, tent it loosely with aluminum foil for the last 15 minutes of baking.
For my readers baking at high altitudes, let’s make a few quick adjustments to this homemade banana bread recipe. Above 3,000 feet, decrease your baking soda by 1/8 teaspoon and increase your oven temperature by 15°F. You might also need an extra tablespoon of milk or sour cream to prevent the batter from drying out in the thinner air.
Common Mistakes & Fixes
Mistake: Using green or under-ripe bananas.
Solution: Your bread will be dry and bland. Wait until the skins are at least half black, or use the oven-ripening trick (250°F for 15 minutes).
Mistake: Overmixing the batter.
Solution: This leads to a tough, rubbery loaf. Stop stirring as soon as the last streak of flour disappears. Lumpy batter is exactly what you want.
Mistake: Underbaking the center.
Solution: The toothpick test is crucial. Insert a toothpick into the very center of the crack. It should come out with a few moist crumbs attached, not wet batter.
Liquid Management for Thawed Bananas
I frequently freeze overripe bananas because I can’t stand throwing them away. When you thaw frozen bananas, they release a massive amount of dark liquid. Do not pour this liquid down the drain. That liquid is pure banana flavor.
Instead, reduce that liquid in a small saucepan over medium heat until it thickens into a syrup, then add it right into your mashed bananas. It intensifies the flavor of your homemade banana bread recipe without adding excess moisture that could make the bread soggy. It’s so satisfying when it comes together like this.
The ‘Day 2’ Flavor Explanation
This is the part I love. The hardest step in this entire homemade banana bread recipe is waiting for it to cool. You must let it rest on a cooling rack for at least an hour before slicing. If you cut into it while it’s lava-hot, the steam escapes, and the bread dries out instantly.
But here’s the real secret. Banana bread actually tastes significantly better on day two. As it sits wrapped at room temperature, the moisture from the bananas redistributes throughout the crumb, and the cinnamon and vanilla flavors deepen. The crust softens slightly, creating a velvety texture. Serving it on day two, perhaps lightly toasted with a smear of salted butter, is absolute perfection. The flavor development over 24 hours makes this the ultimate ripe banana dessert for any occasion.
Freezing & Thawing Guide
If you aren’t serving this homemade banana bread recipe to a crowd, you’ll need to store it properly. To keep classic banana bread from getting soggy at room temperature, place a paper towel in the bottom of your airtight storage container. It absorbs the excess moisture. It’ll keep on the counter for about four days.
For longer storage, the freezer is your best friend. Wrap the completely cooled loaf tightly in plastic wrap, then add a layer of aluminum foil. It lasts for two to four months this way. When you’re ready to eat it, thaw it overnight on the counter. You can also freeze individual slices wrapped in parchment paper and pop them straight into the toaster oven on busy weekday mornings.
Frequently Asked Questions
Ready to Bake?
There’s nothing quite like the smell of a freshly baked loaf filling your kitchen on a lazy weekend morning. It reminds me of those afternoons in my grandmother’s kitchen, where everything felt possible. Once you pull this out of the oven, give it the proper time to cool, and slice into that moist crumb, you’ll understand why this homemade banana bread recipe is the only one you’ll ever need.
I’d love to hear who you’re baking this for. Are you taking it to an Easter brunch, or just meal prepping for your weekday breakfasts? Let me know how it turns out. For more inspiration, check out my Pinterest boards where I share endless variations on classic bakes.
Reference: Original Source
How can I make this homemade banana bread recipe moist and fluffy every time?
The secret to a moist homemade banana bread recipe is using extremely overripe, black bananas and being careful not to overmix your batter. Stop stirring the moment the flour disappears. Adding a tablespoon of sour cream also works wonders for extra moisture and a fluffy texture.
What is the best way to mash bananas for bread to achieve the perfect texture?
Ditch the food processor. I always use a simple fork on a flat plate or in a wide mixing bowl. You want to leave some small, pea-sized chunks of banana in the mash. Those little chunks melt during baking, creating tiny pockets of moisture.
Should I use salted or unsalted butter for a traditional banana bread recipe?
I strongly prefer unsalted butter so I can control the exact sodium level. If you only have salted butter on hand, just reduce the additional salt in the recipe by half. Melted butter gives the bread a richer, more traditional flavor compared to vegetable oil.
Can I add walnuts or extra chocolate chips to this homemade banana bread recipe?
Absolutely. You can fold in up to a cup of chopped walnuts, pecans, or semi-sweet chocolate chips right at the end of mixing. I usually toss my add-ins with a tiny pinch of flour first so they don’t sink to the bottom of the loaf pan.
Can I use white sugar if I don’t have brown sugar?
You can, but the texture will change. Brown sugar provides necessary acidity to react with the baking soda, helping the bread rise. If you only use white sugar, your homemade banana bread recipe might turn out slightly denser and paler, lacking that deep caramelized flavor.
How many bananas make 2 1/3 cups of mashed bananas?
Right in that window, you’ll generally need about 4 to 5 medium-sized bananas to get 2 1/3 cups of mash. I always recommend measuring the mash in a liquid measuring cup rather than just counting bananas, because sizes vary so wildly at the grocery store.
How long do I bake this batter if I want to make muffins instead?
To convert this homemade banana bread recipe into muffins, line a tin with paper liners and fill them three-quarters full. Bake at 400°F for 5 minutes, then drop the temperature to 350°F for another 13 to 15 minutes. That initial blast of heat gives them beautiful domed tops.


