


Easy Chocolate Milkshake Recipe for a Creamy Drink
Ingredients
Method
- Prepare Your Ingredients: Gather all your ingredients: vanilla ice cream, milk, vanilla extract (and optional sweetener), and heavy cream for the topping (if making homemade whipped cream). If you plan to make homemade whipped cream, ensure your heavy cream is very cold. Chill your mixing bowl and whisk attachment for a few minutes in the freezer beforehand. For an extra frosty shake, pop your serving glasses into the freezer for about 10-15 minutes before blending.
- Combine Milkshake Ingredients: Carefully scoop the vanilla ice cream into your blender. Pour in the milk. Add the vanilla extract. If you're using an optional sweetener, add it now too.
- Blend Until Smooth: Secure the lid on your blender. Start blending on a low speed and gradually increase to medium-high. Blend until the mixture is completely smooth and creamy, about 30-60 seconds. If your milkshake is too thick, add a tiny splash more milk and blend again. If it's too thin, add another small scoop of ice cream and blend.
- Taste and Adjust: Open the blender and taste. Adjust the vanilla or sweetness as necessary and blend again to incorporate.
- Prepare the Whipped Cream (if homemade): In your chilled mixing bowl, pour the very cold heavy cream. Add a tablespoon of powdered sugar and a tiny splash of vanilla extract. Using an electric mixer, beat on medium-high speed until soft peaks form, then continue to beat until firm peaks form.
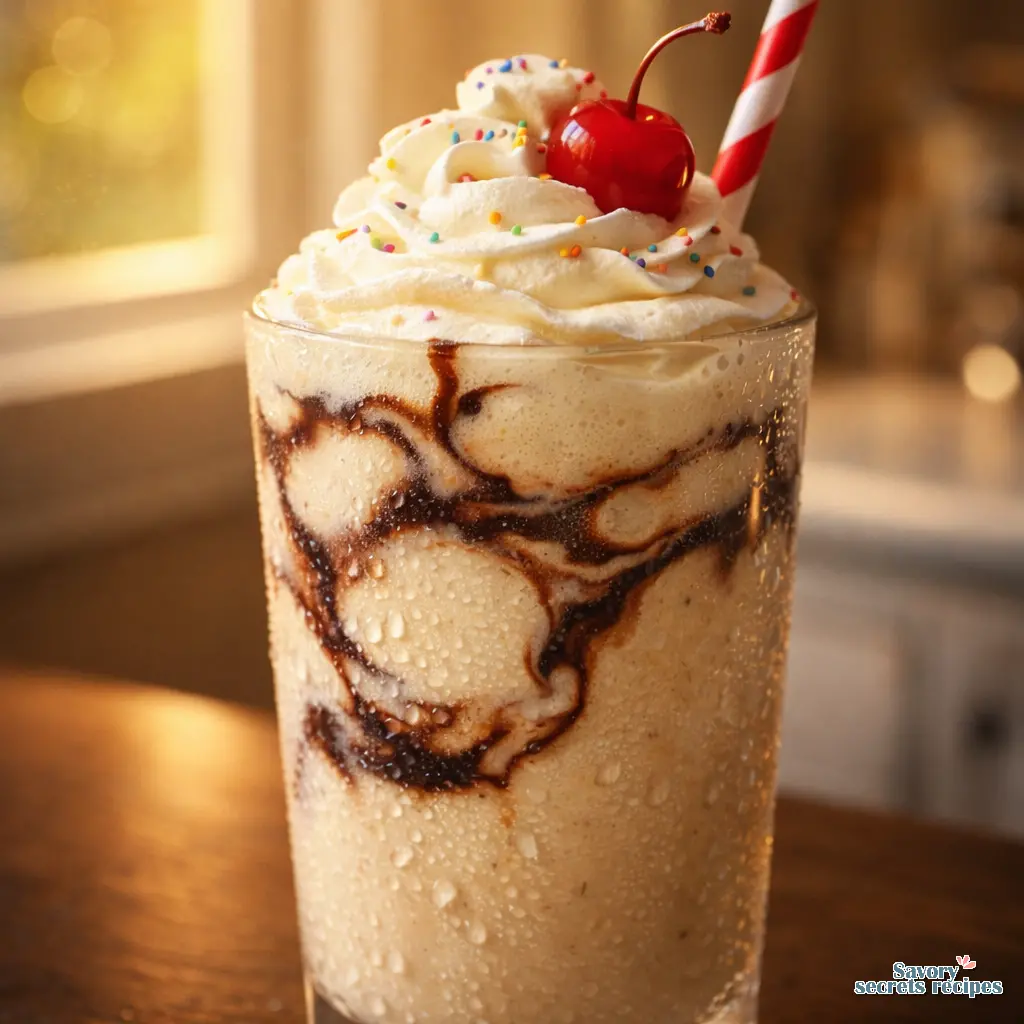
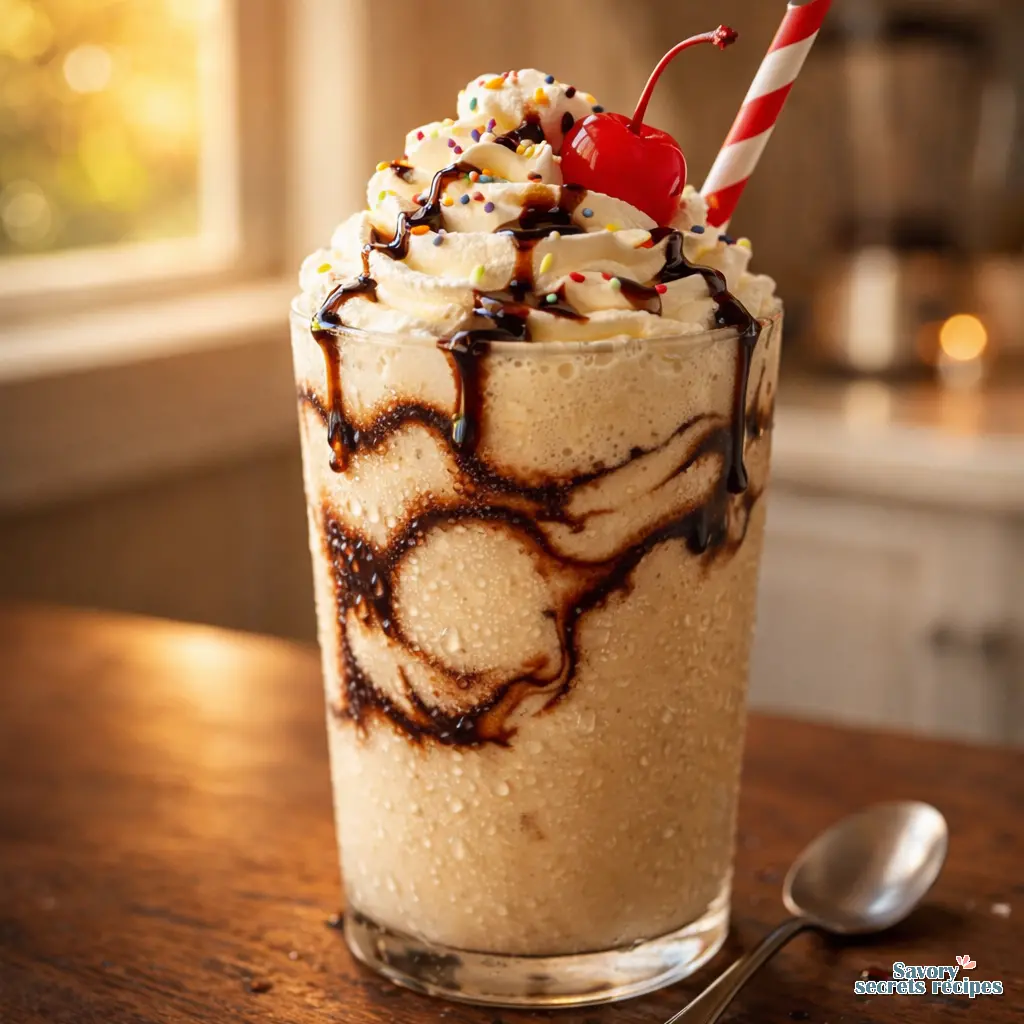
- Pour and Top: Pour the freshly blended vanilla milkshake into your chilled serving glasses. Generously top each milkshake with your homemade whipped cream or store-bought whipped cream.
- Garnish (Optional) and Serve Immediately: Optionally, add sprinkles, a maraschino cherry, or a drizzle of caramel or chocolate sauce. Serve your creamy vanilla milkshake immediately with a wide straw and a spoon for the topping.
Nutrition
Notes
That Sound Takes Me Back
You know the sound I’m talking about. The low, powerful whir of a blender hitting a perfect vortex, pulling vanilla ice cream and milk into something that’s not quite solid, not quite liquid. It’s the sound of a Friday night treat, of a hot day saved, of a kid’s eyes going wide. I remember sitting at the counter of this old diner on Michigan Avenue as a kid, watching the soda jerk spin the metal cup. The chocolate syrup would drizzle down the sides in a thick, glossy spiral before he poured the whole frosty, dreamy concoction into a chilled glass. That first sip through the straw was pure magic. And here’s the thing: you don’t need a diner, or a soda jerk, to get that magic. This homemade milkshake recipe is your five minute ticket back there.
Not gonna lie, I’ve had that “I need chocolate now” feeling more times than I can count. Maybe it’s after a long day, or the kids are begging for something special, or you just want a sweet, cold treat without getting in the car. This classic chocolate drink is the answer. It’s straightforward, it’s forgiving, and it delivers that nostalgic diner-style flavor every single time. Let’s walk it back to the basics and make something incredible.
What You Really Need (And Why It Matters)
Here’s where a lot of homemade milkshake recipes go sideways. They overcomplicate it. You need three things. That’s it. Vanilla ice cream, whole milk, and chocolate syrup. But the quality of those three things? That’s the whole game.
First, the ice cream. You want the real stuff. Straight up, avoid anything labeled “frozen dairy dessert.” Look for “ice cream” on the carton. That real dairy fat is what gives you that velvety, creamy mouthfeel that coats your tongue. I usually grab a good vanilla bean from the freezer aisle at my local Ralphs. The little black specks are a good sign. Fair enough if you have a different favorite brand, just make sure it’s the real deal.
Next, the milk. Whole milk. I know, I know. You could use 2% or almond milk. But for that authentic, rich texture, whole milk is the move. The fat in the milk works with the fat in the ice cream. It’s a chemistry thing, and it makes all the difference between a good shake and a great one. Trust the process on this.
Finally, the chocolate. Use whatever chocolate syrup you like. Hershey’s is the classic, but I’ve used fancier stuff from Trader Joe’s too. The point is, you probably have it in your fridge right now. If you don’t, a good cocoa powder mixed with a little sugar and hot water works in a pinch. This is a no judgment zone. Use what you’ve got.
The Simple Science of a Perfect Blend
Making this easy chocolate dessert drink isn’t just dumping stuff in a blender. There’s a little science to it, and once you get it, you can dial it in until it’s right every time. The ratio’s off if your shake is too thin or too thick to sip. Here’s what’s happening in that blender jar.
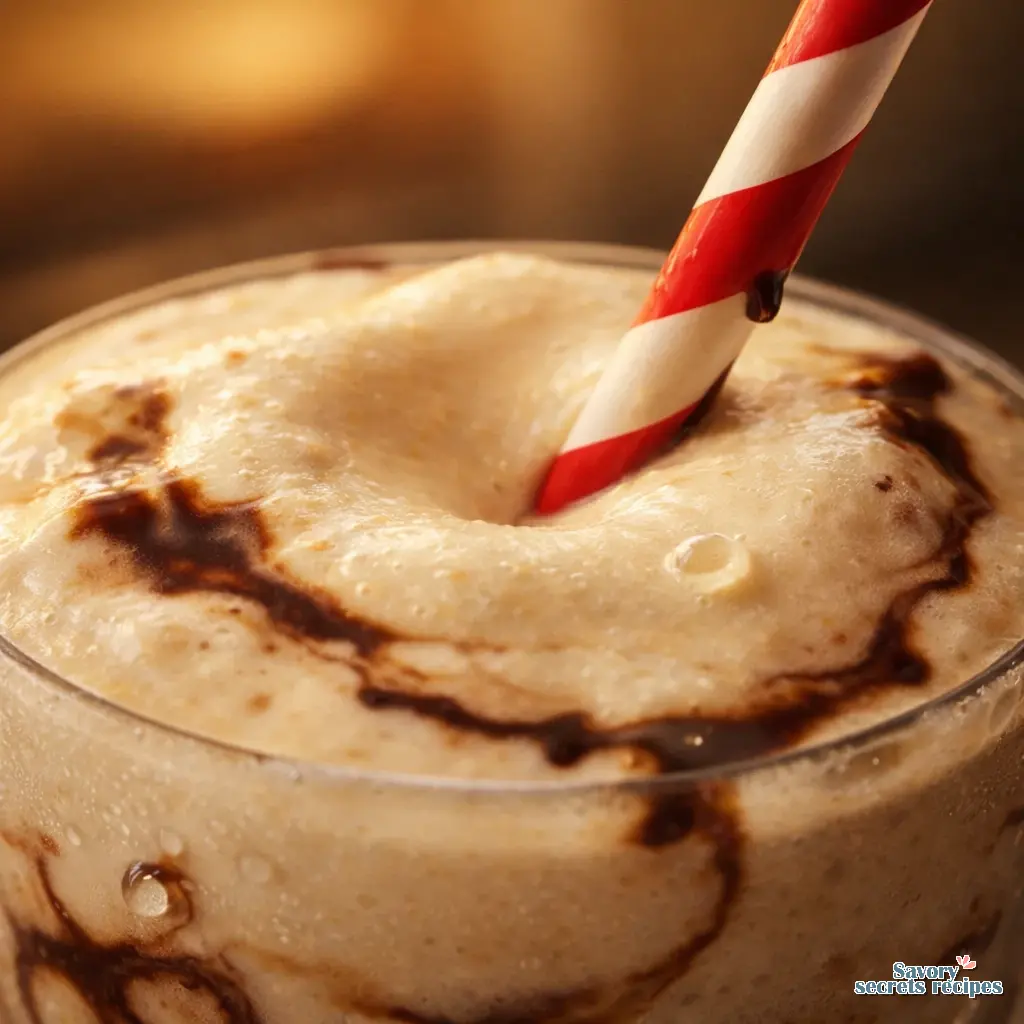
Fat and air. That’s the secret. The fat from the real dairy ice cream and whole milk gives you the rich, creamy body. The blending action incorporates tiny, tiny air bubbles, which makes the shake light and frothy instead of dense and icy. That’s why you don’t add ice. Ever. Ice just melts and waters everything down, diluting the flavor and ruining that perfect texture. If you want it colder, chill your glass. Don’t sabotage your shake with ice cubes.
Temperature matters too. Let your ice cream sit out for five, maybe ten minutes. You want it soft enough to scoop easily, but not melted. If it’s rock hard, your blender will struggle and you might be tempted to add too much milk. If it’s soupy, you’ll end up with a thin mess. That sweet spot where it’s scoopable but still very cold? That’s the one. Works every time.
Your Foolproof Blender Technique
Okay, you’ve got your softened ice cream, your cold milk, your syrup. Now, the blend. This is where you get that straw-sippable consistency. The order you add things actually helps.
Pour the milk in first. Here’s the thing: the liquid at the bottom gets pulled into the blades faster, creating a vortex that sucks the ice cream down. Then add your scoops of ice cream. Drizzle the chocolate syrup over the top. Now, put the lid on. I mean, seriously. Don’t be like me and learn the hard way with a chocolate ceiling.
Start on a low setting. Let it do its thing for about 10 seconds to break up the big chunks. Then, pulse. Pulse, pulse, pulse. This is the key. You’re not making soup. You’re incorporating everything without over-blending it into a thin, airy foam. After a few pulses, scrape down the sides with a spatula if you need to. Give it one more short burst. You’re looking for a thick, homogeneous, creamy mixture. It should mound on a spoon. If it pours like water, you’ve gone too far. Solid. That’s your visual cue.
Dialing In Your Perfect Consistency
So your shake is a little too thick? Or maybe it’s thinner than you wanted? No panic. This is the easiest fix in the world. For a thick shake, you just made it right. Pat yourself on the back. For a shake that’s too thin, well, let’s troubleshoot.
If it’s too thin, you probably added too much milk or over-blended. The fix? Add another small scoop of that softened ice cream and pulse it in. Just once or twice. It’ll thicken right up. If it’s too thick to sip, add a splash more milk. A couple of tablespoons at a time. Pulse to combine. You’re in control. This homemade milkshake recipe is incredibly forgiving. For those who prefer an exceptionally rich and thick texture from the start, our guide to making a thick chocolate shake has specialized tips.
Common Mistakes & Fixes
Mistake: The shake is watery and flavorless.
Solution: You used ice or a “frozen dessert” instead of real ice cream. Or you over-blended. Start over with real dairy ice cream and use the pulse technique.
Mistake: It’s so thick the straw stands straight up, but you can’t sip it.
Solution: Too much ice cream, not enough milk. Add a splash of milk and pulse briefly. The ratio’s off, just adjust it.
Mistake: The blender is struggling and the ice cream isn’t mixing.
Solution: Your ice cream was too hard. Let it soften for another 5 minutes. Also, make sure you added the milk first to help the blades move.
Mistake: It’s not sweet enough or chocolatey enough.
Solution: That’s not a mistake, that’s a preference! Add another tablespoon of chocolate syrup and pulse to combine. Easy.
Beyond the Classic: Make It Your Own
The basic homemade milkshake recipe is a perfect canvas. Once you’ve got that down, the variations are endless. My daughter loves when I toss a handful of leftover Easter candy into the blender for a few seconds at the end. Mini eggs or a broken-up chocolate bunny? Now we’re talking.
For a malted milkshake, add a big tablespoon of malted milk powder. It gives that old-school, earthy sweetness. Love peanut butter? A big spoonful of the creamy kind blends into something magical. You can swap the vanilla ice cream for strawberry, or mint chip. Use chocolate milk instead of plain. The formula stays the same: ice cream + milk + flavor. That tracks for pretty much any combination you can dream up.
Want a Blizzard-style treat? Blend your base smooth, then pulse in some crushed Oreos or chopped peanut butter cups at the very end. You’ll get those delicious, chunky bits throughout. Just don’t blend them into dust. A few quick pulses does it.
Answering Your Milkshake Questions
I get a lot of the same questions about this easy chocolate dessert drink. Let’s tackle the big ones.
What if I don’t have a blender for this homemade milkshake recipe?
No blender? No problem. A food processor works great. You could also use an immersion blender in a deep cup or even whisk vigorously by hand in a big bowl. It’ll take some elbow grease, but you’ll get there. The key is to start with very soft ice cream.
How can I make a milkshake ahead of time?
Honestly, I don’t recommend it. A homemade milkshake recipe is best the second it’s made. If you freeze it, the milk separates and gets icy. If you must, blend it and store it in the freezer for an hour max, then give it a quick re-blend. But fresh is always better.
What’s the best chocolate to milk ratio for a perfect shake?
It’s personal, but I start with 3 big scoops of ice cream to about 1/2 cup of milk for two servings. That gives a thick, spoonable-but-sippable base. For chocolate, 3 tablespoons of syrup is a good start. You can always add more after tasting. Dial it in until it’s right for you.
How do I get my chocolate milkshake extra creamy?
Two ways. First, use real, full-fat dairy ice cream and whole milk. Second, try swapping the milk for heavy cream, or using half milk and half cream. The extra fat content makes it unbelievably lush and velvety. It’s a next-level treat.
What else can I use as a topping?
Whipped cream and a cherry are classic. But get creative! Crushed cookies, chopped nuts, a drizzle of caramel sauce, rainbow sprinkles, mini chocolate chips, or even a pinch of flaky sea salt. I share tons of ideas on my Pinterest if you need inspiration.
Can I make a vegan or dairy-free version?
Absolutely. Use a high-quality vegan ice cream (the kind with coconut or cashew base works well) and your favorite non-dairy milk, like oat or almond. The texture might be slightly different, but the method is exactly the same. It’s all about finding a vegan ice cream you love.
Serving, Storing, and the Joy of Leftovers
Presentation is part of the fun. Chill your glasses in the freezer for ten minutes before you pour. That first touch of a frosty glass is part of the experience. Pour your shake in, top it with a mountain of whipped cream, add that cherry, and maybe an extra drizzle of syrup. Don’t have whipped cream? A quick whip of heavy cream with a little sugar and vanilla makes your own in two minutes. Totally worth it.
Now, about leftovers. I highly recommend you enjoy your homemade milkshake recipe immediately. But. If you’ve got a kid who took two sips and got distracted (happens in my house every time), you can pour it into an airtight container and stick it in the freezer. It won’t be the same. It’ll get icy and separate a bit. But you can let it soften for 15 minutes and re-blend it for a decent recovery. Or, honestly, pour it into popsicle molds. Chocolate milkshake popsicles? That’s the move.
Go Make That Sound
So that’s it. The whole story behind a perfect homemade milkshake recipe. It’s not complicated. It’s three ingredients, a blender, and about five minutes. It’s about that feeling of creating a little joy, of saving a trip to the drive-thru, of hearing that happy silence after the blender stops and everyone gets their glass.
Go grab that ice cream from the freezer. Let it sit on the counter for a minute. Get out your blender. I’m not totally sure, but I think you’ll find that making it is almost as satisfying as drinking it. Now we’re talking. Go make that sound.
Reference: Original Source


