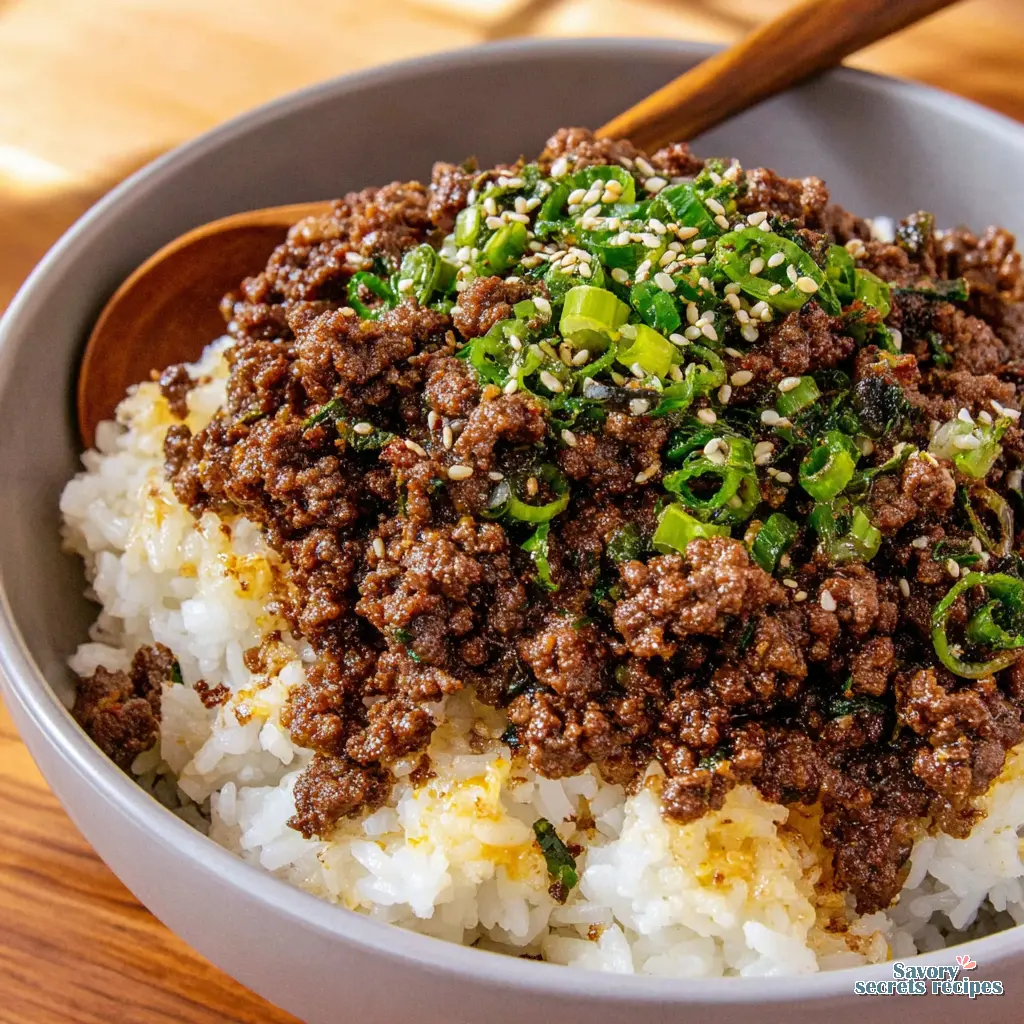
Easy Korean Ground Beef Rice Bowl in 20 Minutes
Ingredients
Method
- Heat 1 tablespoon of neutral oil in a large skillet or wok over medium-high heat.
- Add the ground beef, onion, and garlic, then cook for approximately 10 minutes, breaking the meat apart with a spatula until browned and crispy.
- Allow the beef to crisp undisturbed before adding the sauce.
- Whisk together the sweet Thai chili sauce, vegetarian oyster sauce, light soy sauce, rice vinegar, sesame oil, water, and grated ginger in a small bowl.
- Pour the sauce mixture over the cooked beef and simmer until the sauce thickens.
- Continue cooking until the beef is thoroughly crispy.
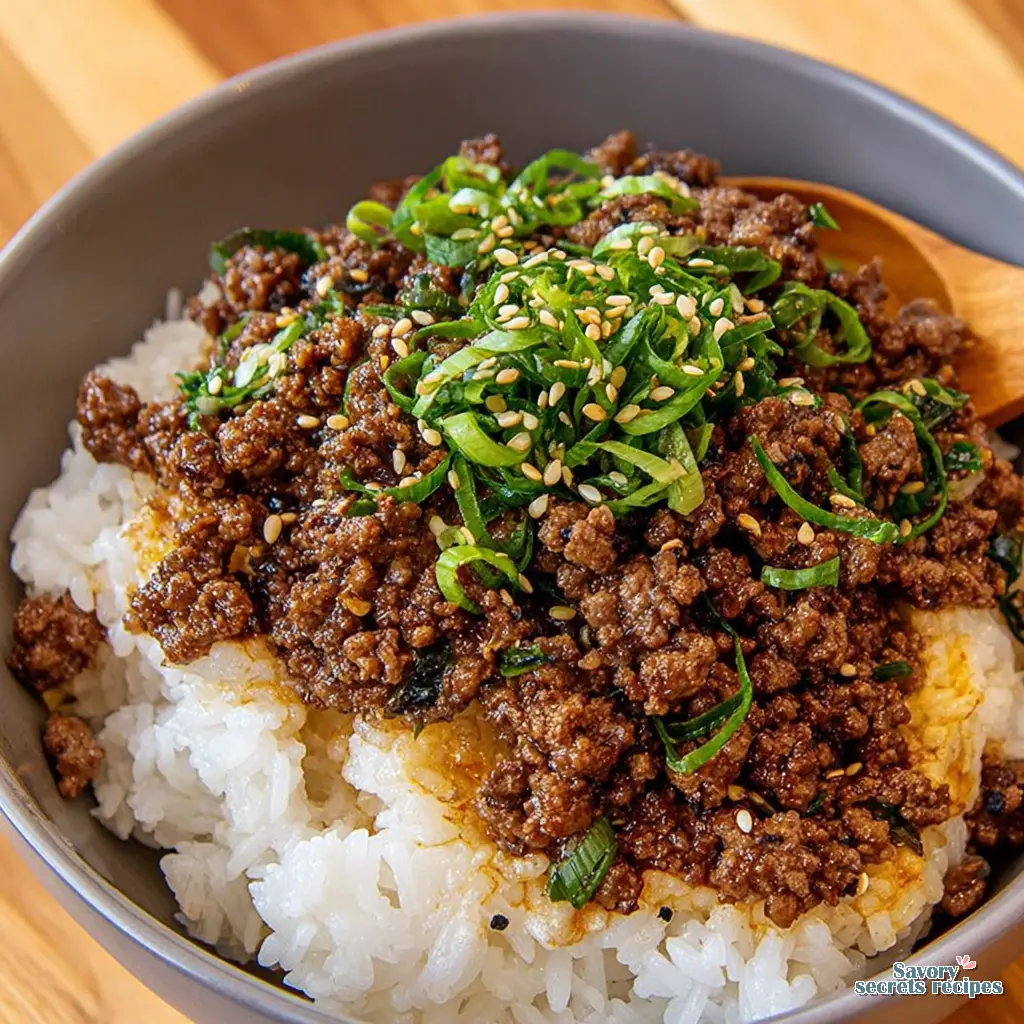
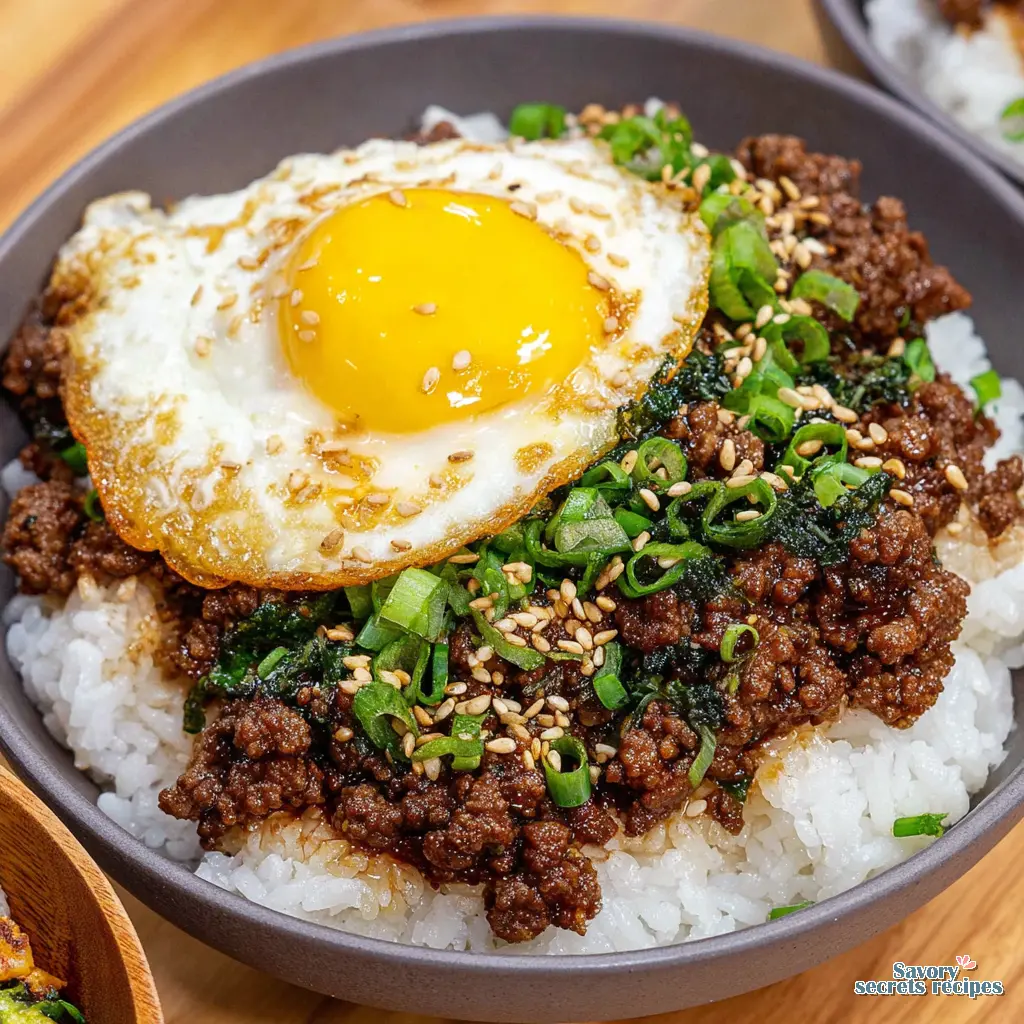
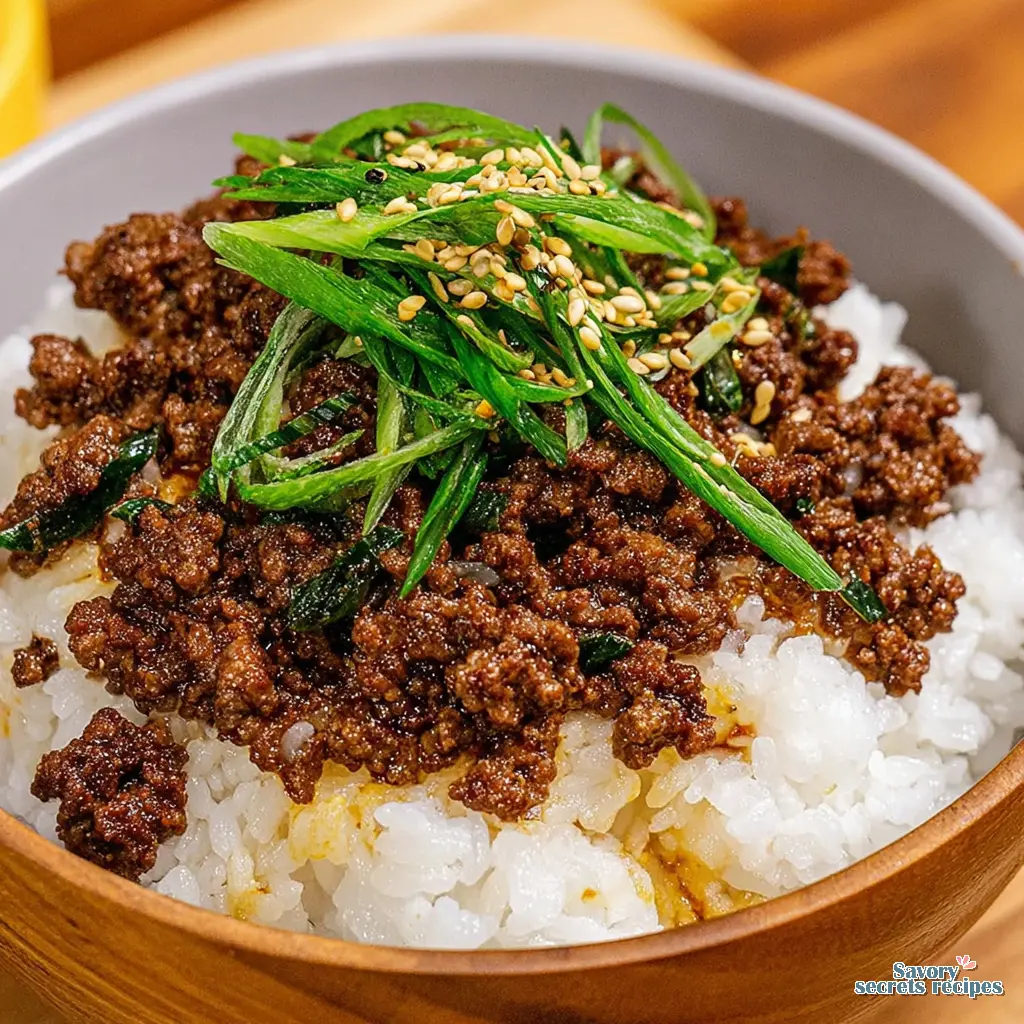
- Place a generous scoop of white rice into each serving bowl.
- Top each bowl with a fried egg for added flavor and protein.
- Garnish with sesame seeds and thinly sliced green onions.
- Serve alongside your choice of vegetables or a side salad.
Nutrition
Notes
- Let the beef get crispy first before putting in the sauce.
The 20-Minute Weeknight Dinner Solution
It is 6 PM on a Wednesday. You are staring into the fridge, completely exhausted from work, and trying to decide between ordering expensive takeout or eating a bowl of cereal. I get it. Decision fatigue is a real thing. Let me show you what I mean with this korean ground beef rice bowl recipe. It is the absolute perfect solution for those nights when you need something savory, fast, and satisfying.
I usually grab the ingredients for this during my weekly Trader Joe’s run here in LA. It relies heavily on basic pantry staples you probably already have sitting around. We are talking about a 20-minute meal that tastes like you spent an hour building complex flavors.
I know this sounds like a bold claim, but you’ll never believe this took 15 minutes of actual active cooking time. The secret is treating affordable ground beef with the same respect you would a premium cut of steak. When you get that perfect balance of sweet and heat, it hits all the right notes.
This korean ground beef rice bowl recipe is my go-to when I am cooking for just two people and want zero fuss. The first whiff of garlic and fresh ginger hitting the hot pan is enough to bring anyone into the kitchen. Trust the process on this one.
Why This korean ground beef rice bowl recipe Works
Here’s the thing about that classic Korean BBQ flavor. It usually takes hours of marinating thin slices of ribeye to get it right. By using ground beef, we completely bypass the marinating time. The meat has so much surface area that it absorbs the savory sauce almost instantly.
I’m not totally sure who first decided to adapt bulgogi flavors for ground meat, but it is brilliant. You get all the umami from the soy sauce and the deep caramel notes from the brown sugar without the premium price tag. It is a highly budget-friendly approach to international flavors.
Let’s talk about the science of bulgogi for a second. Traditional recipes use grated Asian pear or apple and onion to tenderize the meat. We are going to borrow that technique here. Grating an apple and a little onion into a juicy paste creates a more authentic flavor profile. It sounds like an extra step, but it takes thirty seconds and completely changes the dish.
You also get total control over the spice level. If you are feeding kids or just don’t love heat, you can easily dial it back. That makes this a genuinely family-friendly ethnic meal that doesn’t require making two separate dinners.
Ingredients for Korean Beef Bulgogi Bowls
You probably have most of these ingredients in your pantry right now. That is the beauty of this easy korean ground beef rice bowl. The foundation is simple. You need ground beef, soy sauce, brown sugar, garlic cloves, and fresh ginger. I’d probably lean toward using an 80/20 ground beef blend because the fat carries the flavor, but 90/10 works fine if you prefer it leaner.
For the aromatics, fresh ginger and garlic cloves are non-negotiable. I remember my uncle Marc letting me stand on a milk crate at his bistro’s prep station when I was a kid. He taught me how to properly mince aromatics. He’d check my cuts with a ruler. Seemed harsh at the time, but now I get it. You want the garlic and ginger to practically melt into the sauce, so use a microplane or fine grater.
You will also need toasted sesame oil. Do not skip the toasted sesame oil. It provides a depth of flavor that regular, untoasted oil completely lacks. It smells incredible when it hits the warm beef.
As for the base, jasmine rice is my favorite because the slightly sticky texture is perfect for jumbling all the bowl components together. You can absolutely use brown rice or cauliflower rice if you want a low-carb option. That tracks perfectly with how flexible this meal is.
Easy Korean Drizzle Sauce Recipe
The sauce is where the magic happens. A great gochujang ground beef rice bowl relies on the perfect balance of salty, sweet, and spicy. Gochujang paste is a fermented Korean chili paste that brings a complex, earthy heat you just cannot get from regular red pepper flakes.
If you are sensitive to spice, start with a small amount of gochujang, maybe just one teaspoon, and adjust upward. Different brands have completely different heat levels. I usually buy mine at the local Asian market, but most major supermarkets carry it now. If you absolutely cannot find it, you can mix a little Sriracha with honey and sesame oil in a pinch, though the flavor will be a bit different.
We balance that heat with soy sauce and brown sugar. To add brightness, we use rice vinegar. Many traditional recipes call for mirin, but I prefer using a splash of rice vinegar mixed with a tiny pinch of extra sugar. It gives you that same sweet tang without needing a specialty cooking wine.
Mix all of this in a small bowl before you even turn on the stove. You want it ready to go the second the beef is browned.
How to Make Korean Ground Beef Rice Bowls
The key step here is how you cook the beef. You want to sear it, not steam it. I once scheduled a video shoot for a beef recipe and we overcrowded the pan. The meat just boiled in its own juices and turned gray. We had to scrap the footage and start over. I learned to trust the process, not the clock.
Get your skillet nice and hot before adding the meat. Break it up with a wooden spoon, but then leave it alone for a minute. Let it do its thing. You want those crispy, caramelized beef bits on the bottom. That is where the flavor lives.
Once the meat is browned, you need to drain grease. This is where most people run into trouble. If you leave all the fat, the bowl gets incredibly heavy. If you drain it completely dry, you lose the richness. I like to tilt the pan, spoon out the excess liquid, but leave about one tablespoon of fat in the pan. Makes sense to me, right?
Pour your prepared sauce over the browned beef. The pan will immediately sizzle, and the kitchen will smell amazing. Let it simmer for just a couple of minutes until the sauce reduces and coats the meat in a glossy, sticky glaze. You’ll know it’s ready when the liquid is mostly gone and the beef looks shiny.
Visual Troubleshooting: Is my beef too greasy?
Mistake: The sauce won’t stick to the meat and looks separated.
Solution: You left too much fat in the pan. The oil is repelling the water-based soy sauce. Next time, drain more grease before adding the sauce. For now, turn up the heat slightly and stir vigorously to help it emulsify.
Mistake: The beef is dry and tough.
Solution: You likely overcooked the beef before adding the sauce, or drained every single drop of fat. Ground beef should be cooked to 160 degrees Fahrenheit for safety, but don’t let it dry out. Add a splash of water to the pan to help reconstitute the sauce.
Mistake: The flavor is overwhelmingly salty.
Solution: You might have used dark soy sauce instead of light or all-purpose soy sauce. Dark soy is much more intense. Balance it out by adding a little more brown sugar and serving it with extra plain rice.
Expert Tips for the Best Flavor
I’m not precious about traditional methods if a shortcut gets you ninety percent of the way there with half the effort. But a few small details really elevate this dish. First, prep all your vegetable components ahead of time. Once the beef hits the pan, things move incredibly fast.
For a ground beef kimchi rice bowl, the kimchi is technically optional but highly recommended. The cold, crunchy, acidic bite of the fermented cabbage cuts right through the rich, sweet beef perfectly. If you don’t like kimchi, make some quick pickled cucumbers. Just slice a Persian cucumber, toss it with a little rice vinegar, a pinch of sugar, and salt. Let it sit while you cook the meat.
Another tip I picked up from a chef I was filming: taste as you cook. Sounds obvious, but I’d been treating recipe steps like a rigid checklist. Taste the sauce before you pour it in. If it needs more sweetness, add a pinch of sugar. If it needs more heat, add red pepper flakes.
Recipe Variations and Substitutions
This korean ground beef rice bowl recipe is incredibly adaptable. In my experience, though your mileage may vary, you can swap the proteins easily. Substitute ground chicken or turkey if you prefer. Just keep in mind that poultry is much leaner, so you might need a tiny splash of neutral oil to get a good sear.
If you are cooking for someone who is gluten-free, this is an easy fix. Swap the regular soy sauce for Tamari or coconut aminos. You also need to check your gochujang labels carefully, as many traditional brands contain hidden wheat or barley. There are certified gluten-free versions available at Whole Foods.
Want to mix up the presentation? Serve this Ssam-style. Ditch the rice and use butter lettuce or perilla leaves to make little wraps. It is a fantastic lighter option, especially during those rare warm spring days here in California.
Storage and Reheating Instructions
If you are into meal prep, this recipe is a lifesaver. You can double the batch and have lunches sorted for days. The trick to a good meal prep partitioning guide is keeping the temperatures separate. Never mix your cold toppings into the hot beef before storing, or you will end up with soggy vegetables.
Store the cooked beef and rice in an airtight container in the fridge for 3 to 4 days. Keep your quick pickled cucumbers, green onions, and kimchi in separate small containers. When it is time to eat, heat the beef and rice first, then add your fresh garnishes.
When reheating the rice, it can sometimes get hard and dry in the microwave. Not a huge deal, but worth noting. Just sprinkle a few drops of water over the rice and cover it loosely with a damp paper towel before microwaving. It steams the grains right back to their fluffy state. You can also freeze the cooked beef for up to 3 months. Just thaw it overnight in the fridge before reheating.
Frequently Asked Questions
Wrapping It Up
There is something genuinely satisfying about looking at a clean pan and a full belly, knowing you pulled it off in under twenty minutes. This korean ground beef rice bowl recipe proves you don’t need hours of prep to master international flavors at home. It is fast, it is affordable, and it honestly beats ordering delivery on a busy weeknight.
I love seeing how you adapt these techniques in your own kitchens. If you make this, definitely tag me in your bowl art photos. And for more inspiration, check out my Pinterest boards where I save all my favorite quick weeknight dinner ideas. You’ve got this.
Source: Nutritional Information
How can I make a korean ground beef rice bowl recipe taste like authentic bulgogi?
The real secret is grating a little bit of fresh apple and onion directly into your sauce mixture. It mimics the traditional marinade enzymes and gives you that complex, authentic bulgogi sweetness that plain sugar just can’t replicate. Trust me, it takes thirty seconds and changes everything.
What is the best way to incorporate gochujang into a ground beef bulgogi rice bowl?
Don’t just drop the paste into the hot pan. Gochujang is thick and will clump up. Whisk it thoroughly into your liquid ingredients (soy sauce, vinegar, water) in a small bowl first. This ensures it distributes evenly and creates a smooth, glossy coating over the beef.
Can I add kimchi to an easy korean ground beef rice bowl for extra flavor?
Absolutely. I actually insist on it. The cold, acidic crunch of fermented kimchi perfectly balances the rich, sweet, and savory notes of the beef. Serve it right on top or on the side. It elevates a simple weeknight dinner into something that feels like proper restaurant takeout.
How many calories and what is the nutrition profile of a korean ground beef rice bowl?
It really depends on your beef fat percentage. Using 90/10 lean ground beef keeps it lighter, usually around 450 to 500 calories per bowl including the rice. You get a solid hit of protein, but watch the sodium from the soy sauce. You can always use low-sodium soy sauce to control that.
What are the best vegetable substitutes for a ground beef kimchi rice bowl?
If you aren’t a fan of kimchi, quick pickled cucumbers are my top choice. You can also quickly sauté some shredded cabbage, bok choy, or edamame in the same skillet after the beef is done. Steamed broccoli or even raw shredded carrots work great for adding necessary crunch.
What temperature should ground beef be cooked to?
For safety, always cook ground beef to an internal temperature of 160 degrees Fahrenheit. Because we are crumbling it in a hot skillet, it cooks rapidly. Just make sure no pink remains before you pour in the sauce. It usually only takes about five to seven minutes.
Is gochujang gluten-free?
Usually, no. Traditional gochujang often contains wheat or barley as part of the fermentation process. If you are strictly gluten-free, you must read the labels carefully. Look for brands specifically marked certified gluten-free, which use rice flour instead of wheat.
What is the best rice to use?
I’d probably lean toward jasmine or short-grain sushi rice. You want a slightly sticky texture so the rice holds together when you mix it with the saucy beef and eat it with chopsticks. Long-grain white rice works, but it tends to scatter a bit too much in the bowl.