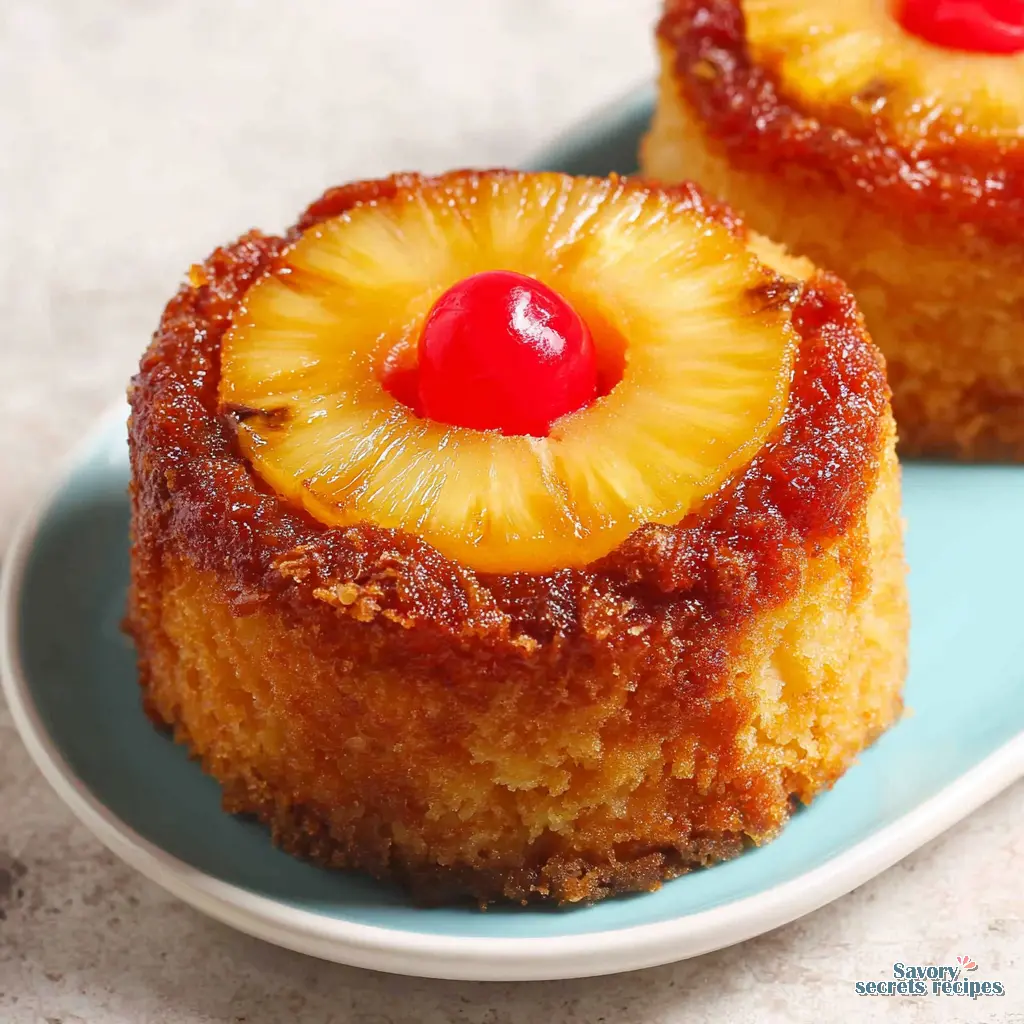
Perfect Pineapple Upside Cake Bundt
Ingredients
Method
- Preheat oven to 350°F. Generously grease a bundt pan with cooking spray. In a medium bowl, whisk together melted butter and brown sugar, then pour the mixture into the bottom of the bundt pan.
- Arrange halved pineapple rings and cherries around the bottom of the pan, alternating them.
- In a large bowl, beat together the cake mix, vegetable oil, pineapple juice, water, and eggs. Pour the batter over the pineapples and cherries. Bake for about 35 minutes, or until a toothpick inserted comes out clean.
- Cool the cake in the pan for 10 minutes. Then, slide a knife or small offset spatula around the edges and center to release the cake. Invert the cake onto a serving tray.
- Serve warm or at room temperature, slicing the cake between the pineapples.
Nutrition
Notes
Why This Pineapple Upside Cake Recipe Works
I remember standing on a stepstool in my Opa’s kitchen in Whitefish Bay, watching him make a pineapple upside cake. He’d let me arrange the cherries in the center of the rings, a task that felt monumentally important. The real lesson, though, came when he flipped the pan. That moment of suspense, the gentle tap, the reveal of that perfect, sticky, golden topping. It felt like magic. Now, after testing more pans and techniques than I care to admit, I realize it wasn’t magic. It was just good, consistent process. That’s what this recipe is about. It’s a tool that should disappear in your hand, letting you focus on the joy of the reveal without the fear of a stuck cake.
This version works because it respects the fundamentals. The brown sugar and butter create a caramel that’s robust but not brittle. The cake mix batter, boosted with a bit of pineapple juice, is forgiving and reliably moist. Most importantly, we’re going to talk about the pan, the prep, and that flip. To be clear, if the handle feels wrong during the flip, everything else suffers. We’ll get to that. This is the kind of design that makes sense, a solid performance across the board.
Key Ingredients and Why They Matter
Let’s talk about the components. A good tool is only as good as the materials, right? For this pineapple upside cake, each ingredient has a specific job.
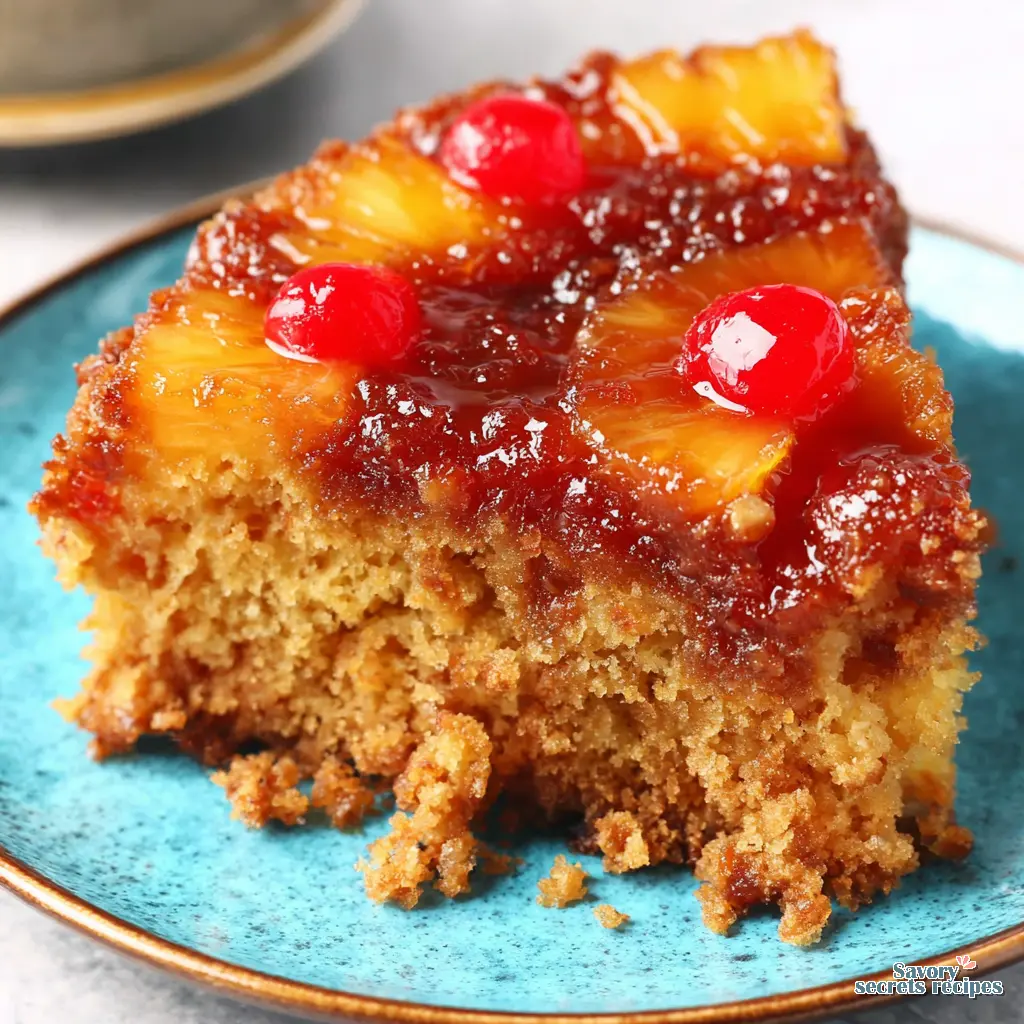
First, the topping. Packed light brown sugar and butter aren’t just sweet and rich. The molasses in the brown sugar encourages a deeper, more complex caramel that stays a bit gooey. That’s exactly what you want to see. The butter provides the fat needed for that luxurious mouthfeel and helps the sugar melt evenly. Using canned pineapple rings and maraschino cherries is a classic for good reason. The rings are uniformly sliced, which means even cooking, and the cherries provide that iconic pop of color and flavor. Just remember to blot them well. Excess liquid is the enemy of a good crust.
For the cake, we’re using a yellow cake mix as our foundation. It’s reliable. In practice, it gives us a consistent crumb and sweetness that pairs perfectly with the fruit. We’re doctoring it up with vegetable oil for tenderness, eggs for structure, and swapping some of the water for pineapple juice. This isn’t being fussy. That juice adds a subtle tropical note that reinforces the pineapple flavor throughout the entire cake, not just on top. It’s a small swap with a big payoff. All things considered, it’s a simple list that does exactly what it promises.
Your Pan is Your Most Important Tool
This might be personal preference, but I’ve tested this in everything from a vintage cast iron skillet to a non-stick cake pan from the grocery store. Your mileage may vary with material, but the size is non-negotiable. A 9×13-inch metal baking pan is your best bet for this recipe. It gives the batter room to rise without overflowing and provides a large, stable surface for the flip.
Pan prep is where most mistakes happen. You need to grease it. Heavily. I use cooking spray for an even, convenient coat. Then, you’ll press the brown sugar mixture into the bottom. This layer needs to be even. If it’s thicker in one spot, that area will be overly sweet and might not set properly. Think of it like seasoning a pan. Good browning takes patience and an even foundation. A cast iron skillet can work beautifully for a deeper, more defined caramel edge, but for a beginner, the straight sides of a cake pan make the flip less intimidating. The tool should disappear in your hand, and for most home bakers, that’s a standard baking pan.
Building Your Pineapple Upside Cake
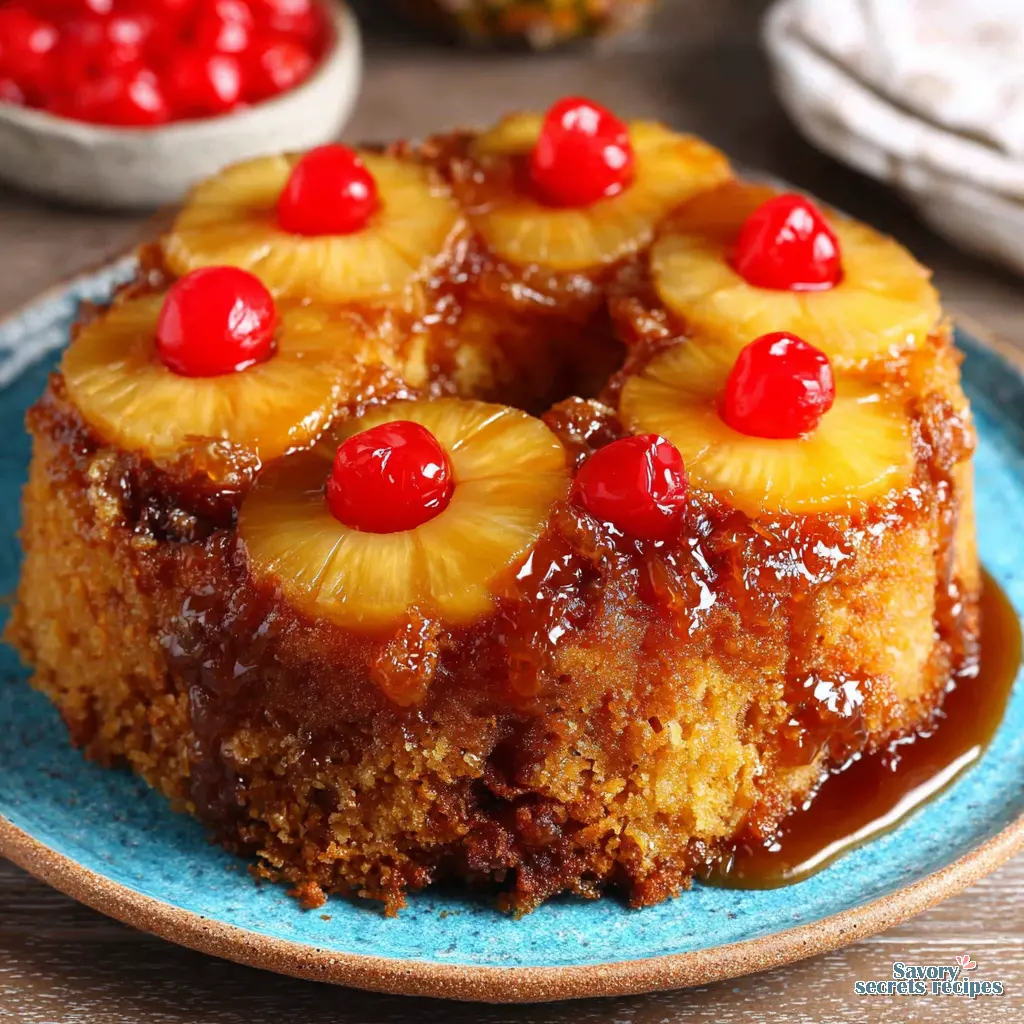
The assembly is where you can relax a bit. After you’ve got your caramel base ready, arrange the pineapple rings. Fit them in snugly. You’ll likely get about six across. Then, place a maraschino cherry in the center of each ring. It looks pretty, sure, but it also serves a purpose. The cherry acts like a little flavor anchor right in the sweet spot of each slice.
Now, the batter. Here’s a tip I learned the hard way. Ensure your eggs are at room temperature. Why? Cold eggs can cause the batter to seize up a bit with the oil, leading to potential over-mixing as you try to smooth it out. Over-mixing is the fast track to a tough cake. Just mix until the ingredients are combined and no dry streaks remain. Let it do its work in the oven. Pour the batter carefully over your arranged fruit. I use a spatula to gently spread it to the edges, trying not to disturb the pineapple rings underneath. It’s okay if they shift a tiny bit. That tracks with homemade charm.
The Flip: A Confidence-Building Moment
This is the step that makes a pineapple upside cake a pineapple upside cake. The anticipation is half the fun. But I get it. It can be nerve-wracking. Here’s the foolproof method.
First, bake the cake until it’s golden brown and a toothpick inserted in the center comes out clean. Then, pull it out and let it cool on a wire rack. Not for five minutes. Give it a solid 10 to 15. This waiting period is critical. It allows the molten sugar topping to cool just enough to set, so it doesn’t become a lava flow when you invert it. But don’t wait too long, or the caramel can harden and stick.
While it’s cooling, grab a large serving platter or a baking sheet. It must be larger than your cake pan. Run a thin knife or an offset spatula around the edges of the cake to loosen it from the pan. Place your platter upside down over the top of the pan. Wear oven mitts. The pan will still be warm. Here’s the move: Hold the platter firmly against the pan with both hands. In one quick, confident, smooth motion, flip the whole thing over. You’ll hear a slight thud. Set it down on the counter. Give the pan a gentle tap or shake. Then, slowly lift it straight up. If a pineapple ring or two sticks, just use a spoon to place it back. No drama.
Worth noting: If you’re nervous, practice with an empty pan and platter first. It sounds silly, but it builds muscle memory. Clean as you go or regret it later, but in this case, practice the flip and you’ll bake with confidence.
Common Pineapple Upside Cake Mistakes & How to Fix Them
Common Mistakes & Fixes
Mistake: A soggy bottom cake.
Solution: You didn’t blot the pineapple and cherries. This is the number one cause. Press them between paper towels until they feel just damp, not wet.
Mistake: The topping sticks to the pan.
Solution: You either didn’t grease well enough or you flipped too late. A well-greased pan and that 10-15 minute cooling window are your best friends.
Mistake: A dense, dry cake.
Solution: Over-mixing or over-baking. Mix just to combine, and start checking for doneness a few minutes before the timer goes off. Ovens vary.
Mistake: The caramel is pale and thin.
Solution: You might not have packed the brown sugar firmly into the pan. Press it down into an even layer for a proper, rich topping.
Storing, Serving, and Making Ahead
Your beautiful pineapple upside cake is best served slightly warm, when the caramel is at its most luscious. If you have leftovers, and that’s a big if, cover them tightly and store at room temperature for a day. For longer storage, refrigerate for up to 3 days. The fridge will change the texture, making the cake a bit denser and the topping firmer. That’s just science.
To reheat, a quick 10-second burst in the microwave for a single slice works. For a whole cake, tent it with foil and warm in a 300°F oven for about 10 minutes. You can make the topping a day ahead. Just prepare it in the pan, cover, and refrigerate. Bring the pan to room temperature before adding the batter and baking. Freezing isn’t my first recommendation for this particular cake. The texture of the topping can become a bit grainy upon thawing. Case in point: some designs are best enjoyed fresh.
Frequently Asked Questions
Final Thoughts
When you make this pineapple upside cake, get ready for that moment. The smell of caramelizing sugar filling your kitchen, the golden-brown sponge rising around the fruit, and finally, that confident flip onto the platter. It’s a retro dessert that never loses its appeal because it delivers pure, simple joy. It tastes like Sunday afternoons and shared successes.
I hope this guide gives you the confidence to try it. Share your beautiful cake creations with me over on Pinterest. I’d love to see your spins on this classic. Now, go preheat that oven. You’ve got this.
Source: Nutritional Information
What type of pan is best for pineapple upside down cake?
A light-colored metal 9×13-inch baking pan is the most reliable. It conducts heat evenly and its straight sides make the flip easier. Cast iron works but requires more confidence with the timing of the flip.
How do I keep my pineapple upside cake from sticking?
Generous greasing with cooking spray is step one. Step two is letting the cake cool for 10-15 minutes after baking so the topping sets slightly. Always run a knife around the edge before flipping.
Why is my pineapple upside down cake soggy?
Excess moisture from un-blotted fruit is the usual culprit. Also, ensure your cake is fully baked. An under-baked center will steam the fruit topping from below, creating a wet layer.
Can I use fresh pineapple for this cake?
You can, but canned is actually easier for a pineapple upside cake. It’s consistently sweet, tender, and sliced uniformly. Fresh pineapple needs to be cooked first to soften and may release more variable juice.
Can I make this pineapple upside cake ahead of time?
The topping can be arranged a day in advance. For the best texture, bake and serve the cake the same day. You can bake it a few hours ahead and reheat gently before serving.
Is it okay to substitute the yellow cake mix?
Fair enough. A French vanilla or butter recipe yellow mix will work fine. For a homemade batter, use a standard yellow cake recipe that fits a 9×13 pan. The doctoring with pineapple juice still applies.