Easy Make-Ahead Red Velvet Cheesecake Bars
Ingredients
Method
- Preheat oven to 350°F (175°C). Line an 8x8-inch baking pan with parchment paper, leaving an overhang on two sides for easy removal. Lightly grease exposed sides.
- Make the red velvet base: In a medium bowl, whisk together flour, cocoa powder, baking soda, and salt.
- In a large bowl, whisk melted butter and 3/4 cup sugar. Whisk in 1 egg, 1 tsp vanilla, red food coloring, and vinegar until smooth and uniformly red.
- Gently fold dry ingredients into wet ingredients until just combined. Spread thick batter evenly into the prepared pan.
- Make the cream cheese swirl: In a clean bowl, beat softened cream cheese until smooth and creamy, about 1-2 minutes.
- Beat in 1/2 cup sugar until combined. Add 1 egg and 1 tsp vanilla, mixing just until the filling is silky and uniform. Do not overmix.
- Pour cream cheese filling over the red velvet layer and spread gently to cover.
- Drag a knife or skewer through the two layers in a zig-zag or swirling pattern to create a marbled effect.
- Bake for 35-40 minutes, until edges are set and the center has a slight, gentle jiggle.
- Let the pan cool completely on a wire rack. Then refrigerate for at least 3 hours, or preferably overnight, before slicing.
Nutrition
Notes
Why You’ll Adore These Red Velvet Cheesecake Bars
You know, life in Astoria, Queens, gets pretty hectic. Sometimes, I find myself staring at the calendar, realizing I’ve promised to bring a dessert to a potluck or a school event, and I’ve got, what, an hour? Maybe two, if I’m lucky, after picking up Salma from her architecture studies and dealing with the evening rush. We’ve all been there, haven’t we? That moment when you desperately want to bring something homemade and truly special, but the thought of a multi-tiered cake or a delicate soufflé just feels like too much. I mean, who has that kind of time?
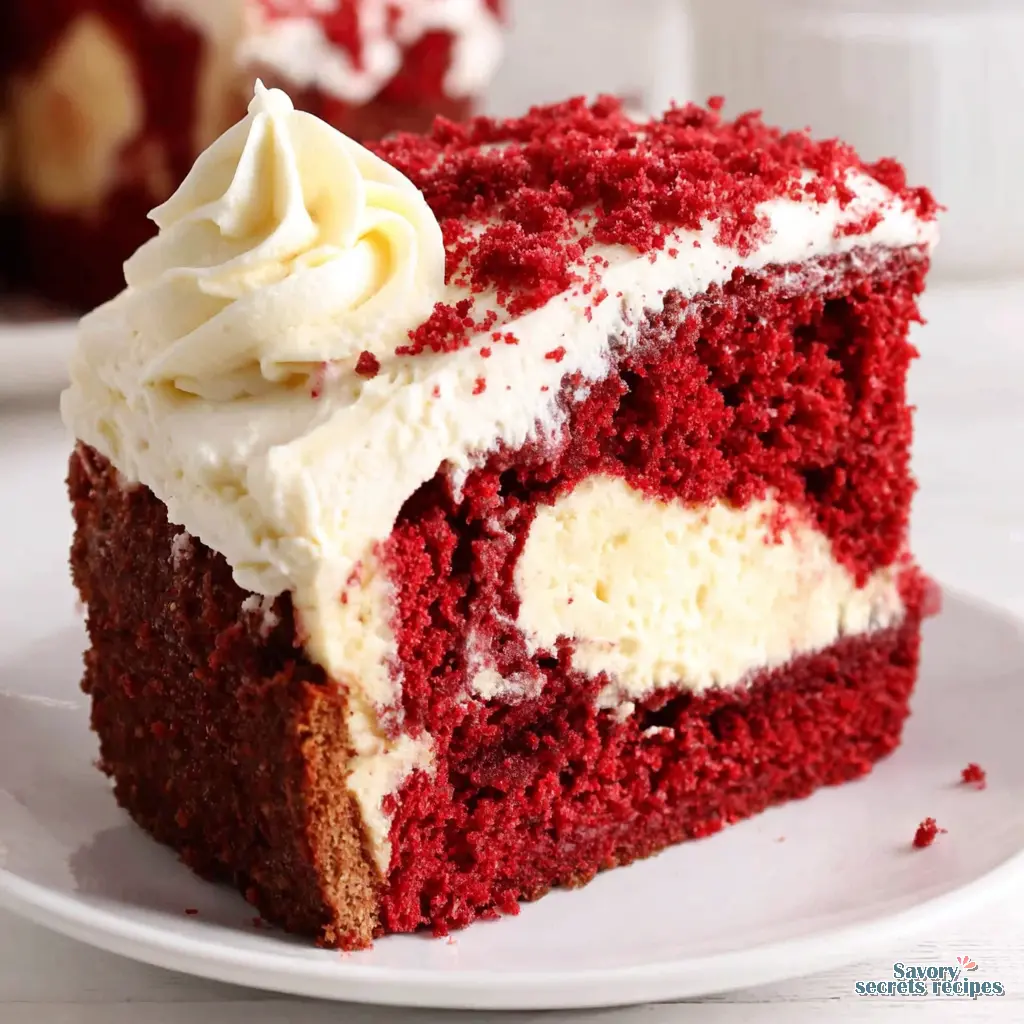
That’s where these red velvet cheesecake cake bars come in. This isn’t just another dessert; it’s a little miracle, honestly. It’s the perfect blend of that rich, moist red velvet cake we all love, swirled with a tangy, creamy cheesecake layer, all in one easy-to-manage bar. They look absolutely stunning, like you spent all day in the kitchen, but the truth is, they’re surprisingly simple. They’re a fantastic solution for those mild spring days here in Los Angeles, perfect for a picnic or a casual gathering where you want a delightful dessert that’s not too heavy but still comforting.
I get genuinely excited about recipes that deliver big flavor with minimal fuss, and these red velvet cheesecake bars are exactly that. They travel beautifully, they slice cleanly, and they disappear even faster. It’s so satisfying when it all comes together, and you’re left with a dessert that everyone raves about. Trust me, these are going to be your new go-to for impressing friends and family without adding any extra stress to your already busy schedule. You’ll thank me later, I promise.
The Heart of the Batter: Key Ingredients & Their Role
When we talk about making really good red velvet cheesecake cake bars, it all starts with understanding what each ingredient brings to the party. We’re not just throwing things in a bowl here; every component has a job, and knowing that helps us make better decisions in the kitchen. For instance, your cream cheese choice really matters for that velvety smooth cheesecake texture. I usually go for a full-fat block cream cheese, like Philadelphia, because it gives you that rich, dense consistency we’re after. The spreadable tubs, they’re just not the same, you know?
Then there’s the red food coloring. This is where you get to decide on your vibrancy. Two tablespoons refers to liquid food coloring, but if you’re using a gel or paste, you’ll need much less. Start with half a teaspoon and build from there. The red color deepens as it bakes, so don’t worry if it looks a little less intense in the batter. That tracks with what I’ve seen in countless tests. And cocoa powder, it’s not just for flavor. It reacts with the vinegar and buttermilk to give red velvet its signature tang and subtle depth. This needs time to hydrate properly with the wet ingredients to really bloom.
For the cake base, you could absolutely use a red velvet cake mix for a shortcut, and there’s no shame in that. We’re all about making life easier, especially when juggling a million things. But if you’re making red velvet cheesecake bars from scratch, ensure your vanilla extract is good quality. It makes a difference. And softened cream cheese, that’s crucial for a silky cheesecake batter. Cold cream cheese will give you lumps, and nobody wants that. Temperature is doing the heavy lifting here, allowing everything to emulsify beautifully.
Crafting Your Red Velvet Cheesecake Cake Bars
Let me walk you through this, because while these red velvet cheesecake cake bars look fancy, the process is quite straightforward. The first thing we need to tackle is getting our pan ready. This is one of those simple steps that makes all the difference, honestly. You’ll want to prep your 9×13 pan well with parchment paper, leaving an overhang on the sides. A little non-stick spray underneath the parchment helps it stick, too. This prevents sticking and makes lifting the whole slab out for slicing so much easier. I learned this the hard way, trust me. My first year as an editor, I published a sorbet recipe I’d only tested in my home freezer, and readers had issues. It taught me that my kitchen isn’t everyone’s kitchen, and being precise with prep instructions is key.
Once your pan is ready, you’ll whip up your red velvet cake batter. Remember, we’re not duplicating the full recipe card here, but focusing on the technique. You’re looking for that ribbon stage when you lift the beaters, where the batter falls back into the bowl in a thick ribbon. That’s the sweet spot for a moist cake layer. Next, spread about two-thirds of that luscious cake batter evenly into your prepared pan. This forms the foundational red velvet base for our bars.
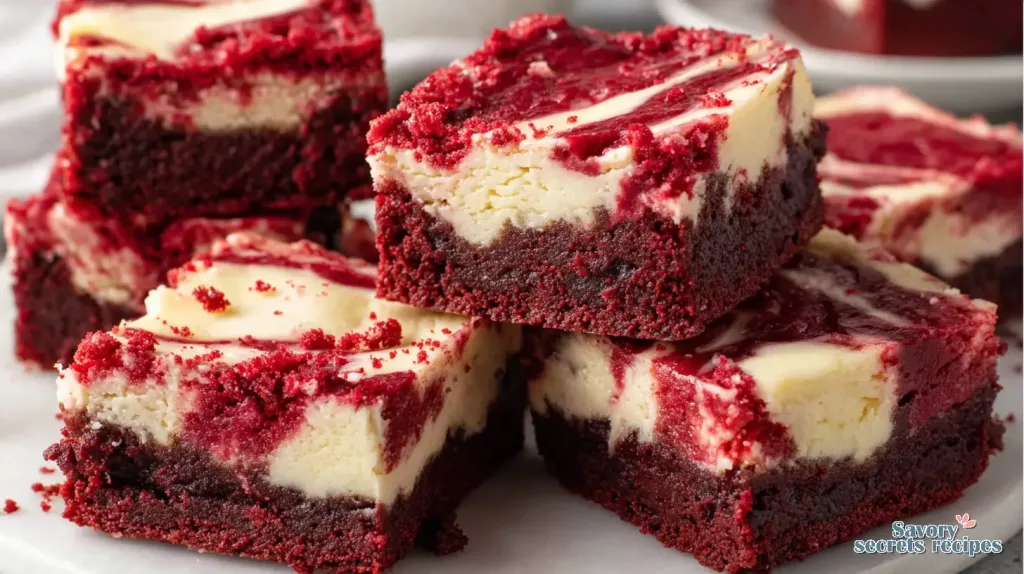
Now, for the cheesecake layer. You’ll mix your softened cream cheese, sugar, eggs, and a touch of vanilla until it’s velvety smooth. This isn’t being fussy, it’s the difference between a dense, creamy texture and something lumpy. Pour this cheesecake batter right over the red velvet base. Then, take the remaining red velvet batter and dollop it over the cheesecake. This is the part I love, watching the colors come alive. For a perfect swirl, use a butter knife or a toothpick. Drag it through the dollops and cheesecake batter, creating those beautiful red velvet cheesecake bars patterns. Don’t overmix it, though. We want distinct swirls, not a muddy mess.
Pro Tips for Your Best Red Velvet Cheesecake Bars
Baking these red velvet cheesecake cake bars is a delightful process, and a few little tricks can make all the difference, really elevating your results. First off, as I mentioned, always start with softened cream cheese. This isn’t just a suggestion; it’s a rule if you want a smooth, silky cheesecake texture without any lumps. I mean, who wants lumpy cheesecake? Give it a minute to settle on the counter, or a quick zap in the microwave for 10-15 seconds if you’re really in a hurry, but watch it closely.
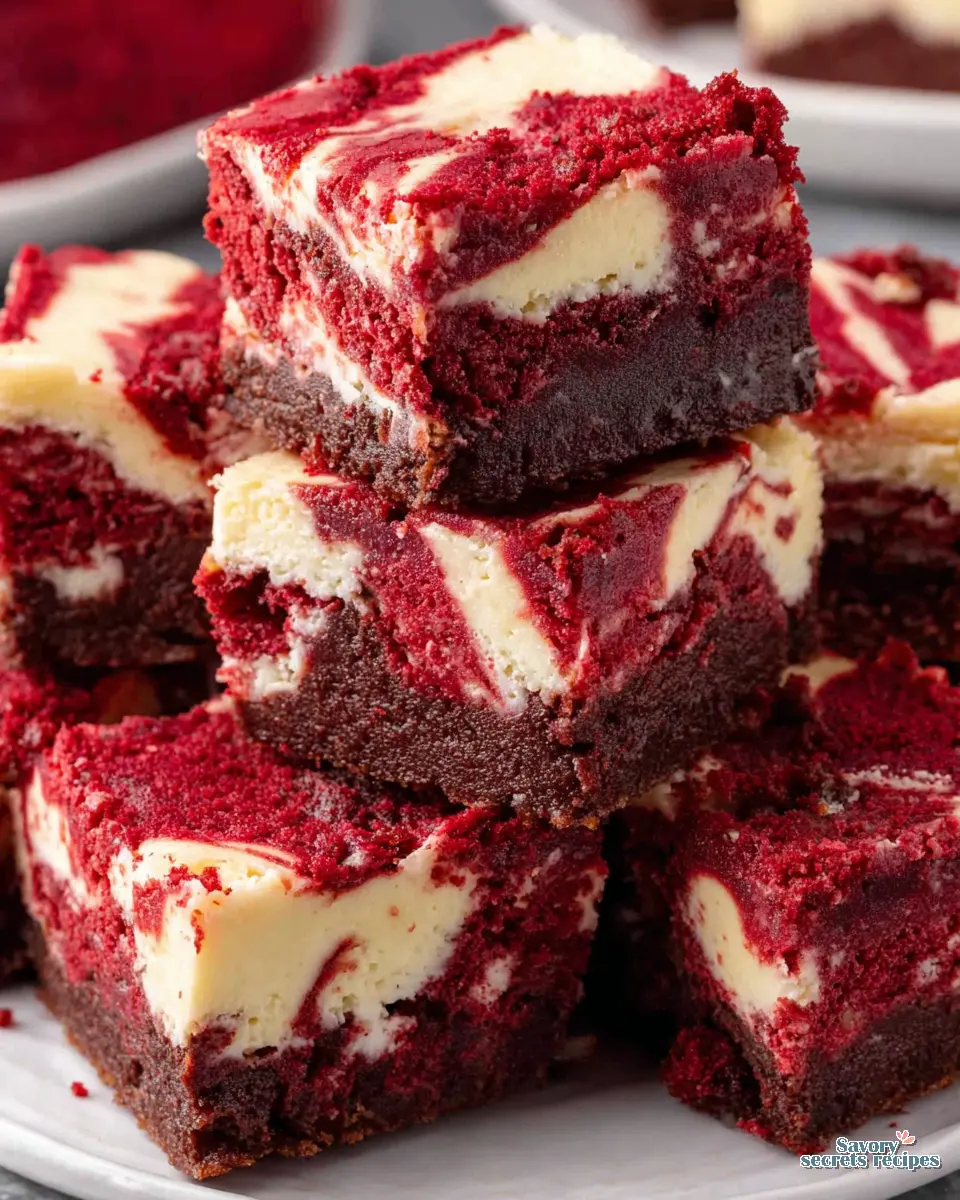
When it comes to that iconic swirl, remember less is more. Drop those dollops of red velvet batter over the cheesecake batter and use a butter knife or a toothpick to gently swirl. Don’t go crazy, you’re not trying to fully mix them. We’re looking for elegant streaks of red, not a uniform pink. That’s the sweet spot. As for baking, keep an eye on it. The edges of the cheesecake should be set, but the center might have a slight jiggle. That tracks with what I’ve seen for perfect doneness. Overbaking can lead to cracks, and we don’t want that.
Cooling time is critical, and it’s where patience really pays off. Once out of the oven, let them cool completely on a wire rack at room temperature. Then, and this is important, refrigerate bars before slicing for cleaner cuts. I tend to find at least 4 hours, or ideally overnight, makes for the neatest slices. Your mileage may vary depending on your refrigerator’s temperature, but chilling instructions are non-negotiable here. When you’re ready to slice and serve, dip your knife in hot water and wipe it dry between each cut. It’s a small step, but it makes a huge difference in presentation, giving you those perfectly neat finger food dessert portions. Serve chilled for the best texture, always.
Troubleshooting Common Issues with Red Velvet Cheesecake Cake Bars
Mistake: Your cheesecake layer cracks.
Solution: This often happens if the cheesecake is overbaked or cooled too quickly. The key is to bake until the edges are set but the center still jiggles slightly, and then let it cool gradually. Don’t open the oven door during baking, if you can help it. I sometimes wonder if I’m too focused on precision, but with cheesecake, it really matters.
Mistake: The cheesecake texture is lumpy.
Solution: You likely used cold cream cheese. Ensure your cream cheese is completely softened to room temperature before mixing. That’s the first step to getting that velvety smooth finish. Let’s troubleshoot together, next time, get it soft.
Mistake: The red color isn’t vibrant enough.
Solution: You might not be using enough red food coloring, or the right type. For a truly bright result, use a good quality liquid or gel food coloring. If using paste, remember to use much less, starting with half a teaspoon. The color will deepen slightly with baking, but if it starts pale, it’ll stay pale.
Mistake: The bars are messy to slice.
Solution: This one’s easy. You’re slicing them before they’re properly chilled. Those chilling instructions are there for a reason! Refrigerate bars for at least 4 hours, or overnight, for nice, clean cuts. And use that hot knife trick I just mentioned. It’s so satisfying when it comes together cleanly.
Making it Your Own: Variations & Substitutions
One of the things I love about baking is how adaptable recipes can be. These red velvet cheesecake cake bars are no exception. While the classic version is truly wonderful, sometimes you want to switch things up, or maybe you have specific dietary needs in mind. I tend to find, but test it yourself, that the core structure of this recipe is quite forgiving. For example, if you’re looking for a gluten-free option, you can easily use a gluten-free red velvet cake mix for the base, or swap the cake layer entirely for a gluten-free graham cracker crust. Just mix crushed gluten-free graham crackers with melted butter and press it into the pan before adding the cheesecake layer. It’s a simple swap that works beautifully.
Speaking of crusts, if you’re not keen on the cake base, an Oreo crust is another fantastic alternative. Crush about 24 Oreo cookies (without the cream filling if you want a less sweet crust, or with for extra richness), mix with 1/4 cup of melted butter, and press it into your 9×13 pan. It adds a delicious chocolatey crunch that complements the tangy cream cheese beautifully. This is what works in my kitchen when I’m feeling a bit adventurous. For those who prefer a less-sweet dessert, you could reduce the sugar slightly in the cheesecake batter, perhaps by a quarter cup. I like my frozen desserts on the less-sweet side, around 16-18% sugar by weight, and that philosophy can apply here too, letting the other flavors come through.
If salted butter is all you have on hand instead of unsalted, that’s fine. Just omit any added salt in the recipe, as the butter will provide enough. And if vanilla sugar isn’t available, simply use regular granulated sugar and add an extra quarter teaspoon of vanilla extract with the cocoa powder. It’s about understanding the function of each ingredient and finding smart, simple substitutions. You’ve got this. These easy dessert bars are meant to be enjoyed, not stressed over.
Keeping Them Fresh: Storage & Freezing Instructions
So, you’ve made these incredible red velvet cheesecake cake bars, and now you want to make sure they last. That’s a smart move, especially if you’re planning for a party or just want to enjoy them throughout the week. Good news, these are fantastic make-ahead dessert options. After they’ve cooled completely and chilled (remember that crucial step!), you can store them in a single layer in an airtight container in the refrigerator for up to four days. I’m keeping an eye on it when I’m storing them, making sure no air gets in, because that can dry out the cake layer.
Now, for the freezer-friendly aspect. Can I freeze red velvet cheesecake bars? Absolutely! These bars freeze beautifully, which is a huge win for meal prep Sundays or when you’re stocking up for future potlucks. Wrap individual bars tightly in plastic wrap first, then wrap them again in aluminum foil. This double layer of protection helps prevent freezer burn. They’ll keep well in the freezer for up to one month. When you’re ready to enjoy them, just thaw them overnight in the refrigerator. Your mileage may vary depending on your freezer, but that’s a good general guideline.
How do you store cheesecake bars? For everyday storage, the refrigerator is your best friend. Always keep them in an airtight container to protect them from absorbing other fridge odors and to maintain their moist texture. And serve chilled for the best experience. That tangy cream cheese just shines when it’s cold, you know? It’s so satisfying when they’re perfectly firm and ready to slice and serve. That texture is exactly what we’re after. These are perfect for spring gatherings, picnics, and potlucks as the weather warms, and knowing you can make them ahead is a game-changer.
Frequently Asked Questions
More Delicious Red Velvet Treats
If you’ve fallen in love with these red velvet cheesecake cake bars, and I bet you will, there’s a whole world of red velvet deliciousness out there to explore! The combination of subtle cocoa, tangy buttermilk, and vibrant red color is just irresistible. Think about classic red velvet cupcakes with a swirl of cream cheese frosting, or maybe a festive red velvet trifle layered with whipped cream and berries. The possibilities are endless when you’re working with such a beloved flavor profile. Now we’re getting somewhere, expanding our baking repertoire.

Your New Favorite Dessert is Here
Honestly, when you make these red velvet cheesecake cake bars, get ready for compliments. They’re that perfect blend of impressive looks and straightforward baking that every busy parent or home cook dreams of. The pride and satisfaction of creating something this beautiful and delicious, with minimal fuss, is just wonderful. It’s so satisfying when it comes together, and you get to share a homemade treat with loved ones.
This is the part I love, seeing people enjoy something I’ve poured a little care into. So go ahead, grab your ingredients on your next Ralphs or Trader Joe’s run, and bring a little bit of that Astoria baking magic into your Los Angeles kitchen. Let me know how your red velvet cheesecake bars turn out in the comments below! For more inspiration and variations, check out my Pinterest boards. You’re about to discover your new baking superpower. Perfect.
Source: Nutritional Information
Can I make red velvet cheesecake cake bars ahead of time?
Yes, absolutely! These red velvet cheesecake bars are an excellent make-ahead dessert. You can prepare them completely, including the chilling time, up to two days in advance. Just keep them stored in an airtight container in the refrigerator until you’re ready to slice and serve. It really helps with busy schedules.
How do I store leftover red velvet cheesecake cake bars?
To store leftover red velvet cheesecake cake bars, place them in a single layer in an airtight container. Keep them in the refrigerator for up to four days for optimal freshness. For longer storage, you can freeze individual bars wrapped tightly in plastic wrap and foil for up to one month, thawing them in the fridge overnight.