Soft Gluten Free Vanilla Cupcakes Recipe
Ingredients
Method
- Preheat the oven to 350°F (180°C) and position a rack in the center. Line a cupcake pan with paper liners and set it aside.
- Combine the oil and sugar in a medium mixing bowl.
- Add the eggs and beat with an electric mixer at medium speed for one minute. Incorporate the flour, salt, baking powder, dairy-free milk, and vanilla extract or paste, then beat at medium speed for another minute.
- Spoon the batter evenly into the cupcake liners. Bake for 18 to 20 minutes, or until the centers spring back when touched and the cupcakes are lightly browned.
- Cool the cupcakes in the pan on a wire rack for five minutes. Transfer the cupcakes to the rack and let them cool completely before frosting.
- Beat the dairy-free butter and vanilla paste in a medium mixing bowl until smooth and creamy.
- Gradually add the powdered sugar one cup at a time, beating well. Alternate between one cup of powdered sugar and one tablespoon of dairy-free milk until all ingredients are fully blended.
- Beat in additional dairy-free milk as needed to achieve the desired consistency.
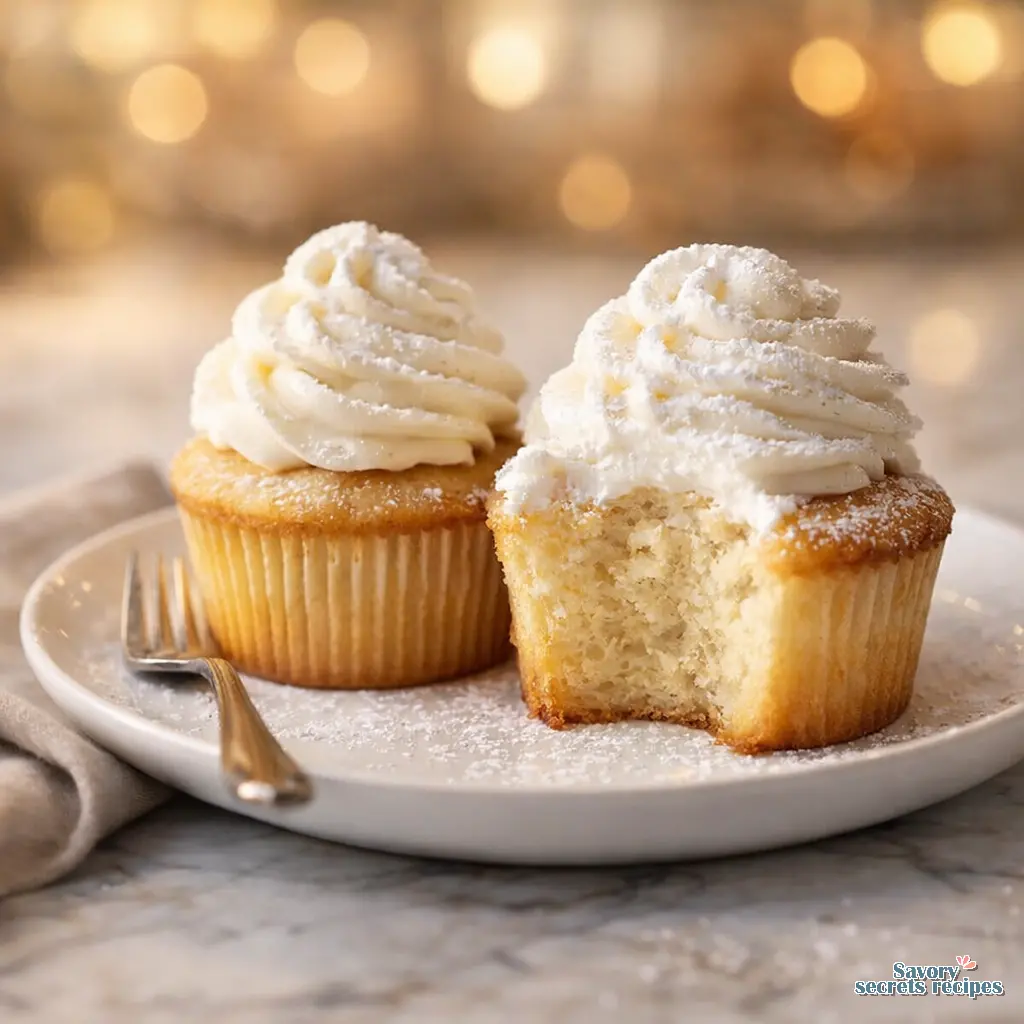
- Frost the cupcakes and serve.
Nutrition
Notes
The Secret to Vanilla Cupcakes Gluten Free That Actually Taste Normal
With Passover just around the corner and spring birthday party season in full swing, I know the absolute panic of needing a safe, delicious treat that everyone can actually enjoy. I mean, we have all been there. You spend twenty dollars on specialty ingredients at Ralphs, follow a recipe exactly, and the result tastes like sweetened sand. It is frustrating. But today, we are fixing that. A delicious gluten-free treat for your Passover celebration or weekend brunch is entirely possible.
My daughter Priya helps me test all the kid-friendly versions of my recipes. She has a very honest five-year-old palate and will absolutely tell me when something tastes weird. When I first started developing vanilla cupcakes gluten free, she took one bite and handed it back to me. Too crunchy, she said. She was right. The texture was terribly gritty. I went back to the drawing board, determined to figure out how to make gluten free vanilla cupcakes that aren’t gritty.
Let me walk you through this. You do not need a culinary degree to master this celiac safe dessert. You just need to understand how these specific flours behave. Once you get the hydration right, your family will be shocked that these are allergy-friendly. I was happy with how this turned out, and I think you will be too.
Why This Recipe Works (And Avoids the Gritty Texture)
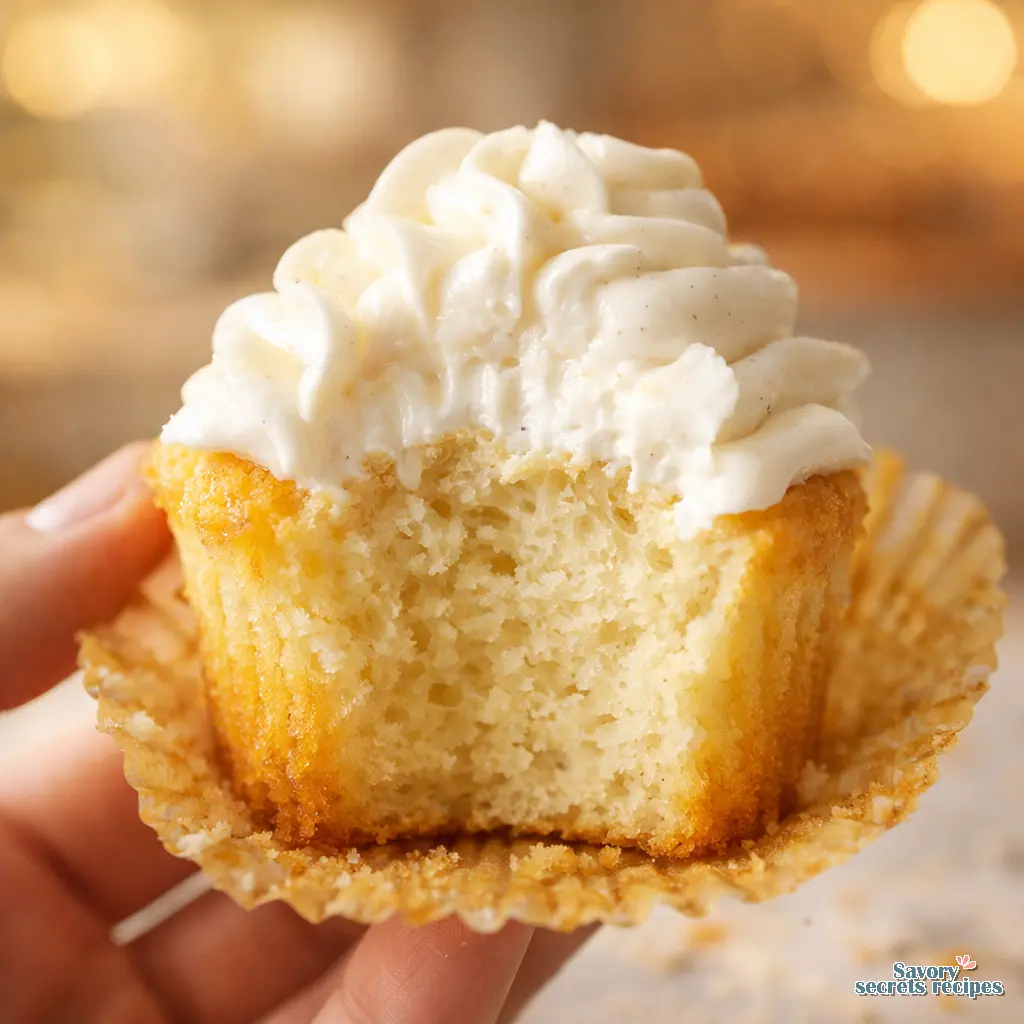
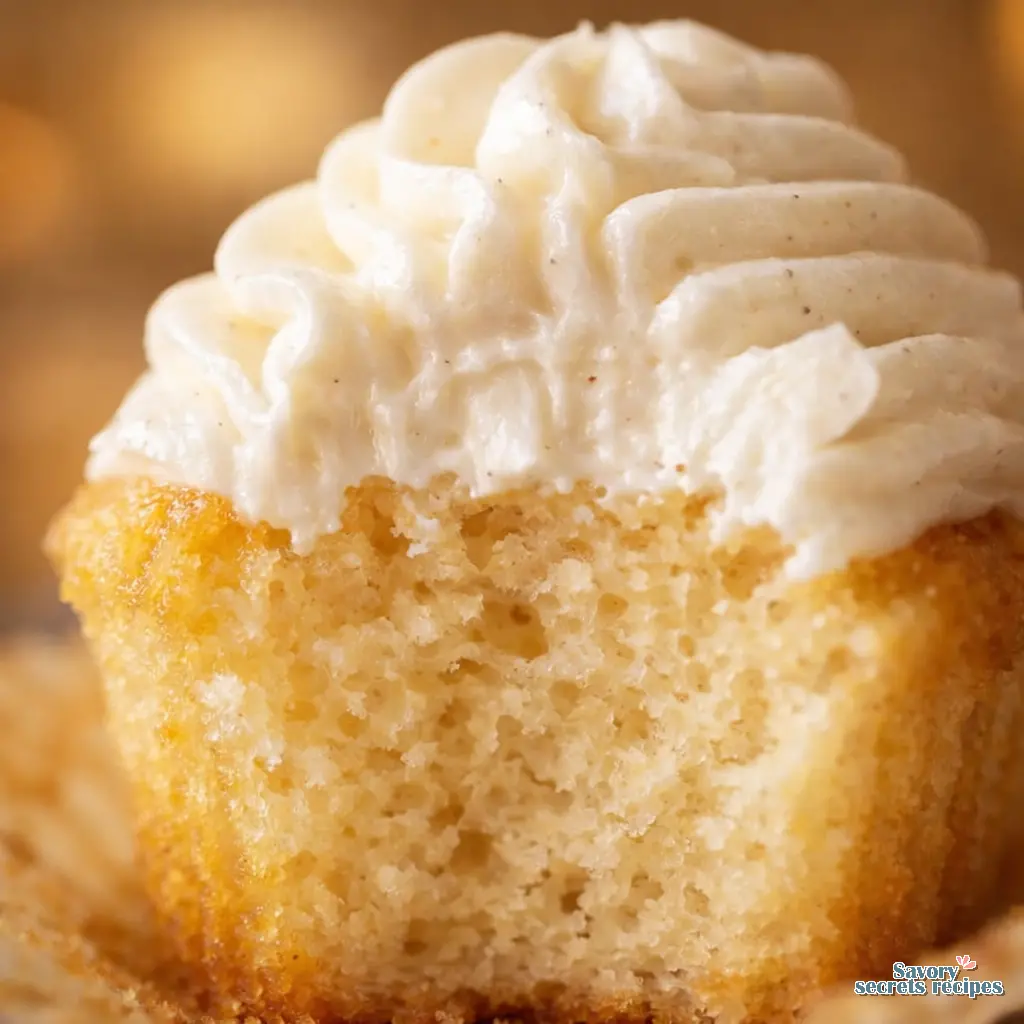
Here is what I have found works. The grittiness in most gluten-free baking comes from unhydrated rice flour. Rice flour is notoriously hard and needs extra time and moisture to soften up. If you just mix the batter and throw it in the oven, those little grains stay hard. That is why your cupcakes taste like they have sand in them.
We are using a high-quality 1-to-1 baking flour here. You want a blend that contains rice flour, tapioca starch, and potato starch. It also absolutely needs xanthan gum as a binding agent. If your blend does not have xanthan gum, the cupcakes will crumble into a sad pile of crumbs the second you bite into them. I usually grab Bob’s Red Mill or King Arthur Measure for Measure on my weekly Trader Joe’s or Whole Foods run.
In my testing, adding just a bit of almond flour to vanilla cupcakes improves their moisture and overall crumb structure. The fats in the almond flour give the cake a tender, springy feel that mimics wheat flour beautifully. Of course, if you are baking vanilla cupcakes gluten free for a kids birthday party and need them to be nut-free, you can skip the almond flour and just stick to the standard 1-to-1 blend. It will still be fantastic.
The ‘Spoon and Level’ Flour Guide
This is the part that matters. If you take your measuring cup and scoop directly from the bag of flour, you are packing the flour down. You will end up with way too much dry ingredient, and your cupcakes will be dense and dry. I learned this the hard way after publishing a recipe that failed for half my readers.
My ajji never measured anything when she made dosas on her cast iron tawa every Sunday morning. She just knew the consistency by feel. But gluten-free baking is a different science. We have to be precise. Always use a spoon to fluff the flour in the bag, then spoon it gently into your measuring cup, and level it off with a butter knife.
Honestly, weighing your ingredients with a kitchen scale is the best method. A cup of gluten-free flour should weigh about 148 grams. If you weigh it, you get perfect vanilla cupcakes gluten free every single time.
The ‘Hydration Rest’ (Your 15-Minute Batter Hack)
This one really works, and it is the biggest secret to eliminating that gritty texture. Once you mix your batter, do not put it in the oven right away. Let the batter rest on the counter for 15 minutes.
Why? Because gluten-free starches need time to absorb the liquids. During this 15-minute rest, the rice flour soaks up the dairy-free milk and oil, softening those hard little granules. If it looks a little too thin when you first mix it, that is normal. After 15 minutes, you will notice the batter has thickened up beautifully. This solved the problem I was having with dry cakes, and it is entirely worth the extra step.
Internal Temperature Guide & Visual Doneness Cues
Knowing exactly when to pull these out of the oven can be tricky. Gluten-free baked goods do not brown exactly the same way wheat flour does. They tend to stay a bit paler.
You will know it is ready when the tops form a nice golden dome and spring back slightly when you touch them gently. The classic toothpick test works too, just insert it into the center and it should come out clean. But if you really want to be safe, use an instant-read thermometer. The internal temperature of a perfectly baked gluten-free cupcake should be between 205°F and 210°F. This is your checkpoint for a crumb structure that is fully set but still moist.
Visual Troubleshooting Guide for Common Mistakes
❌ Mistake: The cupcakes exploded and overflowed the pan.
✅ Solution: You likely overfilled the liners. Fill cupcake liners only 1/2 to 2/3 full to prevent overflowing. Use an ice cream scoop for uniform sizing.
❌ Mistake: The cupcakes sank in the middle.
✅ Solution: This usually happens if you over-mix the batter, which incorporates too much air. Mix just until combined. Also, avoid opening the oven door during the first 12 minutes of baking.
❌ Mistake: The wrappers are completely stuck to the cake.
✅ Solution: Gluten-free cakes have high moisture. You must let them cool completely on a wire rack before peeling. Peeling wrappers while cupcakes are still warm is a guaranteed mess.
Dairy-Free Substitution Table & Egg-Free Testing
Can I make vanilla cupcakes gluten and dairy free using this specific recipe? Absolutely. My mom kept a separate set of pots after my cousin was diagnosed with a severe dairy allergy, so I know how important cross-contamination and safe ingredients are. It is avocado toast money to buy specialized bakery treats, so making them at home is a huge win.
For the milk, I prefer almond or soy milk for dairy-free needs. They have a good protein structure that helps the batter. If you need a dairy free option for the frosting, use vegan buttery sticks like Earth Balance. They hold up much better than coconut oil, which can melt if your kitchen is too warm.
I also tested egg replacement options for a fully vegan version. I learned about aquafaba from a reader comment and was skeptical, but it does work. However, in my experience, though yours may differ, commercial egg replacers or flax eggs make the cupcakes a bit denser. They still taste wonderful, but you won’t get that super high, fluffy dome.
Freezing, Thawing, and Storage Rules
One thing to watch for with gluten-free baking is how quickly it can dry out. Proper storage is everything. If you are making these vanilla cupcakes gluten free ahead of time, let them cool completely on a wire rack. Then, store them unfrosted in an airtight container at room temperature for up to two days.
If you need to keep them longer, the fridge is okay for 3-4 days, but honestly, freezing is better. Wrap each unfrosted cupcake individually in plastic wrap and place them in a freezer bag. They will keep for up to three months. When you are ready to serve, thaw them at room temperature for an hour or two. Always frost them on the day you plan to eat them so the frosting stays fresh and beautiful.
Frequently Asked Questions
Ready to Bake?
I genuinely love the problem-solving part of this work, figuring out why something failed and how to fix it so you can bake with confidence. Making vanilla cupcakes gluten free does not have to be stressful or result in a gritty mess. Just remember to let that batter rest, measure your flour carefully, and let them cool completely before frosting.
If you make these for your next party, I would love to hear how they turned out. What is your favorite 1-to-1 flour brand to use? Let me know in the comments below. For more inspiration, check out my Pinterest boards where I save all my favorite allergy-friendly baking ideas. Happy baking, friends!
Reference: Original Source
Why did my cupcakes explode or overflow?
In my testing, this happens when liners are filled past the two-thirds mark. Gluten-free batter expands rapidly. Fill them only halfway to two-thirds full using a cookie scoop to ensure they bake into a perfect dome without spilling over the edges.
Why did my cupcakes sink in the middle?
This is usually from over-mixing the batter, which whips too much air into the mix. When that air heats up, it expands and then collapses as it cools. Mix just until your dry ingredients are incorporated, and avoid opening the oven door too early.
Why are my gluten-free cupcakes gritty?
Gritty texture comes from unhydrated rice flour in your blend. To fix this, let your batter rest for 15 minutes before baking. This hydration period allows the starches to absorb the liquid, giving you smooth, tender vanilla cupcakes gluten free.
Why do the wrappers stick to the cupcakes?
Gluten-free cakes retain a lot of moisture. If you try to peel the paper while they are still warm, the cake will stick and tear. Let them cool completely on a wire rack. Using high-quality parchment liners also makes a huge difference.
Can I use butter instead of oil in the batter?
You can, but I prefer vegetable oil. Oil coats the gluten-free flours better and locks in moisture longer than butter. If you do use butter, melt it first to help eliminate grittiness and ensure it mixes evenly into the batter.
How do I store them and can I freeze them?
Store them in an airtight container at room temperature for up to two days. For freezing, wrap unfrosted cupcakes tightly in plastic wrap and freeze for up to three months. Thaw at room temperature before frosting and serving.
Can I halve the recipe?
Yes, you can easily halve this vanilla cupcakes gluten free recipe. Just make sure you measure your ingredients accurately, preferably with a kitchen scale. The baking time and temperature will remain exactly the same for a smaller batch.
Can I make this recipe dairy free?
Absolutely. Swap the regular milk for almond, soy, or oat milk. For the frosting, use a high-quality vegan buttery stick like Earth Balance instead of dairy butter. The texture and flavor will still be fantastic and completely safe for dairy allergies.
Can I make this recipe vegan?
You can make it dairy-free easily, but replacing the eggs is trickier. I have tested aquafaba and flax eggs. They work, but the cupcakes will be slightly denser and won’t rise as high. It is a fair compromise if you need an egg replacement.
Can I replace the oil?
If you want to reduce refined oils, you can use melted coconut oil or unsweetened applesauce. Just keep in mind that applesauce will change the crumb structure slightly, making it a bit denser. I find vegetable oil gives the most authentic bakery texture.
What are the best cupcake liners?
I highly recommend unbleached parchment paper liners. Gluten-free batters are sticky by nature, and standard cheap paper liners will cling to the cake. Parchment liners peel away effortlessly once the cupcakes are completely cool.
Why did the frosting melt off?
You frosted them while they were still warm. Even a slightly warm center will turn butter or vegan buttery sticks into a liquid mess. Always wait until the cupcakes are 100% cool to the touch before piping on your frosting.