Ingredients
Method
- Preheat oven to 350°F (177°C). Grease three 9-inch round cake pans, line with parchment paper rounds, then grease the parchment paper. Parchment paper helps the cakes seamlessly release from the pans. (If it’s helpful, see this parchment paper rounds for cakes video & post.)
- Whisk the flour, baking powder, baking soda, and salt together in a large bowl. Set aside. Using a handheld or stand mixer fitted with a paddle or whisk attachment, beat the butter and sugar together on high speed until smooth and creamy, about 3 minutes. Scrape down the sides and up the bottom of the bowl with a silicone spatula as needed. On medium-high speed, add 1 egg at a time, beating well after each addition. Beat in the vanilla extract. Scrape down the sides and up the bottom of the bowl with a rubber spatula as needed. Scrape down the sides and up the bottom of the bowl with a rubber spatula as needed.
- With the mixer on low speed, add the dry ingredients in three additions alternating with the buttermilk, beginning and ending with the dry ingredients, and mixing each addition just until incorporated. Do not overmix this batter. The batter will be smooth, velvety, and slightly thick.
- There is about 8 cups of batter total, so each layer will be 2 and 2/3 cups. Pour/spread batter evenly into prepared cake pans. If you’re worried about uneven cake layers, you can use a kitchen scale and weigh the cake pans for accuracy. (The weight of just the batter in my cake pans was about 1 lb 6 ounces.)
- Bake for around 25-26 minutes or until the cakes are baked through. To test for doneness, insert a toothpick into the center of the cake. If it comes out clean, it is done. Allow cakes to cool completely in the pans set on a wire rack. The cakes must be completely cool before frosting and assembling.
- In a large bowl using a handheld mixer or stand mixer fitted with a whisk or paddle attachment, beat the butter on medium speed until creamy—about 2 minutes. Add 5 and 1/2 cups confectioners’ sugar, 5 Tablespoons heavy cream, the vanilla extract, and salt with the mixer running on low. Increase to high speed and beat for 3 full minutes. Add 1/2 cup more confectioners’ sugar if frosting is too thin, 1 more Tablespoon cream if frosting is too thick, or a pinch more of salt if frosting is way too sweet. Yields about 4.5 cups of frosting.
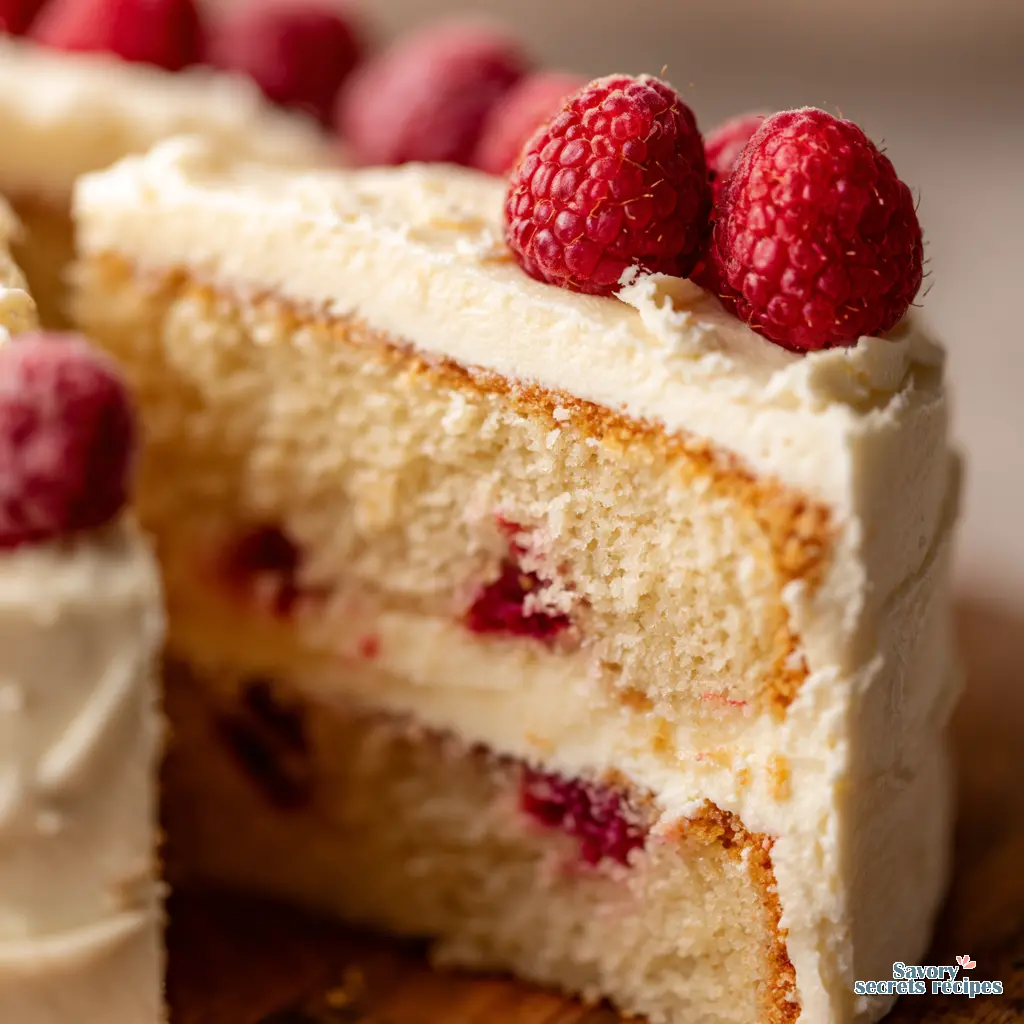
- Watch the video above for a tutorial on assembling and decorating this naked cake. First, using a large serrated knife, slice a thin layer off the tops of the cakes to create a flat surface. Discard (or crumble over ice cream!). Place 1 cake layer on your cake stand, cake turntable, or serving plate. Spread 1 and 1/2 cups of frosting evenly on top. If using, dot half of the raspberries around the rim. Flatten them down into the frosting as best you can so the cake layer on top is sturdy. Top with 2nd cake layer and evenly cover the top with another 1 and 1/2 cups of frosting and more (flattened!) raspberries around the rim. You can sprinkle a few leftover raspberries in the center, too. (Like I did in the video.) Top with the third cake layer. Spread the remaining frosting on top and all around the sides using an icing spatula. Use a bench scraper to smooth out the frosting on the sides of the cake. If you’re making a full naked cake, just spread the remaining frosting on top of the cake. If you have leftover frosting, you can freeze it for up to 3 months and thaw in the refrigerator for next time.
- Decorate the cake with garnishes.
- Refrigerate the cake for 2-3 hours or up to 1 day before slicing and serving. If chilling for more than a few hours, loosely cover with plastic wrap after 1 hour of refrigeration. (The frosting will “set” after about 1 hour and the plastic wrap won’t really ruin your frosting at that point.) And if you’re chilling for more than a few hours, I suggest decorating with garnishes right before serving (so as not to wilt the flowers, etc).
- Cover and store leftover cake at room temperature for 1-2 days or in the refrigerator for up to 1 week.
Notes
Ingredient Swap: I always use full-fat buttermilk for the best texture, but in a pinch, you can make your own by adding a tablespoon of lemon juice or white vinegar to regular milk and letting it sit for five minutes.
Storage Tip: This cake keeps beautifully.
I store leftovers covered at room temperature for a day, but for longer freshness, I refrigerate it for up to a week, letting slices come to room temperature before serving.
Make-
Ahead Secret: The cake layers can be baked, cooled, wrapped tightly in plastic, and frozen for up to three months.
I thaw them overnight in the fridge before frosting, which makes assembly day so much easier.
Common Mistake: The biggest error is overmixing the batter once you add the dry ingredients.
I mix just until the last streak of flour disappears; overmixing leads to a dense, tough crumb.
Serving Suggestion: For a stunning presentation, I love adding a cascade of fresh berries and edible flowers on top just before serving, which complements the simple, rustic look of the naked sides.
Equipment Note: If you don't have three cake pans, you can bake the layers in batches.
I just make sure the pans are completely cool before re-greasing and lining them for the next batch of batter.
Frosting Insight: Getting the frosting consistency right is key.
I always start with the lower amount of cream and sugar, then adjust.
If it's too sweet for your taste, a tiny pinch of salt is my secret weapon to balance it perfectly.