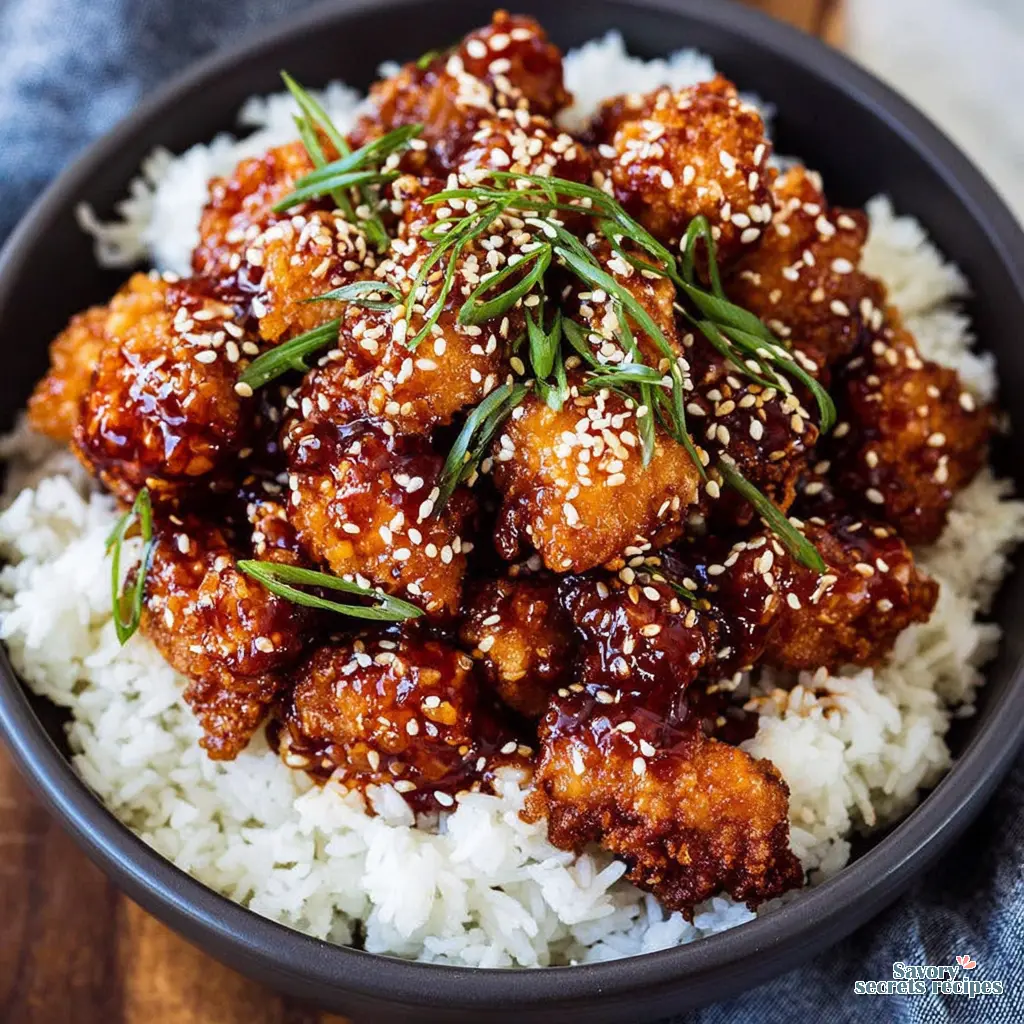
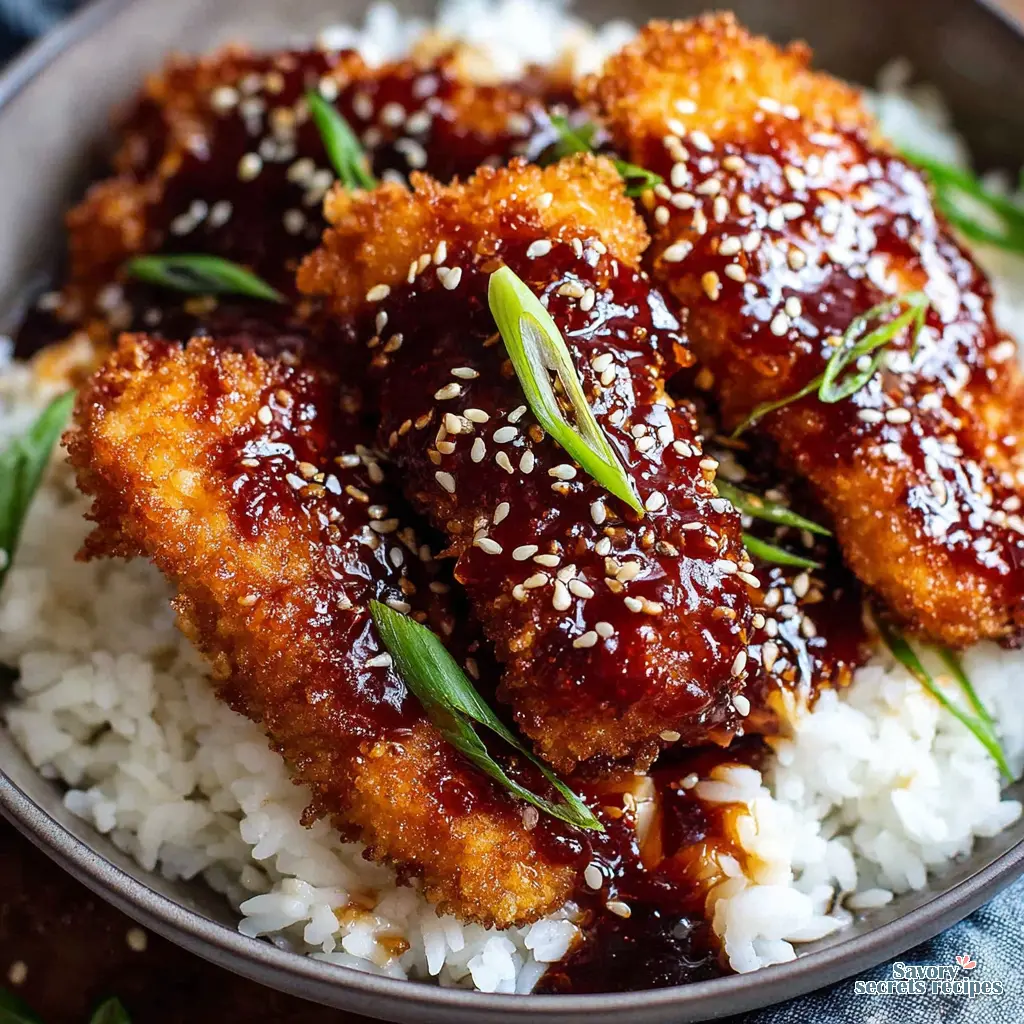
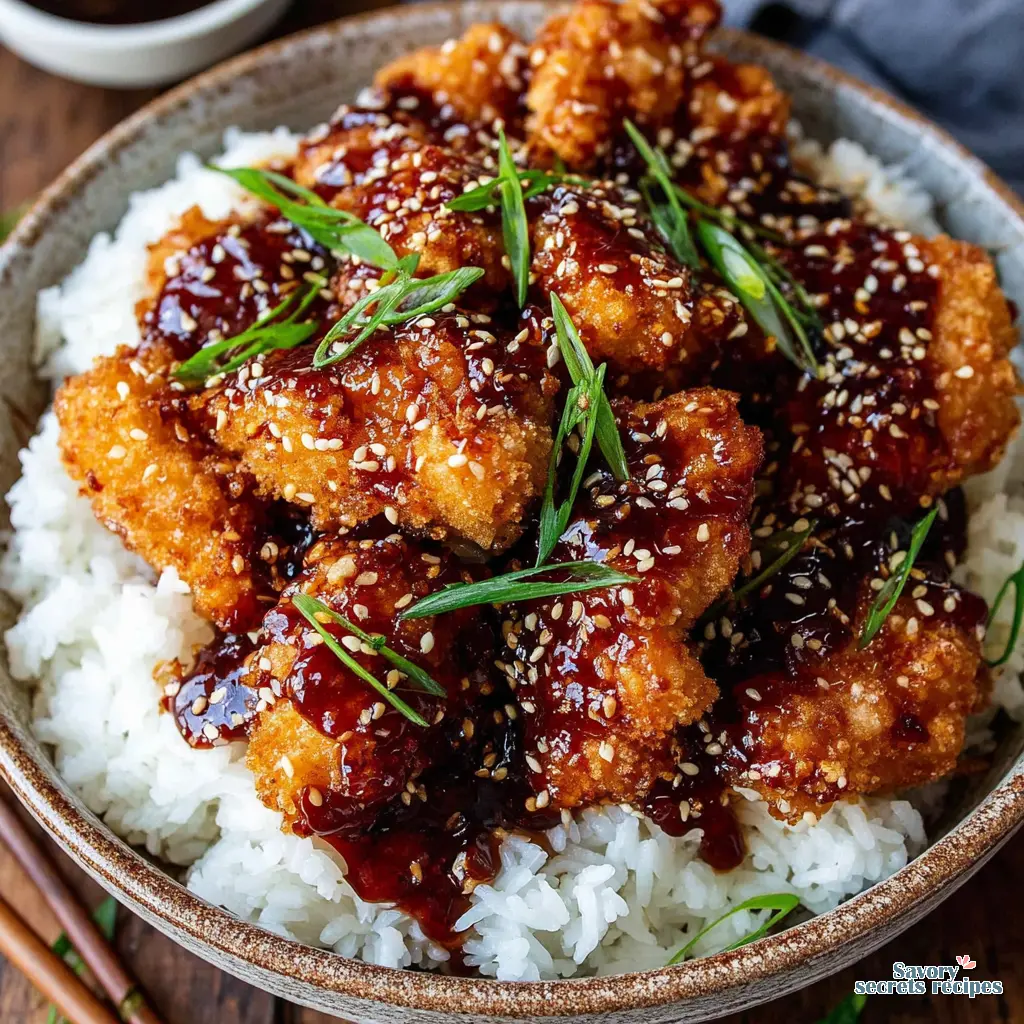
Crispy Sticky Sesame Chicken Bowl Recipe
Ingredients
Method
- Prepare ingredients. Place the egg in one shallow bowl and the cornflour in another. Add flour, salt, pepper, garlic salt, and paprika to a third shallow bowl and mix.
- Heat oil in a wok or large frying pan until hot.
- Dredge the chicken in cornflour, then dip it in the egg wash, ensuring full coverage. Finally, dredge in the seasoned flour. Add the chicken to the wok and cook on high heat for 6-7 minutes, turning 2-3 times, until well browned. Cook in batches if necessary. Remove from the pan and place in a kitchen towel-lined bowl.
- Add all sauce ingredients to the hot wok. Stir and bubble on high heat until the sauce reduces by about one-third (2-3 minutes). Return the chicken to the wok and toss to coat in the sauce. Cook for 1-2 minutes.
- Turn off the heat. Divide the chicken among four bowls. Serve with boiled rice and top with sesame seeds and spring onions.
Nutrition
Notes
It’s 5:30 PM and You Need Dinner in 30 Minutes
You know that feeling. The clock’s ticking, everyone’s hungry, and you’re staring at a pack of chicken breasts like they’re supposed to magically transform into dinner. I’ve been there more times than I can count. Especially on those evenings when the last thing you want to do is spend an hour cooking something that’ll get eaten in ten minutes flat.
That’s where this sticky sesame chicken bowl comes in. It’s my go to when I need something fast that actually feels special. The kind of meal that makes you look like you planned ahead when really you just threw things together. To be honest, I stumbled into this recipe during a particularly chaotic week when my daughter had three after school activities and I was running on coffee and determination.
I remember standing in my kitchen in Oakland, staring at the same ingredients I’d used a dozen times before, and thinking there had to be a way to get that takeout flavor without the wait. So I started tweaking. A little more honey here, a splash of rice vinegar there, and suddenly I had this glossy, sweet, savory sauce that coated the chicken like a dream. My family devoured it. And I knew I’d hit on something worth sharing.
Why This Sticky Sesame Chicken Bowl Works
Here’s what I’m seeing after testing this recipe about six times. The magic is in the balance. You’ve got that sticky, almost caramelized exterior from the honey and brown sugar, but the rice vinegar cuts through the sweetness so it doesn’t cloy. The sesame oil adds this nutty depth that makes the whole thing taste like it came from a restaurant kitchen.
The technique matters too. I learned to properly brown meat from a line cook I interviewed years ago. He told me the pan has to be hot enough that you’re a little nervous, and you have to resist the urge to move the meat around. Just let it sit. That single piece of advice changed everything for me. Before that, I was constantly fidgeting with the chicken, moving it around the pan, and wondering why it never got that nice crust.
This sticky sesame chicken bowl also works because it’s forgiving. If your sauce is a bit thin, just simmer it longer. If the chicken isn’t as crispy as you’d like, crank the heat and give it another minute. The recipe gives you a framework, and then trusts you to adjust based on what you’re tasting. That’s how cooking should feel.
Key Ingredients for the Perfect Glaze
Let me walk you through what goes into this. The ingredient list isn’t long, and you probably have most of this stuff already. That’s part of why I love this recipe. It doesn’t require a special trip to an Asian grocery store or some obscure ingredient you’ll use once and forget about.
The chicken breast fillets are the star. I prefer them because they cook quickly and stay tender. But here’s the thing, you could absolutely use chicken thighs if that’s what you have. The cooking time might shift by a few minutes, but the result will be just as good. I’m not convinced there’s a wrong choice here.
The sauce is where it all comes together. You’ve got honey for sweetness, brown sugar for that deep caramel note, and sweet chili sauce for a little heat. The ketchup might seem unusual, but trust me, it adds a subtle tang and helps the sauce get that beautiful glossy texture. Soy sauce brings the savory umami, and Chinese rice vinegar keeps everything bright. Garlic and sesame oil round it out with aromatic depth.
For the coating, I use a mix of cornflour (cornstarch) and all-purpose flour with some garlic salt and paprika. The cornstarch is the key to that crispy texture. It creates a light crust that grabs the sauce without getting soggy. Fair enough, you could skip the flour and just use cornstarch, but I like the combination for a slightly sturdier coating.
Recipe Science: Why the Cornstarch Coating Works
I want to geek out for a minute about the cornstarch. This is the good stuff. When you coat chicken in cornstarch and fry it, that starch creates a barrier that traps moisture inside while the outside gets beautifully crispy. It’s the same principle behind Korean fried chicken and those addictive Chinese takeout wings.
The double coating is optional but worth it if you have an extra few minutes. After the first coat, let the chicken rest for a minute, then dip it back in the flour mixture. This creates a thicker crust that stays crispier longer. I learned this from a Taiwanese colleague who told me the secret to restaurant quality fried rice was cooking the rice a day ahead. Same idea here, small technique changes that make a big difference.
The sauce science is simpler. When you simmer honey, sugar, and soy sauce together, the sugars caramelize and the liquid reduces into that sticky, glossy glaze. The cornstarch in the coating also helps thicken the sauce as it cooks together. If it smells ready, it probably is. That sweet, savory aroma filling your kitchen is a good sign you’re on the right track.
Step by Step: Building Your Bowl
I’m still working this out, but here’s the flow that works best for me. Start by getting your rice going. Boiled rice takes about 15 to 20 minutes, so get that on the stove first. While it cooks, you can prep everything else.
Cut your chicken into bite sized pieces. I aim for about one inch cubes, but honestly, uniformity matters more than exact size. You want pieces that’ll cook at the same rate. Season them with salt, pepper, garlic salt, and paprika. Then toss them in the cornflour and flour mixture until each piece is well coated.
Heat your vegetable oil in a large skillet or wok over medium high heat. You want it hot enough that a piece of flour sizzles immediately when you drop it in. Cook the chicken in batches so you don’t overcrowd the pan. Overcrowding drops the oil temperature and you’ll end up with steamed chicken instead of crispy. Let me tell you, I learned this the hard way.
Once the chicken is golden and cooked through, set it aside on a paper towel lined plate. In the same pan, reduce the heat to medium and add your sesame oil, minced garlic, and the sauce ingredients. Whisk everything together and let it simmer for a few minutes until it thickens. Toss the chicken back in and coat it well. The sizzle when that sauce hits the hot chicken is exactly what I mean.
Serving Ideas for Your Sticky Sesame Chicken Bowl
Now for the fun part. Building your bowl. I start with a bed of steamed rice, then pile on the glazed chicken. A sprinkle of sesame seeds and chopped spring onions (scallions) on top adds color and crunch. If you want extra vegetables, steamed broccoli or snap peas work beautifully alongside the chicken.
You could also serve this over noodles instead of rice. Rice noodles, udon, or even regular pasta would work. The sticky sauce clings to everything. For a lower carb option, cauliflower rice is a solid choice. I’ve done it for meal prep and it holds up well.
Here’s a tip I picked up from testing. If you want extra sauce to spill over onto your rice, double the sauce ingredients. I always do this because that saucy rice is honestly one of the best parts of the bowl. My daughter calls it the “magic rice” and asks for extra.
Variations and Add Ins
This sticky sesame chicken bowl is endlessly adaptable. I’ve made it with shrimp instead of chicken and it was fantastic. Just reduce the cooking time since shrimp cooks faster. Tofu works too, especially if you press it well and use the same cornstarch coating method.
For extra crunch, try adding chopped toasted cashews or peanuts on top instead of or in addition to the sesame seeds. I did this once when I ran out of sesame seeds and it was a happy accident. The nuttiness complements the sauce perfectly.
You could also throw in some cucumber slices or red onion for freshness. The cool crunch against the warm, sticky chicken is a nice contrast. I like to add a handful of fresh cilantro or parsley if I have it. It brightens up the whole bowl.
Storage and Leftovers
This recipe is great for meal prep. Store the chicken and rice separately in airtight containers in the fridge. The chicken will keep for 3 to 4 days. The rice stays good for about 5 days. I wouldn’t recommend freezing the assembled bowl, but you can freeze the cooked chicken on its own for up to 3 months.
For reheating, the microwave works fine. Just heat until warmed through, about 1 to 2 minutes. If you want to restore some of that crispiness, reheat the chicken in a hot skillet for a minute or two. The oven at 350°F for 5 to 10 minutes on a sheet pan also works well. If the sauce seems dried out, make a quick extra batch or add a splash of water when reheating.
Common Mistakes and Fixes
Mistake: The coating falls off the chicken.
Solution: This usually happens if the oil isn’t hot enough or you moved the chicken too soon. Let the crust set before you touch it. Patience is key here.
Mistake: The sauce is too thin.
Solution: Simmer it a bit longer. The sugars need time to caramelize and thicken. It should coat the back of a spoon when it’s ready.
Mistake: The chicken is soggy after adding the sauce.
Solution: Toss the chicken in the sauce right before serving. If you let it sit too long, the coating will absorb moisture and lose its crunch.
Mistake: The sauce is too thick or sticky.
Solution: Add a splash of water or extra rice vinegar to thin it out. You can always thicken it again by simmering.
Frequently Asked Questions
Expert Tips for Success
Taste as you go. This is the most important thing I can tell you. The sauce should balance sweet, savory, and tangy. If it’s too sweet, add a splash more vinegar. Too tangy, a bit more honey. Trust your palate.
Season in layers. Don’t just rely on the sauce for flavor. Season the chicken with garlic salt and paprika before coating. That base layer of seasoning makes a difference. I learned this from watching my grandmother cook. She never skipped a step, no matter how small.
If you’re using an air fryer, you can cook the coated chicken at 400°F for about 10 to 12 minutes, shaking halfway through. Then toss with the sauce. This method is great for a lighter version. The research isn’t entirely clear on whether it’s healthier, but it definitely uses less oil.
For a gluten free version, use tamari or coconut aminos instead of soy sauce, and make sure your cornstarch and flour are certified gluten free. The rest of the ingredients are naturally gluten free.
Conclusion
When you make this sticky sesame chicken bowl, you’ll feel like a pro. I promise. It’s one of those recipes that looks and tastes like it took hours, but really comes together in about 30 minutes. The glossy sauce, the crispy chicken, the perfect bowl of rice, it’s the kind of dinner that makes everyone at the table happy.
I’d love to see how yours turns out. Tag me if you post your bowl on social media, I genuinely enjoy seeing your creations. And if you have questions or variations that work for you, drop them in the comments. That’s how we all get better.
For more inspiration, check out my Pinterest boards where I share tons of bowl ideas and weeknight dinner solutions. Go ahead, give yourself a high five. You just made takeout at home.
Source: Nutritional Information
Can I make Sticky Sesame Chicken Bowl ahead of time?
Yes, you can prep the sauce and coat the chicken up to a day ahead. Store them separately in the fridge. Cook the chicken and toss with sauce just before serving for the best texture. The rice can also be made a day in advance.
How do I store leftover Sticky Sesame Chicken Bowl?
Store the chicken and rice in separate airtight containers in the refrigerator. The chicken stays good for 3 to 4 days. For best results, reheat the chicken in a skillet to restore some crispiness, or use the microwave for convenience.
Can I use chicken thighs instead of chicken breast fillets for this sticky sesame chicken bowl?
Absolutely. Chicken thighs work great and are actually more forgiving since they stay moist. Just adjust the cooking time slightly, thighs may need an extra minute or two to cook through. The coating and sauce work the same way.
What is the best way to reheat a sticky sesame chicken bowl for meal prep?
The microwave is fastest, just heat for 1 to 2 minutes until warmed through. For better texture, reheat the chicken in a hot skillet for a minute per side. If the sauce seems dry, add a splash of water or make a quick extra batch.
How do you get the sesame chicken coating extra crispy before adding the sauce?
Double coat the chicken for extra crunch. After the first coat of cornstarch and flour, let it rest for a minute, then dip it back in the mixture. Also, make sure your oil is hot enough and don’t overcrowd the pan. Cook in small batches.
What can I substitute for Chinese rice vinegar in this savory sesame chicken dish?
You can use regular rice vinegar, apple cider vinegar, or even white wine vinegar. The flavor will shift slightly but still work. For a milder option, try unseasoned rice vinegar. Avoid distilled white vinegar as it’s too harsh.