


How to cook frozen rice cakes for crispy tteokbokki
Ingredients
Method
- Boil a pot of water. Add rice cakes and cook for 2 minutes or until soft. Strain and transfer to a large mixing bowl. Drizzle with half the oil and mix well to coat evenly.
- Add onion, gochugaru, soy sauce, and sugar to the rice cakes. Toss thoroughly to season evenly.
- Heat remaining oil in a non-stick skillet over medium-low heat. Add rice cakes and cook slowly for 3 minutes, turning regularly to prevent sticking or burning. Reduce heat to low if needed. Avoid high heat and stir frequently to coat the rice cakes without burning the sauce.
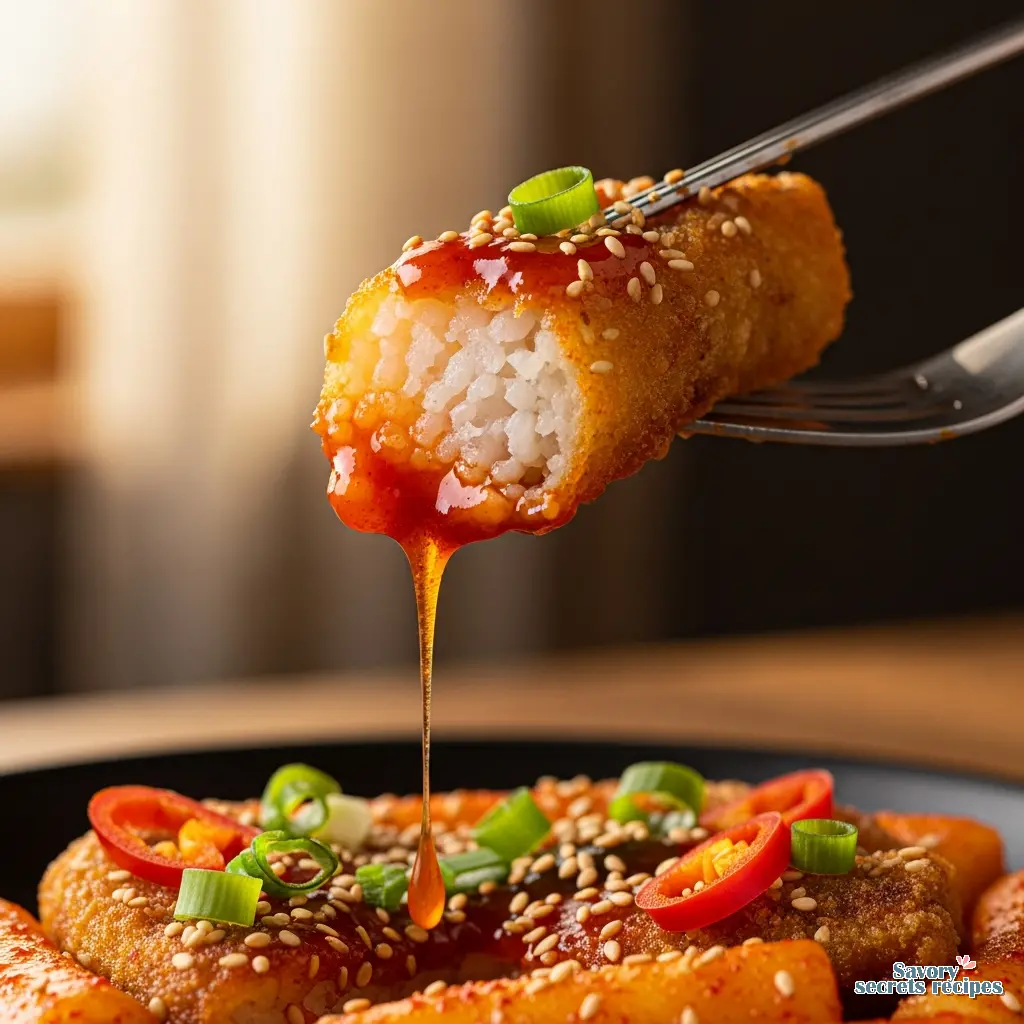
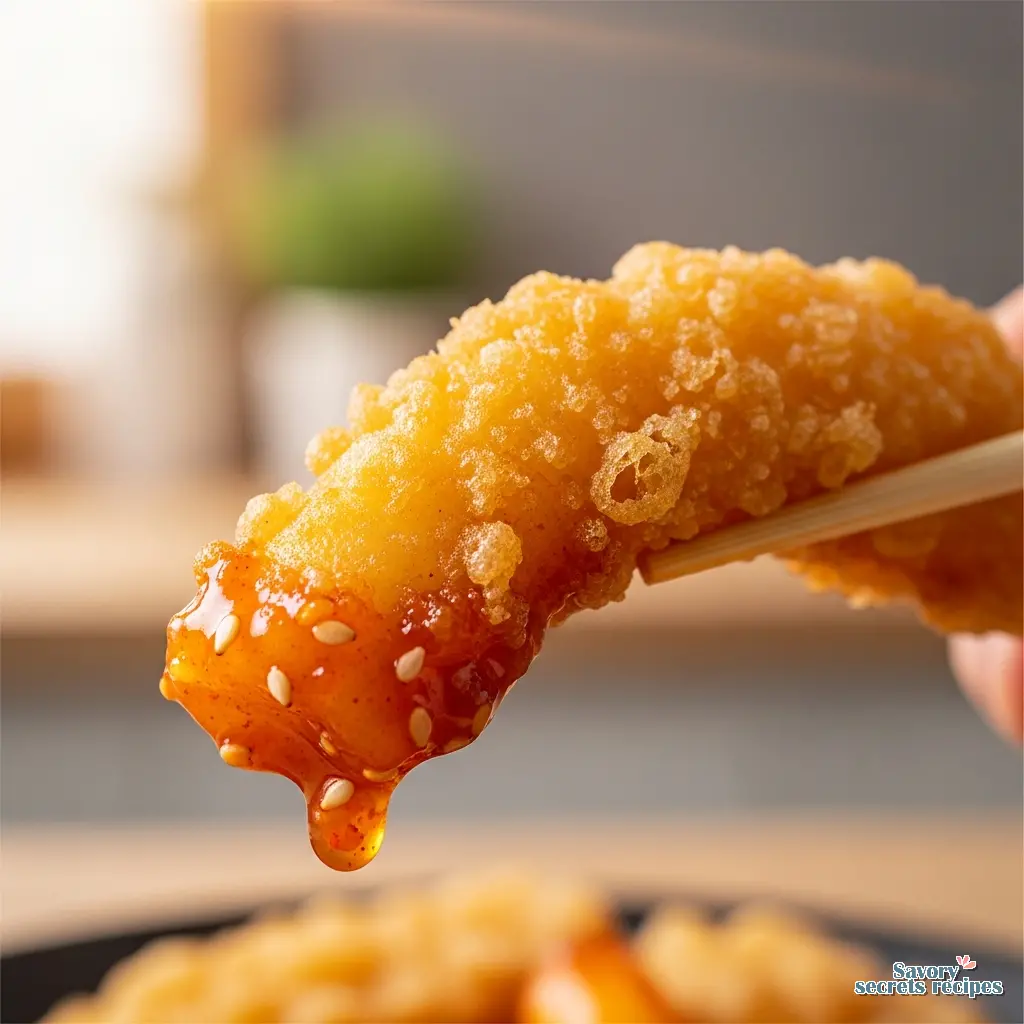
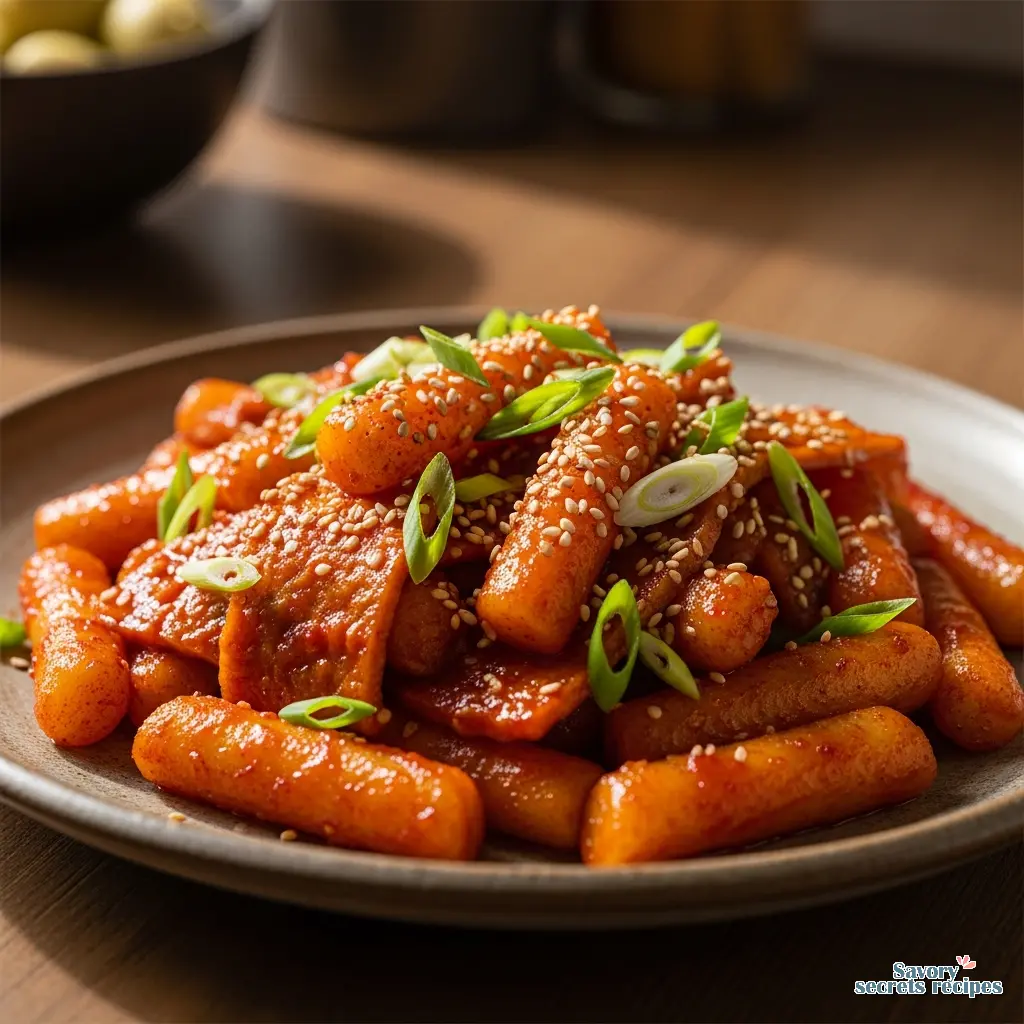
- Drizzle with sesame oil and sprinkle with toasted sesame seeds. Serve hot.
Nutrition
Notes
Why Most Homemade Rice Cakes Fail (And How We Fix It)
I still remember my first attempt at making tteokbokki at home. It was a Tuesday night, I was tired, and I just wanted that specific, spicy-sweet chew you get from the street stalls in Seoul or, honestly, the better spots in Koreatown here in LA. I grabbed a bag of frozen rice cakes from the freezer, threw them in a pan with some sauce, and hoped for the best.
The result? Disappointing. They were hard in the middle, slimy on the outside, and nothing like the crispy tteokbokki I was craving. I think I actually snapped a chopstick trying to pry one apart. It was a texture disaster.
You know, frying rice cakes seems simple on paper. It’s just rice flour and water, right? But achieving that perfect golden brown exterior where it shatters slightly when you bite into it while keeping the inside perfectly tender and chewy… that requires a bit of technique. It’s not hard, but you have to respect the ingredient.
Most recipes treat these dense little cylinders like pasta, just boiling them until soft. But if you want that “Gireum” style (oil-fried) crunch, we need to treat them more like gnocchi that you’re pan-searing. Today, I’m going to walk you through exactly how to take those rock-hard frozen sticks and turn them into the ultimate crispy, spicy snack. No sweat, you’ve got this.
What Exactly is Gireum Tteokbokki?
If you’re used to the soupy, stew-like tteokbokki that comes swimming in broth with fish cakes and eggs, this is its crispier, rebellious cousin. Gireum literally means “oil” in Korean. So, Gireum Tteokbokki is essentially oil-fried rice cakes.
Instead of boiling the cakes in a large volume of liquid, we pan-fry them with plenty of oil first to create a crust. Then, we toss them in a seasoning that clings to that crust rather than drowning it. The result is a texture contrast that is honestly addictive: crunchy, chewy, spicy, and savory all at once.
I love this version for weeknight cooking because it’s faster. You aren’t waiting for a pot of broth to reduce. You’re just crisping, tossing, and eating. It’s the kind of thing you make when you need a comfort food hit in under 30 minutes.
Essential Prep: The Soaking and Blanching Step
Here is where most people mess up. I mean, I did too. If you buy fresh rice cakes from a local mill (lucky you), you can skip this. But for the 99% of us buying bags from the freezer section at H Mart or the shelf-stable packs at Trader Joe’s, you cannot just throw them in the pan.
Frozen rice cakes are dehydrated and brittle. If you fry them straight away, they might burn on the outside while staying chalky in the middle. Not good.
The Fix: Blanching. It sounds fancy, but it just means a quick boil.
Drop your frozen or refrigerated cakes into boiling water for about 1-2 minutes. You aren’t trying to cook them through completely, just wake them up. As soon as they float or feel slightly soft to the touch, drain them. Then and this is critical rinse them under cold water to stop the cooking and drain them really well. You want them dry before they hit the oil, or you’ll have a splatter situation on your hands.
The Science: Why Do Rice Cakes Get Hard?
I find it helpful to understand what’s happening inside the food. Rice cakes are made of short-grain rice flour, which is almost entirely starch. When starch is cooked (gelatinized) and then cooled, the molecules realign and crystallize. This process is called retrogradation.
It’s the same reason leftover rice gets hard in the fridge. With tteokbokki, that retrogradation turns them into little bricks. By blanching them, we reverse that crystallization, making the starch pliable again. By frying them immediately after, we lock in that softness while creating a new texture on the surface.
Temperature Control for Perfect Caramelization
Now for the cooking. You might think, “I want crispy, so I need high heat.” Stop right there. That’s a trap.
If you blast these with high heat, two things happen. One, the rice cakes might burst (literally explode), which is dangerous. Two, the sauce contains sugar and gochugaru (chili flakes), both of which burn very easily.
I recommend a medium-low heat approach. It takes a little patience, maybe 6 to 8 minutes of frying, but it ensures the heat penetrates to the center of the cake while the outside gets that beautiful golden brown color. You want to hear a gentle sizzle, not an aggressive roar.
The Air Fryer Method: Maximum Crisp, Less Oil
I was skeptical about this at first. I’m a purist; I like my cast iron skillet. But I tried air frying these last week, and I have to admit, it’s amazing for convenience.
If you want to use the air fryer, the prep is the same: blanch and dry the cakes. Then, toss them in a bowl with about 1 tablespoon of oil just enough to coat them. Arrange them in a single layer in your basket. Don’t crowd them, or they’ll steam instead of crisp.
Cook at 380°F for about 8-10 minutes, shaking the basket halfway through. They puff up slightly and get incredibly crunchy. While they’re cooking, I mix the sauce in a separate pan on the stove and just simmer it for a minute to thicken. When the cakes are done, toss them in the sauce. It’s cleaner, uses less oil, and the crunch is serious.
A Note on Gluten-Free Sauces
Rice cakes themselves are naturally gluten-free (usually check the package to be sure no wheat flour was added). However, the classic sauce ingredients often aren’t.
Standard soy sauce contains wheat. Gochujang (Korean chili paste) almost always contains wheat flour as a thickener. If you are cooking for someone with celiac or a gluten sensitivity, this is a minefield.
The Swap: Use tamari or coconut aminos instead of soy sauce. For the gochujang, you have to buy a specifically certified gluten-free brand (they exist, usually in the “health food” aisle or online) or make a quick substitute using fine gochugaru, miso paste, and a bit of maple syrup. It won’t be exactly the same, but it gets you 90% of the way there without the gluten risk.
Common Mistakes & Fixes
Even with a simple recipe, things can go sideways. Here are the issues I see most often.
Troubleshooting Guide
Mistake: The rice cakes are exploding or popping.
Solution: Your heat is too high, or the cakes were too wet. Lower the heat immediately and use a splatter screen. Always pat them dry after blanching.
Mistake: The sauce is burnt and bitter.
Solution: You added the sauce too early. Crisp the cakes first, then add the aromatics and sauce in the last minute or two. Sugar burns at 350°F, so keep it moving.
Mistake: The cakes are all stuck together in a giant clump.
Solution: You overcrowded the pan. Rice cakes are incredibly sticky when warm. Cook in batches if you have a small skillet, and toss them in oil before they hit the heat.
Storage & The ‘No-Microwave’ Rule
I’ll be honest with you: crispy tteokbokki is a dish best eaten immediately. Like, standing at the kitchen counter while it’s still hot. As it cools, the texture changes from crispy-chewy to just… hard.
If you do have leftovers, store them in an airtight container in the fridge for up to 2 days. But please, for the love of food, don’t microwave them to reheat. The microwave zaps moisture and turns rice cakes into rubber tires. It’s tragic.
Instead, put them back in a pan with a splash of water or broth. Cover it with a lid and steam-fry them on low heat until they soften up again. Remove the lid at the end to re-crisp the outside. It won’t be quite as good as fresh, but it’s edible.
Frequently Asked Questions
Final Thoughts
When you finally nail that texture crispy on the outside, soft and chewy on the inside it is just so satisfying. It’s the perfect snack for a movie night or a quick dinner when you want something with bold flavor but don’t want to spend hours in the kitchen.
For more inspiration, check out my Pinterest boards where I save all my favorite Korean street food ideas. Tag me in your photos I love seeing your creations! You’re now a crispy tteokbokki pro go enjoy!
Reference: Original Source


