


Baked Cheesy Shrimp with Garlic Butter
Ingredients
Method
- Combine cream cheese, garlic, chives, and salt in a bowl and mix well. Transfer the mixture to a piping bag and refrigerate until ready to use.
- Trim the shrimp whiskers, then wash and pat the shrimp dry.
- Butterfly the shrimp by cutting through the shell along the back from head to tail. Remove the vein, then slice the meat nearly all the way through to divide it into halves. Open the shrimp flat and press gently to hold the shape.
- Arrange the butterflied shrimp in a single layer on a foil-lined baking sheet.
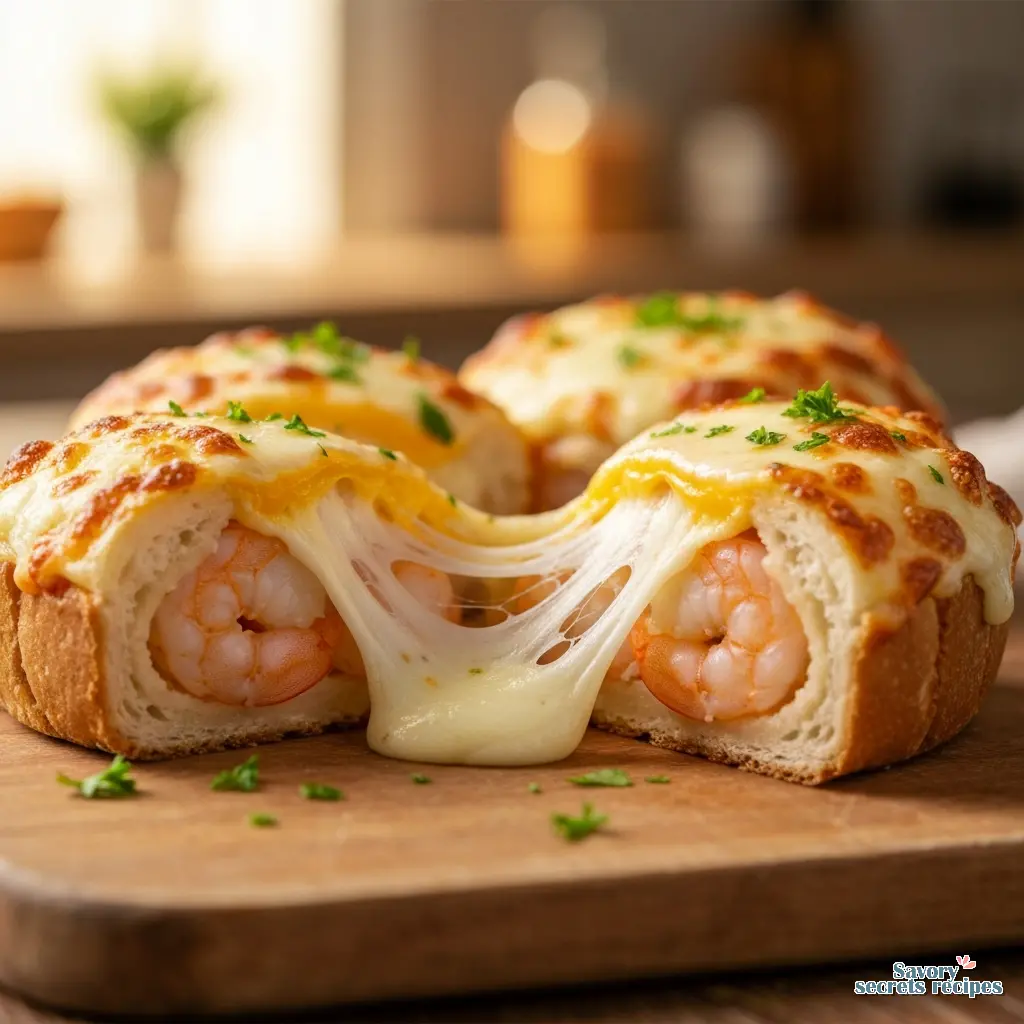
- Pipe the cream cheese filling onto each shrimp and spread it with the back of a spoon. Top with shredded quick-melt cheese.
- Bake the shrimp in a preheated oven at 200°C for 7 to 10 minutes or until cooked through.
- Transfer the shrimp to a serving dish, garnish with chopped parsley, and serve while warm.
Nutrition
Notes
Why This Recipe Breaks All the Rules (And Why You Should Too)
I know, I know. Mixing seafood and cheese is supposed to be the ultimate culinary sin. If my grandmother Lalla Fatima were here, she might give me that look the one she reserved for when I tried to rush the chebakia dough. But let me walk you through this. Sometimes rules are there to be broken, especially when it’s February in New York, the wind is howling down the street, and you just need something warm, gooey, and comforting.
This cheesy shrimp recipe isn’t just a rebellion against tradition. It is a study in texture. In my world of frozen desserts, we obsess over mouthfeel, and the same principles apply here. You have the snap of the shrimp (if you don’t overcook it) playing against the velvet richness of the melted cheese. It creates a contrast that is genuinely satisfying.
Plus, let’s be honest. After a long day, when you are staring into the fridge at 7 PM, you don’t want a lecture on French culinary purity. You want dinner. This comes together faster than delivery, and the result is a bubbling skillet of comfort that feels like a hug. It is perfect for those nights when you want to feel fancy but have zero energy to actually be fancy. This dish also fits perfectly alongside other shrimp appetizer ideas if you are hosting a party.
The Science of Texture: Avoiding the Rubber
The biggest fear people have with shrimp is the texture. Nobody wants to eat something that feels like a pencil eraser. In my kitchen, I treat protein a lot like I treat sugar structures temperature is doing the heavy lifting here.
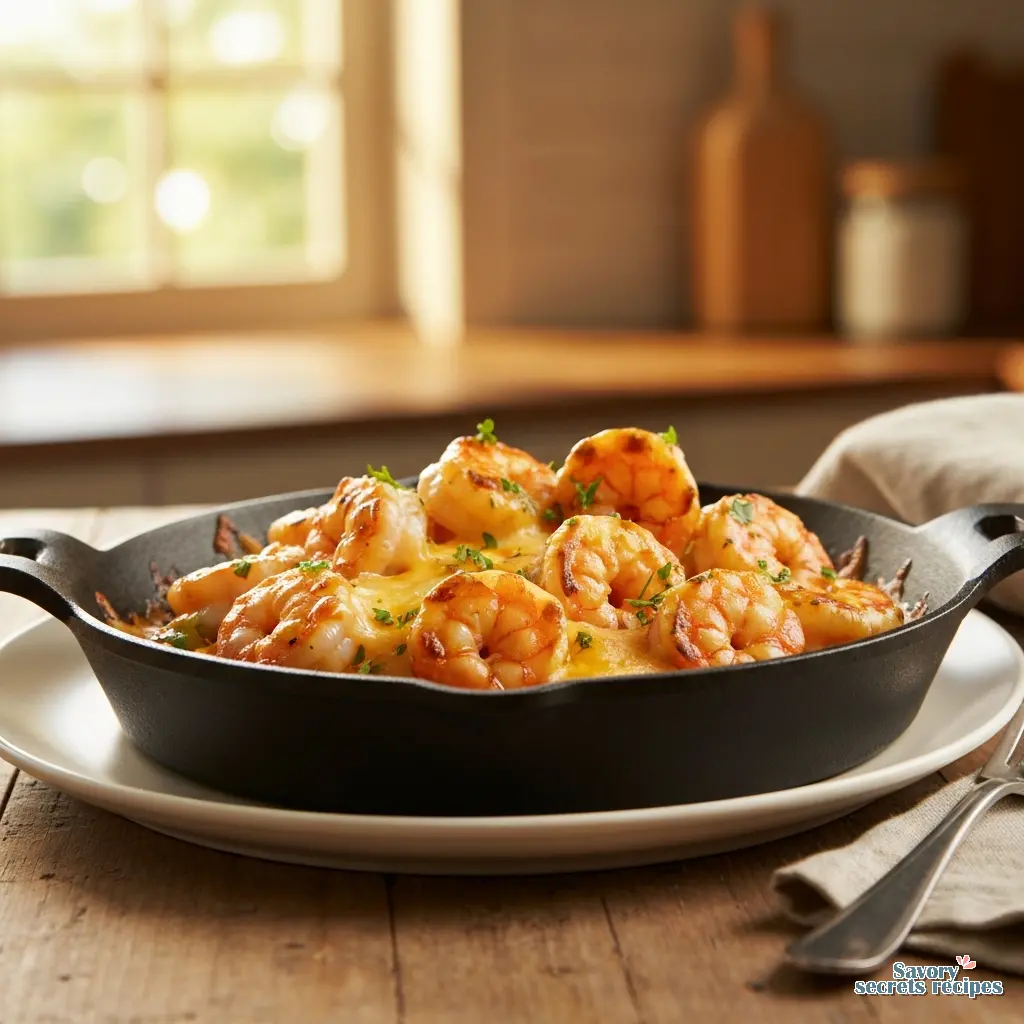
Shrimp are incredibly sensitive to heat. They cook in minutes, sometimes seconds. When shrimp curl into a tight “O” shape, the muscle fibers have contracted too much, squeezing out all the moisture. That is when you get that rubbery chew. We are looking for a “C” shape. That tracks with what I’ve seen in testing; the “C” stands for “Cooked” and “O” stands for “Overdone.” If you are starting with leftovers, you can find creative what to do with already cooked shrimp to avoid any waste.
Because we are broiling this cheesy shrimp to get that golden crust, the heat is intense and direct. I tend to find, but test it yourself, that using larger shrimp (jumbo or colossal) gives you a buffer. They take slightly longer to cook through, which buys you time for the cheese to melt and bubble before the protein seizes up. It’s a delicate balance, but once you hit that sweet spot, it is magic. Mastering this timing is also the secret to a perfect southern fried shrimp recipe.
Butterflying: It’s About Surface Area
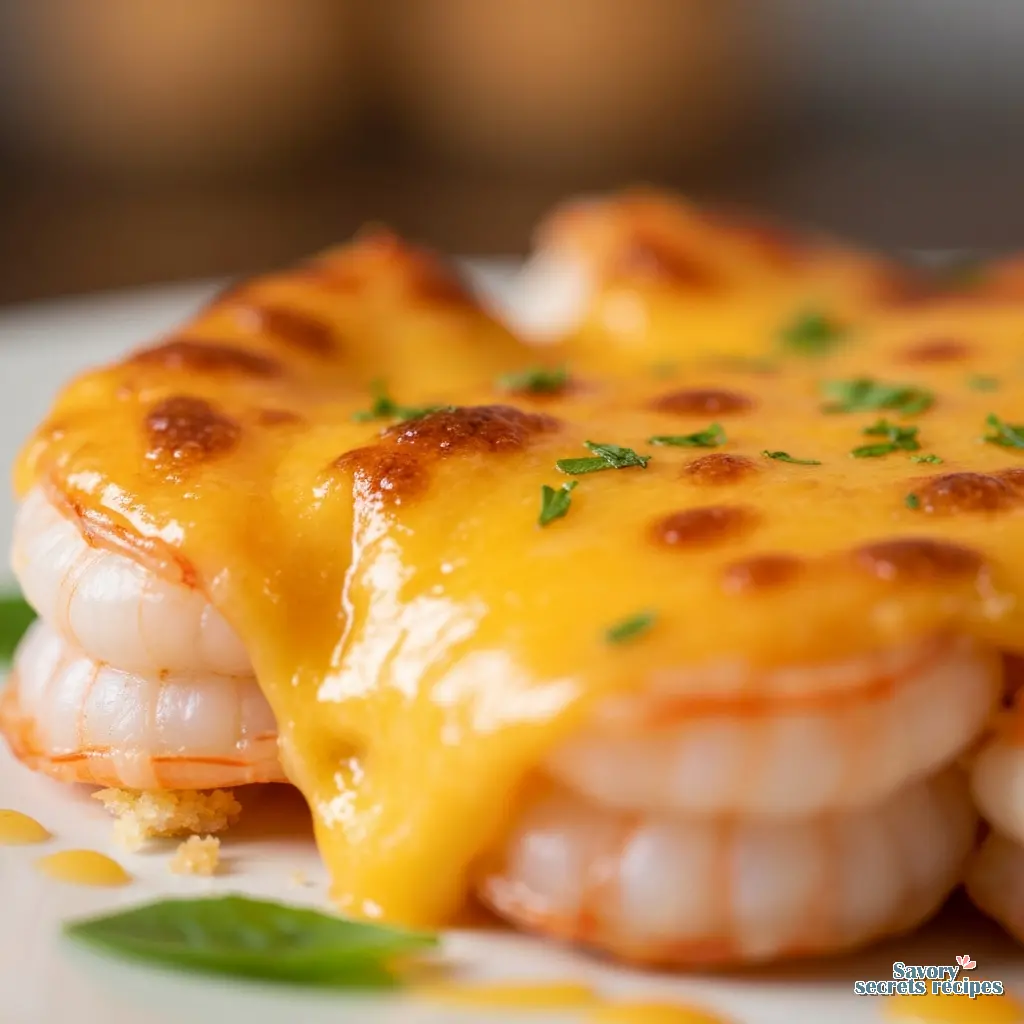
You might think butterflying is just for looks. It’s not. Well, it is partially for looks because it makes the shrimp look like a beautiful heart shape, but there is a structural reason too. By splitting the shrimp down the back, you are doubling the surface area.
More surface area means more room for that garlic butter and cheese mixture to cling to. If you just pile cheese on top of a round shrimp, it slides off the moment you take a fork to it. I’ve been there, and it’s frustrating. By butterflying, you create a little valley or cradle that holds the filling in place. It ensures that every single bite has the perfect ratio of shrimp to cheese.
To do this, take a sharp paring knife or kitchen shears. Cut along the outer curve of the shrimp, where the vein is, but don’t cut all the way through. Open it up like a book. Press it down gently to flatten it. Give it a minute to settle. This simple step changes the entire eating experience.
The Cheese Strategy
Not all cheeses are created equal when it comes to melting. I remember trying to make a cheese sauce with an aged Gouda once, and it just separated into a greasy mess. The oil separated from the solids, and the texture was grainy. For this recipe, we need cheeses that are high in moisture and have good melting properties.
I use a three-part system here. First, cream cheese provides the base. It acts as a stabilizer, keeping the sauce creamy and preventing it from breaking. Second, mozzarella gives us that pull that visual drama we all love. Third, and this is crucial, Parmesan adds the savory, salty punch that cuts through the richness. Without the Parmesan, it can taste a bit flat.
If you don’t have mozzarella, Monterey Jack is a fantastic substitute. It melts beautifully. Just avoid super hard, aged cheeses for the bulk of the melting, or you’ll end up with a pool of oil. And please, grate your own cheese if you can. Pre-grated stuff is coated in potato starch to prevent clumping, which interferes with the melt. I know it’s an extra step, but the texture difference is worth it.
Variations & Substitutions
I get it. Sometimes you open the fridge and realize you are missing half the ingredients. Or maybe you just want to switch things up. Here is what works in my kitchen.
The Air Fryer Method
If you don’t want to heat up the big oven, the air fryer is your friend. Preheat it to 375°F. Place the butterflied shrimp in a single layer do not crowd them, or they will steam instead of roast. Cook for about 6 to 8 minutes. Keep an eye on it around the 5-minute mark. Air fryers circulate heat differently, and things can go from perfect to dried out very quickly. While this recipe is all about the cheese, you can also learn how to make crispy shrimp for a different texture profile.
Protein Swaps
This cheesy garlic topping works on almost anything. I’ve used it on scallops, and it was incredible. Just remember scallops cook even faster than shrimp. You could also use it on chicken breast cutlets, but you’ll need to adjust the cooking time significantly since chicken needs to reach 165°F. If you do chicken, I’d bake the chicken halfway first, then add the cheese topping for the last 10 minutes so it doesn’t burn. For those looking for a lighter alternative, a shrimp and veggies recipe is another excellent weeknight option.
Flavor Twists
Want a little heat? I love adding a pinch of red pepper flakes into the butter mixture. It wakes up the palate. Or, if you want something brighter, add a teaspoon of lemon zest. The acid cuts through the heavy dairy and really lifts the whole dish.
Common Mistakes & Troubleshooting
Mistake: The shrimp is watery.
Solution: You didn’t pat them dry enough. Water is the enemy of browning. Use paper towels and really get that moisture off before adding the topping.
Mistake: The cheese burned before the shrimp cooked.
Solution: Your broiler was too close or too hot. Move the rack down one notch. Or, bake at 400°F for 5 minutes first, then switch to broil just for the last minute to brown the top.
Mistake: The shrimp curled up tight.
Solution: They are overcooked. Next time, check them a minute earlier. As soon as they turn opaque and pink, they are done. They will continue to cook slightly from the residual heat of the pan.
Storage & Reheating Guide
Leftover seafood is tricky. I usually tell people to eat this fresh because reheating shrimp can easily make them tough. But if you have leftovers, don’t throw them out. Store them in an airtight container in the fridge for up to 2 days.
To reheat, do not use the microwave. It zaps the moisture out instantly and you’ll end up with rubber. Instead, place the shrimp on a baking sheet and cover it loosely with foil. Warm them in a 275°F oven for about 10 to 15 minutes. The low temperature heats them through gently without cooking them further. It’s not perfect, but it’s the best way to salvage the texture.
Frequently Asked Questions
Final Thoughts
When you pull this bubbling skillet out of the oven, you’ll wonder why you ever listened to the “no seafood and cheese” rule. It is rich, savory, and incredibly satisfying. The texture of the snappy shrimp against the gooey cheese is just… right. Serve it with some crusty bread to soak up that garlic butter, maybe a simple green salad to cut the richness, and you have a meal that feels like a celebration.
If you try this, let me know how it turned out. Did you get the butterfly right? Did you experiment with the cheese blend? I’d love to hear about it. For more inspiration, check out my Pinterest boards where I save all my favorite texture experiments.
Reference: Original Source
What if I don’t have an escargot dish?
Don’t worry about it. While those little dimpled dishes are cute, a standard baking sheet or a cast iron skillet works perfectly. I actually prefer a skillet because it retains heat better, keeping the cheesy shrimp warm at the table. Just space them out so they roast rather than steam.
How do I butterfly shrimp properly?
Use sharp kitchen shears. Cut along the outer curve where the vein is, stopping just before the tail. Open it like a book and press down gently. It creates a flat surface that holds the filling. It maximizes the cheesy shrimp surface area, which is exactly what we want.
Can I make this ahead of time?
You can prep the components, but I wouldn’t assemble it until you’re ready to bake. The salt in the cheese mixture can start to cure the shrimp if it sits too long, changing the texture. Keep the shrimp and the cheese mix in separate bowls in the fridge until go-time.
What kind of shrimp should I use?
Go for large, jumbo, or colossal shrimp. Small shrimp cook too fast and are a pain to butterfly. Look for “easy peel” or already deveined ones to save time. Frozen is fine just thaw them completely and pat them bone-dry before starting your cheesy shrimp recipe.
How do I prevent rubbery shrimp?
Watch the clock and the shape. Cook just until they turn opaque and form a “C” shape. If they curl into a tight “O,” they are overdone. High heat for a short time is the secret. It allows the cheese to melt without turning the protein into rubber.


