


Chewy Chocolate Chip Cookies
Ingredients
Method
- Preheat your oven to 375°F.
- Combine the butter, peanut butter, and both sugars in a medium bowl, beating with a hand mixer until the texture is light and fluffy.
- Add the egg and vanilla extract, mixing until the ingredients are fully integrated.
- Whisk the flour, baking soda, and salt together in a separate bowl.
- Slowly incorporate the dry ingredients into the creamed mixture.
- Shape the dough into 1-inch balls and roll them in granulated sugar until lightly coated.
- Arrange the balls on an ungreased baking sheet, maintaining a 2-inch distance between them.
- Press a fork into the top of each ball to create a crisscross design.
- Bake for 10 to 12 minutes until the edges are a light golden brown.
- Move the cookies to a wire rack and let them cool for a few minutes before serving.
Nutrition
Notes
The Only Homemade Cookie Recipe You’ll Ever Need
It was Wednesday evening, about 35 minutes before a holiday potluck, and I was staring at my kitchen counter in a total panic. Living in LA now, during these cooler winter months when we actually use our ovens, the pressure to bring something impressive to a party is high. I wanted that specific smell of browning butter and vanilla to fill the house. You know the one. It reminds me of Sunday afternoons at Opa’s house in Wisconsin. He was strict about his baking, writing every exact measurement in a little leather notebook. I thought finding the perfect homemade cookie recipe was impossible. I’ve tested dozens of them for work. Most of them fail. But I finally nailed it, and I promise this is the last one you’ll ever need to search for.
Before we get into the deep testing data, let’s start with a few quick wins. I know you’re probably busy, maybe planning a quick Trader Joe’s run, and you just want results. First, always measure your all-purpose flour by scooping it with a spoon into the cup and leveling it with a knife. Never pack it down. Second, use room temperature butter and large eggs. It makes a massive difference. Third, pull them out of the oven when the centers still look slightly underdone. They continue baking on the hot pan. Finally, use alcohol-free vanilla extract for the purest flavor. These four simple steps will fix 90% of your baking issues right out of the gate.
I know this sounds completely basic, but mastering a reliable homemade cookie recipe is easier than you think. You’ve got this. Your family and friends will be seriously impressed, and it takes very little active effort once you understand the mechanics.
Why This Homemade Cookie Recipe Works
In my testing, I’ve found that the best baking relies on simple pantry staples doing exactly what they’re supposed to do. We use unsalted butter because it gives us complete control over the sodium level. Different brands add wildly different amounts of salt to their butter. If you use salted butter, your mileage may vary with the final taste. We want a precise measurement of sea salt to balance the sweetness.
The combination of granulated sugar and light brown sugar is critical here. The white sugar provides those crispy, golden brown edges we all want. The molasses in the brown sugar holds onto moisture, giving you those soft centers that stay chewy for days. That tracks with everything we know about baking science. I also highly recommend alcohol-free vanilla extract. It doesn’t evaporate as harshly in the high heat of the oven, leaving a much rounder, warmer flavor profile behind.
The Weight vs. Volume Experiment
I test kitchen equipment for a living, so I naturally test ingredients too. I once tried to speed-test a food processor and burned out the motor, which taught me that real-world testing matters more than sterile lab conditions. Case in point: measuring flour.
If you look at professional baking charts, they’ll tell you that one cup of all-purpose flour weighs 120 grams. But in practice, when the average home cook dips a measuring cup into a bag of flour, they end up with about 135 grams. That extra 15 grams per cup is exactly why so many people complain about thick, dry dough. For this homemade cookie recipe, if you don’t have a kitchen scale, you absolutely must use the spoon-and-level method. Fluff the flour, spoon it into your cup, and level it off. The tool should disappear in your hand, and the technique should become muscle memory.
Visual Troubleshooting: The Creaming Method
The most common place things go wrong is right at the beginning. You need to cream the butter and sugar for several minutes until it’s light in color and fluffy in texture. I remember watching my mom struggle with cold butter, trying to mash it with a wooden spoon. It never worked. You want to hear that steady, rhythmic sound of the mixer doing its job. Let it do its work.
If your butter is too warm or oily, the dough will be greasy, and your cookies will spread into sad, flat puddles. If your butter is too cold, the sugar won’t aerate properly. You want it at room temperature, meaning it yields slightly when you press it with your finger, but it doesn’t lose its shape entirely. Add your room temperature large eggs one at a time to ensure proper emulsification with the fats.
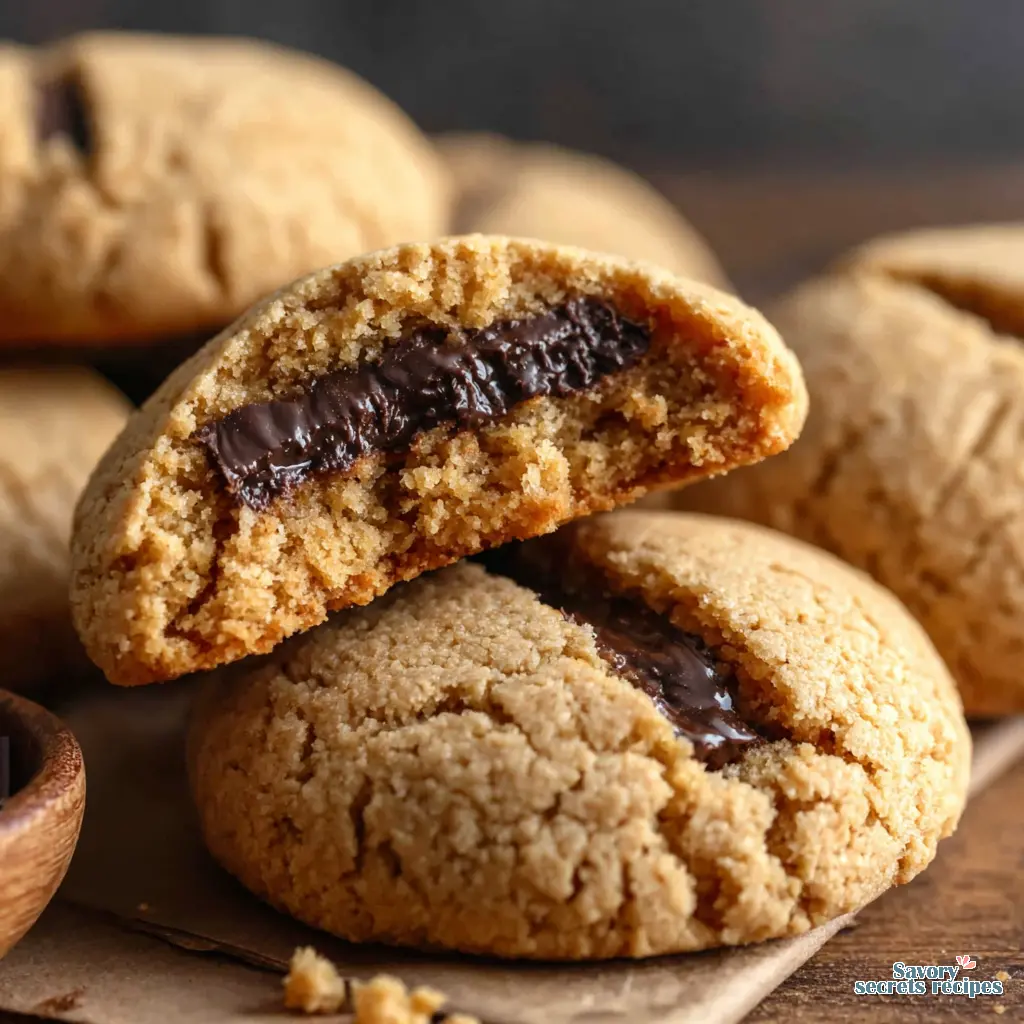
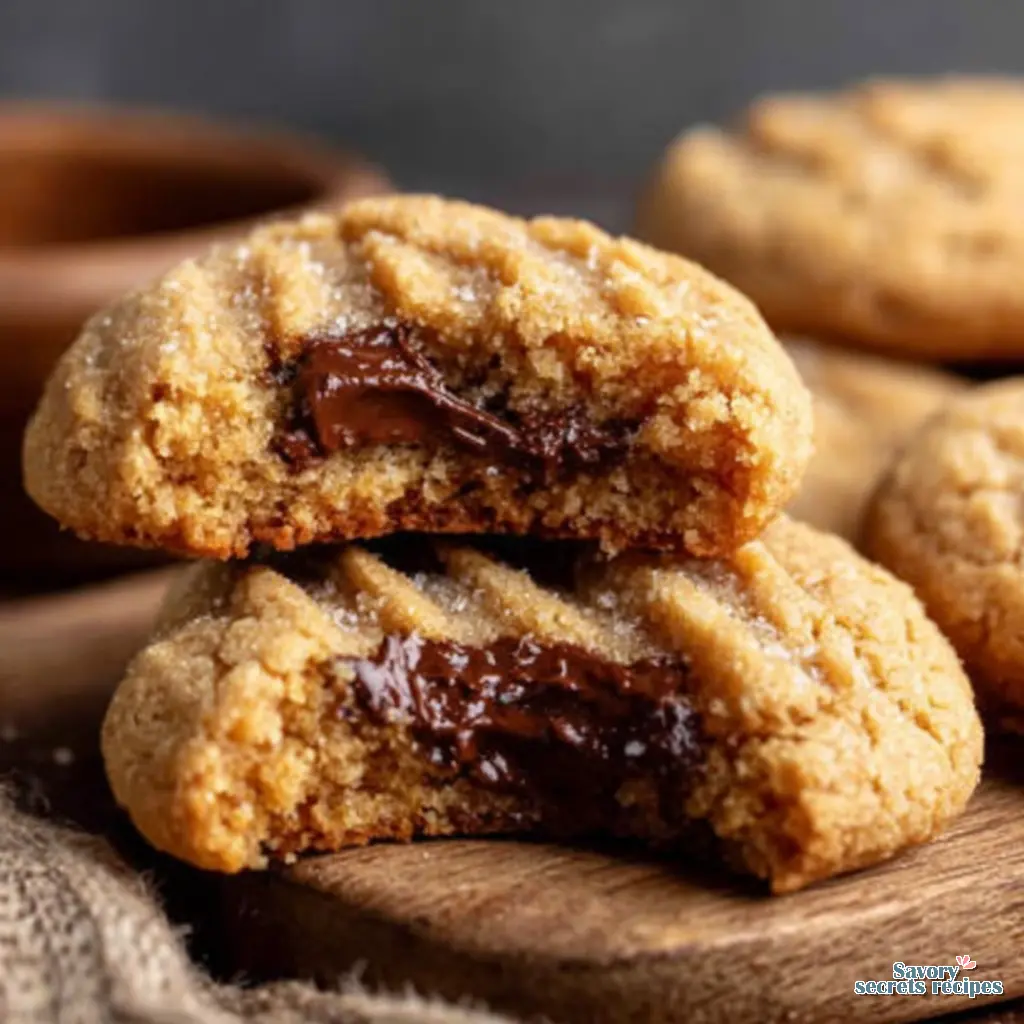
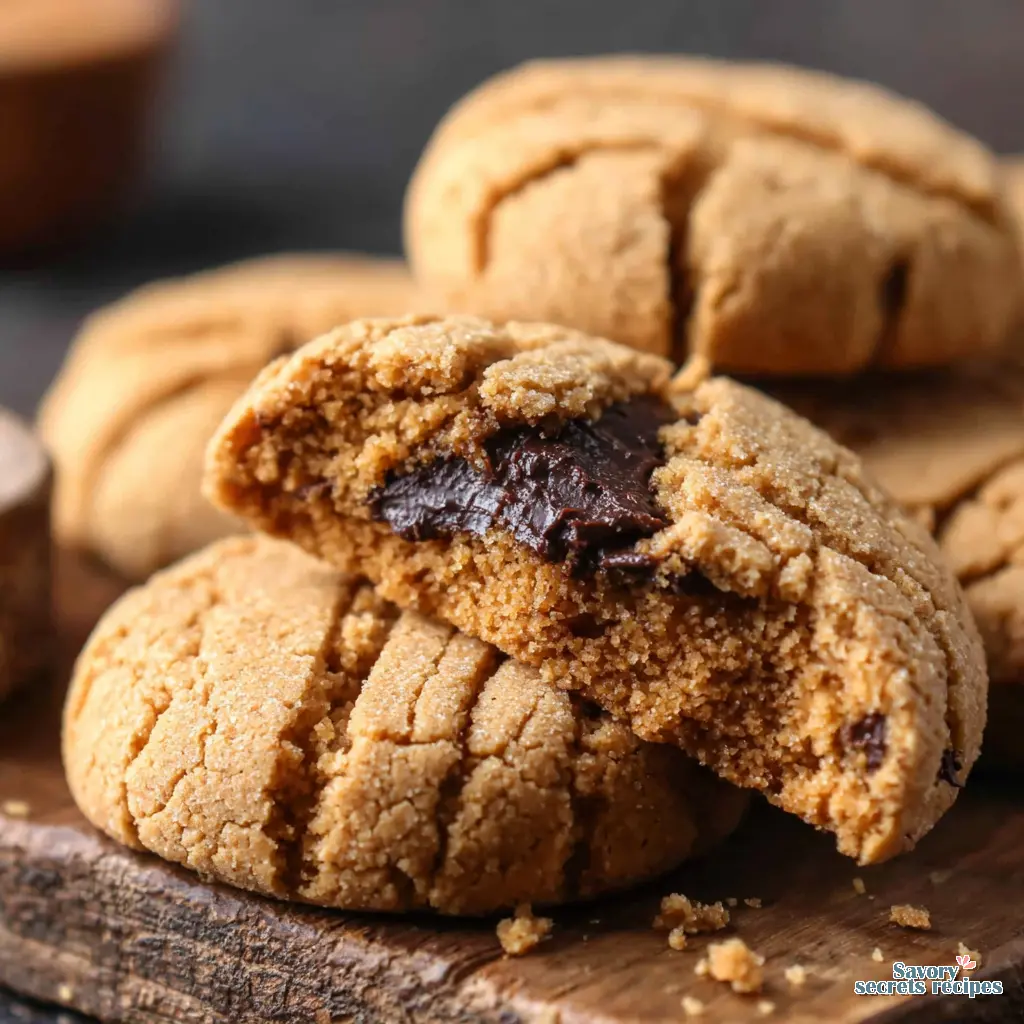
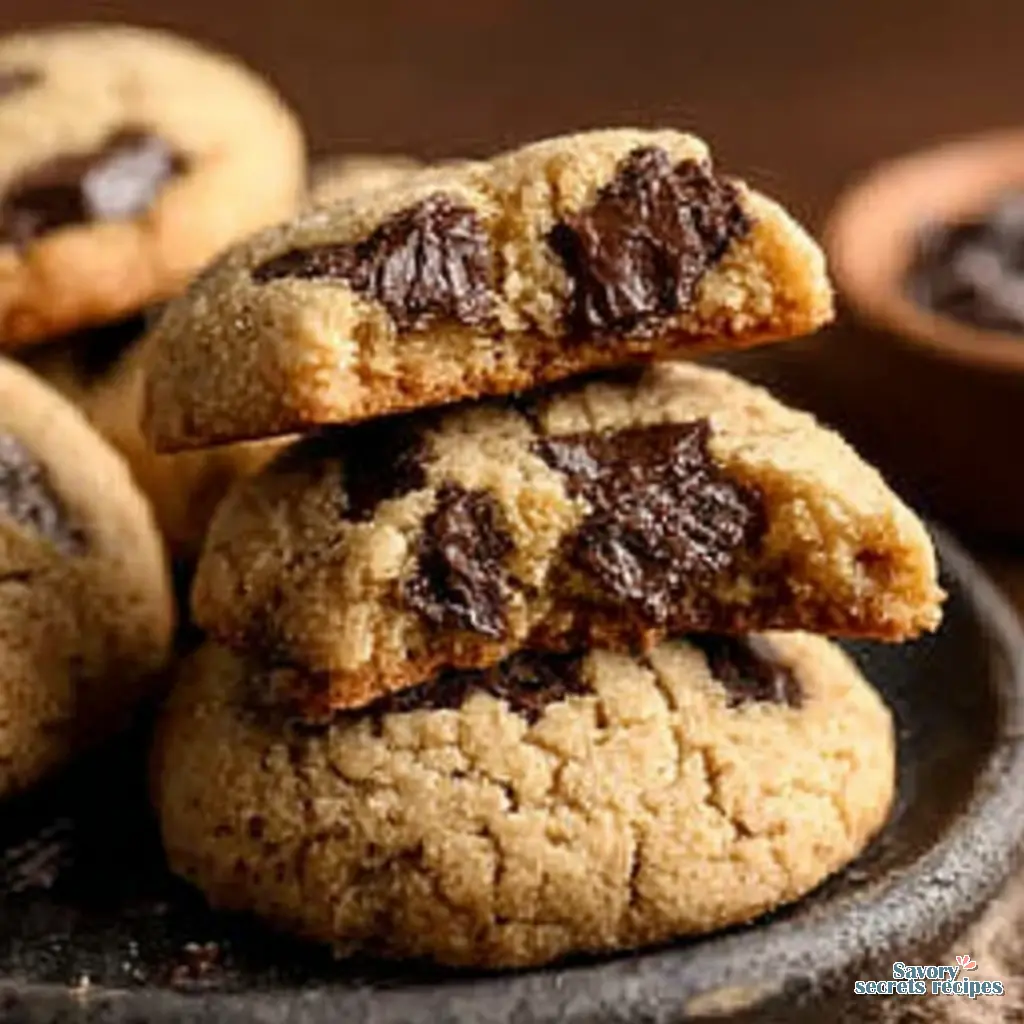
Reviewing Chocolate Percentages
This might be personal preference, but I believe the chocolate you choose makes or breaks the entire experience. I prefer using high-quality chocolate, mixing semi-sweet chocolate chips with some darker chocolate chunks. You need at least 2 cups per batch. The chips hold their shape, providing texture, while the chunks melt into those beautiful, irregular pools of chocolate.
If you’re making a grocery run to Ralphs or Vons, skip the bottom-shelf generic chips. Spend the extra two dollars on a premium brand. It’s the kind of simple excellence that makes baking feel rewarding. You can absolutely mix semi-sweet and milk chocolate chips for depth, or even toss in some white chocolate chips and dried cranberries if you want to experiment. Just keep the total volume at 2 cups.
High-Altitude Adjustments for Baking
If you’re baking this homemade cookie recipe somewhere high up in the mountains, the standard rules change. I learned this the hard way while visiting friends in Colorado. The lower air pressure means your dough will rise faster and lose moisture quicker. To fix this, increase your oven temperature by 15°F to set the structure faster. You’ll also want to decrease the baking soda by about 1/8 teaspoon and add an extra tablespoon or two of all-purpose flour. It requires a bit of tweaking, but the results are worth it.
Pro-Tips for Shaping and Baking
Here’s what I wish someone had told me years ago. Once your dough is mixed, you have to chill it. I know it’s frustrating to wait, but chilling the dough for at least 2-3 hours prevents spreading and increases thickness. While it’s chilling, clean your workspace. Clean as you go or regret it later.
When you’re ready to bake, use a cookie scoop for uniform size and even baking. But don’t roll them into perfectly smooth little balls. Instead, roll the dough into tall, lumpy columns or oblong shapes. This bakery-style technique ensures the edges get crispy while the center stays thick and gooey. This technique is essential for achieving the best results with chewy chocolate chip cookies.
Always line your baking sheet with parchment paper or silicone mats for even heat distribution. I prefer enameled cast iron for cooking, but for baking, heavy-gauge aluminum sheets are exactly what you want to see. And please, use an oven thermometer to verify your actual temperature versus the dial setting. Ovens lie all the time.
Common Mistakes & Fixes
Mistake: Using expired baking soda.
Solution: This leads to flat, dense results. Always check the date on your leavening agents. If it’s older than six months, toss it.
Mistake: Over-mixing the dough.
Solution: Once you add the flour, mix only until the white streaks just disappear. Over-mixing develops gluten, leading to tough, bready textures.
Mistake: Relying on the oven’s built-in temperature display.
Solution: Buy a cheap internal oven thermometer. Your oven might say 350°F, but it could actually be 325°F or 375°F. Good browning takes patience and accuracy.
Mistake: Over-baking until they look ‘done’ in the oven.
Solution: Pull them out when the edges are golden but the centers still look pale and slightly raw. Let them rest on the hot baking sheet for 5-10 minutes. They will finish cooking perfectly on the wire cooling rack.
Storage & Freezing Guide for Your Homemade Cookie Recipe
If you somehow have leftovers, proper storage is everything. To keep them soft, store them in an airtight container at room temperature. You can also use a Ziploc bag with all the air pressed out. Throwing a small piece of sandwich bread into the container works wonders, the baked goods will absorb the moisture from the bread, staying incredibly soft for days.
Honestly, my favorite trick is freezing the dough. I flash-freeze individual dough balls on a baking sheet for an hour, then transfer them to a freezer bag. When my daughter wants a treat on a random Tuesday, I can bake them straight from frozen. Just put them in the oven at 350°F while it preheats, adding maybe two extra minutes to the total bake time. If you have already baked them and frozen them, just microwave a frozen one for about 15 seconds to restore that gooey, fresh-out-of-the-oven texture. Solid performance across the board.
Frequently Asked Questions
Wrapping It Up
There’s genuine satisfaction in pulling a perfect tray out of the oven, especially when the house smells incredible and you know you nailed the technique. This homemade cookie recipe is designed to be your reliable fallback, whether you’re prepping for a holiday party or just need a Tuesday night treat. Take a plate over to your neighbor. Food is meant to be shared, and these are too good to keep entirely to yourself. You’ve got this.
If you end up trying these, I’d love to hear how they turned out for you. I share tons of variations and equipment testing over on my Pinterest boards if you want more ideas for your kitchen setup. Happy baking!
Reference: Original Source
Why are my cookies flat?
In my testing, flat results usually come from expired leavening agents, over-mixing the dough, or using butter that is entirely too warm. Make sure your butter is just at room temperature, and always double-check the expiration date on your baking soda.
How do I make gooey cookies?
The secret to a gooey homemade cookie recipe is pulling them out of the oven early. They should look slightly underdone in the center. Let them rest on the hot baking sheet for 5-10 minutes. The residual heat finishes the job perfectly.
Can I freeze the dough?
Absolutely. Scoop the dough into tall, lumpy balls and place them on a baking sheet. Flash-freeze them for an hour, then move them to a Ziploc bag. They will keep perfectly in the freezer for up to three months. It’s incredibly convenient.
Do I have to chill the dough?
I highly recommend it. Chilling the dough for at least 2-3 hours solidifies the fats, which prevents excessive spreading in the oven. It also gives the flour time to hydrate, leading to a much deeper, more developed flavor profile. Don’t skip it.
Why didn’t my cookies spread?
If they stayed in tight little balls, you likely added too much flour. This is why the scoop-and-level method is so important. Using liquid measuring cups for dry ingredients or packing the flour down will result in dense, dry dough that won’t spread.
Can I bake dough straight from the freezer?
Yes, you can. You don’t even need to thaw them. Just place the frozen dough balls on a lined baking sheet and pop them in the oven. You’ll just need to add about 2-3 extra minutes to the standard baking time.
How to keep cookies soft?
Store your finished homemade cookie recipe batch in an airtight container at room temperature. For an extra layer of protection, place a small piece of plain white bread in the container. The moisture from the bread keeps everything incredibly soft and chewy.
Can I make cookies without brown sugar?
You can, but I wouldn’t recommend it for this specific texture. White sugar alone creates a crispy, crunchy bite. The molasses in brown sugar is what provides the moisture needed for a soft, chewy center. Without it, the texture completely changes.
Can I make cookies without baking soda?
Baking soda is essential for leavening and browning. If you omit it, your batch will be dense and pale. If you’re completely out, you can substitute baking powder, but you’ll need to use three times the amount, and the texture will be slightly cakier.
Does 1 cup of flour weigh 120 grams?
Professionally, yes. But in a home kitchen, a standard scoop-and-level cup usually weighs around 135 grams. That’s why I always stress fluffing the flour first and never packing it down. It’s the difference between a perfect bake and a dry disaster.


