
How to Make Creamy Grits with Sour Cream
Ingredients
Method
- Combine the water, heavy cream, and half-and-half in a pot.
- Bring the liquid to a boil.
- Gradually whisk in the grits, stirring constantly.
- Reduce the heat to low and cover the pot.
- Cook for 5 to 7 minutes, whisking frequently.
- Remove the pot from the heat.
- Stir in the butter and season with salt and pepper to taste.
- Serve immediately.
Notes
Why This Creamy Grits Recipe Will Change Your Mornings
Let’s walk it back to a cold Tuesday morning in Dearborn. I was about eight years old, sitting at my Teta’s kitchen counter, watching her stir a pot of something that looked like porridge but smelled like heaven. She wasn’t making grits she was making a grain porridge with cardamom but the principle she taught me that day stuck. She told me, “Tariq, if you stop stirring, you kill the soul of the dish.”
Fast forward twenty years. I’m in a diner in the South, staring at a bowl of watery, sad, flavorless mush that someone had the audacity to call grits. It was a betrayal. Good grits should be a hug in a bowl. They should be rich, savory, and have a velvety mouthfeel that coats your tongue like a good espresso. If you’ve only ever had instant grits from a packet, I’m sorry. You’ve been lied to.
This creamy grits recipe is my redemption arc for that bad diner experience. It is specifically designed for these chilly winter mornings when you need something that sticks to your ribs. We aren’t just boiling cornmeal here. We are building flavor with a specific dairy ratio and a secret weapon sour cream that adds a tang you didn’t know you needed. It’s the move. Trust the process.
The “No-Package” Rule
Here is the thing about the instructions on the back of the grits package: they are wrong. Straight up. If you follow the package directions, you will end up with something that tastes like wet paper. The manufacturers want you to think it’s fast. It’s not fast. Real flavor takes a minute.
First, we need to talk about the corn itself. You have three main options, and your choice determines your destiny here:
- Instant Grits: These are pre-cooked and dehydrated. Avoid these. They have no texture and no soul.
- Quick Grits: These are ground fine to cook faster. They are okay in a pinch, but they lack that toothy bite we want.
- Stone-Ground Grits: This is the gold standard. The whole kernel is ground between stones, keeping the germ intact. This gives you a robust corn flavor and a texture that actually feels like food. This recipe works best with stone-ground or high-quality old-fashioned grits.
When you buy stone-ground, you’re getting texture. You’re getting flavor. You’re getting a product that demands a little respect and a little time. It’s worth the wait.
The Liquid Ratio: Water vs. Milk vs. Cream
I treat grits like I treat my coffee extraction. The water matters. If you cook grits in 100% water, they will taste like… well, water. If you cook them in 100% milk or cream, the dairy will scorch before the corn is tender, and you’ll have a burnt mess on the bottom of your pot. I’ve done it. It’s a nightmare to clean.
The ratio’s off in most recipes. Through a lot of trial and error (and a few ruined pots), I’ve found the sweet spot. We start with a mix of water and chicken stock (or vegetable stock) for the initial boil. The stock penetrates the corn granules as they swell, seasoning them from the inside out. Then, we finish with heavy whipping cream and milk.
My go-to ratio for liquid to grits is usually 4:1 or even 5:1. Stone-ground corn is thirsty. It drinks up liquid like you wouldn’t believe. If the pot looks too dry, don’t panic. Just keep some warm liquid or hot water nearby to splash in. You want a loose, flowing consistency while it cooks, not a concrete block.
The Whisking Technique (The Anti-Lump Strategy)
Lumps are the enemy. There is nothing worse than biting into a pocket of dry, raw corn powder in the middle of a creamy bowl. The secret to a lump-free creamy grits recipe happens in the first two minutes.
Here is how I do it. Bring your liquid to a boil, then salt it. You must salt the water. If you try to add salt at the end, it just tastes salty, not seasoned. Once the water is boiling, grab your whisk. Slowly pour the grits in a steady stream with one hand while whisking furiously with the other. Do not stop.
My daughter likes to watch this part because I look a little crazy, but this agitation separates the granules before they can clump together. Once they are all in and boiling, dial the heat down to low. Low and slow. Put the lid on, but maybe leave it a crack open so it doesn’t boil over. Now you can switch to a wooden spoon or a spatula.
You need to stir frequently. The cornstarch settles at the bottom and will burn if you ignore it. It needs attention. Not constant attention, but regular check-ins. Think of it like a risotto.
The Secret Ingredients
Okay, the grits are tender. They’ve been simmering for about 20 to 30 minutes (longer for coarse stone-ground). They are thick. Now we make them legendary.
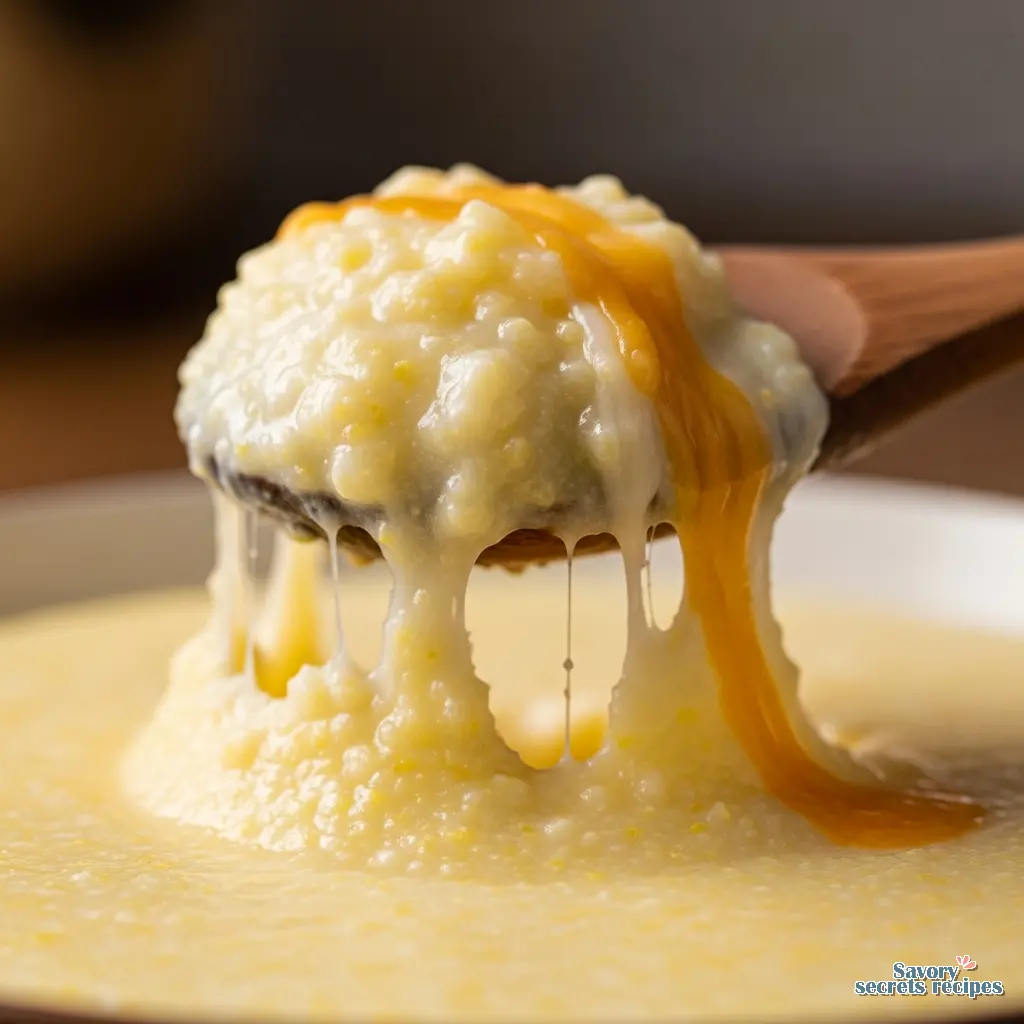
Most people just add butter and cheese. That works. But if you want that tangy, complex richness that makes people ask “what is in this?”, you need sour cream. I add about a quarter cup of sour cream right at the end. It cuts through the heaviness of the corn and adds a brightness that heavy cream alone can’t achieve.
I also use sharp cheddar cheese. Don’t use mild. The corn flavor is strong, so you need a cheese that can stand up to it. And please, grate your own cheese. Pre-shredded cheese is coated in potato starch to keep it from clumping in the bag, but that starch prevents it from melting smoothly in your pot. It makes the texture grainy. Grating a block takes two minutes. It’s worth it.
Common Mistakes & Fixes
Mistake: The grits are crunchy or gritty.
Solution: They aren’t done yet. Add another splash of water or milk, cover, and keep cooking on low. Patience is the only fix here.
Mistake: The pot is scorched on the bottom.
Solution: You had the heat too high or didn’t stir enough. Don’t scrape the black bits! Pour the good grits into a new pot and leave the burnt layer behind.
Mistake: They turned into a solid brick immediately.
Solution: This happens as they cool. Stir in a little warm milk or broth to loosen them back up right before serving.
Variations & Serving Ideas
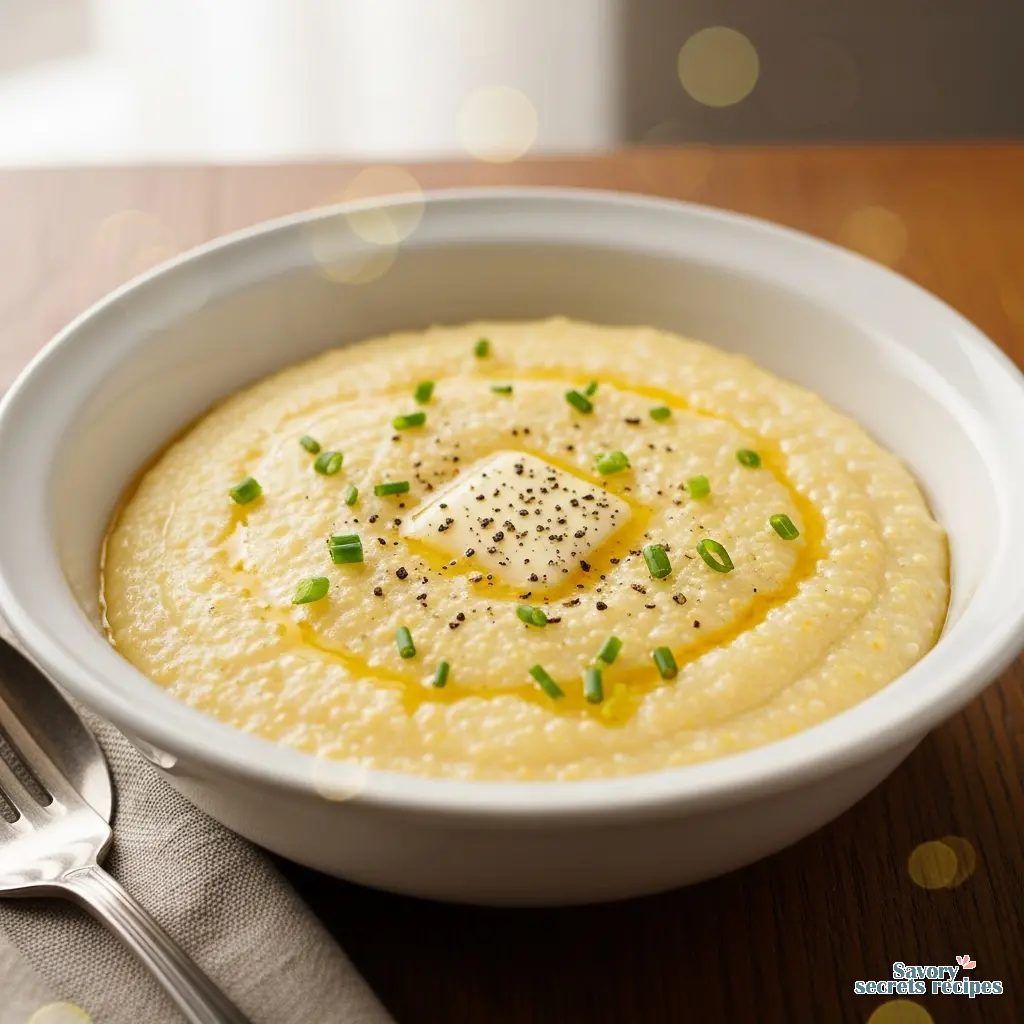
This recipe is a canvas. I love it plain with just butter and black pepper, but you can take it in a lot of directions. In my house, we sometimes treat it like a savory dinner base.
Garlic & Herb: Sauté some minced garlic in the butter before adding your liquids. Stir in fresh thyme or chives at the end. This is incredible under braised short ribs.
Smoked Gouda: Swap the cheddar for smoked Gouda. This gives it a deep, wood-fired flavor that pairs perfectly with sautéed mushrooms or grilled vegetables.
Breakfast Style: Keep it simple. Serve with a couple of fried eggs on top. I like my eggs with a runny yolk so it breaks and creates its own sauce over the grits. My daughter calls this “yellow sauce,” and she’s not wrong.
Storage & The “Perfect Reheat”
Leftover grits are notorious. They solidify into a rubbery block that looks unappealing. I used to throw them out, thinking they were ruined. I was wrong.
To store them, put them in an airtight container in the fridge. They will keep for about 3 to 4 days. When you take them out, they will be solid. That tracks. It’s just the starch gelatinizing.
To reheat, do not just nuke them in the microwave as is. Put the block of grits in a saucepan on the stove over low heat. Add a splash of milk or water about 1 tablespoon per cup of grits. Break up the block with your spoon as it warms. The liquid will re-emulsify with the starches, and they will become creamy again. You might need to add a little pinch of salt since you added more liquid. Dial it in until it tastes right.
Frequently Asked Questions
Final Thoughts
Making a great creamy grits recipe isn’t about fancy equipment. It’s about patience and ratios. It’s about taking a humble ingredient like corn and giving it the time it needs to become something luxurious. When you take that first bite on a cold morning, and the cheese stretches, and the butter hits your palate, you’ll get it.
For more inspiration on comfort food that gets you through the winter, check out my Pinterest boards where I save all my family favorites. Go get your whisk!
Reference: Original Source