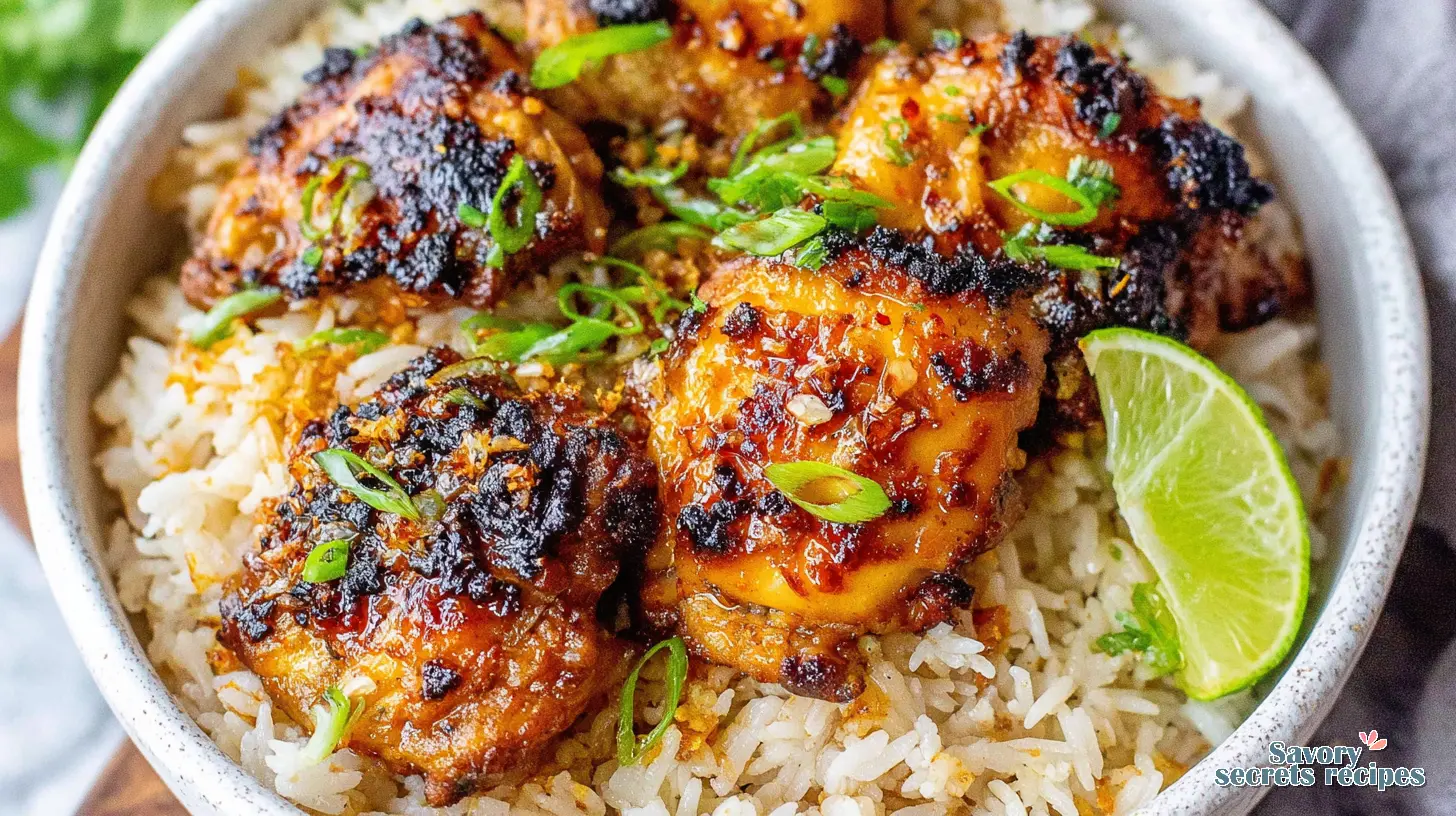
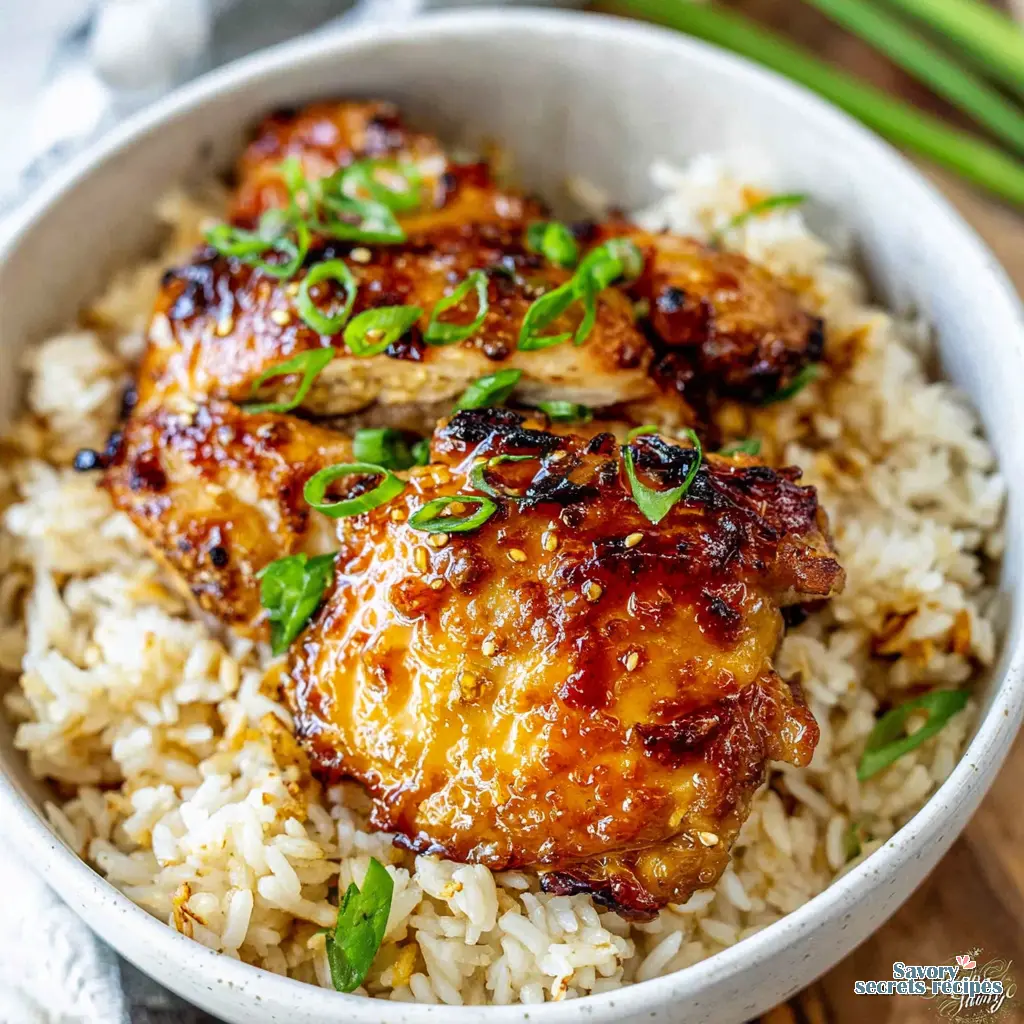
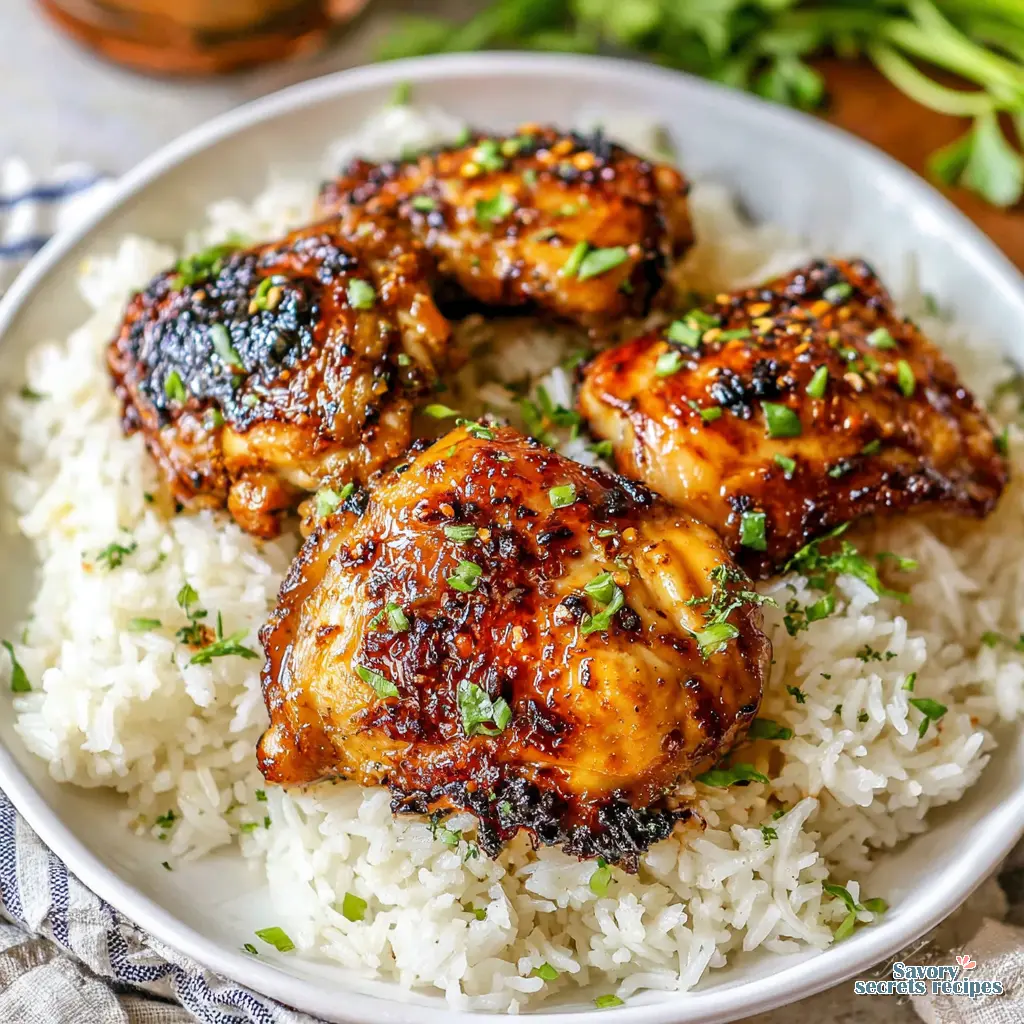
Crispy Air Fryer Honey Garlic Chicken & Rice Dinner
Ingredients
Method
- Pat chicken thighs dry. Remove any excess fat if desired.
- Season all sides with salt and pepper.
- In a large bowl, combine olive oil, soy sauce, honey, lime juice and zest, and garlic powder. Stir to combine.
- Add chicken thighs and mix until coated in the marinade. Cover with plastic wrap and refrigerate for at least 30 minutes to marinate.
- Preheat air fryer to 400 degrees F for 5 minutes. Spray or brush the air fryer basket with oil to prevent sticking.
- Add chicken thighs. Cook at 400 degrees F for 12-14 minutes, flipping halfway through. Aim for an internal temperature of 175-195 degrees F.
Nutrition
Notes
Why This Honey Garlic Chicken Rice in Air Fryer Is a Weeknight Savior
It’s Tuesday. You’re at the kitchen counter, the clock reads 5:30 pm, and the kids are already on the couch scrolling. You need dinner, fast, and you’ve got zero brain power left for a complicated plan. I promise you’ll have honey garlic chicken rice in air fryer on the table in under 30 minutes, using just one appliance.
I remember my first attempt – a sticky, smoky disaster that left the whole family confused. I learned the hard way that the sauce belongs at the end, not in the basket. Trust me on this one, the glaze timing trick saves the night.
Because the air fryer cranks it up hot, we’re talking 400°F, you get crispy chicken skin without the mess of a deep‑fried pan. And the rice? Either a quick microwave shortcut (no shame) or a clever air‑fryer side if you’re feeling adventurous.
Key Ingredients You’ll Need
You probably already have most of this in your pantry: boneless skinless chicken thighs, honey, soy sauce (or coconut aminos for gluten‑free), minced garlic, a splash of olive oil spray, and a cup of jasmine rice. I keep a stick of butter on hand for the rice, but you can swap it for a dab of olive oil.
For the glaze I like a ¼ cup honey, 3 Tbsp soy sauce, 2 tsp minced garlic, and a pinch of red pepper flakes. If you’re after a deeper flavor, add a splash of rice vinegar – that’ll give the dish a little zing.
Everything’s measured in cups and teaspoons, so no metric confusion. And if you’re at Ralphs or Trader Joe’s, you’ll find all of these in the same aisle.
How to Make the Honey Garlic Sauce
Combine honey, soy sauce, minced garlic, and red pepper flakes in a small saucepan. Heat on low for about three minutes, just enough for the honey to dissolve and the garlic to release its aroma. You’ll hear a gentle sizzle – that’s the sweet and savory magic starting.
Don’t let it boil; sugar burns above 375°F and the air fryer is already hot enough. Once it looks glossy, pull it off the heat and set aside. The sauce will thicken a bit as it cools, so you’ll have a perfect sticky glaze.
Trust the process. You’ll know it when you see the honey turning a light amber, not dark brown. That’s the one.
How to Make Honey Garlic Chicken Rice in Air Fryer
First, pat the chicken thighs dry – that’s the trick to crispy chicken skin. Sprinkle a little salt and pepper, then give them a light mist of olive oil spray. I’m not a fan of commercial spray oils; they can damage the non‑stick finish.
Preheat the basket for three minutes at 400°F. While it’s heating, line the bottom with a thin sheet of parchment paper if you’re worried about sticking, but remember it can block some airflow, so use just enough to cover the base.
Arrange the thighs in a single layer, making sure they’re not touching. Overcrowding the basket = steamed chicken, not crispy. Set the timer for 18 minutes for breast or 22 minutes for thighs, shaking the basket halfway. Use a meat thermometer – you’ll want an internal chicken temperature of 165°F.
While the chicken cooks, cook the jasmine rice. If you’re short on time, microwave the rice according to the package – no judgment, literally none. If you want the full one‑appliance experience, add a small rice pouch on the top rack with a little water; it’ll steam nicely. For a different approach to one-pot cooking, explore our instant pot honey garlic chicken thighs and rice guide.
When the chicken hits that perfect crispy golden, toss it in the honey garlic sauce. The glaze clings, caramelizing just enough to give you that sticky chicken sauce vibe.
You’re doing great. Seriously.
Tips for Best Results
Always oil the bottom of the air fryer basket – a quick mist of olive oil spray prevents the chicken from sticking and helps that crispy chicken skin develop. If you’re using boneless skinless chicken thighs, they need a couple extra minutes compared to breast.
Shake the basket halfway through cooking; it ensures even browning. And if you notice the glaze getting too thin, just simmer it a minute longer – the sugars need time to caramelize.
For extra flavor, brush a little of the soy‑honey marinade onto the chicken when you flip it. That’ll build in layers of taste without making the coating too thick.
Remember, the key is single‑layer cooking. Pick one. Trust me, the texture difference is night and day.
Recipe Science: Why the Air Fryer Works
The air fryer circulates hot air at a high velocity, creating a Maillard reaction on the chicken’s surface. That’s why you get that crispy chicken skin without deep frying. The honey’s sugars caramelize quickly, but only because the air is moving fast enough to keep the surface from burning.
When you add the sauce after cooking, the chicken’s exterior is already dry, so the glaze sticks instead of sliding off. The heat from the chicken finishes the caramelization, giving you that sweet‑savory finish.
Cooking rice in the same appliance works because the steam from the rice adds humidity, which can actually help keep the chicken juicy if you time it right.
Comprehensive Troubleshooting Guide
Common Mistakes & Fixes
Mistake: Chicken ends up rubbery.
Solution: Check the internal temperature with a thermometer. If it’s below 165°F, add a couple more minutes and flip again. Also, don’t overcook breast – it dries out fast.
Mistake: Sauce burns in the basket.
Solution: Add the glaze after the chicken is done. If you need to warm the sauce, do it on the stovetop low and watch closely.
Mistake: Chicken isn’t crispy.
Solution: Make sure the basket is preheated and the chicken is patted dry. Overcrowding also kills crispiness – give each piece space.
Mistake: Rice is soggy.
Solution: Use the microwave shortcut or a rice pouch with the right water ratio. Fluff with a fork before serving.
Variations and Substitutions
If you prefer chicken breast, cut the cook time down to about 18 minutes and keep an eye on the thermometer. For a gluten‑free spin, swap soy sauce for coconut aminos. Maple syrup or golden syrup can replace honey for a different sweetness profile.
Want extra heat? Toss in more red pepper flakes or a dash of sriracha into the glaze. Or add a splash of lime juice at the end for a bright finish – that’ll need more acid, but it lifts the flavor.
You can also throw in broccoli or snap peas on the top rack for a complete one‑appliance dinner. Just make sure they’re in a single layer too.
What to Serve With This Dish
Classic jasmine rice is the perfect side, but you can also go for quick garlic butter rice – just melt butter, add minced garlic, stir in cooked rice, and finish with a sprinkle of green onion topping. If you’re looking for a low-carb alternative, our honey garlic chicken cauliflower rice recipe offers a fantastic option.
Steamed asparagus, green beans, or corn on the cob add color and crunch. A drizzle of sesame seeds over the chicken gives a nice visual pop – I love that contrast.
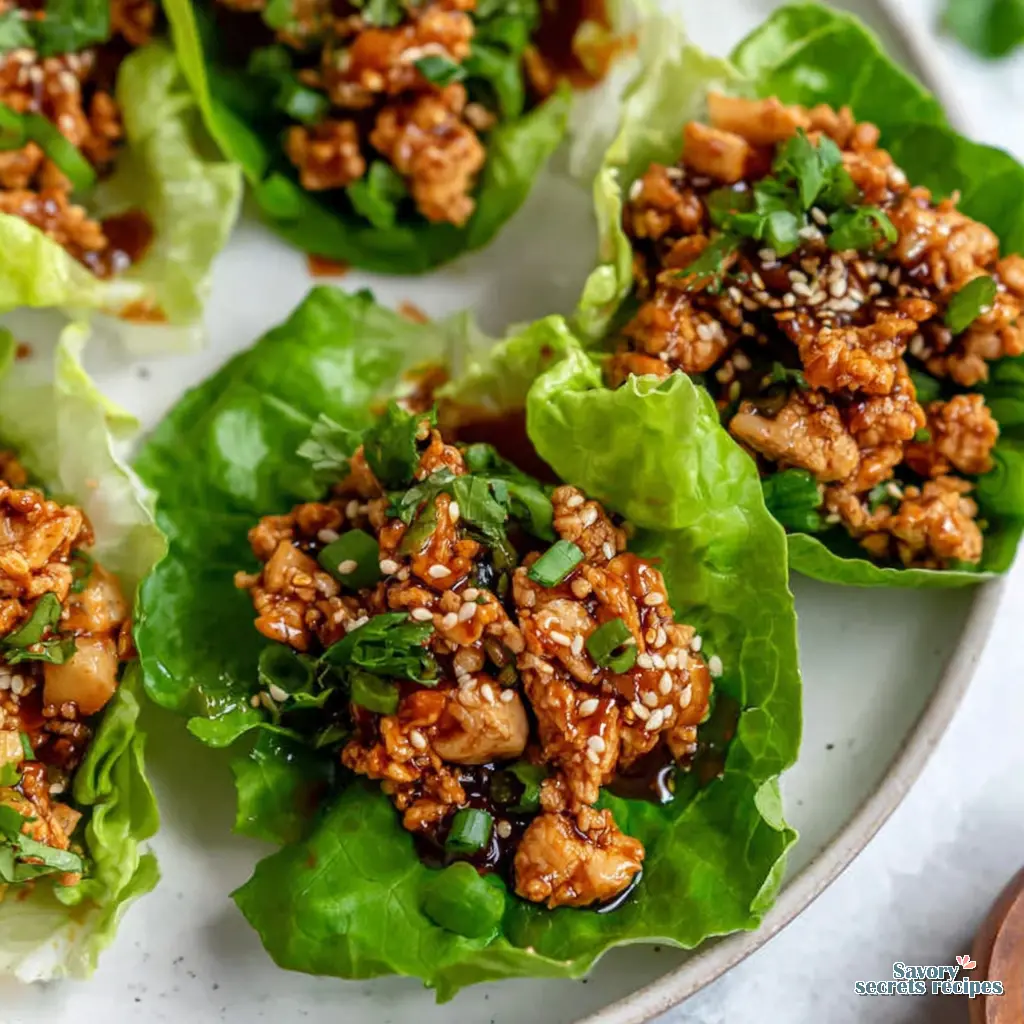
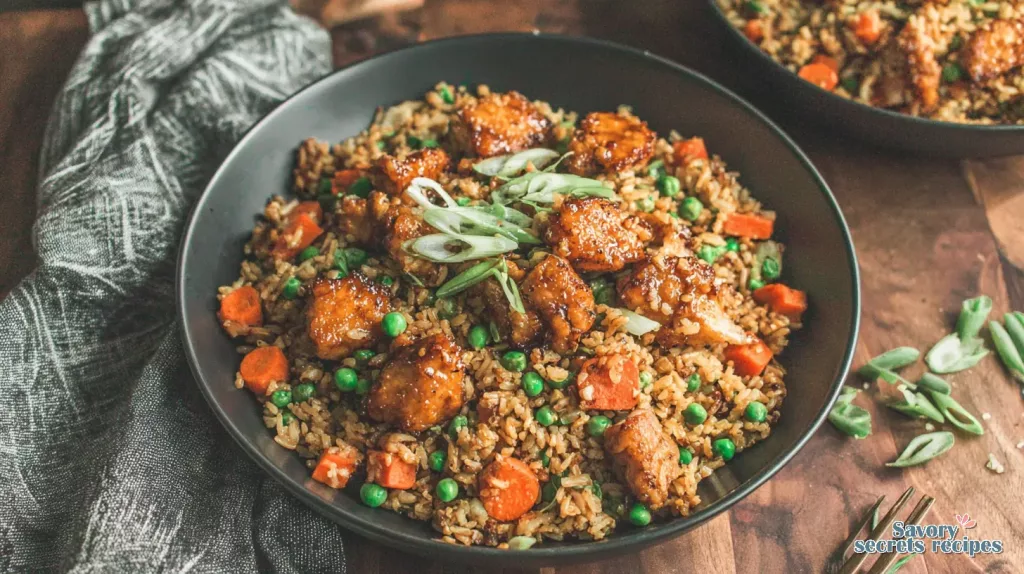
If you’re feeling fancy, serve the chicken over a bed of fried rice, or slice it thin for a sandwich with crisp lettuce. The options are endless, and every version still feels like a restaurant‑quality meal.
Storage and Reheating Tips
Store leftovers in an airtight container in the fridge for three to four days. If you’re meal‑prepping, separate the chicken and rice on parchment paper, then wrap tightly – they’ll stay fresh for about two months in the freezer.
To reheat, pop the chicken in the air fryer at 350°F for three to four minutes; that brings back the crispiness. If you’re in a hurry, the microwave works for the rice, but the chicken will lose its crunch.
When reheating on the stovetop, add a splash of water or broth to the pan, cover, and heat until steam lifts the sauce back to glossy perfection.
Frequently Asked Questions
Reader Reviews
“My kids actually asked for seconds, and I didn’t have to run to the store for extra ingredients. This is a keeper.” – Jenna, LA.
“The chicken was perfectly crisp, and the sauce was just the right balance of sweet and garlicky. I’ll be making this every week.” – Marco, Santa Monica.
Ingredient Spotlight: Choosing the Right Honey
Local raw honey from a farmer’s market adds a subtle floral note that pairs beautifully with garlic. If you grab a light clover honey from Costco, you’ll get a milder sweetness that lets the soy sauce shine. Either works, just avoid overly dark honey that can burn faster.
Advanced Meal‑Prep Strategy
Cook a batch of chicken and rice on Sunday, portion into containers, and freeze the sauce separately. When you need dinner, reheat the chicken in the air fryer, stir in the warmed glaze, and you’ve got a quick, tasty meal without the nightly scramble. This strategy is ideal for effective honey garlic chicken and rice meal prep, ensuring quick meals throughout the week.
Air Fryer Model Comparison
Philips XXL: great for large families, even heat distribution, but a bit pricey. Ninja Foodi: versatile, multiple functions, affordable. Cosori: compact, easy to clean, perfect for small kitchens. All hit the 400°F mark, which is crucial for that crispy chicken skin.
Recipe Science Recap
High‑heat air circulation creates that Maillard crust. The honey’s sugars caramelize quickly, but only if you add the glaze after cooking – otherwise you get a burnt mess. The quick microwave rice shortcut saves time without compromising flavor, especially on a busy Tuesday night.
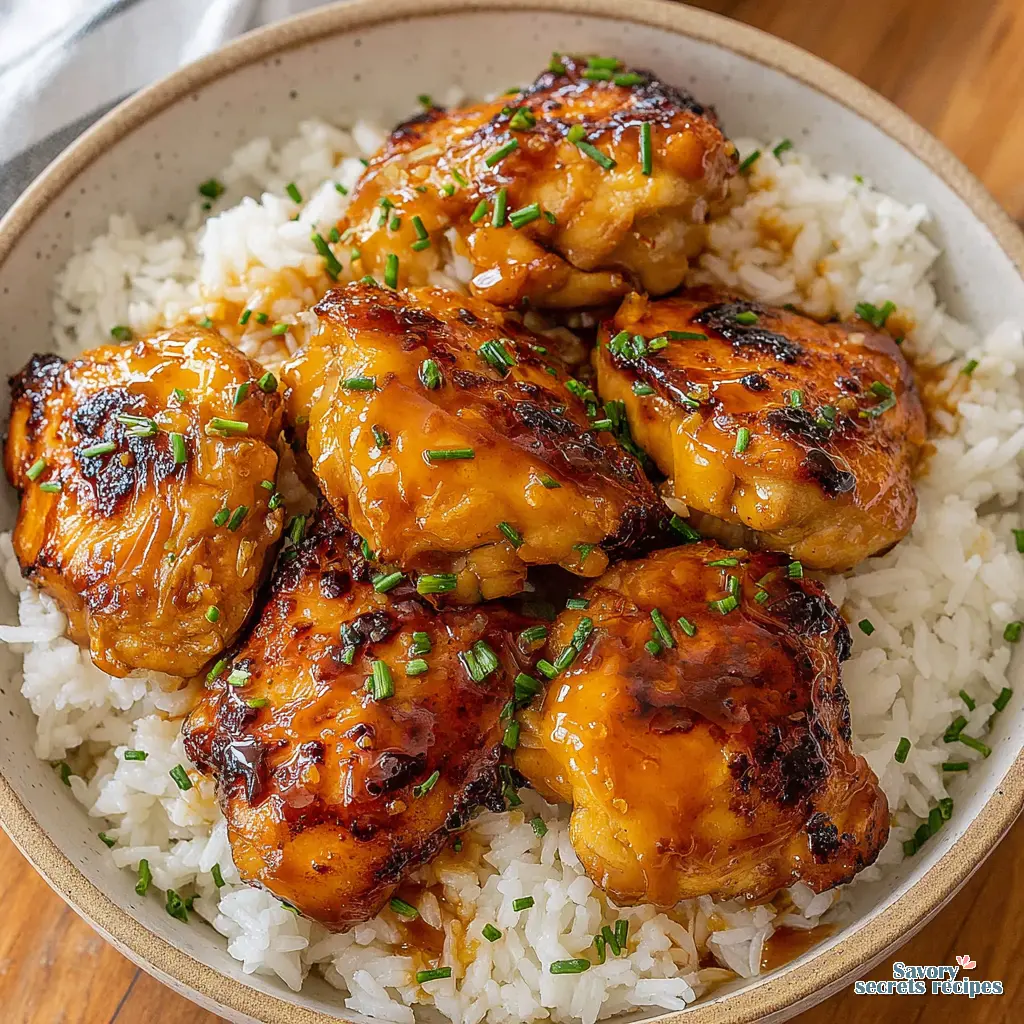
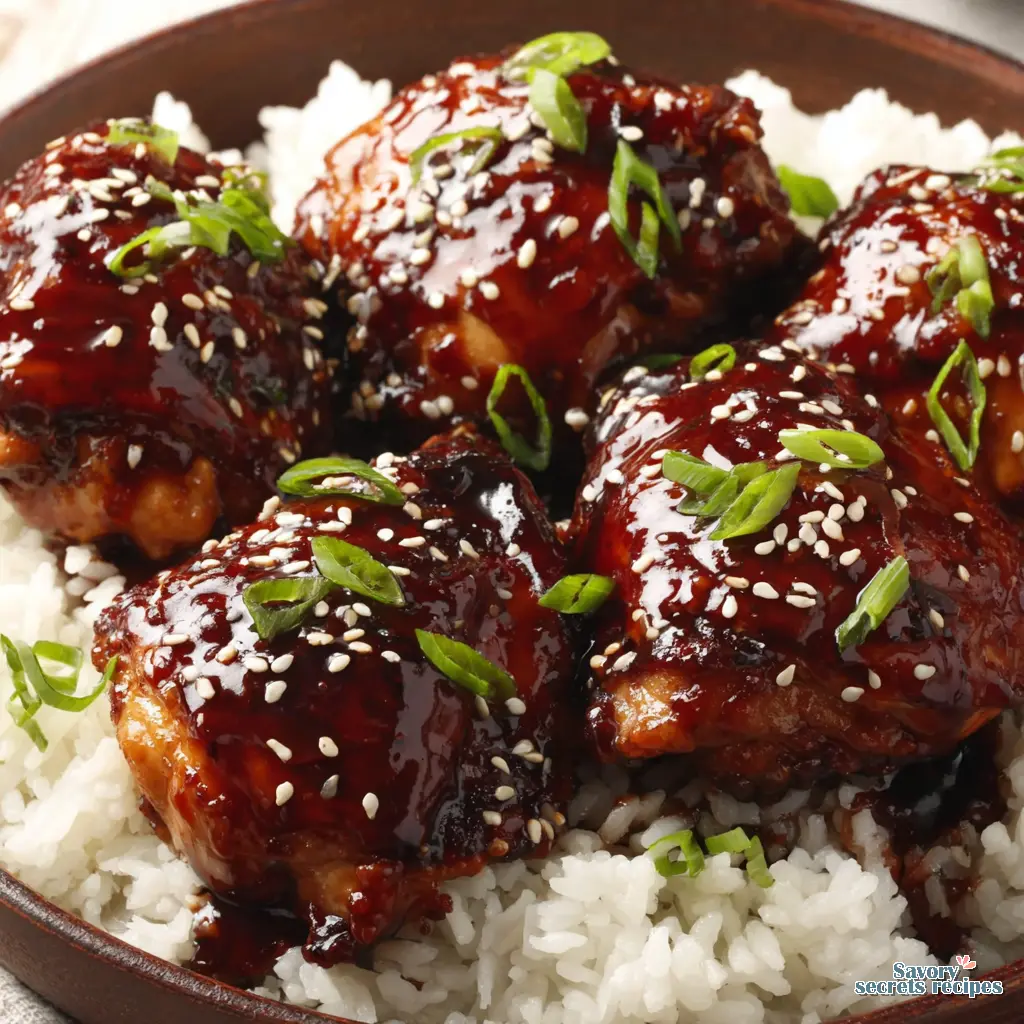
When you pull this out of the air fryer, the chicken will be glossy, the glaze will be sticky, and the rice will be fluffy. Serve it with a sprinkle of sesame seeds and chopped green onion – it looks as good as it tastes.
For more inspiration, check out my Pinterest boards. I love sharing twists on this dish that keep things fresh.
Source: Nutritional Information
Can I make honey garlic chicken rice in air fryer ahead of time?
Absolutely. Cook the chicken and glaze, then cool and store in the fridge. When you’re ready, reheat in the air fryer at 350°F for a few minutes. The rice can be microwaved or reheated on the stove. You’ll still get that sweet‑savory bite.
How do I store leftover honey garlic chicken rice in air fryer?
Place the chicken and rice in separate airtight containers. The chicken stays best if you line it with parchment paper before sealing. Store in the fridge up to four days, or freeze for two months. Thaw overnight and reheat as described.
What sides go well with honey garlic chicken?
Steamed jasmine rice, quick garlic butter rice, or a simple green salad are all solid choices. Add roasted asparagus or corn on the cob for texture. Sprinkle sesame seeds and chopped green onions for a pop of flavor and color.
How do I reheat honey garlic chicken in the air fryer?
Preheat the air fryer to 350°F. Place the chicken in a single layer and heat for three to four minutes, shaking once. The glaze will re‑gloss, and the skin will crisp up again – perfect for a second night.
Can I use parchment paper to line my air fryer?
You can, but only a thin sheet that doesn’t block airflow. It helps prevent sticking, especially with the honey glaze, but too much paper can steam the chicken and stop it from getting crispy.
Is this air fryer chicken thigh recipe gluten‑free?
Yes, just swap soy sauce for coconut aminos or a certified gluten‑free soy sauce. The rest of the ingredients are naturally gluten‑free, so you’ll still get that caramelized honey chicken without the gluten.
How will I know when my air fryer honey garlic chicken thighs are done cooking?
Use a meat thermometer – you want an internal chicken temperature of 165°F. Visually, the skin should be golden and crisp, and the juices run clear when you cut into the thickest part.
What is the best air fryer to cook chicken thighs in?
I recommend a model with at least a 5‑quart capacity and adjustable temperature up to 400°F, like the Ninja Foodi or Philips XXL. They have even airflow and a sturdy basket, which helps achieve that crispy skin.
Can I use boneless skinless chicken thighs for this recipe?
Definitely. They cook faster than bone‑in thighs and absorb the honey garlic glaze nicely. Just keep an eye on the timer – about 20‑22 minutes at 400°F, and check for that 165°F internal temperature.
When do I pour the sauce?
After the chicken is fully cooked and crispy. Toss the hot chicken in the warm honey garlic glaze so the sauce adheres without burning. That’s the one that gives you that sticky, caramelized finish.
How do I thicken the sauce?
Let the sauce simmer a minute longer on low heat, or stir in a tiny pinch of cornstarch mixed with water. It’ll coat the back of a spoon and cling to the chicken beautifully.
But how do I keep the chicken from coming out of the air fryer white?
Pat the chicken dry, preheat the basket, and give it a light mist of oil spray. The dry surface and hot air create that golden crust. Overcrowding will steam it, so give each piece breathing room.
Can I freeze this once cooked?
Yes. Let the chicken and rice cool, then separate onto parchment sheets, wrap tightly, and freeze. When you’re ready, thaw overnight and reheat in the air fryer or oven to bring back the crispness.
Can I use golden or maple syrup instead of honey?
You can swap honey for golden syrup or maple syrup. The flavor will shift a bit sweeter, and the glaze may be a tad thinner, so you might need to simmer a little longer to thicken.
What air fryer do you use?
I use a Ninja Foodi 6‑quart model because it heats evenly and has a sturdy basket that fits nicely on my countertop. It also reaches 400°F without fuss, which is perfect for crispy honey garlic chicken.
Hi, do you spray the chicken with oil spray before cooking?
Yes, a quick mist of olive oil spray helps the skin crisp up and prevents the honey glaze from sticking to the basket. Just a light coating – you don’t need a lot.