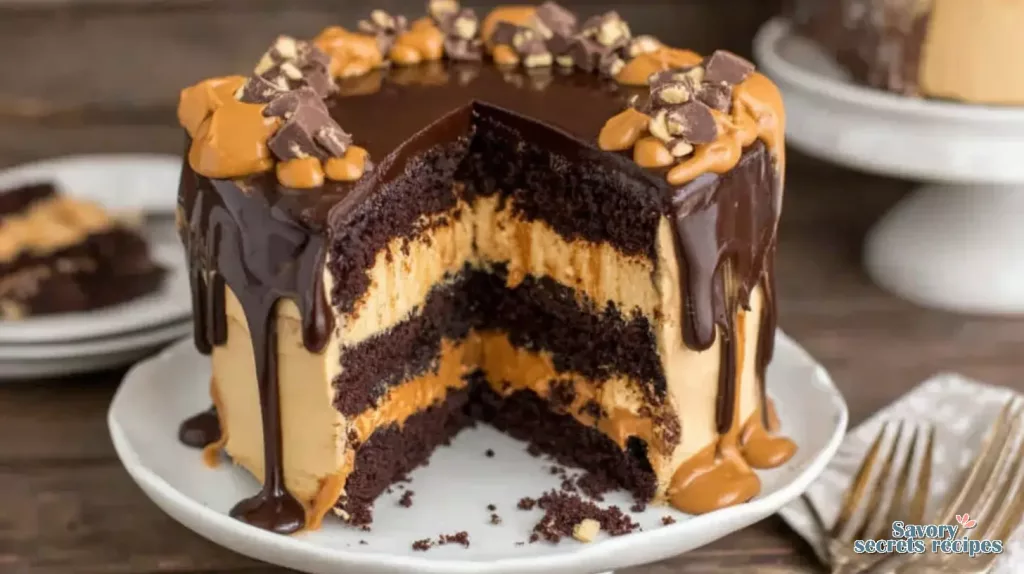
Glossy Mocha Coffee Drip Cake Recipe
Ingredients
Method
- Preheat your oven to 350°F (175°C) and grease a round cake pan to prevent sticking. In a medium bowl, sift together the all-purpose flour, cocoa powder, instant coffee or espresso powder, baking powder, and baking soda until well combined.
- In a separate large bowl, cream the softened butter and granulated sugar together using an electric mixer until the mixture is light and fluffy. This ensures a smooth texture for your cake.
- Beat in the eggs one at a time, ensuring each is fully incorporated before adding the next. Then mix in the buttermilk and vanilla extract to create a smooth batter.
- Gradually add the dry ingredients into the wet mixture, mixing slowly until you have a smooth, well-blended batter without overmixing.
- In a medium saucepan, combine the brown sugar, heavy cream, butter, and salt. Heat over medium heat, stirring constantly, until the sauce becomes smooth and slightly thickened. Remove from heat and set aside.
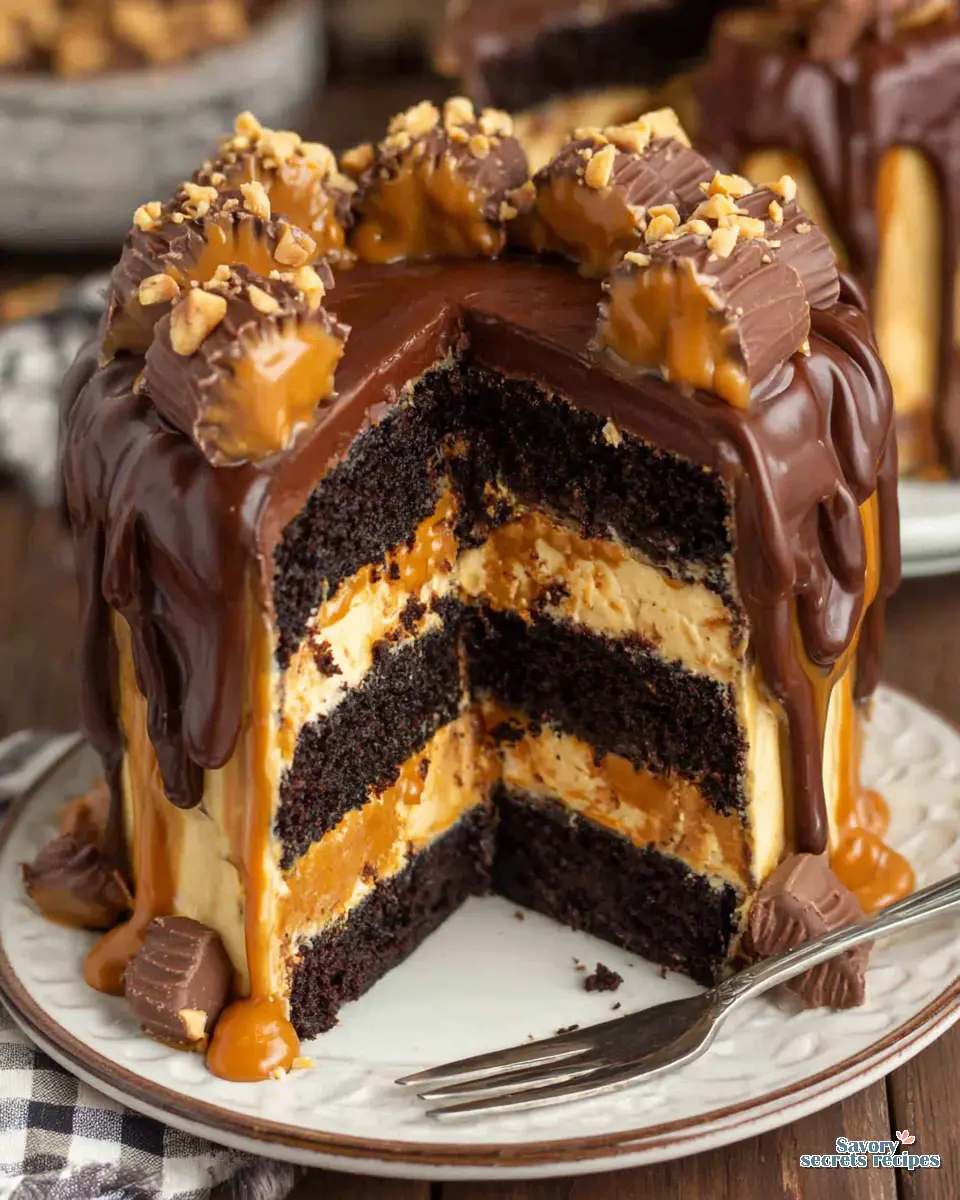
- Pour half of the cake batter into the greased cake pan, spreading it evenly. Drizzle half of the caramel sauce over the batter. Then pour the remaining batter on top and finish by drizzling the remaining caramel sauce over the surface.
- Place the cake in the preheated oven and bake for 40-45 minutes, or until a toothpick inserted into the center comes out clean, indicating the cake is fully baked.
- Remove the cake from the oven and let it cool in the pan for about 10 minutes. Once slightly cooled, slice and serve to enjoy the perfect balance of mocha and caramel flavors.
Nutrition
Notes
The Mocha Coffee Drip Cake That’ll Make You a Legend
You know, there’s just something about seeing a perfectly glossy drip cake, right? The kind that looks like it stepped right out of a bakery window at Joan’s on Third or maybe a fancy display at Erewhon. Not gonna lie, for a long time, I’d see those pictures and think, “Nope, that’s just not for me. Too much fuss.” I figured it was one of those things only professional bakers or folks with unlimited time on their hands could pull off. But here’s the thing, I was wrong.
Turns out, making a showstopping mocha coffee drip cake is a lot less intimidating than it looks. It’s truly achievable for a home baker, even if you’ve got a busy schedule and just want to impress your friends at your next weekend brunch in Silver Lake. This recipe, I promise you, will demystify the whole “drip” technique and leave you with a decadent, rich dessert that everyone will rave about.
It’s the kind of cake that brings that satisfying feeling of turning simple ingredients into something truly beautiful. Reminds me of my teta’s kitchen on Friday mornings, that specific smell of za’atar heating in olive oil, the way it hits you before you even walk in the door. That same sense of pride, you know, when you’ve created something from scratch that just feels right.
Why Coffee and Chocolate are Best Friends Forever
Let’s talk about the magic of mocha. It’s not just coffee and chocolate hanging out; it’s a full-on flavor symphony. That tracks, right? Coffee, especially a good strong brew, doesn’t just add its own flavor to this mocha coffee drip cake; it actually amplifies the chocolate. It makes the cocoa powder taste even more chocolatey, deeper, more intense.
That’s the move. It’s like how a pinch of salt makes sweets sweeter. The coffee provides a subtle bitterness that cuts through the richness of the chocolate, creating a more balanced and complex profile. You’ll find the dark coffee cake layers truly sing with that coffee flavor. It’s a solid combination.
Gathering Your Goodies for a Decadent Mocha Cake
Fair enough, before we dive into the fun stuff, we need to make sure we’ve got all our ingredients lined up. Think of it like setting up your mise en place for manaeesh; everything in its place makes the process smoother. For this rich mocha cake slice, you’ll need your standard baking pantry staples, plus a few specific items to get that signature mocha flavor.
When you’re at Ralphs or Whole Foods, look for good quality cocoa powder. Dutch-processed cocoa powder, if you can find it, gives a deeper, darker chocolate color and flavor, which is perfect for this coffee chocolate drip dessert. And for the coffee, a good quality instant coffee or espresso powder is key. It really brings that intense coffee flavor without adding too much liquid to the batter. Trust me on this.
How to Make This Impressive Mocha Coffee Drip Cake
Alright, let’s get into the nitty-gritty. This is where we build our masterpiece, layer by delicious layer. We’re talking about a moist cake, a dreamy coffee buttercream, and that showstopping dark chocolate ganache drip. It’s a layered coffee chocolate cake that’s truly worth the effort.
Making Perfect Cake Layers
The foundation of any great layer cake is, well, great layers. For a moist cake, a big tip I’ve picked up over the years is to use room temperature ingredients. Set out your butter, eggs, and buttermilk in advance. They blend so much better, creating a smoother batter and a more tender crumb. That’s just how I do it, anyway.
Another thing? Weigh your flour. I’m not totally sure, but I think too many folks accidentally use too much flour when they scoop it, which will straight up cause your cake to turn out dry. Precision isn’t about fancy tools, it’s about repetition, like my teta measuring her spices. Use baking strips around your cake pans to help promote more even baking. This prevents those annoying domed centers and dry edges, giving you flat, easy-to-stack cake layers. Grease the whole pan, dust with cocoa powder, and then press a parchment paper circle down on the bottom before adding the batter. This ensures the sides release cleanly. Works every time.
Crafting Coffee Buttercream
This coffee buttercream is where the mocha magic really comes alive between the layers. We’re aiming for a smooth, stable frosting that’s pipeable and holds its shape. The key here is good quality butter and confectioners’ sugar. And here’s the real secret: make sure you use cooled coffee for the buttercream, otherwise your coffee buttercream will curdle. Nobody wants that.
You might look at the buttercream at some point and think it’s curdled. Don’t worry if it looks a little rough. Keep mixing it. Seriously, just let your stand mixer do its thing. It’ll come together and become completely smooth and luscious. It’s quite forgiving, I promise. If you want to decorate the cake with additional piped icing, you’ll probably want to make 1.25 or 1.5 times the amount of mocha buttercream. That’s the move for extra swirls.
Assembling Your Layer Cake
Now for the fun part: putting it all together. Once your cake layers are completely cooled (this is critical, don’t rush it!), it’s time to stack. A crumb coat is your best friend here. Spread a very thin layer of frosting all over the cake, then pop it in the fridge for about 20 minutes to firm up. This traps any loose crumbs and gives you a much cleaner, smoother final finish.
Once that crumb coat is chilled, you can go in with the rest of your mocha buttercream. You’ll find it’s so much easier to get that smooth, professional look without crumbs messing things up. This is truly the difference between a homemade cake and one that looks like it came from a high-end bakery. It just feels solid.
Achieving the Perfect Drip
Okay, the drip. This is often the part that scares people, but I’m telling you, it’s easier than you think. The perfect dark chocolate ganache drip is all about consistency and temperature. You’ll want to chill the cake before adding the drip. This is a high-value tip. A cold cake means the ganache will set faster when it hits the surface, giving you those beautiful, defined drips instead of a runny mess.
The ganache itself should be warm but not hot, and pourable but not watery. The key is not to get the heavy cream too hot when you’re making it. Let it set overnight (with plastic wrap directly on the surface to prevent a skin), then microwave it for 10 seconds and stir to desired consistency. For a pretty ganache drip down the sides of the cake, you may need to add an additional 1 to 2 tablespoons of warm heavy cream to the remaining ganache (after using it between the cake layers) to dial it in until it’s right. Adjust with cream as needed, rewarm if necessary. Test the drip consistency on the rim of a glass or the side of the cake before you commit. You’ll know it when you feel it, it should glide, not plop.
Expert Tips for Best Results
Baking, especially something like a mocha coffee drip cake, has its little quirks. But once you understand the basics, you’ve got this. Here are a few things I’ve learned that make a real difference.
Baking Flat and Even Layers
We already talked about weighing your flour and using baking strips, both solid moves for even layers. Another thing to consider for this chocolate cake recipe is not to overmix the batter. Once you add the dry ingredients, mix just until combined. Overmixing develops too much gluten, which can lead to a tougher cake. We want tender, moist cake layers, not a workout for your jaw.
If you’re using glass dishes, I’ve found it’s best to lower the oven temperature to 325°F and place your glass dishes on a cookie sheet. Bake for approximately 45 minutes, but keep an eye on them. That’s just how I do it to prevent over-browning and ensure even cooking.
Chill Cake Before Drip
This is probably the most critical tip for that glossy mocha drip cake. Seriously, chill the cake before adding the drip. Cold cake, warmish ganache. That’s the one. It lets the ganache set quickly and gives you those beautiful, defined trails down the sides. It’s a simple step, but it makes all the difference in the final elegant dessert presentation.
Troubleshooting Drip Cake Issues
Common Mistakes & Fixes for Your Mocha Coffee Drip Cake
Mistake: Dry chocolate cake layers.
Solution: You likely used too much flour (weigh it next time!) or overbaked it. Check for doneness with a toothpick that comes out with moist crumbs, not completely clean.
Mistake: Buttercream looks curdled.
Solution: Keep mixing! Seriously, just let your stand mixer keep going. It looks weird, then suddenly it’s smooth. Trust the process.
Mistake: Ganache is too thick or too runny.
Solution: Too thick? Add a teaspoon of warm heavy cream at a time and stir until it’s right. Too runny? Let it cool a bit longer, or pop it in the fridge for 5-10 minutes, stirring every couple of minutes.
Mistake: Drip runs all the way down the cake and pools.
Solution: Your cake wasn’t cold enough, or your ganache was too warm. Chill the cake longer, and let the ganache cool a bit more. Test it on the back of a spoon first.
Mistake: Uneven cake layers or a domed top.
Solution: Use baking strips, don’t overmix the batter, and make sure your oven temperature is accurate. Sometimes ovens run hot, that’s just how it is. An oven thermometer can be a real game-changer.
Mocha Drip Cake Variations for Your Tastebuds
The beauty of a mocha coffee drip cake is how versatile it is. The recipe as-is will also work perfectly in two 8-inch pans. If you’re feeding a crowd for a birthday cake, you could 1.5x the recipe for three 8-inch pans, or even 2.5x the recipe for three 9-inch pans. Just remember the batter is thin and rises a lot, so don’t fill the pans more than half full. Could be wrong here, but I think that’s a good rule of thumb.
For cupcakes, all you need to do is reduce the baking time. Start checking them at around 15 minutes or so. And if you’re looking to cut back on sweetness a bit, you can use less granulated sugar, maybe 1 cup instead of 1.5 cups. It’ll still taste sweet, I promise. You can also use brewed coffee or instant espresso powder mixed with hot water for the coffee component; both work wonderfully. If you don’t have Dutch-process cocoa, regular cocoa powder is perfectly fine. And for a slightly denser cake, cooled melted butter can be used instead of vegetable oil.
Serving Your Impressive Mocha Coffee Drip Cake
When you finally slice into this rich dessert, it’s a moment, you know? The smell of the dark chocolate ganache and rich coffee flavor just fills the air. It’s an elegant dessert that deserves a little presentation. I like to garnish mine with some finely chopped chocolate or maybe a few chocolate shavings. Straight up, it just makes it look even more professional.
Serving it with a cup of freshly brewed coffee on the side is always a solid move. For me, there’s nothing better than that first sip of a properly dialed-in pour-over on a cold morning. This cake pairs beautifully. If you’ve stored the cake in the fridge, let it sit out for a couple of hours before serving so the buttercream and cake can soften up to their optimal texture. That’s the move for peak enjoyment.
Storage & Freezing Tips
So, you’ve got this amazing mocha coffee drip cake, and you might have some leftovers. Fair enough. You want to keep it fresh. Store the cake covered or in an airtight container in the refrigerator for up to 5 days. It’ll keep that moist texture and rich flavor really well.
If you’re thinking longer term, you can absolutely freeze slices. Wrap them well with plastic wrap, then pop them into a freezer bag or container. Unfrosted cake layers can be frozen, wrapped tightly, for up to 2 months. Same goes for a frosted cake, wrapped tightly. Just thaw frozen slices for a few hours before enjoying, or thaw a whole frosted cake overnight in the refrigerator and bring to room temperature before serving. It’s a great make-ahead strategy, especially for busy weeks or when you’re planning for a special occasion cake.
Frequently Asked Questions
And there you have it. When you present this stunning mocha coffee drip cake, prepare for gasps and compliments. This isn’t just a cake; it’s a statement, a delicious testament to your baking prowess. I can’t wait to see your creations! Tag me in your gorgeous mocha coffee drip cake photos. For more inspiration, check out my Pinterest boards. Go grab that cocoa powder and get baking, you’ve got this.
Source: Nutritional Information
<!– wp:rank-math/faq-block {"questions":[{"id":"faq-question-1776275461414","title":"What kind of cocoa powder should you use for this mocha coffee drip cake?”,”content”:”Unsweetened natural or Dutch-processed cocoa powder both work well. Dutch-processed will give you a darker, richer chocolate flavor and color, which I think is solid for a deep coffee chocolate drip dessert. Just avoid sweetened varieties; they’ll throw off the sugar balance.”,”visible”:true},{“id”:”faq-question-1776275461415″,”title”:”What kind of coffee should I use in my mocha cake?”,”content”:”Freshly brewed hot coffee is ideal. But you can also warm up cold brew or dissolve instant espresso powder in hot water. Any of those options will work well to bring out the chocolatey flavor in the cake. For intense coffee flavor, I’ll sometimes concentrate coffee, like 4 cups reduced down to 1 and ¼ cup, using 1 cup for the cake and ¼ cup for the frosting. That’s the one.”,”visible”:true},{“id”:”faq-question-1776275461416″,”title”:”Can I use regular espresso or regular coffee for the mocha coffee drip cake batter?”,”content”:”For the cake batter, regular brewed coffee is generally preferred over highly concentrated espresso. Too much concentrated espresso can make the flavor overpowering. Hot coffee works well for incorporating into the batter, just make sure it’s cooled for the buttercream.”,”visible”:true},{“id”:”faq-question-1776275461417″,”title”:”I’m always confused about the number of egg whites for the buttercream. Why so few for this mocha coffee drip cake?”,”content”:”Fair enough. The number of egg whites in Swiss meringue buttercream can vary depending on the desired consistency and yield. This recipe is designed to provide enough stable, delicious coffee buttercream for this specific cake size without being excessive. Trust the process, it’ll be plenty.”,”visible”:true},{“id”:”faq-question-1776275461418″,”title”:”Can I avoid the dark chocolate in the buttercream if I want to give it a bluish or purple color? Should I avoid the coffee powder as well?”,”content”:”Yes, you absolutely can leave out both the dark chocolate and the instant coffee or espresso powder if you want to color the buttercream. Just know it won’t have that classic mocha flavor anymore. It’ll be a vanilla-based buttercream, which is still solid for decorating.”,”visible”:true},{“id”:”faq-question-1776275461419″,”title”:”What is your measurement for this mocha coffee drip cake recipe for a cupcake?”,”content”:”To make cupcakes from this recipe, you don’t need to change the ingredient measurements. Just fill your cupcake liners about halfway, maybe a little more, and reduce the baking time significantly. Start checking for doneness at around 15-18 minutes; a toothpick should come out with moist crumbs.”,”visible”:true},{“id”:”faq-question-1776275461420″,”title”:”My wife has a gluten-free diet. Any tips besides substituting AP flour with gluten-free flour for this mocha coffee drip cake?”,”content”:”For gluten-free, a proper all-purpose gluten-free flour blend should work fine as a direct substitution. I’m not totally sure, but I think most commercial blends are formulated to behave similarly to wheat flour in cake recipes. No other major changes should be needed for this homemade cake.”,”visible”:true},{“id”:”faq-question-1776275461421″,”title”:”For the chocolate cake recipe, can I use hot espresso for the ¾ strong coffee? Or should I use regular coffee?”,”content”:”I’d stick with regular hot brewed coffee for the ¾ cup in the cake batter. Espresso can be too concentrated and might make the coffee flavor overwhelming or even slightly bitter. We want that rich, balanced mocha, not just a shot of espresso in cake form. That tracks, right?”,”visible”:true},{“id”:”faq-question-1776275461422″,”title”:”I made a sheet cake from this recipe but the middle of it rose high, like a dome, and the edge of the cake was a little dry. What did I do wrong? Does this happen with all sheet cakes?”,”content”:”That doming and dry edge is a common issue with sheet cakes. It’s often due to uneven heat distribution in the oven or overmixing. Using baking strips can help, and make sure your oven isn’t running too hot. I’ve found that sometimes the answer is to reduce the oven temp by 25°F for sheet cakes. That’s just how I do it.”,”visible”:true},{“id”:”faq-question-1776275461423″,”title”:”Can you use butter instead of the vegetable oil for the dark coffee cake layers?”,”content”:”Yes, you can substitute cooled melted butter for the vegetable oil. Here’s the thing, it will make the cake a bit denser than with oil, which typically contributes to a lighter, more moist crumb. If you prefer a denser cake, that’s the move. Just make sure it’s cooled so it doesn’t cook the eggs in the batter.”,”visible”:true},{“id”:”faq-question-1776275461424″,”title”:”Heya! Would it be possible to do this recipe by baking it in a 9×13 pan, and if so, do you know what the baking time might be like?”,”content”:”Yes, you can absolutely bake this mocha coffee drip cake recipe in a 9×13 inch pan. The baking time will be different than for round layers, probably closer to 30-40 minutes. Start checking around 30 minutes with a toothpick in the center. It needs another minute if it comes out wet. Keep an eye on it; ovens vary.”,”visible”:true},{“id”:”faq-question-1776275461425″,”title”:”Hey! I want to make this mocha coffee drip cake for a baby shower using 3 2\”x9\” rounds, what serving size do you suggest? I also am thinking of using a homemade dulce de leche for a filling, what do you think?”,”content”:”For three 9-inch rounds, you’ll want to 2.5x the recipe to ensure nice, thick layers. That’s the one. And a homemade dulce de leche filling? Now we’re talking! That sounds like a solid, decadent treat and would pair wonderfully with the coffee flavor. It’ll be a showstopper for sure.”,”visible”:true}]} –>